用源码搭建LNMP环境+部署WordPress
首先要做的是就是关闭Centos7.4的防火墙及selinux
#systemctl stop firewalld

#systemctl disable firewalld

#sed -ri 's/^(SELINUX=).*/\1disabled/g' /etc/selinux/config

#setenforce 0        \\临时启用
一:用源码安装nginx:
1、首先安装nginx的编译环境:
#yum -y install make zlib zlib-devel gcc gcc-c++ libtool openssl openssl-devel autoconf
2、下载并解压nginx:
#wget http://mirrors.sohu.com/nginx/nginx-1.6.1.tar.gz

#tar -zxvf nginx-1.6.1.tar.gz
3、预编译 nginx:
#cd /root/nginx-1.6.1

#./configure    --prefix=/usr/local/nginx \

--sbin-path=/usr/local/nginx/sbin/nginx \

--conf-path=/usr/local/nginx/nginx.conf \

--pid-path=/usr/local/nginx/nginx.pid \

--user=nginx \

--group=nginx \

--with-http_ssl_module \

--with-http_flv_module \

--with-http_mp4_module \

--with-http_stub_status_module \

--with-http_gzip_static_module \

--http-client-body-temp-path=/var/tmp/nginx/client/ \

--http-proxy-temp-path=/var/tmp/nginx/proxy/ \

--http-fastcgi-temp-path=/var/tmp/nginx/fcgi/ \

--http-uwsgi-temp-path=/var/tmp/nginx/uwsgi \

--http-scgi-temp-path=/var/tmp/nginx/scg--with-pcre
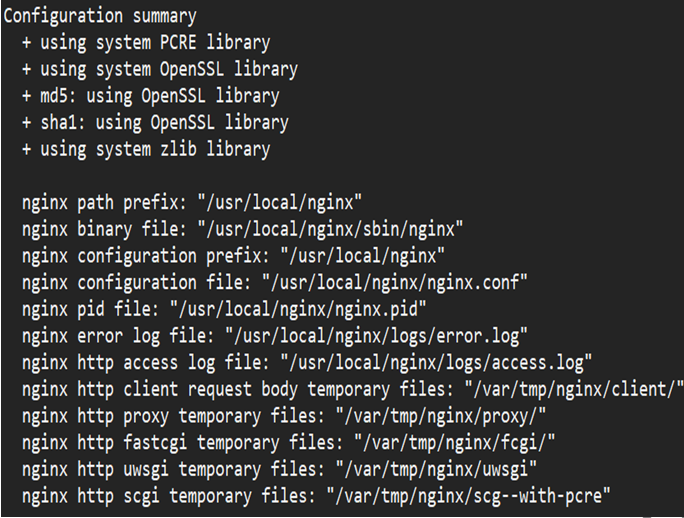
预编译成功,会出现如下的提示信息:
4、创建/var/tmp/nginx/client/目录:
#mkdir -p /var/tmp/nginx/client
5、编译安装nginx:
#cd /root/nginx-1.6.1

#make && make install
编译安装完成没有报错,说明安装成功
6、创建给nginx使用的nginx用户以及组
#groupadd -r nginx               #创建一个系统账户

#useradd -r -g nginx nginx       #创建一个系统账户,所属组为nginx
7、在/usr/local/nginx/nginx.conf 目录下修改以下内容
[root@localhost ~]vim /usr/loca/nginx/nginx.conf

 //添加 index.php:

location / {

root        /usr/local/nginx/html;

index     index.php index.html index.htm;            (红色部分是需要添加的内容)

}

 //修改:①、先去掉一下部分内容前面的注释“#”;②、将php-fpm所指的目录指向nginx的工作目录

location ~ \.php$ {

root         /usr/local/nginx/html;   (此路径是绝对路径,应该与 nginx 工作目录的路径一致)

        fastcgi_pass          127.0.0.1:9000;

        fastcgi_index  index.php;

        fastcgi_param         SCRIPT_FILENAME   $document_root$fastcgi_script_name; include  fastcgi_params;

        }
8、启动nginx服务:
#/usr/local/nginx/sbin/nginx          \\启动nginx服务

#/usr/local/nginx/sbin/nginx -s reload   \\重新载入配置

#/usr/local/nginx/sbin/nginx -s reopen   \\重启nginx服务

#/usr/local/nginx/sbin/nginx -s stop    \\停止nginx服务
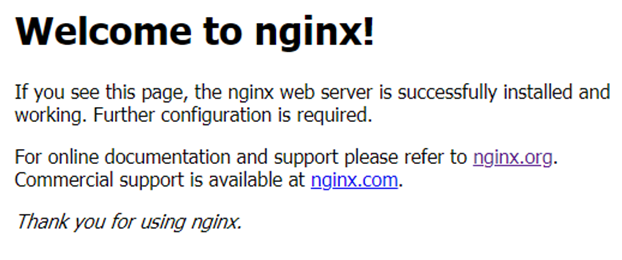
9、测试nginx首页
在浏览器的地址栏输入自己主机的IP地址:例如:192.168.1.1,就会出现如下界面
二、安装数据库(mariadb-server)
1、用yum安装mariadb-server
#yum install –y mariadb-server mariadb

#systemctl start mariadb

#systemctl enable mariadb
2、数据库初始化
#mysql_secure_installation

或者

#mysqladmin –u root password   ‘password’
3、进入数据库,创建等会要用的WordPress的数据库
#mysql -u root -p    #输入密码

MariaDB [(none)]> create database wordpressdb;

MariaDB [(none)]> create user wordpress@localhost identified by '123456';

MariaDB [(none)]> grant all privileges on wordpressdb.* to wordpress@localhost;

MariaDB [(none)]> flush privileges;

MariaDB [(none)]> exit
三、用源码安装PHP7的版本
1、安装epel和webtatic扩展包
rpm -Uvh https://mirror.webtatic.com/yum/el7/epel-release.rpm

rpm -Uvh https://mirror.webtatic.com/yum/el7/webtatic-release.rpm
2、安装PHP编译环境
#yum install -y mcrypt mhash libxml2-devel openssl-devel bzip2-devel curl-devel libmcrypt-devel readline-devel systemtap-sdt-devel libjpeg-devel libpng-devel freetype-devel
3、下载PHP并且解压
#wget http://mirrors.sohu.com/php/php-7.0.10.tar.gz

#tar -zxvf php-7.0.10.tar.gz
4、预编译PHP
#cd php-7.0.10

./configure    --prefix=/usr/local/php

--with-config-file-path=/usr/local/php/etc \

--enable-fpm \

--with-fpm-user=www \

--with-fpm-group=www \

--with-pdo-mysql=mysqlnd \

--with-mysql-sock=/usr/local/mysql/commondir/mysql.sock \

--with-libxml-dir \

--with-gd \

--with-jpeg-dir \

--with-png-dir \

--with-freetype-dir \

--with-iconv-dir \

--with-zlib-dir \

--enable-soap \

--enable-gd-native-ttf \

--enable-ftp \

--enable-mbstring \

--enable-exif \

--with-pear \

--with-curl \

--with-openssl
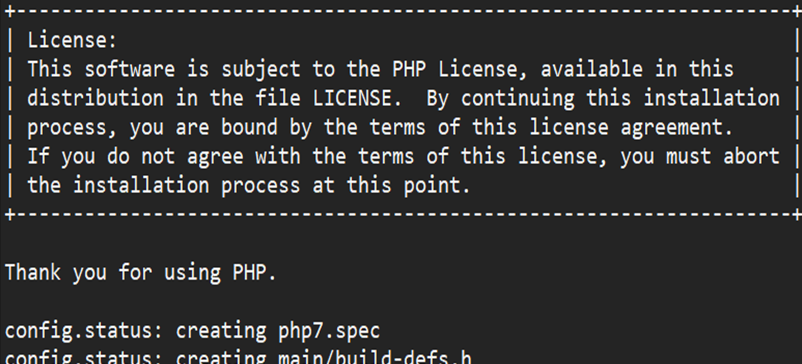
预编译出现以下提示信息,就预编译成功:
5、编译安装PHP7
#cd /root/php-7.0.10

#make && make install
编译安装过程没有报错,代表安装成功
6、修改 php-fpm.conf.default 为 php-fpm.conf,并编辑 php-fpm.conf 里面的部分内容
#cd /usr/local/php/etc

#mv php-fpm.conf.default php-fpm.conf

#vim php-fpm.conf

    pid = run/php-fpm.pid          #去掉前面的分号(;)
7、 修改 www.conf.default 为 www.conf
#cd /usr/local/php/php-fpm.d

#cp -a www.conf.default www.conf
8、复制 php.ini 配置文件
#cd /root/php-7.0.10

#cp -a php.ini-production /usr/local/php/etc/php.ini
9、复制 php-fpm 启动脚本到 init.d,并赋予执行权限
#cp -a sapi/fpm/init.d.php-fpm /etc/init.d/php-fpm

#chmod u+x /etc/init.d/php-fpm
10、给PHP创建 www 群组和 www 用户
#groupadd -r www                     #创建一个系统账户

#useradd -r -g www www         #创建一个系统账户,所属组为www
11、启动 php-fpm
#/etc/init.d/php-fpm start
四、在nginx的工作目录首页编辑一个测试PHP的首页,判断nginx是否支持解析PHP
1、在 nginx 的工作目录下,编辑测试 PHP 文件 test.php(测试文件名可以随意,但是必须是以“.php”结尾的文件)
#cd /usr/local/nginx/html/

#vim test.php

    <?php

        phpinfo();

    ?>
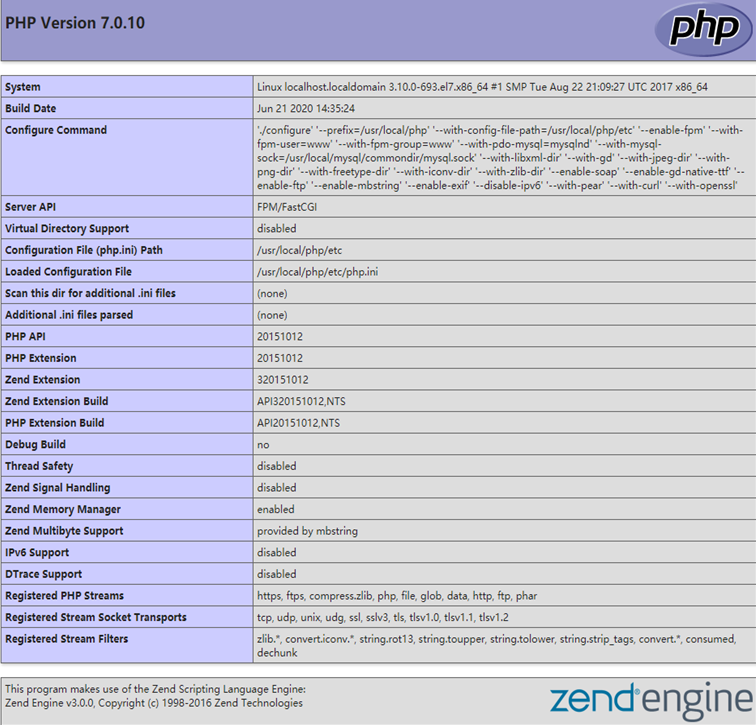
2、在浏览器地址栏输入:IP/test.php
例如:192.168.1.1/test.php;就会看到如下的PHP测试首页
五、LNMP环境已经搭建成功,下面就可以开始上传WordPress了
1、下载解压 wordoress
wget https://wordpress.org/latest.tar.gz

tar –zxvf latest.tar.gz
2、将wordpress里面所有内容移到/usr/local/nginx/html 目录下
mv /root/wordpress/* /usr/local/nginx/html
3、将 wp-config-sample.php 更换成 wp-config.php,并修改以下内容
#cd /usr/local/nginx/html

#mv wp-config-sample.php wp-config.php

#vim wp-config.php

    /** The name of the database for WordPress */

    define( 'DB_NAME', 'wordpressdb' );       \\数据库名

    /** MySQL database username */

    define( 'DB_USER', 'wordpress' );         \\数据用户名

    /** MySQL database password */

    define( 'DB_PASSWORD', '123456' );        \\数据库密码
4、将/usr/local/nginx/html 下的所有文件的用户改为root用户
#chown -R root:root /usr/local/nginx/html
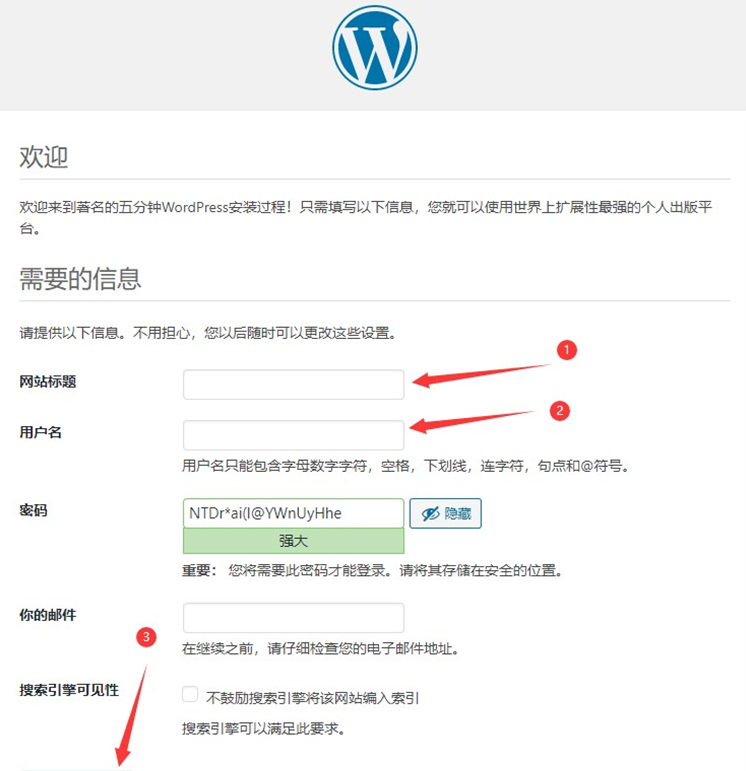
5、在浏览器地址栏输入自己主机的IP地址,即可出现wordpress安装界面
扩展【 https://www.runoob.com/linux/nginx-install-setup.html 源码安装Nginx】
用源码搭建LNMP环境+部署WordPress的更多相关文章
- CentOS 7 源码搭建LNMP环境
搭建 LNMP 环境 源码包版本 : CentOS Linux 7 nginx-1.15.1.tar.gz mysql-boost-5.7.21.tar.gz php-7.2.7.tar.gz ...
- 在CENTOS上源码搭建LNMP环境
前言 1.操作前提: CentOS Linux release 7.5.1804: sudo用户(需要root权限): 2.需要安装的组件: nginx稳定版:nginx-1.14.0: MariaD ...
- 搭建LNMP环境部署Wordpress博客
!!!首先要做的就是关闭系统的防火墙以及selinux: #systemctl stop firewalld #systemctl disable firewalld #sed -ri 's/^(SE ...
- 源码搭建LNMP
源码安装LNMP 作者:尹正杰 版权声明:原创作品,谢绝转载!否则将追究法律责任. 欢迎加入:高级运维工程师之路 598432640 前言:非常简单的一个平台LNMP,在生产实际环 ...
- 源码搭建lnmp平台
lnmp平台是指利用linux操作系统,nginx服务器,mysql数据库和php语言搭建高性能web服务器,负载均衡器和邮件代理服务器. 原理图:‘
- CentOS 6.5 下源码搭建LAMP环境
参考网站: http://wenku.baidu.com/link?url=Cvkqss2E9mnxXOZigMWPaCfqwsBxnm0sZ4aKE2oLAgQ888XxeC0DWOChxVqiHz ...
- 终于完成了 源码 编译lnmp环境
经过了大概一个星期的努力,终于按照海生的编译流程将lnmp环境源码安装出来了 nginx 和php 主要参考 http://hessian.cn/p/1273.html mysql 主要参考 http ...
- MyCAT源码分析——分析环境部署
为了更好地了解mycat的原理,计划对mycat源码进行通读一遍,根据实际业务环境进行相关源码优化. 一.环境描述 操作系统:windows 10 x64 软件:jdk 1.7+ maven ...
- ubuntu 源码安装 lnmp 环境
准备篇 下载软件包 1.下载nginx http://nginx.org/download/nginx-1.2.0.tar.gz 2.下载pcre (支持nginx伪静态) ftp://ftp.cs ...
随机推荐
- [状压DP]车II
车 I I 车II 车II 题目描述 有一个 n ∗ m n*m n∗m的棋盘 ( n . m ≤ 80 , n ∗ m ≤ 80 ) (n.m≤80,n*m≤80) (n.m≤80,n∗m≤80)要 ...
- 安装mongoDB出现的问题:无法启动
在我的电脑- 管理 - 服务-中会出现一个MongoDB Server的服务,你需要去手动删除这个服务删除指令: 在cmd管理员模式下使用: sc delete MongoDB Server 然后再配 ...
- 如何快速在odoo中创建自己的菜单
上一篇内容:如何快速创建odoo模块,使用脚手架快速创建自己的odoo应用app 前言 在上一个教程中,我们已经实现了对模块的创建,现在我们要对创建的模块添加内容,这个教程将教你如何在odoo菜单中创 ...
- odoo视图入门学习- tree视图的使用
上一篇内容:如何快速在odoo中创建自己的菜单 前言 上面的内容我们已经学会了如何去创建odoo的菜单,下面我们要学习的是odoo的基础视图tree视图,我们的目标是实现型号管理的列表页面 创建mod ...
- leetcode 刷题(数组篇)1题 两数之和(哈希表)
题目描述 给定一个整数数组 nums 和一个整数目标值 target,请你在该数组中找出 和为目标值 的那 两个 整数,并返回它们的数组下标. 你可以假设每种输入只会对应一个答案.但是,数组中同一个元 ...
- Java(94-100)【数组、对象】
1.数组作为方法的参数 任何数据类型都可以作为方法的参数 直接建立数组的方法,将数组作为方法的参数. 当调用方法的时候传递的是数组的地址. 2.数组作为方法的返回值 任何数据类型都可以作为方法的参数, ...
- Win10双系统安装Gentoo-(附Networkmanagr/Gnome安装)
安装Gentoo 本文主要参考的是官方Wiki,还有一些网友的经验,在后面的具体安装步骤里会分享对应网友的一些解决办法和相关文章 官方Wiki:https://wiki.gentoo.org/wiki ...
- ART模式下基于Xposed Hook开发脱壳工具
本文博客地址:http://blog.csdn.net/qq1084283172/article/details/78092365 Dalvik模式下的Android加固技术已经很成熟了,Dalvik ...
- Intel汇编程序设计-整数算术指令(下)
7.5 扩展加法和减法 扩展精度的假发和减法是指任意尺寸大小数字的加法和减法.例如要求你写一个C++程序,把两个1024位的整数相加,解决方案可不是那么简单!但在汇编语言中,ADC(带进位加)指令和 ...
- html个人笔记
HTML 1.1常用编辑器 dreamweaver.sublime.webstorm.Hbuilder.vscode 1.2 浏览器内核 分为渲染引擎和JS引擎 渲染引擎:它负责取得网页的内容(HTM ...