
Building a Radio Listening Station to Decode Digital Audio & Police Dispatches
On April 7, 2017, residents in Dallas, Texas, woke to the sound of emergency sirens blaring all over the city. No one could shut them off, and after repeated efforts to contain the situation, the city had to shut down the entire system. While the media reported a sophisticated computer hack was responsible, the truth was much less high-tech.
The sirens in Dallas were controlled by a series of radio signals that weren't encrypted, and anyone could broadcast them with the right equipment. Turns out, someone simply listened in to the radio signal during a test or real emergency that triggered the sirens to go off, then played it back later. This low-tech hack managed to use the principles of signals intelligence to control a system via radio waves.
But how would someone sniff radio signals — and then use them to control or interact with a system?
Things like garage door openers, car keys, and apparently emergency sirens are controlled by radio frequencies that can be eavesdropped on, decoded, or even simply rebroadcast to trigger the same effect. In this series, we will learn to both detect and listen in on these hidden radio frequencies, then rebroadcast or transmit them — on the $35 Raspberry Pi, no less.
Getting Started with a Portable Radio Listening Station
This build will teach you to detect local radio signals outside the "normal" FM band you're used to tuning into in your car or on your commercial FM radio. We will create a portable listening station to explore the VHF (very high frequency) and UHF (ultra high frequency) spectrums and decode digital audio data to make sense of the sounds in the world around you.
Example of a hidden radio frequency that I found.
This will start our series on signals intelligence (SIGINT), which is the analysis of signals to discern intelligence about a target. Of course, the first step in analyzing a signal is being able to hear it, so we'll need to dive into talking about both software-defined radio (SDR) and the radio frequency spectrum we'll be pulling the signal from.
The Radio Spectrum
There's an invisible conversation going around us in the radio frequency all the time. Though we can't see it, we transmit our civilization's wireless data overwhelmingly through the radio frequency spectrum.
Don't Miss: How to Load & Use Keystroke Injection Payloads on the USB Rubber Ducky
Visible light sits on that spectrum between 430–770 THz, which is what our biological eyes can sense. But down in the sub-1 GHz range lies much of our radio communication, including FM radio and the communication that takes place between law enforcement and first responders.
Wouldn't it be great if you could peer into this spectrum and make sense of signals of your biological body isn't built to perceive?
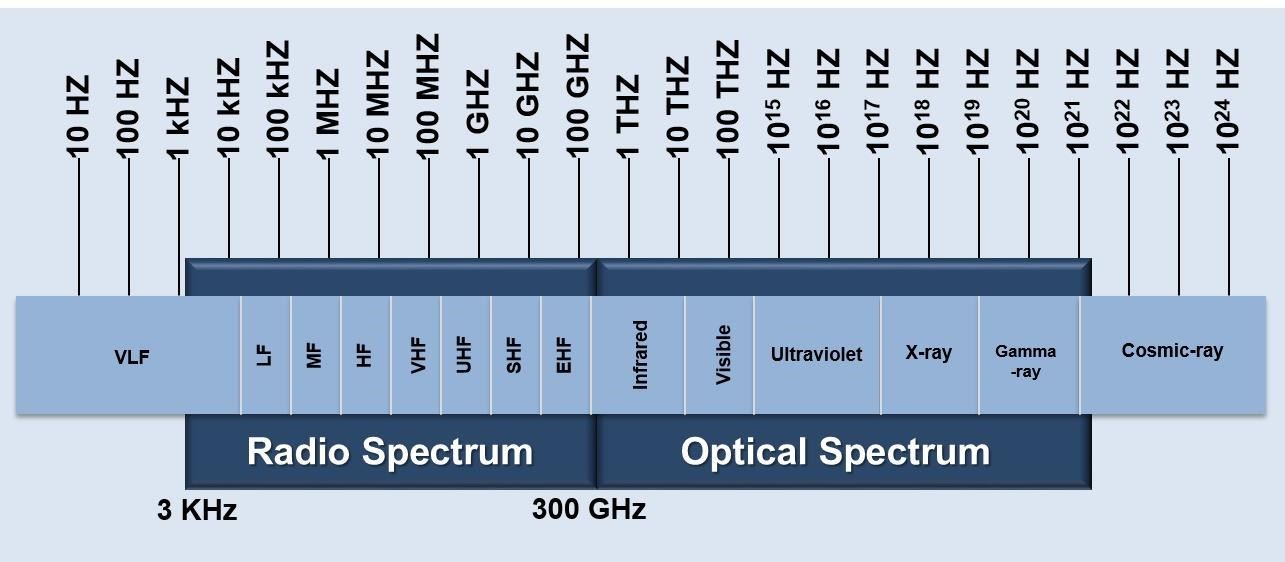
The basics of the radio frequency spectrum.Image via NASA
The radio spectrum is huge, so to avoid getting lost, this guide will be quite specific. However, there is a lot to explore and this guide is only the beginning. If you're curious about the signals you're receiving, you can always reference them against this handy chart if you're in the United States. In this guide, 24 MHz to 1.7 GHz is where we'll be operating.
Step 1: Gather Your Materials
To accomplish this tutorial, you'll need an SDR dongle and antenna to receive and convert the signal. You'll also need software to interpret the radio signal as well as another software to decode digital speech.
The Software-Defined Radio Receiver
SDR takes the parts of radio tuning that was normally done by crystals or local oscillators and accomplishes them with software instead. The basic requirements for such a system are a personal computer (or Raspberry Pi), a sound card or signal processor, and an RF receiver to receive the signal. As a result, many of the processes done by dedicated hardware are now done by a computer, making the entire radio system very low cost and flexible.
The team at RTL-SDR created a very cheap software-defined radio receiver that uses a DVB-T television tuner dongle based on the RTL2832U chipset, which they wrote a new software driver for to directly access the signal data. Their SDR kit gets you up and running for a mere $25.
Your other options, if you're feeling fancy, are the $169 Airspy R2 or the $149 SDRPlay. While those are certainly nice, I prefer low-cost, open-source, and commonly used tools for hacking, so we will focus on the RTL-SDR.
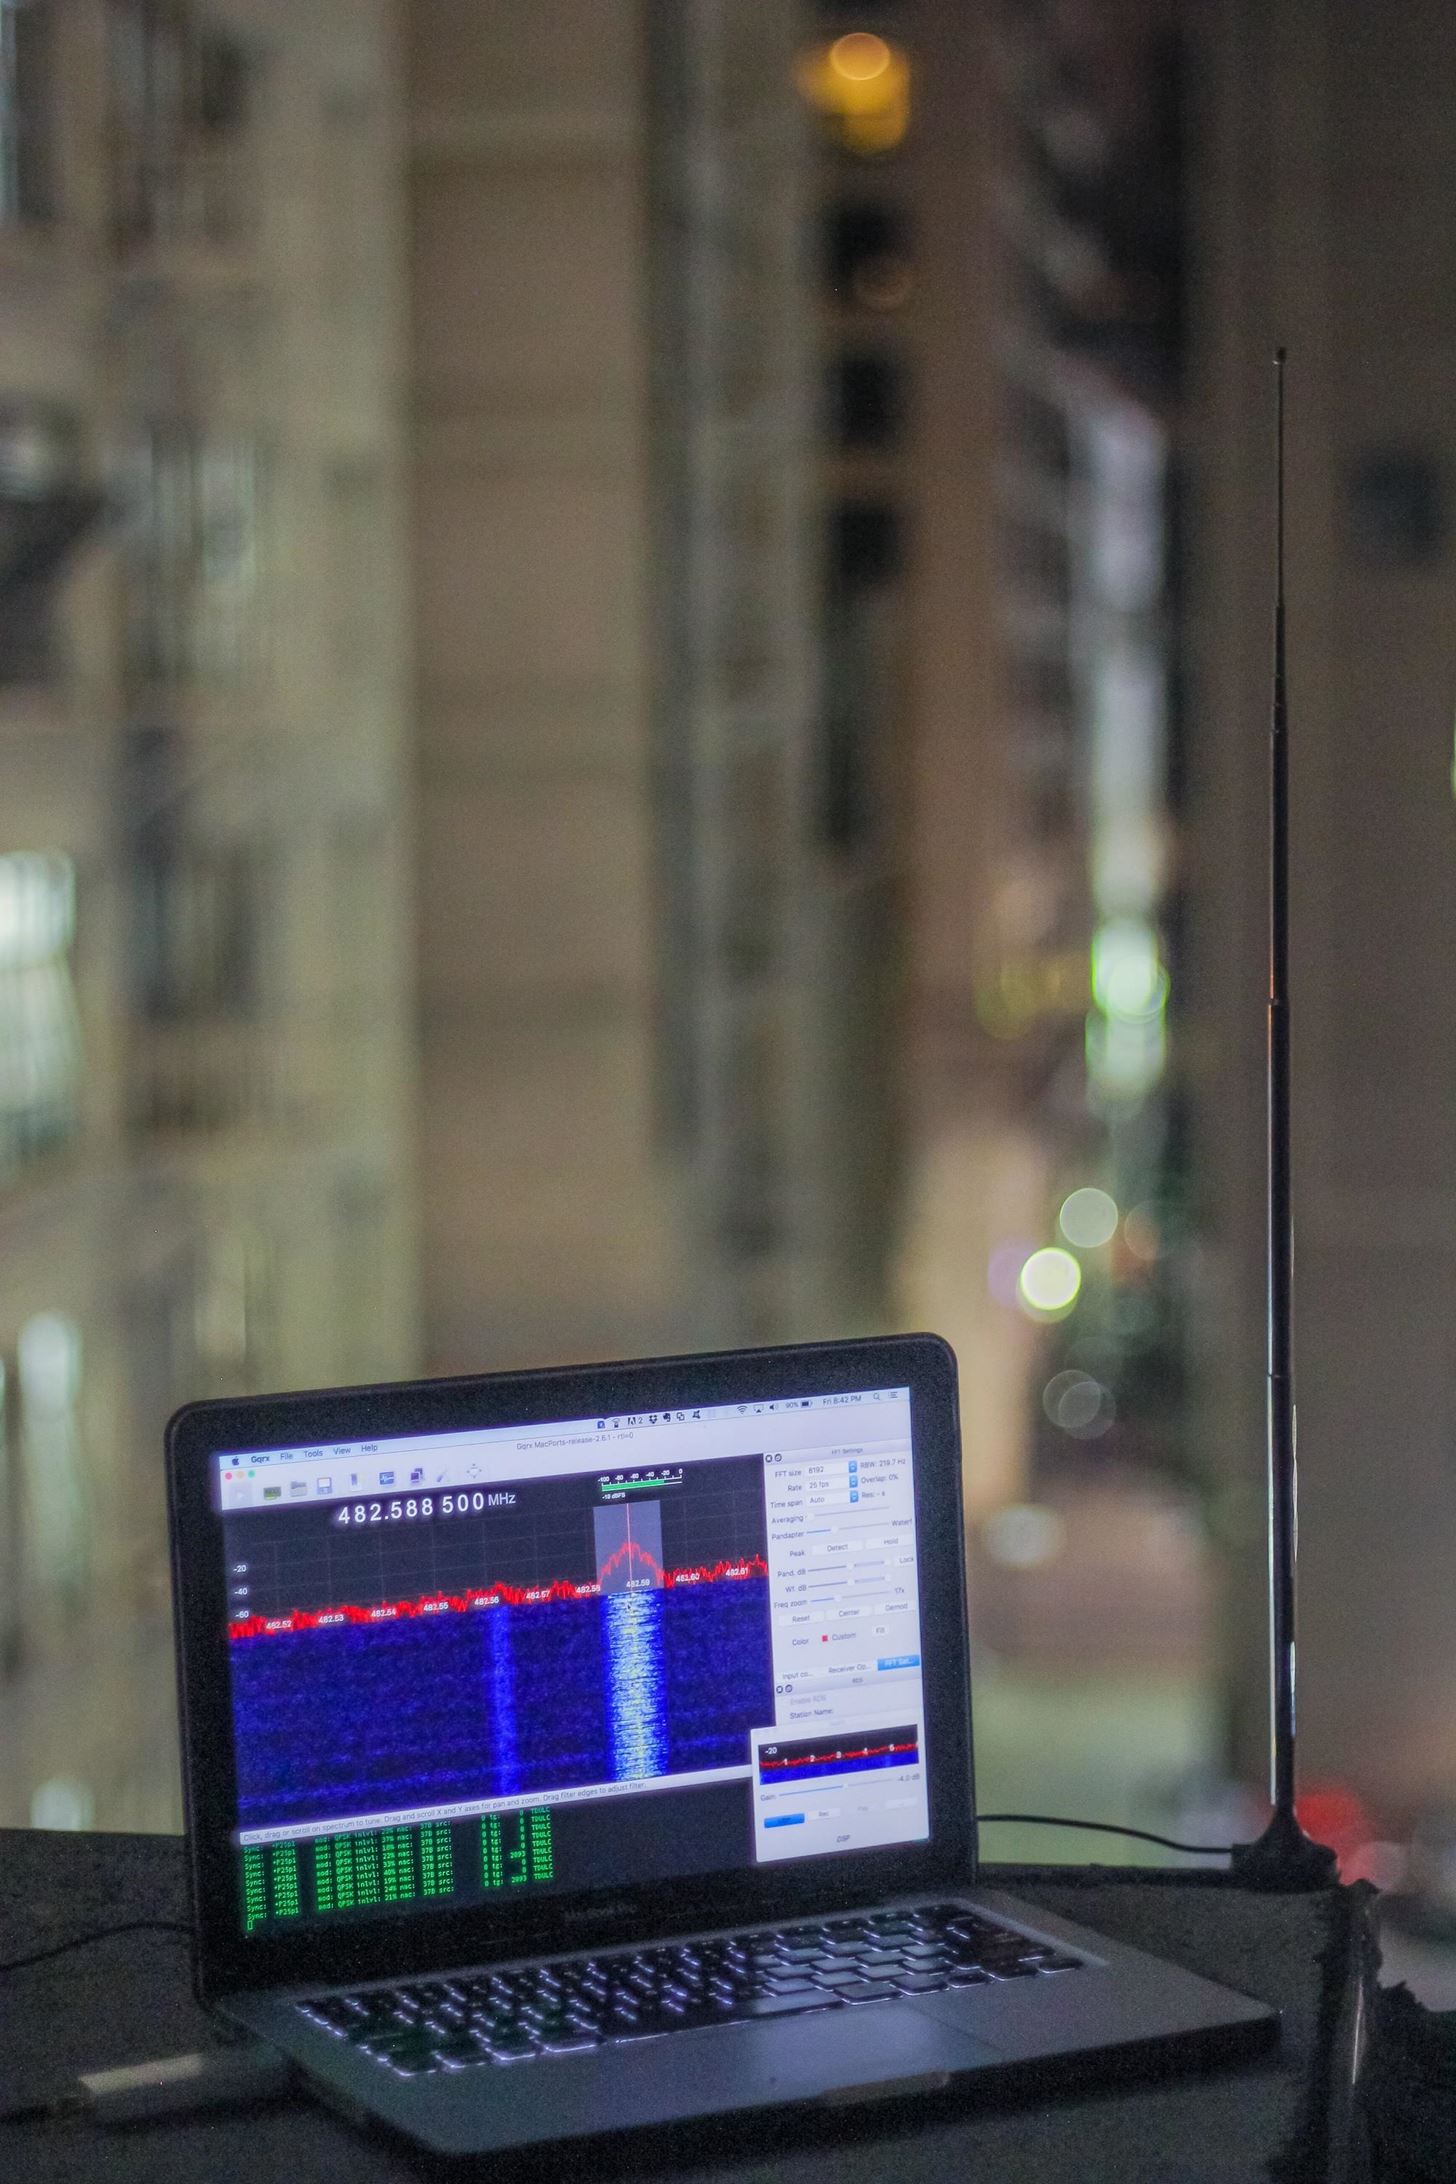
Slurping some signals with our outdoor monitoring setup.Image by SADMIN/Null Byte
I used an RTL-SDR plus two adjustable antennas, but any SDR kit that can tune into around the 400–600 MHz range should do fine. This tutorial will use the RTL-SDR for selectors in our SDR radio program; You may need to modify them to get a different adapter to work.
The SDR Software
Next, we will need software to interpret the radio signal. The open-source GQRX is my tool of choice, after managing to get it working on macOS Sierra and Kali Linux. This guide will cover macOS. However, I will cover the Kali install on a Raspberry Pi another time, as it requires a lot of dependencies and needs the sound cards to be working properly. The macOS build is more straightforward.
Don't Miss: Set Up a Headless Raspberry Pi Hacking Platform Running Kali Linux
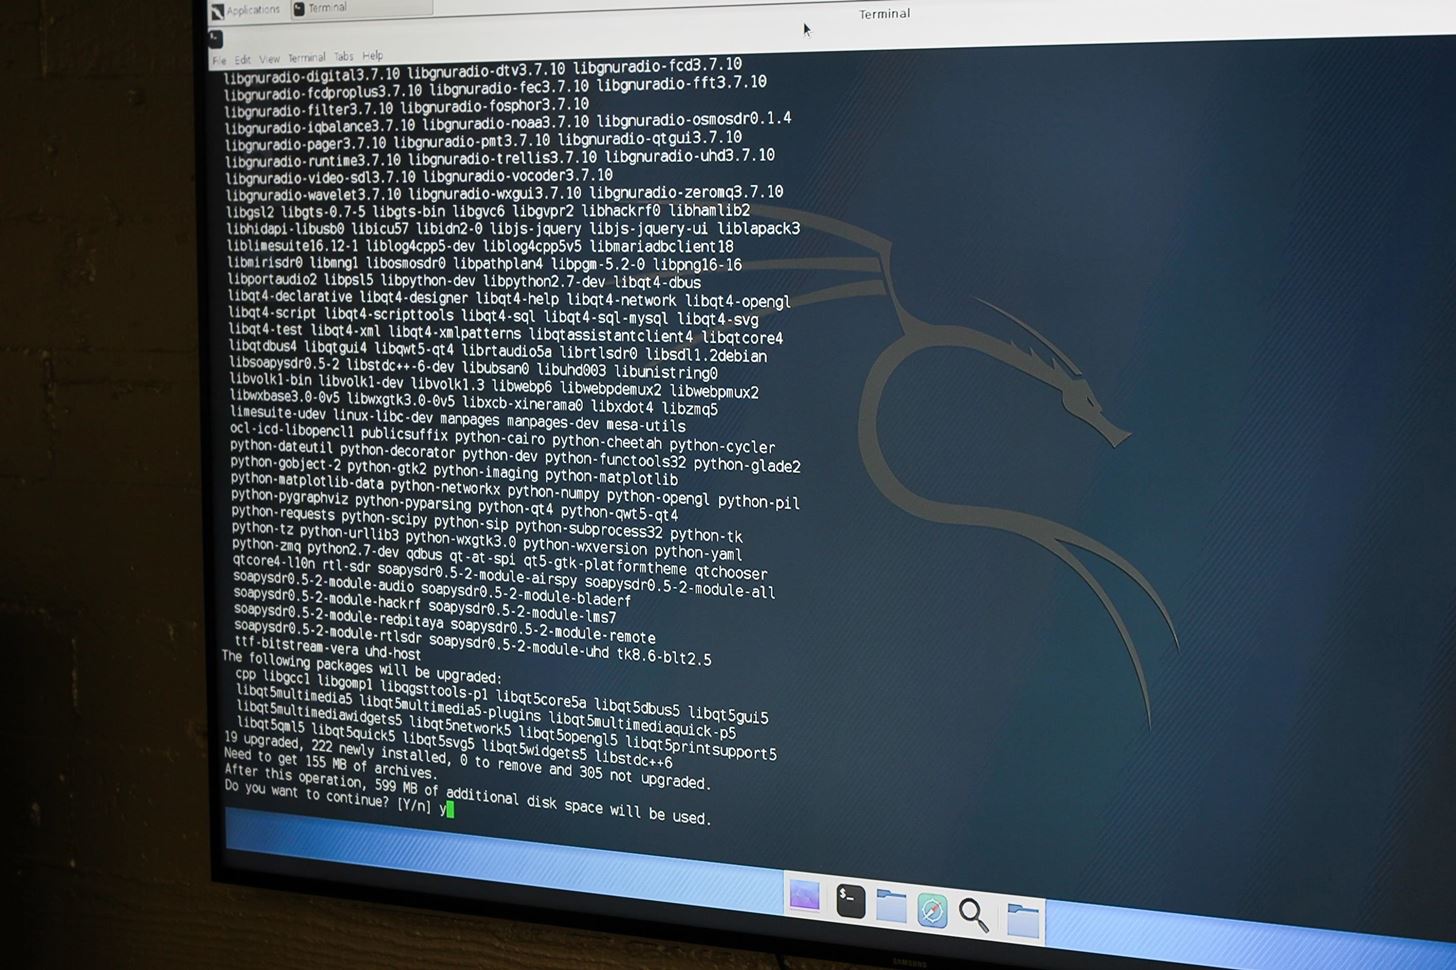
Lots of dependencies in Kali.Image by SADMIN/Null Byte
The Digital Speech Decoder
My macOS listening post build relies on the ability to decode digital data we intercept live to listen in on conversations. To do so, we will focus on one common type of signal we hope to intercept — digital audio.
Digital audio constitutes a signal of interest because it's frequently used by police and security organizations for communication and is often not encrypted since they are encoded. This, of course, is silly since encoding can be easily broken.
In my city, police do not encrypt dispatch except for tactical channels, it's just encoded as digital audio, so we'll use DSD to break the code live and listen in to their communications. We do this by streaming the audio via UDP (User Datagram Protocol) to DSD running in a terminal window below GQRX that decodes digital audio.
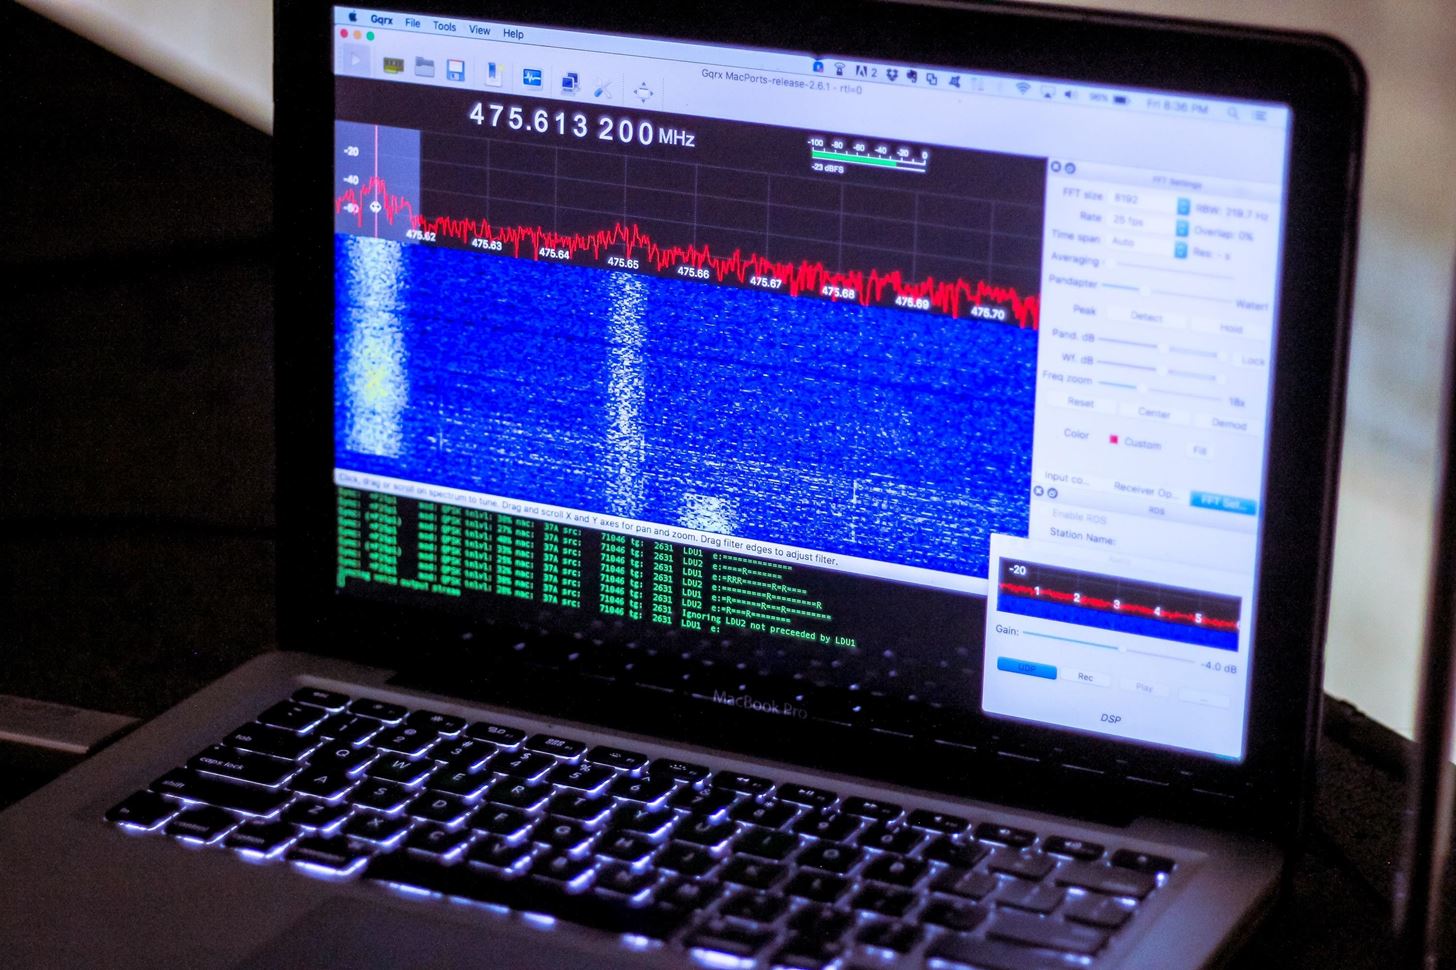
Decoding some digital audio.Image by SADMIN/Null Byte
Someone might point out that there are websites where you can stream these kinds of signals decoded by someone with a fancy, expensive radio and streamed digitally. That's great, but the stream is from a third party provided over the internet. Source your own data. For the cost of an SDR tuner and the software to run it, you can target specific agencies in your area for data collection.
Step 2: Install GQRX
GQRX, as pictured above in Kali, required a ton of dependencies. Want to compile them for hours? Me neither, so we'll install them using MacPorts. There is also a version available via Homebrew, but I was disappointed to find it didn't work properly.
First thing's first, MacPorts. Head to the MacPorts homepage and download the appropriate version, ensuring you've downloaded and installed Xcode and the Xcode Command Line Tools. Once Xcode is all ready, install MacPorts via the guided install, and you should be ready to begin installing GQRX.
Step 3: Run GQRX
To ensure everything is up to date, update MacPorts by typing the following in terminal:
sudo port selfupdate
Now, the battle begins. To download and install all the dependencies for GQRX, enter:
sudo port install gqrx
You may get errors while installing, as I did. For my Mac, this took six tries. Each time I chewed through more dependencies before getting an error and having to start the command over, and each time the list of dependencies got smaller until finally, they were all installed. Eventually, your resolve will defeat the machine and you will finish installing the complete list of dependencies.
Once the install is complete, run GQRX by typing the following in a terminal:
gqrx

Successful start screen after installing GQRX on macOS.
Step 4: Decode Digital Audio with DSD
To install DSD, we will need to install Homebrew since, of course, it's not available in MacPorts. Thanks to Hugh Dev, there is a nicely documented way to install a speech decoder via Homebrew.
To install Homebrew, run the following in terminal (ignore the giant spaces if you see them, they're just once space each):
ruby -e "$(curl -fsSL https://raw.githubusercontent.com/Homebrew/install/master/install)"
Once this is complete, we can install DSD. Run the following commands in terminal to install DSD:
brew install git cmake libsndfile itpp portaudio
brew install --HEAD mbelibgit clone https://github.com/szechyjs/dsd.git
cd dsd & mkdir build && cd build
cmake ..
make
sudo make install
Run "dsd -a" to see a list of available audio sources. We'll need this later to connect the audio from our receiver too. In this case, it's pretty straightforward.
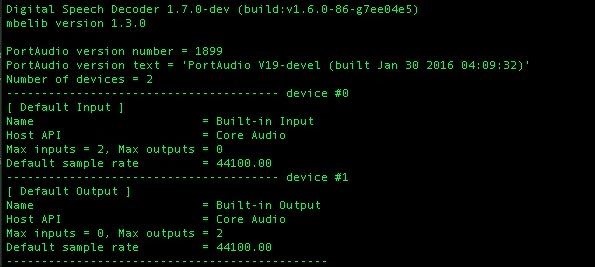
Great! Now we can use these to pipe radio data to DSD.
Step 5: Configure GQRX with the RTL-SDR
If you try to start capture in GQRX with the wrong settings enabled, it will likely crash. Click on the hardware configuration tab (the green chip icon next to the "play" symbol on the top left of the screen) and enter the configuration to match the following configuration.
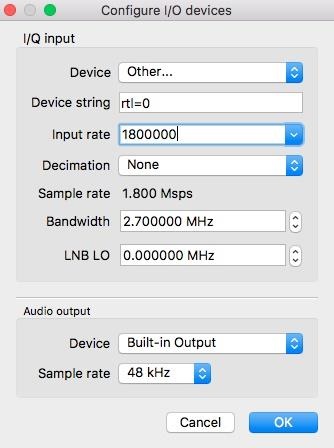
I/Q input:
- Device: Other...
- Device string: rtl=0
- Input rate: 1800000
- Decimation: None
- Sample rate: 1.800 Msps
- Bandwidth: 2.700000 MHz
- LNB LO: 0.000000 MHz
Audio output:
- Device: Built-in Output
- Sample rate: 48 kHz
Once your configuration matches mine, click okay and then plug in your RLT-SDR with antenna deployed. Due to something I did, I'll remind you to turn down your audio, take out any headphones, and turn down the gain.
Next, click the play button to start the capture.
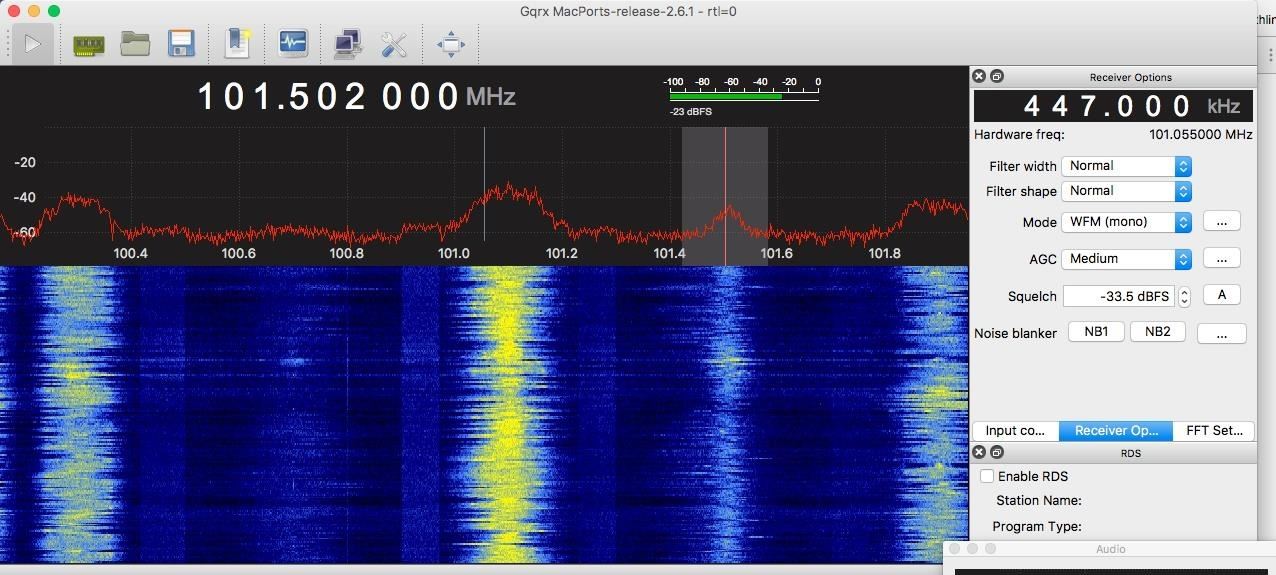
In this case, I'm detecting a radio signal I'm sending from a nearby Raspberry Pi's GPIO pin.
Step 6: Capture Unencoded Audio from Our Listening Station
If everything went well, we have the entire spectrum the RTL-SDR can tune into at our disposal. For practice, tune to a channel between 88 and 102 MHz, the standard range for FM radio. Set the "mode" to FM mono (or stereo depending on which sounds better), and click on a strong signal you can see in that range. You should hear audio play. You're tuning into public broadcasts. Explore up and down the frequency to start finding other unencoded broadcasts, using the guide above to understand the signals you find.
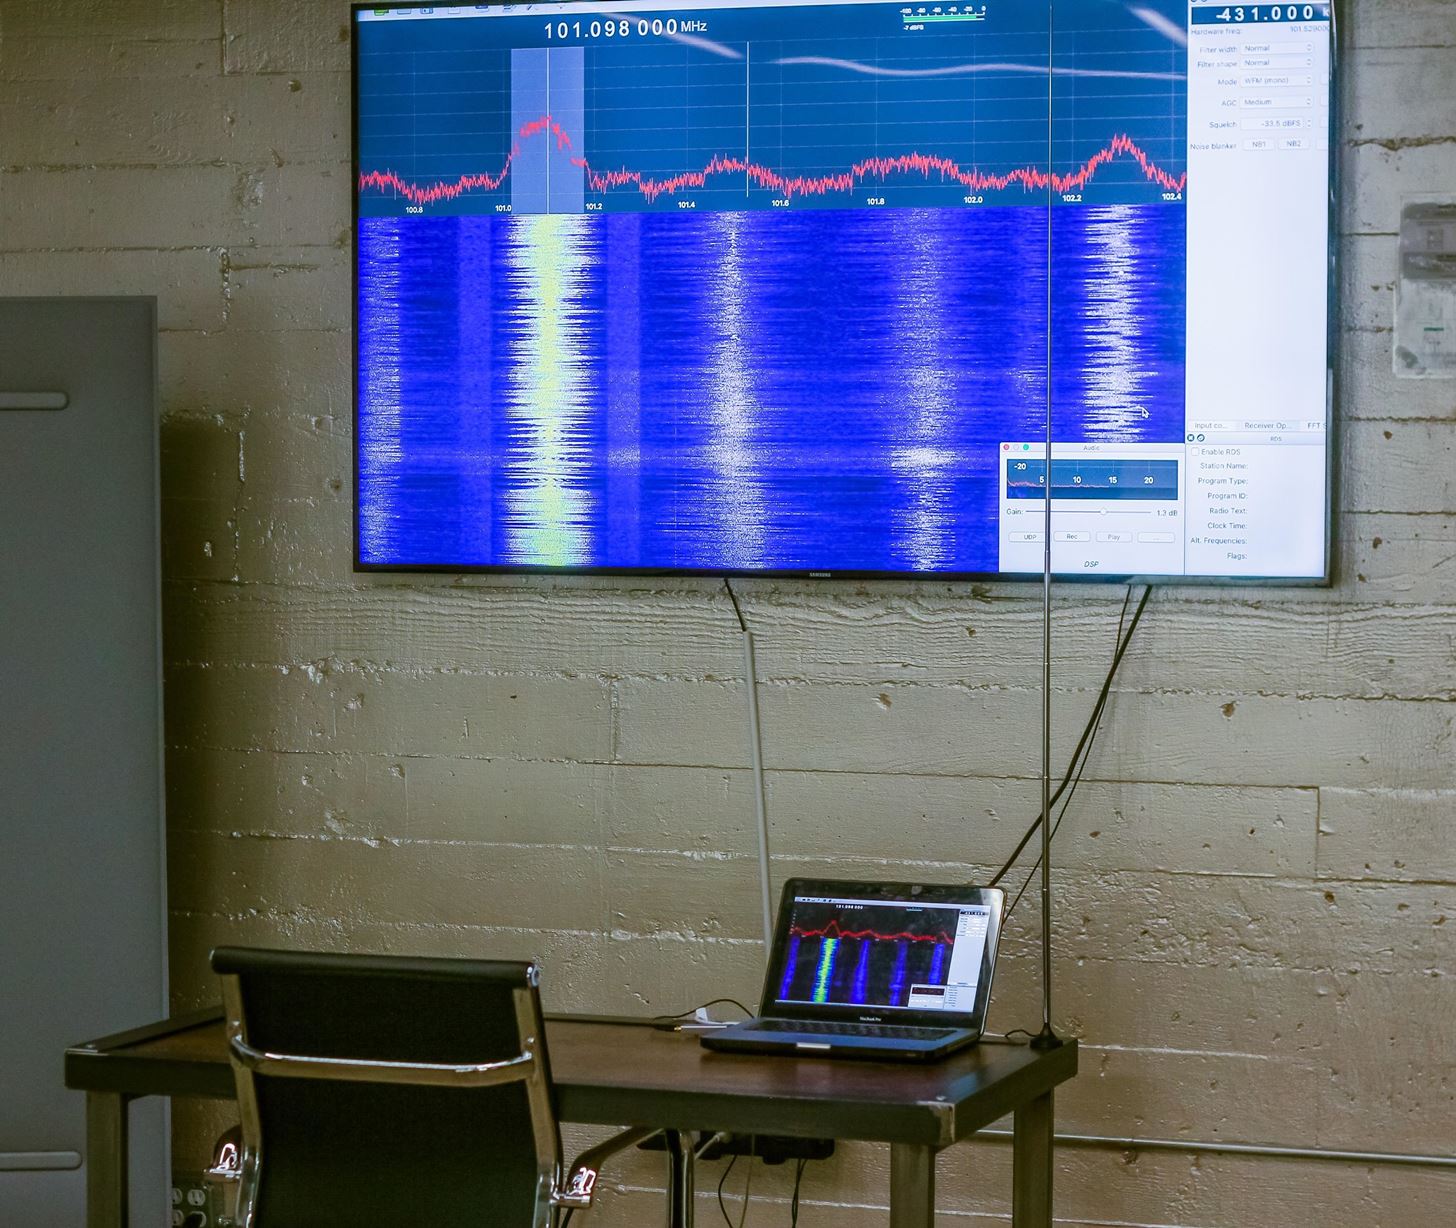
Indoor GQRX software-defined radio listening station based on RLT-SDR, with the waveform of unencoded FM broadcasts visible on-screen.Image by SADMIN/Null Byte
Step 7: Find Encoded Audio to Decode
Look up what frequencies emergency services in your area use and navigate to that set of frequencies. If you live in a city like I do, this should be lit up with transmissions that look like "waterfalls" of data rather than waveforms of FM transmissions. In these frequencies, you may find unencoded dispatch frequencies and private security company two-way radio communication as well, but you must switch modes to hear it.
Switch "mode" to narrow FM and try tuning into an unencoded audio stream if one is available. If one is not, target a waterfall that looks like the one in the picture below. Select the "UDP" option in the audio window as shown below in blue to output our audio to DSD.
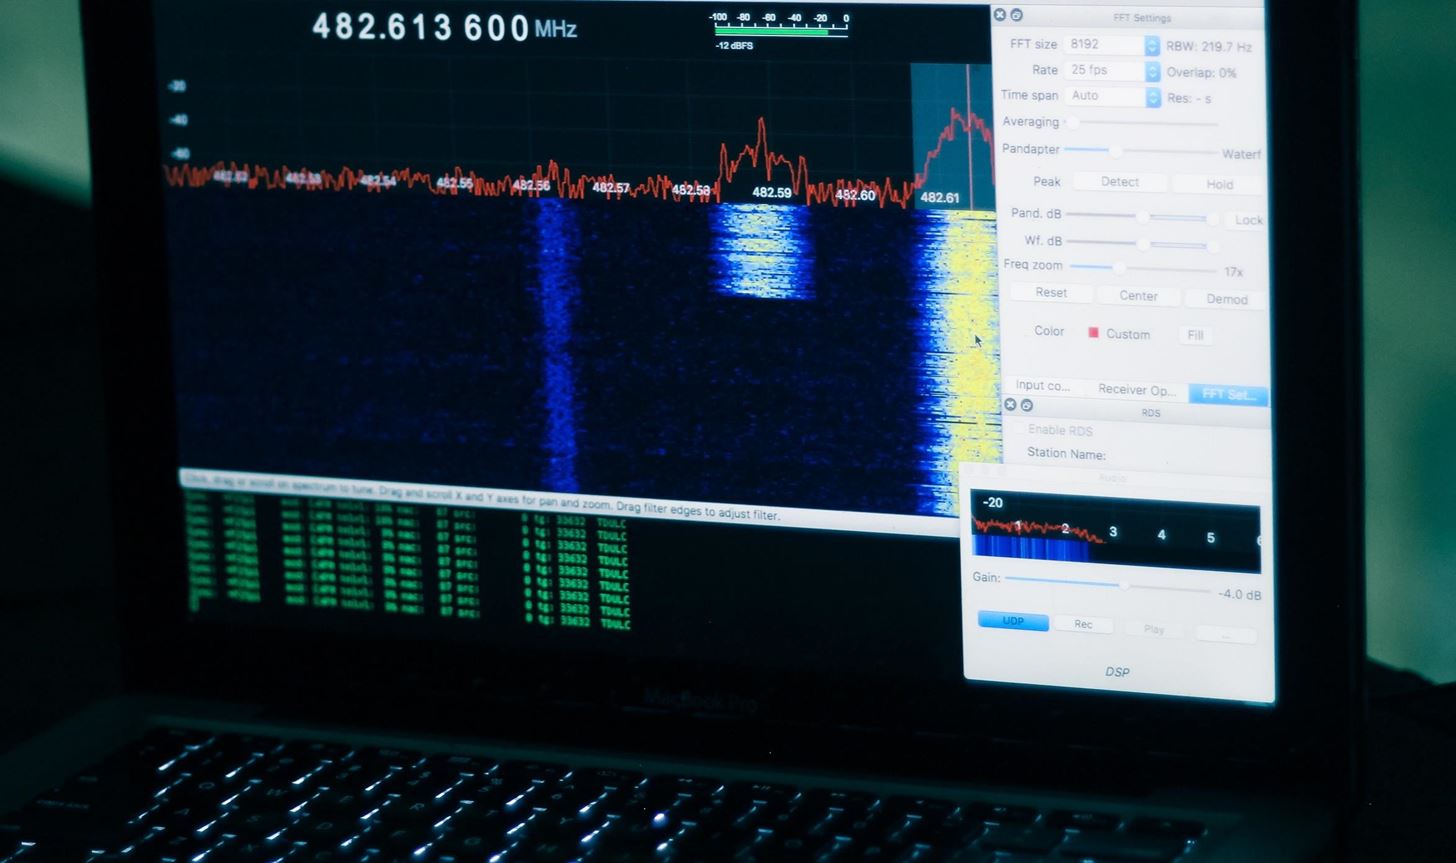
Here we sample from a digital audio source on the far right, while we see another digital audio signal starting to the left of it at 482.59.Image by SADMIN/Null Byte
Look for streams that turn on and off. Always-on streams are usually trunk relay units or other logistics-related data transmissions that aren't human voices we can decode. Once you find a promising one, let's try decoding it.
With the station locked on and UDP selected, run the following in terminal to check if the output is working.
nc -u -l localhost 7355
If so, run the following to begin decoding digital speech, with pa:1 the number of the output device we found before.
nc -l -u localhost 7355 | dsd -i - -o pa:1
As packets are received from the air, they will show up in DSD.
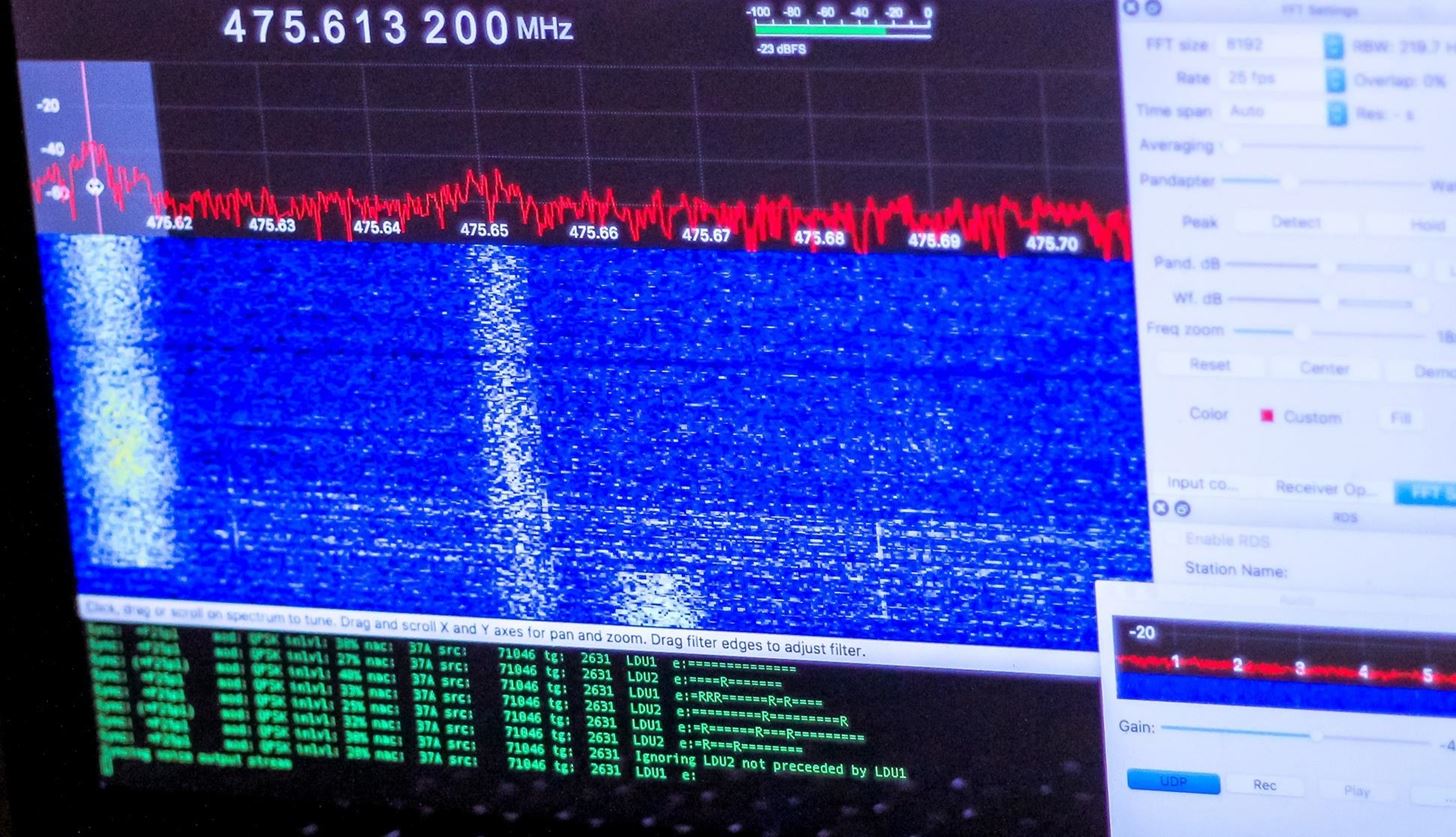
Successful intercept of digital audio from emergency services.Image by SADMIN/Null Byte
The packets in the photo above are indicative of a digital voice transmission being intercepted and decoded live.
Step 8: Squeeze Speech Out of a Bad Signal
Some signals won't yield voice because they are encrypted (rather than encoded) or require some tweaking to lock on to. Try narrowing or expanding the filter, adjusting the gain or squelch, or going up or down the spectrum to get a voice stream to begin flowing through DSD. Be creative in your antenna placement and note differences in reception in response to things you do or places you put it.

Image by SADMIN/Null Byte
This build gives you the ability to scan normally invisible spectrums and begin to listen in on those who may think they are communicating in private. While decoding radio broadcasts is legal in the US, things get interesting when we go up to cellular phone and Wi-Fi transmissions.
Make sure to check out my follow-up guide, where I go over broadcasting signals from a Raspberry Pi in the radio spectrum by simply adding a piece of wire.
Thanks for reading, and make sure to keep an eye on Null Byte for more hacking tutorials. You can ask me questions here or @sadmin2001 on Twitter or Instagram.
Building a Radio Listening Station to Decode Digital Audio & Police Dispatches的更多相关文章
- Digital Audio - Creating a WAV (RIFF) file
Abstract:This tutorial covers the creation of a WAV (RIFF) audio file. It covers bit size, sample ra ...
- Hijacking FM Radio with a Raspberry Pi & Wire
转载:https://null-byte.wonderhowto.com/how-to/hack-radio-frequencies-hijacking-fm-radio-with-raspberry ...
- Networked Graphics: Building Networked Games and Virtual Environments (Anthony Steed / Manuel Fradinho Oliveira 著)
PART I GROUNDWORK CHAPTER 1 Introduction CHAPTER 2 One on One (101) CHAPTER 3 Overview of the Intern ...
- [label][翻译][JavaScript]如何使用JavaScript操纵radio和check boxes
Radio 和 check boxes是form表单中的一部分,允许用户通过鼠标简单点击就可以选择.当与<textarea>元素的一般JavaScript操纵相比较,这些表单控件(form ...
- Codeforces Round #130 (Div. 2) C - Police Station 最短路+dp
题目链接: http://codeforces.com/problemset/problem/208/C C. Police Station time limit per test:2 seconds ...
- Linux下编译内核配置选项简介
Code maturity level options代码成熟度选项 Prompt for development and/or incomplete code/drivers 显示尚在开发中或尚未完 ...
- Linux: 介绍make menuconfig中的每个选项含义【转】
转自:http://blog.csdn.net/gaoyuanlinkconcept/article/details/8810468 介绍make menuconfig中的每个选项含义 Linux 2 ...
- 【内核】linux2.6版本内核编译配置选项(二)
目录 Linux2.6版本内核编译配置选项(一):http://infohacker.blog.51cto.com/6751239/1203633 Linux2.6版本内核编译配置选项(二):http ...
- top-100-of-the-best-useful-opensource-applications/
top-100-of-the-best-useful-opensource-applications/ http://www.ubuntulinuxhelp.com/top-100-of-the-be ...
随机推荐
- NOIP 2017 D2T1 奶酪
#include<iostream> #include<cstdio> #include<cstdlib> #include<algorithm> #i ...
- 【Java_基础】Java的访问权限控制
1.类成员的访问权限控制 Java中类成员的访问权限分为四类:private,无(默认情况下),protected和public.其权限控制如下表所示: 修饰词 本类 同一个包的类 继承类 其他类 p ...
- (16)zabbix history trends历史与趋势数据详解
1. 保留历史数据 我们可以通过如下方式来设置保留数据的时长:监控项(item)配置里匹配更新监控项(item)设置Housekeeper tasksHousekeeper会定期删除过期的数据.如果数 ...
- 蓝牙学习(4) -- L2CAP
L2CAP in protocol 首先看一下L2CAP在Bluetooth protocol architecture diagram中的位置: Features of L2CAP Logical ...
- RN安卓原生模块
https://facebook.github.io/react-native/docs/native-modules-android.html RN实际就是依附在原生平台上,把各种各样的RN组件展示 ...
- 1、初学探讨PYTHON的itchat和wxpy两库
最近好奇学习了python,觉得简单明了,但是最头疼的就是调整空格和调试吧,的确调试不如C#使用visual studio 方便,都是使用print()来调试.也许因为我是菜鸟,如果大家还有更好的方法 ...
- appIcon
原文地址:https://developer.apple.com/library/ios/documentation/UserExperience/Conceptual/MobileHIG/IconM ...
- (转)automaticallyAdjustsScrollViewInsets(个人认为iOS7中略坑爹的属性)
转自http://m.blog.csdn.net/blog/humingtao2013/27662093 automaticallyAdjustsScrollViewInsets(个人认为iOS7中略 ...
- (转)编写高质量的OC代码
点标记语法 属性和幂等方法(多次调用和一次调用返回的结果相同)使用点标记语法访问,其他的情况使用方括号标记语法. 良好的风格: view.backgroundColor = [UIColor or ...
- 排序算法C语言实现——冒泡排序
/*冒泡O(n^2)*//*原理: 比较相邻的元素.如果第一个比第二个大,就交换他们两个. 对每一对相邻元素做同样的工作,从开始第一对到结尾的最后一对.在这一点,最后的元素应该会是最大的数 ...