Spring Event事件驱动
Spring事件驱动模型,简单来说类似于Message-Queue消息队列中的Pub/Sub发布/订阅模式,也类似于Java设计模式中的观察者模式。
自定义事件
Spring的事件接口位于org.springframework.context.ApplicationEvent,源码如下:
public abstract class ApplicationEvent extends EventObject {

	private static final long serialVersionUID = 7099057708183571937L;

	private final long timestamp;

	public ApplicationEvent(Object source) {

		super(source);

		this.timestamp = System.currentTimeMillis();

	}

	public final long getTimestamp() {

		return this.timestamp;

	}

}
继承了Java的事件对象EventObject,所以可以使用getSource()方法来获取到事件传播对象。
自定义Spring事件
public class CustomSpringEvent extends ApplicationEvent {

    private String message;

    public CustomSpringEvent(Object source, String message) {

        super(source);

        this.message = message;

    }

    public String getMessage() {

        return message;

    }

}
然后定义事件监听器,该监听器实际上等同于消费者,需要交给Spring容器管理。
@Component

public class CustomSpringEventListener implements ApplicationListener<CustomSpringEvent> {

    @Override

    public void onApplicationEvent(CustomSpringEvent event) {

        System.out.println("Received spring custom event - " + event.getMessage());

    }

}
最后定义事件发布者
@Component

public class CustomSpringEventPublisher {

    @Autowired

    private ApplicationEventPublisher applicationEventPublisher;

    public void doStuffAndPublishAnEvent(final String message) {

        System.out.println("Publishing custom event. ");

        CustomSpringEvent customSpringEvent = new CustomSpringEvent(this, message);

        applicationEventPublisher.publishEvent(customSpringEvent);

    }

}
创建测试类
@RunWith(SpringRunner.class)

@SpringBootTest

public class CustomSpringEventPublisherTest {

    @Autowired

    private CustomSpringEventPublisher publisher;

    @Test

    public void publishStringEventTest() {

        publisher.doStuffAndPublishAnEvent("111");

    }

}
运行测试类,可以看到控制台打印了两条重要信息
//发布事件

Publishing custom event.

//监听器得到了事件,并相应处理

Received spring custom event - 111
由于Spring事件是发布/订阅的模式,而发布订阅模式有以下三种情况
- 1生产者 - 1消费者
- 1生产者 - 多消费者
- 多生产者 - 多消费者
上面举的例子是第一种情况,我们来试试其他两个情况
继续创建一个事件监听器作为消费者:
@Component

public class CustomSpringEventListener2 implements ApplicationListener<CustomSpringEvent> {

    @Override

    public void onApplicationEvent(CustomSpringEvent event) {

        System.out.println("CustomSpringEventListener2 Received spring custom event - " + event.getMessage());

    }

}
运行测试类后,可以观察到,控制台顺序打印了两条消费信息:
Publishing custom event.

CustomSpringEventListener1 Received spring custom event - 111

CustomSpringEventListener2 Received spring custom event - 111
说明,Spring的发布订阅模式是广播模式,所有消费者都能接受到消息,并正常消费
再试试第三种多生产者 - 多消费者的情况
继续创建一个发布者,
@Component

public class CustomSpringEventPublisher2 {

    @Autowired

    private ApplicationEventPublisher applicationEventPublisher;

    public void doStuffAndPublishAnEvent(final String message) {

        System.out.println("CustomSpringEventPublisher2 Publishing custom event. ");

        CustomSpringEvent customSpringEvent = new CustomSpringEvent(this, message);

        applicationEventPublisher.publishEvent(customSpringEvent);

    }

}
控制台输出:
CustomSpringEventPublisher Publishing custom event.

CustomSpringEventListener1 Received spring custom event - 111

CustomSpringEventListener2 Received spring custom event - 111

CustomSpringEventPublisher2 Publishing custom event.

CustomSpringEventListener1 Received spring custom event - 222

CustomSpringEventListener2 Received spring custom event - 222
从以上输出内容,我们可以猜测到,Spring的事件发布订阅机制是同步进行的,也就是说,事件必须被所有消费者消费完成之后,发布者的代码才能继续往下走,这显然不是我们想要的效果,那有没有异步执行的事件呢?
Spring中的异步事件
要使用Spring 的异步事件,我们需要自定义异步事件配置类
@Configuration

public class AsynchronousSpringEventsConfig {

    @Bean(name = "applicationEventMulticaster")

    public ApplicationEventMulticaster simpleApplicationEventMulticaster() {

        SimpleApplicationEventMulticaster eventMulticaster

                = new SimpleApplicationEventMulticaster();

        eventMulticaster.setTaskExecutor(new SimpleAsyncTaskExecutor());

        return eventMulticaster;

    }

}
发布和订阅的代码不用变动,直接运行测试类,控制台将打印出:
CustomSpringEventPublisher Publishing custom event.

CustomSpringEventPublisher2 Publishing custom event.

CustomSpringEventListener1 Received spring custom event - 111

CustomSpringEventListener2 Received spring custom event - 111

CustomSpringEventListener2 Received spring custom event - 222

CustomSpringEventListener1 Received spring custom event - 222
可以看到,两个发布者几乎同时运行,证明监听器是异步执行的,没有阻塞住发布者的代码。准确的说,监听器将在一个单独的线程中异步处理事件。
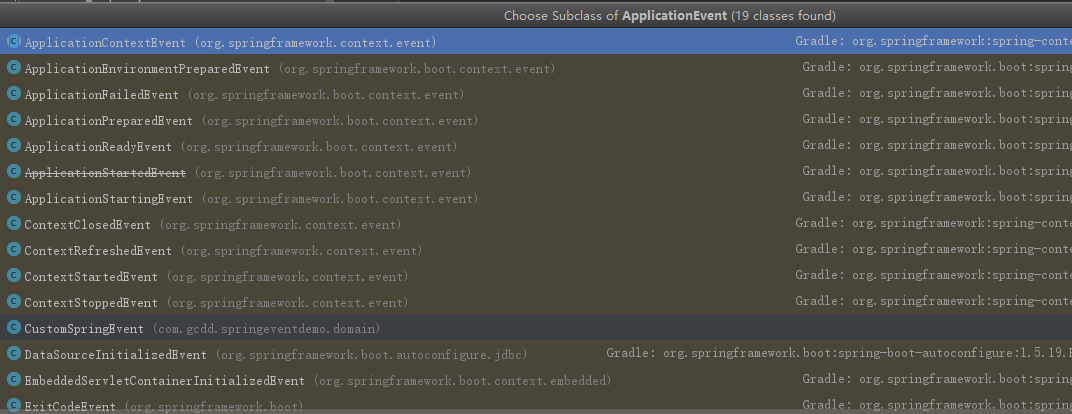
Spring自带的事件类型
事件驱动在Spring中是被广泛采用的,我们查看ApplicationEvent的子类可以发现许多Event事件,在此不赘述。
注解驱动的监听器
从Spring 4.2开始,事件监听器不需要是实现ApplicationListener接口的bean,它可以通过@EventListener注解在任何被Spring容器管理的bean的公共方法上。
@Component

public class AnnotationDrivenContextStartedListener {

    @EventListener

    public void handleContextStart(CustomSpringEvent cse) {

        System.out.println("Handling Custom Spring Event.");

    }

}
控制台输出结果:
CustomSpringEventPublisher Publishing custom event.

Handling Custom Spring Event.

CustomSpringEventPublisher2 Publishing custom event.

Handling Custom Spring Event.
同样的,我们可以看出,这个事件监听器是同步执行的,如果要改为异步监听器,在事件方法上加上@Async,并且在Spring应用中开启异步支持(在SpringBootApplication上添加@EnableAsync)。
@Component

public class AnnotationDrivenContextStartedListener {

    @Async

    @EventListener

    public void handleContextStart(CustomSpringEvent cse) {

        System.out.println("Handling Custom Spring Event.");

    }

}
再次运行测试类:
CustomSpringEventPublisher Publishing custom event.

CustomSpringEventPublisher2 Publishing custom event.

Handling Custom Spring Event.

Handling Custom Spring Event.
泛型支持
创建一个通用泛型事件模型
@Data

public class GenericSpringEvent<T> {

    private T message;

    protected boolean success;

    public GenericSpringEvent(T what, boolean success) {

        this.message = what;

        this.success = success;

    }

}
注意GenericSpringEvent和CustomSpringEvent之间的区别。我们现在可以灵活地发布任何任意事件,并且不再需要从ApplicationEvent扩展。
这样的话,我们无法像之前一样,通过继承ApplicationListener的方式来定义一个监听器,因为ApplicationListener定义了事件必须是ApplicationEvent的子类。所以,我们只能使用注解驱动的监听器。
通过在@EventListener注释上定义布尔SpEL表达式,也可以使事件监听器成为条件。在这种情况下,只会为成功的String的GenericSpringEvent调用事件处理程序:
@Component

public class AnnotationDrivenEventListener {

    @EventListener(condition = "#event.success")

    public void handleSuccessful(GenericSpringEvent<String> event) {

        System.out.println("Handling generic event (conditional).");

    }

}
定义具体类型的事件:
public class StringGenericSpringEvent extends GenericSpringEvent<String> {

    public StringGenericSpringEvent(String message, boolean success) {

        super(message, success);

    }

}
定义发布者:
@Component

public class StringGenericSpringEventPublisher {

    @Autowired

    private ApplicationEventPublisher applicationEventPublisher;

    public void doStuffAndPublishAnEvent(final String message, final boolean success) {

        System.out.println("CustomSpringEventPublisher Publishing custom event. ");

        StringGenericSpringEvent springEvent = new StringGenericSpringEvent(message, success);

        applicationEventPublisher.publishEvent(springEvent);

    }

}
测试类:
@RunWith(SpringRunner.class)

@SpringBootTest

public class CustomSpringEventPublisherTest {

    @Autowired

    private StringGenericSpringEventPublisher publisher;

    @Test

    public void publishStringEventTest() {

        publisher.doStuffAndPublishAnEvent("success", true);

        publisher.doStuffAndPublishAnEvent("failed", false);

    }

}
运行结果:
CustomSpringEventPublisher Publishing custom event.

Handling generic event (conditional) success

CustomSpringEventPublisher Publishing custom event.
监听器只处理了成功的事件,成功忽略掉了失败的事件。这样的好处是,可以为同一个事件定义成功和失败不同的操作。
Spring事件的事务绑定
从Spring 4.2开始,框架提供了一个新的@TransactionalEventListener注解,它是@EventListener的扩展,允许将事件的侦听器绑定到事务的一个阶段。绑定可以进行以下事务阶段:
- AFTER_COMMIT(默认的):在事务成功后触发
- AFTER_ROLLBACK:事务回滚时触发
- AFTER_COMPLETION:事务完成后触发,不论是否成功
- BEFORE_COMMIT:事务提交之前触发
总结
- Spring中处理事件的基础知识:创建一个简单的自定义事件,发布它,然后在监听器中处理它。
- 在配置中启用事件的异步处理。
- Spring 4.2中引入的改进,例如注释驱动的侦听器,更好的泛型支持以及绑定到事务阶段的事件。
Spring Event事件驱动的更多相关文章
- EventBus VS Spring Event
EventBus VS Spring Event 本地异步处理,采用事件机制 可以使 代码解耦,更易读.事件机制实现模式是 观察者模式(或发布订阅模式),主要分为三部分:发布者.监听者.事件. Gua ...
- spring event
昨天看到了一遍关于spring event的帖子,觉得很好,就照着敲了一份代码,感觉对spring event有了进一步的认识.帖子链接:https://segmentfault.com/a/1190 ...
- 自定义Spring event
通过Spring自定义event 首先我们定义我们的event类 package com.hyenas.spring.custom.event; import org.springframework. ...
- nginx源代码分析--event事件驱动初始化
1.在nginx.c中设置每一个核心模块的index ngx_max_module = 0; for (i = 0; ngx_modules[i]; i++) { ngx_modules[i]-> ...
- spring的事件驱动模型
在工作中会遇到这样的业务,生成一个订单后需要给指定的用户发送短信或者邮件,但是短信或者邮件发送失败又不会影响正常的业务: 这里介绍通过ApplicationContext和spring的@EventL ...
- 配置Apache运行在event事件驱动模式下
(1)启用MPM Include conf/extra/httpd-mpm.conf (2)配置evnet MPM参数 <IfModule event.c> #default 3 Ser ...
- spring事件驱动模型--观察者模式在spring中的应用
spring中的事件驱动模型也叫作发布订阅模式,是观察者模式的一个典型的应用,关于观察者模式在之前的博文中总结过,http://www.cnblogs.com/fingerboy/p/5468994. ...
- spring中自定义Event事件的使用和浅析
在我目前接触的项目中,用到了许多spring相关的技术,框架层面的spring.spring mvc就不说了,细节上的功能也用了不少,如schedule定时任务.Filter过滤器. intercep ...
- 从spring框架中的事件驱动模型出发,优化实际应用开发代码
一.事件起源 相信很多人在使用spring框架进行开发时,都会遇到这样的需求:在spring启动后,立即加载部分资源(例如:spring启动后立刻加载资源初始化到redis中).当我去解决这个问题时发 ...
随机推荐
- 2019牛客多校2 F Partition problem(dfs)
题意: n<=28个人,分成人数相同的两组,给你2*n*2*n的矩阵,如果(i,j)在不同的组里,竞争力增加v[i][j],问你怎么分配竞争力最 4s 思路: 枚举C(28,14)的状态,更新答 ...
- 题解【CF1303D Fill The Bag】
\[ \texttt{Preface} \] 不开 long long 见祖宗. \[ \texttt{Description} \] 你有一个 \(n\) 码的袋子,你还有 \(m\) 个盒子,第 ...
- python练习——第4题
原GitHub地址:https://github.com/Yixiaohan/show-me-the-code 题目:任一个英文的纯文本文件,统计其中的单词出现的个数. 代码: import coll ...
- Lnmp环境源码包编辑安装
最近做了一个小工具可以方便的部署LNMP环境,有兴趣的同学可以尝试下: 这是一个集成的shell脚本,脚本将会自动安装好LNMP环境相关软件: 使用步骤 1.下载脚本源码到本地 git clone h ...
- qt creator源码全方面分析(2-10-1)
目录 Getting and Building Qt Creator 获取Qt 获取和构建Qt Creator Getting and Building Qt Creator 待办事项:应该对此进行扩 ...
- python3 kubernetes api 使用
一.安装 github:https://github.com/kubernetes-client/python 安装 pip install kubernetes 二.认证 1.kubeconfig文 ...
- 如何构建OpenStack镜像
本文以制作CentOS7.2镜像为例,详细介绍手动制作OpenStack镜像详细步骤,解释每一步这么做的原因.镜像上传到OpenStack glance,支持以下几个功能: 支持密码注入功能(nova ...
- light oj1170 - Counting Perfect BST卡特兰数
1170 - Counting Perfect BST BST is the acronym for Binary Search Tree. A BST is a tree data structur ...
- 线段树学习----C语言
/* 线段树学习:如果一个节点为i,那么他的左孩子为2I+1,右孩子为2i+2: */ #include<stdio.h> #define min(a,b) a<b?a:b; ]; ...
- 【问题】多重继承时,super函数只初始化继承的第一个类,不初始化第二个类。
class A(object): def __init__(self): print("init class A") class B(object): def __init__(s ...