Spring Boot Cache配置 序列化成JSON字符串
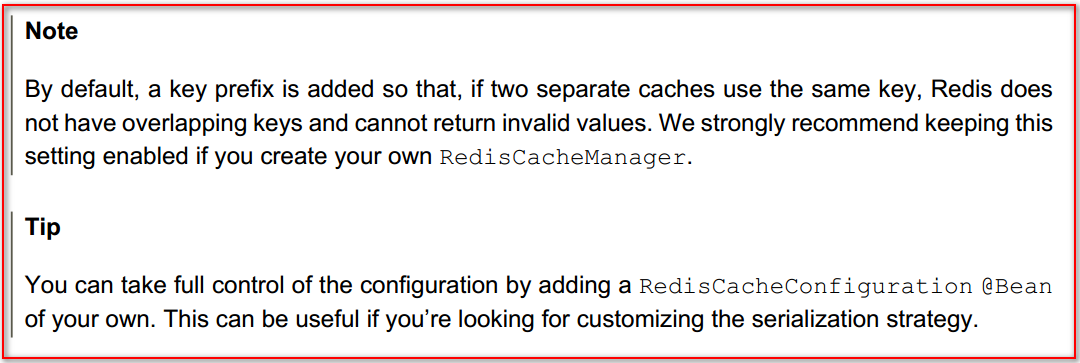
当我们使用@Cacheable注解的时候会将返回的对象缓存起来,我们会发现默认缓存的值是二进制的,不方便查看,为此我们自定义序列化配置,改成JSON格式的
配置如下:
pom.xml
<?xml version="1.0" encoding="UTF-8"?>

<project xmlns="http://maven.apache.org/POM/4.0.0" xmlns:xsi="http://www.w3.org/2001/XMLSchema-instance"

    xsi:schemaLocation="http://maven.apache.org/POM/4.0.0 http://maven.apache.org/xsd/maven-4.0.0.xsd">

    <modelVersion>4.0.0</modelVersion>

    <groupId>com.cjs.example</groupId>

    <artifactId>cjs-springsecurity-example</artifactId>

    <version>0.0.1-SNAPSHOT</version>

    <packaging>jar</packaging>

    <name>cjs-springsecurity-example</name>

    <description></description>

    <parent>

        <groupId>org.springframework.boot</groupId>

        <artifactId>spring-boot-starter-parent</artifactId>

        <version>2.0.2.RELEASE</version>

        <relativePath/> <!-- lookup parent from repository -->

    </parent>

    <properties>

        <project.build.sourceEncoding>UTF-8</project.build.sourceEncoding>

        <project.reporting.outputEncoding>UTF-8</project.reporting.outputEncoding>

        <java.version>1.8</java.version>

    </properties>

    <dependencies>

        <dependency>

            <groupId>org.springframework.boot</groupId>

            <artifactId>spring-boot-starter-cache</artifactId>

        </dependency>

        <dependency>

            <groupId>org.springframework.boot</groupId>

            <artifactId>spring-boot-starter-data-redis</artifactId>

        </dependency>

        <dependency>

            <groupId>org.springframework.boot</groupId>

            <artifactId>spring-boot-starter-security</artifactId>

        </dependency>

        <dependency>

            <groupId>org.springframework.boot</groupId>

            <artifactId>spring-boot-starter-thymeleaf</artifactId>

        </dependency>

        <dependency>

            <groupId>org.springframework.boot</groupId>

            <artifactId>spring-boot-starter-web</artifactId>

        </dependency>

        <dependency>

            <groupId>org.projectlombok</groupId>

            <artifactId>lombok</artifactId>

            <optional>true</optional>

        </dependency>

        <dependency>

            <groupId>org.springframework.boot</groupId>

            <artifactId>spring-boot-starter-test</artifactId>

            <scope>test</scope>

        </dependency>

        <dependency>

            <groupId>org.springframework.security</groupId>

            <artifactId>spring-security-test</artifactId>

            <scope>test</scope>

        </dependency>

    </dependencies>

    <build>

        <plugins>

            <plugin>

                <groupId>org.springframework.boot</groupId>

                <artifactId>spring-boot-maven-plugin</artifactId>

            </plugin>

        </plugins>

    </build>

</project>
application.yml
spring:

  cache:

    type: redis

    redis:

      cache-null-values: false

      time-to-live: 3600000ms

  redis:

    host: 10.123.52.189

    port:

    database:

    password: 自己的密码

logging:

  level:

    root: info
RedisConfig.java
package com.cjs.example.config; import com.fasterxml.jackson.annotation.JsonAutoDetect;
import com.fasterxml.jackson.annotation.PropertyAccessor;
import com.fasterxml.jackson.databind.ObjectMapper;
import org.springframework.beans.factory.annotation.Autowired;
import org.springframework.cache.annotation.CachingConfigurerSupport;
import org.springframework.cache.annotation.EnableCaching;
import org.springframework.context.annotation.Bean;
import org.springframework.context.annotation.Configuration;
import org.springframework.data.redis.cache.RedisCacheConfiguration;
import org.springframework.data.redis.cache.RedisCacheManager;
import org.springframework.data.redis.cache.RedisCacheWriter;
import org.springframework.data.redis.connection.RedisConnectionFactory;
import org.springframework.data.redis.core.RedisTemplate;
import org.springframework.data.redis.serializer.Jackson2JsonRedisSerializer;
import org.springframework.data.redis.serializer.RedisSerializationContext;
import org.springframework.data.redis.serializer.StringRedisSerializer; @EnableCaching
@Configuration
public class RedisConfig extends CachingConfigurerSupport { @Autowired
private RedisConnectionFactory redisConnectionFactory; @Bean
public RedisTemplate<String, Object> redisTemplate(RedisConnectionFactory redisConnectionFactory) {
Jackson2JsonRedisSerializer<Object> serializer = new Jackson2JsonRedisSerializer<Object>(Object.class);
ObjectMapper objectMapper = new ObjectMapper();
objectMapper.setVisibility(PropertyAccessor.ALL, JsonAutoDetect.Visibility.ANY);
objectMapper.enableDefaultTyping(ObjectMapper.DefaultTyping.NON_FINAL);
serializer.setObjectMapper(objectMapper); RedisTemplate<String, Object> redisTemplate = new RedisTemplate<>();
redisTemplate.setConnectionFactory(redisConnectionFactory);
redisTemplate.setKeySerializer(new StringRedisSerializer());
redisTemplate.setValueSerializer(serializer);
redisTemplate.setHashKeySerializer(new StringRedisSerializer());
redisTemplate.setHashValueSerializer(serializer);
redisTemplate.afterPropertiesSet(); return redisTemplate;
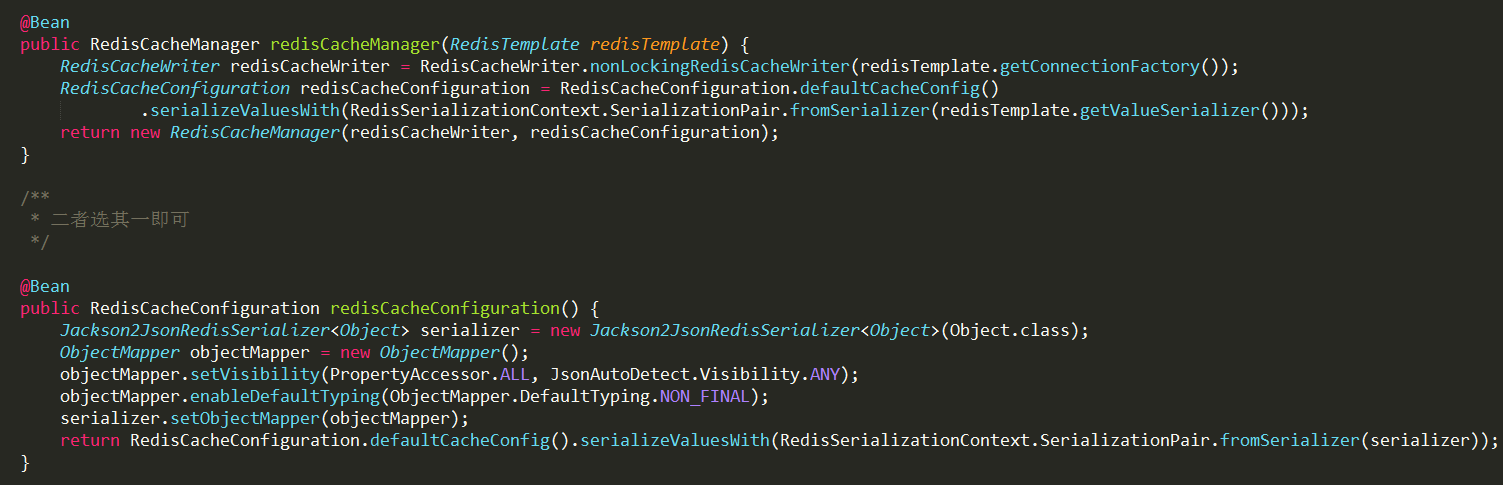
} @Bean
public RedisCacheManager redisCacheManager(RedisTemplate redisTemplate) {
RedisCacheWriter redisCacheWriter = RedisCacheWriter.nonLockingRedisCacheWriter(redisTemplate.getConnectionFactory());
RedisCacheConfiguration redisCacheConfiguration = RedisCacheConfiguration.defaultCacheConfig()
.serializeValuesWith(RedisSerializationContext.SerializationPair.fromSerializer(redisTemplate.getValueSerializer()));
return new RedisCacheManager(redisCacheWriter, redisCacheConfiguration);
} /**
* 二者选其一即可
*/ // @Bean
// public RedisCacheConfiguration redisCacheConfiguration() {
// Jackson2JsonRedisSerializer<Object> serializer = new Jackson2JsonRedisSerializer<Object>(Object.class);
// ObjectMapper objectMapper = new ObjectMapper();
// objectMapper.setVisibility(PropertyAccessor.ALL, JsonAutoDetect.Visibility.ANY);
// objectMapper.enableDefaultTyping(ObjectMapper.DefaultTyping.NON_FINAL);
// serializer.setObjectMapper(objectMapper);
// return RedisCacheConfiguration.defaultCacheConfig().serializeValuesWith(RedisSerializationContext.SerializationPair.fromSerializer(serializer));
// } }
UserServiceImpl.java
package com.cjs.example.service.impl;

import com.cjs.example.dao.UserDao;

import com.cjs.example.entity.SysUser;

import com.cjs.example.service.UserService;

import org.springframework.beans.factory.annotation.Autowired;

import org.springframework.cache.annotation.Cacheable;

import org.springframework.stereotype.Service;

@Service

public class UserServiceImpl implements UserService {

    @Autowired

    private UserDao userDao;

    @Cacheable(cacheNames = "authority", key = "#username")

    @Override

    public SysUser getUserByName(String username) {

        return userDao.selectByName(username);

    }

}
反复看文档,一遍又一遍
最最重要的是
代码上传至https://github.com/chengjiansheng/cjs-springsecurity-example
Spring Boot Cache配置 序列化成JSON字符串的更多相关文章
- C#将对象序列化成JSON字符串
C#将对象序列化成JSON字符串 public string GetJsonString() { List<Product> products = new List<Product& ...
- 使用 EntityFramework后把一个对象序列化成json字符串引起循环引用的问题
先看一个T4模板生成的model实体类 著作权归作者所有. 商业转载请联系作者获得授权,非商业转载请注明出处. 作者:卷猫 链接:http://anneke.cn/ArticleInfo/Detial ...
- SpringMVC将表单对象序列化成Json字符串提交,以List接收
出自:http://blog.csdn.net/m0_37595732/article/details/71440853 HTML <%@ page language="java&qu ...
- .net 将List序列化成Json字符串
将List类型转化为Json,是我们平常开发时最常见的了.在使用中,有很多种方法,也可以使用. 第一种 第三方组件:Newtonsoft.Json.dll //转化成Json Newtonsoft.J ...
- 对象序列化成Json字符串 及 反序列化成对象
一. public static string JsonSerializer<T>(T t) { DataContractJsonSerializer ...
- jackson2.8.4java对象序列化成json字符串格式化时间
public class User {private int id; private Date birthday; private double money; private String name; ...
- 转:spring boot log4j2配置(使用log4j2.yml文件)---YAML 语言教程
转:spring boot log4j2配置(使用log4j2.yml文件) - CSDN博客http://blog.csdn.net/ClementAD/article/details/514988 ...
- (36)Spring Boot Cache理论篇【从零开始学Spring Boot】
Spring Boot Cache理论篇 在上一篇中我们介绍了Spring Boot集成Redis的实战例子,里面使用到了Spring Cache,那么什么是Spring Cache呢,本章将会做一个 ...
- 玩转spring boot——properties配置
前言 在以往的java开发中,程序员最怕大量的配置,是因为配置一多就不好统一管理,经常出现找不到配置的情况.而项目中,从开发测试环境到生产环境,往往需要切换不同的配置,如测试数据库连接换成生产数据库连 ...
随机推荐
- 《JAVA程序设计》结对编程联系_四则运算(第一周:阶段总结)
结对对象与其博客链接 20175312陶光远:https://www.cnblogs.com/20175312-tgy/p/10630566.html 需求分析 (一)功能需求 1.自动生成题目(本周 ...
- SQL数据库的操作,表的操作
数据库定义语言(DDL):用于对数据库及数据库中的各种对象进行创建,删除,修改等操作 (1)create:用于创建数据库或数据库对象 (2)alter:用于对数据库或数据库对象进行修改 (3)drop ...
- 什么是布局?Android中的布局是怎样的?
布局管理器(通常被称为是布局)是对ViewGroup类的扩展,是用来控制子控件在UI中的位置. Android SDK包含了许多布局类,在为视图.Fragment和Activity创建UI时,可以使用 ...
- wpf 的各个template
--转载 在使用TabControl.ListView.Menu.TreeView的时候被各种Template搞得头昏眼花,决心把这个问题搞清楚,究竟什么时候该用什么Template?这是个麻烦的问题 ...
- vue 使用瞬间
vue 使用瞬间 一, 图片类 <img :src="data.deptLogo | imgUrl" onerror="this.src='../img/headD ...
- esb和eai的区别
话说SOA也推了很多年了,出现了比如ESB.SCA.jbi等各类技术和标准,乱的很.各类比较也说的云里雾里,在下理一理,按自己的观点说说. 先说说esb和eai的区别. 个人观点:esb就是eai+设 ...
- FliterLog代码分析
Filter简介 Filter也称之为过滤器,它是Servlet技术中最实用的技术,WEB开发人员通过Filter技术,对web服务器管理的所有web资源:例如Jsp, Servlet, 静态图片文件 ...
- h5直接分享的实现方案
首先得知道,h5是无法直接通过js跳转到微信或QQ等软件进行分享, 参照新浪的分享方式,在uc浏览器和QQ浏览器等主流浏览器中是可以直接分享的, 原因是uc浏览器和QQ浏览器这样的主流浏览器是自带分享 ...
- 微信小程序中的AJAX——POST,GET区别
注意:发送服务器时的DATA 最终发送给服务器的数据是 String 类型,如果传入的 data 不是 String 类型,会被转换成 String .转换规则如下: 对于 GET 方法的数据,会将数 ...
- java课程之团队开发冲刺阶段1.1
一.今天所要完成的内容 1.实现软件添加日期的功能并生成当前所在周的功能 2.对之前的代码进行重新排版,将主函数的内容移到方法中 3.利用Android自带的左侧菜单栏实现app的整体美观