(三)Installation
Elasticsearch requires at least Java 8. Specifically as of this writing, it is recommended that you use the Oracle JDK version 1.8.0_131. Java installation varies from platform to platform so we won’t go into those details here. Oracle’s recommended installation documentation can be found on Oracle’s website. Suffice to say, before you install Elasticsearch, please check your Java version first by running (and then install/upgrade accordingly if needed):
java -version

echo $JAVA_HOME
Once we have Java set up, we can then download and run Elasticsearch. The binaries are available from www.elastic.co/downloads along with all the releases that have been made in the past. For each release, you have a choice among a zip or tar archive, a DEB or RPM package, or a Windows MSIinstallation package.
curl -L -O https://artifacts.elastic.co/downloads/elasticsearch/elasticsearch-6.2.4.tar.gz
tar -xvf elasticsearch-6.2..tar.gz
cd elasticsearch-6.2./bin
./elasticsearch
Installation with Homebrew
使用Homebrewedit进行安装
On macOS, Elasticsearch can also be installed via Homebrew:
brew install elasticsearch
If installation succeeds, Homebrew will finish by saying that you can start Elasticsearch by entering elasticsearch. Do that now. The expected response is described below, under Successfully running node
如果安装成功,Homebrew将说完你可以通过输入elasticsearch来启动Elasticsearch。现在就这样做。在成功运行nodeedit下,下面描述了预期的响应
Installation example with MSI Windows Installer
For Windows users, we recommend using the MSI Installer package. The package contains a graphical user interface (GUI) that guides you through the installation process.
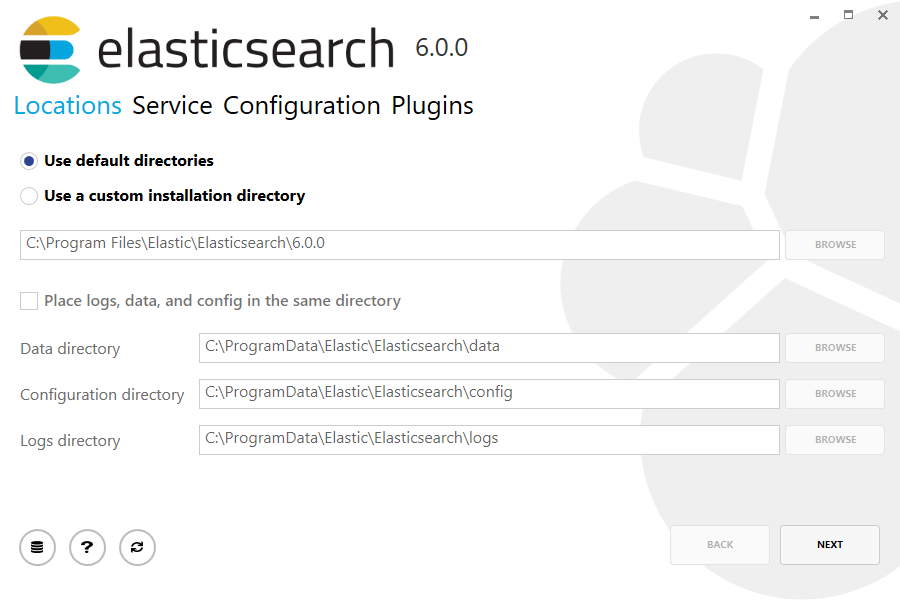

By default, Elasticsearch will be installed at %PROGRAMFILES%\Elastic\Elasticsearch. Navigate here and go into the bin directory as follows:
默认情况下,Elasticsearch将安装在%PROGRAMFILES%\ Elastic \ Elasticsearch中。在此处导航并进入bin目录,如下所示:
with Command Prompt:
cd %PROGRAMFILES%\Elastic\Elasticsearch\bin
cd $env:PROGRAMFILES\Elastic\Elasticsearch\bin
And now we are ready to start our node and single cluster:
.\elasticsearch.exe
Successfully running node
If everything goes well with installation, you should see a bunch of messages that look like below:
[--16T14::,][INFO ][o.e.n.Node               ] [] initializing ...

[--16T14::,][INFO ][o.e.e.NodeEnvironment    ] [-bjhwl] using [] data paths, mounts [[/ (/dev/sda1)]], net usable_space [.7gb], net total_space [.6gb], spins? [no], types [ext4]

[--16T14::,][INFO ][o.e.e.NodeEnvironment    ] [-bjhwl] heap size [.9gb], compressed ordinary object pointers [true]

[--16T14::,][INFO ][o.e.n.Node               ] [-bjhwl] node name [-bjhwl] derived from node ID; set [node.name] to override

[--16T14::,][INFO ][o.e.n.Node               ] [-bjhwl] version[6.2.], pid[], build[f5daa16/--16T09::.346Z], OS[Linux/4.4.--generic/amd64], JVM[Oracle Corporation/Java HotSpot(TM) -Bit Server VM/1.8.0_60/25.60-b23]

[--16T14::,][INFO ][o.e.p.PluginsService     ] [-bjhwl] loaded module [aggs-matrix-stats]

[--16T14::,][INFO ][o.e.p.PluginsService     ] [-bjhwl] loaded module [ingest-common]

[--16T14::,][INFO ][o.e.p.PluginsService     ] [-bjhwl] loaded module [lang-expression]

[--16T14::,][INFO ][o.e.p.PluginsService     ] [-bjhwl] loaded module [lang-mustache]

[--16T14::,][INFO ][o.e.p.PluginsService     ] [-bjhwl] loaded module [lang-painless]

[--16T14::,][INFO ][o.e.p.PluginsService     ] [-bjhwl] loaded module [percolator]

[--16T14::,][INFO ][o.e.p.PluginsService     ] [-bjhwl] loaded module [reindex]

[--16T14::,][INFO ][o.e.p.PluginsService     ] [-bjhwl] loaded module [transport-netty3]

[--16T14::,][INFO ][o.e.p.PluginsService     ] [-bjhwl] loaded module [transport-netty4]

[--16T14::,][INFO ][o.e.p.PluginsService     ] [-bjhwl] loaded plugin [mapper-murmur3]

[--16T14::,][INFO ][o.e.n.Node               ] [-bjhwl] initialized

[--16T14::,][INFO ][o.e.n.Node               ] [-bjhwl] starting ...

[--16T14::,][INFO ][o.e.t.TransportService   ] [-bjhwl] publish_address {192.168.8.112:}, bound_addresses {{192.168.8.112:}

[--16T14::,][WARN ][o.e.b.BootstrapCheck     ] [-bjhwl] max virtual memory areas vm.max_map_count [] likely too low, increase to at least []

[--16T14::,][INFO ][o.e.h.HttpServer         ] [-bjhwl] publish_address {192.168.8.112:}, bound_addresses {[::]:}, {192.168.8.112:}

[--16T14::,][INFO ][o.e.g.GatewayService     ] [-bjhwl] recovered [] indices into cluster_state

[--16T14::,][INFO ][o.e.n.Node               ] [-bjhwl] started
Without going too much into detail, we can see that our node named "6-bjhwl" (which will be a different set of characters in your case) has started and elected itself as a master in a single cluster. Don’t worry yet at the moment what master means. The main thing that is important here is that we have started one node within one cluster.
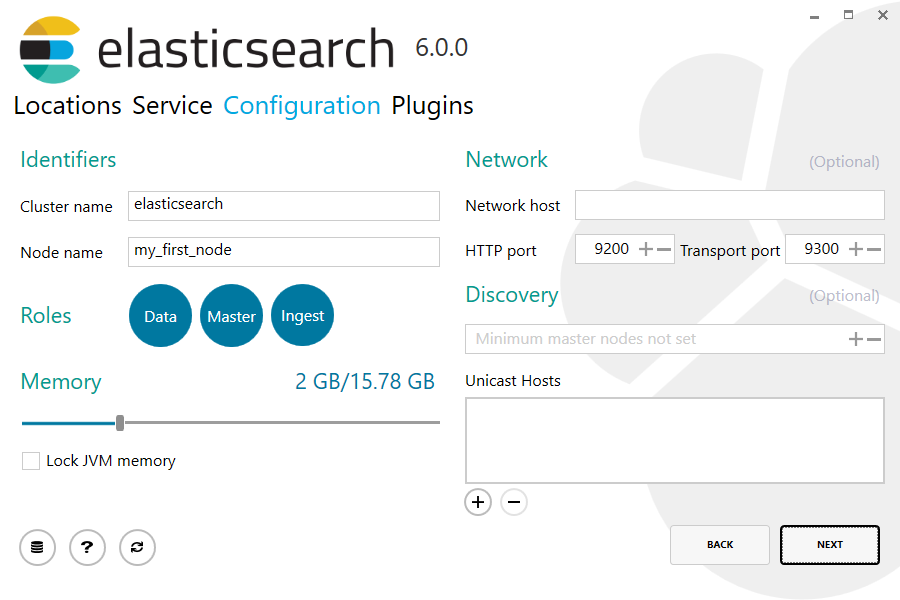
./elasticsearch -Ecluster.name=my_cluster_name -Enode.name=my_node_name
192.168.8.112) and port (9200) that our node is reachable from. By default, Elasticsearch uses port 9200 to provide access to its REST API. This port is configurable if necessary.(三)Installation的更多相关文章
- HTML5 学习总结(三)——本地存储
一.HTML4客户端存储 B/S架构的应用大量的信息存储在服务器端,客户端通过请求响应的方式从服务器获得数据,这样集中存储也会给服务器带来相应的压力,有些数据可以直接存储在客户端,传统的Web技术中会 ...
- The Installation and Compilation of OpenCASCADE
OpenCASCADE的编译 The Installation and Compilation of OpenCASCADE eryar@163.com 一. 安装OpenCASCADE 可以从Ope ...
- 第三十章 elk(1) - 第一种架构(最简架构)
软件版本: es:2.4.0 logstash:2.4.0 kibana:4.6.1 一.logstash安装(收集.过滤日志.构建索引) 1.下载:https://www.elastic.co/do ...
- kali 2.0 U盘安装错误Your installation cd-rom couldn't be mounted
1.kali 2.0前天(2015.08.11)发布了.果断下载下来换掉本机的1.0版本. 2.用U盘安装的过程中,出现cd-rom无法挂载.提示错误Your installation CD-ROM ...
- Oracle EBS R12 (12.1.3) Installation Linux(64 bit)
Oracle EBS R12 (12.1.3) Installation Linux(64 bit) Contents Objective. 3 1 Download & Unzip. 3 D ...
- Dynamics CRM 2013 installation
原创地址:http://www.cnblogs.com/jfzhu/p/3445820.html 转载请注明出处 一 硬件要求 1. CRM Server 下表对硬件的要求是假定Microsoft S ...
- salesforce 零基础学习(三十六)通过Process Builder以及Apex代码实现锁定记录( Lock Record)
上一篇内容是通过Process Builder和Approval Processes实现锁定记录的功能,有的时候,往往锁定一条记录需要很多的限制条件,如果通过Approval Processes的条件 ...
- ROS探索总结(三)——ROS新手教程【转】
转自:http://blog.csdn.net/hcx25909/article/details/8811313 版权声明:本文为博主原创文章,未经博主允许不得转载. 目录(?)[-] 一ROS的 ...
- P6 EPPM R16.1安装与配置指南(三)
P6 EPPM R16.1安装与配置指南(三) 解压:V137390-01.zip 修改 D:\P6_R161\p6suite\database\dbsetup.bat 的行 SET JAR_FI ...
随机推荐
- navicat连接mysql出现Client does not support authentication protocol requested by server解决方案
USE mysql; '; FLUSH PRIVILEGES; root是用户名 localhost是ip地址127.0.0.1都是特指本机,%表示任何IP都可访问 mysql_native_pass ...
- leetcode — merge-sorted-array
import java.util.Arrays; /** * Source : https://oj.leetcode.com/problems/merge-sorted-array/ * * * G ...
- ES6躬行记(17)——Map
一.Map Map类似于Object(对象),可用来存储键值对,但需要通过SameValueZero算法保持键的唯一性.与Set一样,在使用之前也得要实例化,如下代码所示,构造函数Map()中的参数也 ...
- Python机器学习笔记 使用scikit-learn工具进行PCA降维
之前总结过关于PCA的知识:深入学习主成分分析(PCA)算法原理.这里打算再写一篇笔记,总结一下如何使用scikit-learn工具来进行PCA降维. 在数据处理中,经常会遇到特征维度比样本数量多得多 ...
- React-router杂记
HashRouter: 即对应url中的hash值,如xx.com/#/a.xx.com/#/a/b, 服务器对任务url都返回同一个url,具体的路径由浏览器区分,因为浏览器不会发送hash后面的值 ...
- Python并发编程之实战异步IO框架:asyncio 下篇(十一)
大家好,并发编程 进入第十一章. 前面两节,我们讲了协程中的单任务和多任务 这节我们将通过一个小实战,来对这些内容进行巩固. 在实战中,将会用到以下知识点: 多线程的基本使用 Queue消息队列的使用 ...
- 杭电ACM2013--蟠桃记
蟠桃记 Time Limit: 2000/1000 MS (Java/Others) Memory Limit: 65536/32768 K (Java/Others)Total Submiss ...
- java开发环境配置——JDK
虽然网上有很多类似的文章了,第一次搭的时候也是看的网上的文章,但为了做个记录,自己也写一下,记录一下. 首先是先安装JDK,JDK下载可以直接去官网下载,地址:http://www.oracle.co ...
- Django学习之二:Django 项目创建 和 应用创建
Django 项目创建 和 应用创建 创建一个Django项目 都是在相应平台的命令行环境下操作: 1. 进入用于存放项目的目录下 1.1 windows下切换目录:先进入具体的分区磁盘中如E盘就输入 ...
- Vue UI:Vue开发者必不可少的工具
译者按: Vue开发工具越来越好用了! 原文: Vue UI: A First Look 译者: Fundebug 本文采用意译,版权归原作者所有 随着最新的稳定版本Vue CLI 3即将发布,是时候 ...