
SpringBoot学习笔记(2):引入Spring Security
SpringBoot学习笔记(2):用Spring Security来保护你的应用
快速开始
本指南将引导您完成使用受Spring Security保护的资源创建简单Web应用程序的过程。
参考资料:
SpringSecurity中文参考文档:点击进入
IBM参考文档:点击进入
使用Maven进行构建
首先,设置一个基本的构建脚本。在使用Spring构建应用程序时,您可以使用任何您喜欢的构建系统,但此处包含了使用Maven所需的代码。如果您不熟悉Maven,请参阅使用Maven构建Java项目。
 <!--添加Security依赖-->

        <dependency>

            <groupId>org.springframework.security</groupId>

            <artifactId>spring-security-test</artifactId>

            <scope>test</scope>

        </dependency>

        <dependency>

            <groupId>org.springframework.boot</groupId>

            <artifactId>spring-boot-starter-security</artifactId>

        </dependency>
创建一个不安全的应用
在将安全性应用于Web应用程序之前,您需要一个Web应用程序来保护安全。本节中的步骤将引导您创建一个非常简单的Web应用程序。然后在下一节中使用Spring Security保护它。
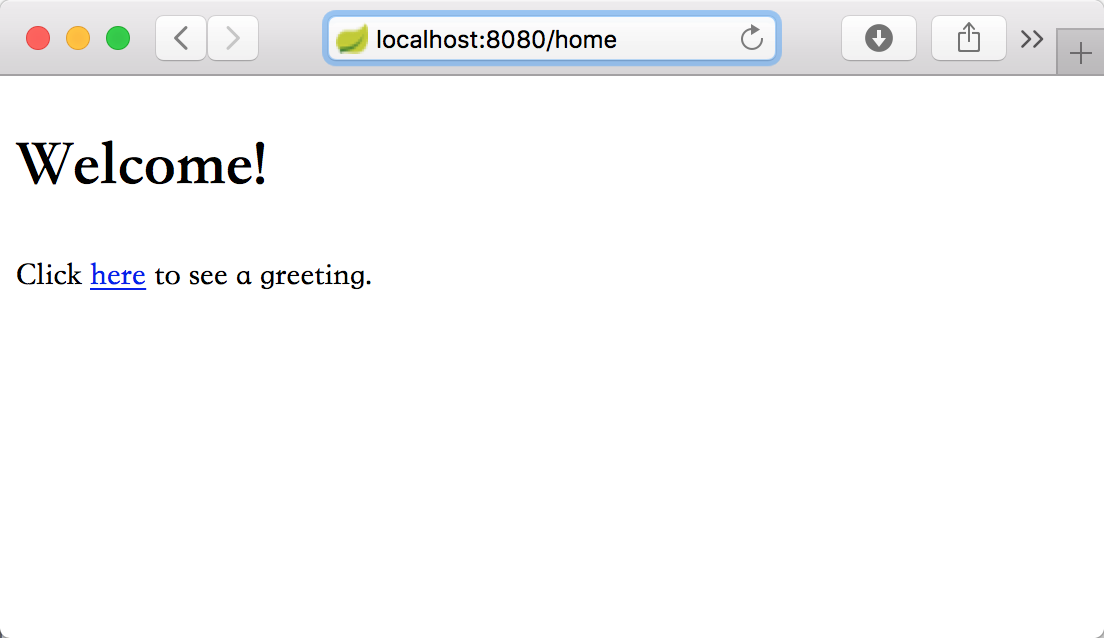
<!DOCTYPE html>

<html xmlns="http://www.w3.org/1999/xhtml" xmlns:th="http://www.thymeleaf.org" xmlns:sec="http://www.thymeleaf.org/thymeleaf-extras-springsecurity3">

<head>

    <title>Spring Security Example</title>

</head>

<body>

<h1>Welcome!</h1>

<p>Click <a th:href="@{/hello}">here</a> to see a greeting.</p>

</body>

</html>
如您所见,这个简单的视图包含指向页面“/ hello”的链接。这在以下Thymeleaf模板中定义:
<!DOCTYPE html>

<html xmlns="http://www.w3.org/1999/xhtml" xmlns:th="http://www.thymeleaf.org"

      xmlns:sec="http://www.thymeleaf.org/thymeleaf-extras-springsecurity3">

<head>

    <title>Hello World!</title>

</head>

<body>

<h1>Hello world!</h1>

</body>

</html>
Web应用程序基于Spring MVC。因此,您需要配置Spring MVC并设置视图控制器以公开这些模板。这是在应用程序中配置Spring MVC的配置类。
import org.springframework.context.annotation.Configuration;

import org.springframework.web.servlet.config.annotation.ViewControllerRegistry;

import org.springframework.web.servlet.config.annotation.WebMvcConfigurer;

@Configuration

public class MvcConfig implements WebMvcConfigurer {

    @Override

    public void addViewControllers(ViewControllerRegistry registry) {

        registry.addViewController("/home").setViewName("home");

        registry.addViewController("/").setViewName("home");

        registry.addViewController("/hello").setViewName("hello");

        registry.addViewController("/login").setViewName("login");

    }

}
设置Spring Security
假设您要阻止未经授权的用户在“/ hello”查看问候语页面。就像现在一样,如果用户单击主页上的链接,他们会看到问候语,没有障碍阻止他们。您需要添加一个屏障,强制用户在查看该页面之前登录。
您可以通过在应用程序中配置Spring Security来实现。如果Spring Security位于类路径上,则Spring Boot会自动使用“基本”身份验证来保护所有HTTP端点。但您可以进一步自定义安全设置。您需要做的第一件事是将Spring Security添加到类路径中。
我们已经在Maven构建部分加入了相应配置,此处不再赘余。
这是一个安全配置,可确保只有经过身份验证的用户才能看到秘密问候语:
import org.springframework.context.annotation.Bean;

import org.springframework.context.annotation.Configuration;

import org.springframework.security.config.annotation.web.builders.HttpSecurity;

import org.springframework.security.config.annotation.web.configuration.EnableWebSecurity;

import org.springframework.security.config.annotation.web.configuration.WebSecurityConfigurerAdapter;

import org.springframework.security.core.userdetails.User;

import org.springframework.security.core.userdetails.UserDetails;

import org.springframework.security.core.userdetails.UserDetailsService;

import org.springframework.security.provisioning.InMemoryUserDetailsManager;

@Configuration

@EnableWebSecurity

public class WebSecurityConfig  extends WebSecurityConfigurerAdapter {

    @Override

    protected void configure(HttpSecurity http) throws Exception {

        http

                .authorizeRequests()

                .antMatchers("/", "/home")

                    .permitAll()

                .anyRequest()

                    .authenticated()

                .and()

                .formLogin()

                    .permitAll()

                .and()

                .logout()

                    .permitAll();

    }

    @Bean

    public UserDetailsService userDetailsService()

    {

        UserDetails user =

                User.withDefaultPasswordEncoder()

                        .username("user")

                        .password("password")

                        .roles("USER")

                        .build();

        return new InMemoryUserDetailsManager(user);

    }

}
WebSecurityConfig类使用@EnableWebSecurity进行批注,以启用Spring Security的Web安全支持并提供Spring MVC集成。它还扩展了WebSecurityConfigurerAdapter并覆盖了其几个方法来设置Web安全配置的一些细节。
configure(HttpSecurity)方法定义应该保护哪些URL路径,哪些不应该保护。具体而言,“/”和“/ home”路径配置为不需要任何身份验证。必须对所有其他路径进行身份验证。
当用户成功登录时,它们将被重定向到先前请求的身份验证页面。 loginPage()指定了一个自定义的“/ login”页面,允许每个人查看它。
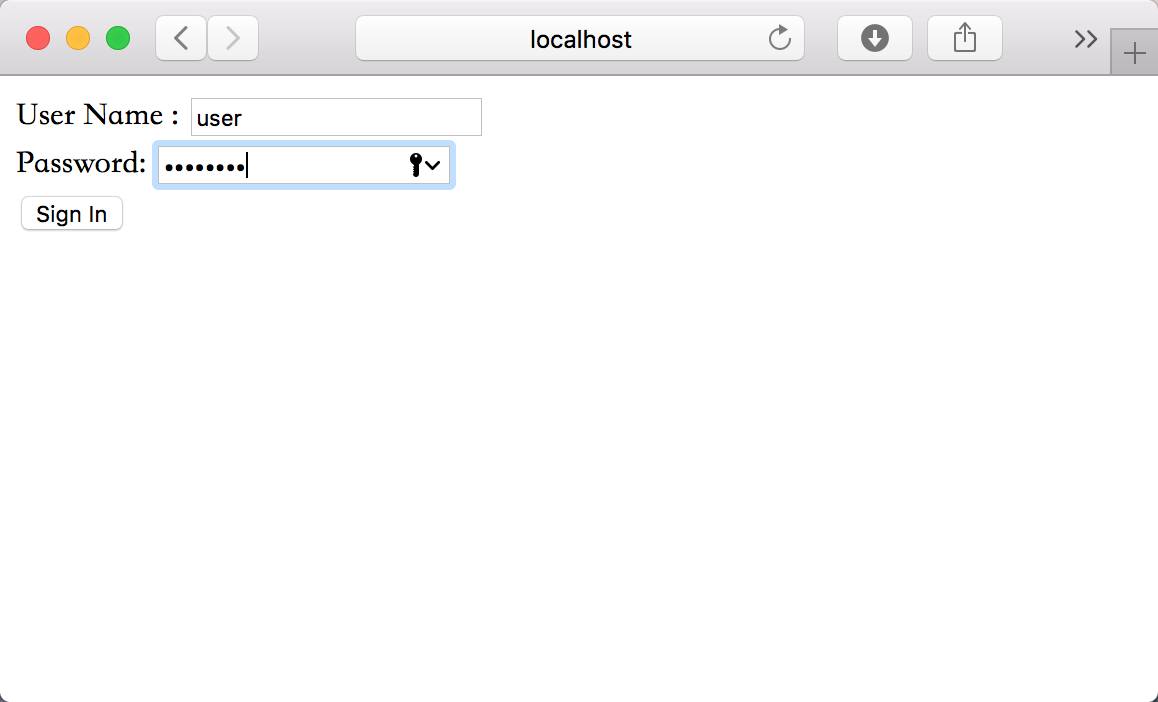
对于userDetailsService()方法,它使用单个用户设置内存用户存储。该用户被赋予用户名“user”,密码为“password”,角色为“USER”。
效果演示


编写简单的安全性配置
启用Web安全性功能最简单配置
@Configuration

@EnableWebSecurity //注解开启Spring Security的功能

public class WebSecurityConfig extends WebSecurityConfigurerAdapter{

}
说明:
@EnableWebSecurity 将会启用Web安全功能,但他本身没有什么用。
我们还需要配置一个实现了WebSecurityConfigurer的Bean。
指定Web安全的细节
如果我们希望指定Web安全的细节,需要重载WebSecurityConfigureAdapter中的configure方法:

默认的configure Filter链:
    protected void configure(HttpSecurity http) throws Exception {

        this.logger.debug("Using default configure(HttpSecurity).
                If subclassed this will potentially override subclass configure(HttpSecurity).");

        ((HttpSecurity)((HttpSecurity)((AuthorizedUrl)http.
      authorizeRequests().
        anyRequest()).
          authenticated().
        and()).
      formLogin().
      and()).
      httpBasic();

    }
基于内存的用户存储
    protected void configure(AuthenticationManagerBuilder auth) throws Exception {

        //AuthenticationManagerBuilder提供了有多个方法来配置Security对认证的支持。

        auth.inMemoryAuthentication()   //启用内存用户存储

                .withUser("user").password("password").roles("USER").and()

                .withUser("admin").password("password").roles("USER","ADMIN");

    }
基于数据库表进行认证
    protected void configure(AuthenticationManagerBuilder auth) throws Exception {

        //AuthenticationManagerBuilder提供了有多个方法来配置Security对认证的支持。

        auth.jdbcAuthentication()

                .dataSource(dataSource)

                .usersByUsernameQuery("SELECT username,password,enable FROM mybatis.user WHERE username=?")

                .authoritiesByUsernameQuery("SELECT username,role FROM mybatis.user WHERE username=?");

    }
细粒度控制访问
    protected void configure(HttpSecurity http) throws Exception {

        http

                .formLogin()    //重写configure 需要添加formLogin来显示默认的登陆页面

                    .loginPage("/login")//登录页面的访问路径

                    .loginProcessingUrl("/check")//登录页面下表单提交的路径

                    .failureUrl("/login")//登录失败后跳转的路径

                    .defaultSuccessUrl("/show")//登录成功后默认跳转的路径

                .and()

                .authorizeRequests()

                    .antMatchers("/index.do").authenticated()

                    .anyRequest().permitAll();  //其他请求是允许的,不需要经过认证和权限

    }
基于注解的方式控制访问
简要介绍两种注解方式:
- @Secured()注解
- SpringBoot:
@EnableGlobalMethodSecurity(securedEnabled = true,prePostEnabled = true) //开启基于注解的安全验证
- SpringBoot:
- 基于表达式语法
- Spring Security中定义了四个支持使用表达式的注解,分别是@PreAuthorize、@PostAuthorize、@PreFilter和@PostFilter。其中前两者可以用来在方法调用前或者调用后进行权限检查,后两者可以用来对集合类型的参数或者返回值进行过滤。
public class HtmlController {

    @PreAuthorize("hasAuthority('ROLE_ADMIN')")

    @RequestMapping(value = "security.do")

    public String PreAuthorize()

    {

        return "@PreAuthorize:该注解用来确定一个方法是否应该被执行。" +

                "该注解后面跟着的是一个表达式,如果表达式的值为真,则该方法会被执行。" +

                "如 @PreAuthorize(\"hasRole('ROLE_USER')\")" +

                "就说明只有当前用户具有角色 ROLE_USER的时候才会执行。";

    }

    @Secured("ROLE_ADMIN")

    @RequestMapping(value = "security1.do")

    public String Security()

    {

        return "@Secured是由Spring Security定义的用来支持方法权限控制的注解。" +

                "它的使用也是需要启用对应的支持才会生效的。" +

                "通过设置global-method-security元素的secured-annotations=”enabled”" +

                "可以启用Spring Security对使用@Secured注解标注的方法进行权限控制的支持,其值默认为disabled。";

    }

}
配置自定义的用户服务
你好
添加验证码
SpringBoot学习笔记(2):引入Spring Security的更多相关文章
- springboot学习笔记:5.spring mvc(含FreeMarker+layui整合)
Spring Web MVC框架(通常简称为"Spring MVC")是一个富"模型,视图,控制器"的web框架. Spring MVC允许你创建特定的@Con ...
- SpringBoot学习笔记(13)----使用Spring Session+redis实现一个简单的集群
session集群的解决方案: 1.扩展指定server 利用Servlet容器提供的插件功能,自定义HttpSession的创建和管理策略,并通过配置的方式替换掉默认的策略.缺点:耦合Tomcat/ ...
- SpringBoot学习笔记二之Spring整合Mybatis
原文链接: https://www.toutiao.com/i6803235766274097678/ 在learn-admin-component子工程中加入搭建环境所需要的具体依赖(因为比较长配置 ...
- SpringBoot学习笔记(14):使用SpringBootAdmin管理监控你的应用
SpringBoot学习笔记(14):使用SpringBootAdmin管理监控你的应用 Spring Boot Admin是一个管理和监控Spring Boot应用程序的应用程序.本文参考文档: 官 ...
- SpringBoot学习笔记(4):添加自定义的过滤器
SpringBoot:学习笔记(4)——添加自定义的过滤器 引入自定义过滤器 SpringBoot提供的前端控制器无法满足我们产品的需求时,我们需要添加自定义的过滤器. SpringBoot添加过滤器 ...
- Springboot学习笔记(六)-配置化注入
前言 前面写过一个Springboot学习笔记(一)-线程池的简化及使用,发现有个缺陷,打个比方,我这个线程池写在一个公用服务中,各项参数都定死了,现在有两个服务要调用它,一个服务的线程数通常很多,而 ...
- SpringBoot学习笔记(3):静态资源处理
SpringBoot学习笔记(3):静态资源处理 在web开发中,静态资源的访问是必不可少的,如:Html.图片.js.css 等资源的访问. Spring Boot 对静态资源访问提供了很好的支持, ...
- SpringBoot学习笔记(13):日志框架
SpringBoot学习笔记(13):日志框架——SL4J 快速开始 说明 SpringBoot底层选用SLF4J和LogBack日志框架. SLF4J的使用 SpringBoot的底层依赖关系 1. ...
- springboot 学习笔记(二)
springboot 学习笔记(二) 快速创建一个springboot工程,并引入所需要的依赖 1.利用Spring initializr 来创建一个springboot项目,登陆http://sta ...
随机推荐
- PJISP 修改 消息头Fromto字段
项目需求,需要修改sip信令消息头中Fromto字段,完成此功能需要修改sip库(PJSIP)源码,具体如下: PJSIP 消息头 Formto 字段默认的格式是sip:平台@平台IP地址,例如si ...
- 类中的internal成员可能是一种坏味道
前言 最近除了搞ASP.NET MVC之外,我也在思考一些编程实践方面的问题.昨天在回家路上,我忽然对一个问题产生了较为清晰的认识.或者说,原先只是有一丝细微的感觉,而现在将它和一些其他的方面进行了联 ...
- AIX 安装标准
文件夹 一.网卡需求 二.光纤卡需求 三.磁盘需求 四.主机文件系统需求 五.主机名命名规范 六.安装设置规范 七.參数改动规范 八.时钟同步设置 九.rootvg做镜像 十.AIX系统安全加固 一. ...
- linux内核参数分析
这是原来在51cto写的,现在都转到博客园来了 1.time_wait连接数过多,需要调整内核参数 http://blog.renhao.org/2010/07/setup-linux-kernel- ...
- CDN对于动态加速是否有效
CDN对于动态加速是否有效的问题.关于这个问题,一直存在一些分歧,部分人认为有效,部分人认为无效,主要是CDN技术也在更新,而且是比较低调的进行着更新,所以并不是所有人都清楚CDN对动态加速的效果.其 ...
- python easy install时,使用aliyun阿里云镜像提示主机名不匹配的问题
因网络问题,因此设置 easy_install 使用阿里云的源, ## 更新 easy_install 源 tee ~/.pydistutils.cfg <<-'EOF' [easy_in ...
- 题目3 : Fibonacci
时间限制:10000ms 单点时限:1000ms 内存限制:256MB 描述 Given a sequence {an}, how many non-empty sub-sequence of it ...
- Java线程—-Runnable和Callable的区别和联系
Java 提供了三种创建线程的方法 1.继承Thread接口 public class Thread2Thread { public static void main(String[] args) { ...
- C#:ref和out的联系及区别。
总结以上四条得到ref和out使用时的区别是: ①:ref指定的参数在函数调用时候必须初始化,不能为空的引用.而out指定的参数在函数调用时候可以不初始化: ②:out指定的参数在进入函数时会清空自己 ...
- Spring框架结构
在processOn思维导图上看的一个程序员写的,挺不错的,分享出来,便于学习和回顾.