
Nginx 版本回滚
①.对于软件的版本升级、添加官方模块、添加第三方模块,都需要用源码安装包重新生成(configure)、编译(make)、安装(make install),在企业生产中的源码安装包,一般需要存放在固定的位置,以便不时之需;
②.对于软件的版本回滚,只需要将软链接文件重新指向版本升级前的目录即可;
③.对于升级后(或添加了新模块)的版本,需要将旧版本中的 .pid 文件、.conf 配置文件以及我们修改(或创建)的其他重要文件和目录 拷贝到新版本目录的对应位置,再使用平滑重启,避免影响用户体验,也升级了版本,添加了新的功能 ;
④.对于添加某些第三方模块,需要使用 patch 命令,在源码安装包目录下指定补丁文件,再进行生成(configure)、编译(make)、安装(make install);
⑤.patch 命令,本质上是对源码文件作出修改(补丁),进行了升级:

参考信息
# 先参考使用官方YUM仓库 安装的 nginx-1.18.0 的配置参数,源码安装时,可以在此基础上稍作修改

[root@blog ~]# nginx -V

nginx version: nginx/1.18.0

built by gcc 4.8.5 20150623 (Red Hat 4.8.5-39) (GCC)

built with OpenSSL 1.0.2k-fips  26 Jan 2017

TLS SNI support enabled

configure arguments: --prefix=/etc/nginx --sbin-path=/usr/sbin/nginx --modules-path=/usr/lib64/nginx/modules --conf-path=/etc/nginx/nginx.conf --error-log-path=/var/log/nginx/error.log --http-log-path=/var/log/nginx/access.log --pid-path=/var/run/nginx.pid --lock-path=/var/run/nginx.lock --http-client-body-temp-path=/var/cache/nginx/client_temp --http-proxy-temp-path=/var/cache/nginx/proxy_temp --http-fastcgi-temp-path=/var/cache/nginx/fastcgi_temp --http-uwsgi-temp-path=/var/cache/nginx/uwsgi_temp --http-scgi-temp-path=/var/cache/nginx/scgi_temp --user=nginx --group=nginx --with-compat --with-file-aio --with-threads --with-http_addition_module --with-http_auth_request_module --with-http_dav_module --with-http_flv_module --with-http_gunzip_module --with-http_gzip_static_module --with-http_mp4_module --with-http_random_index_module --with-http_realip_module --with-http_secure_link_module --with-http_slice_module --with-http_ssl_module --with-http_stub_status_module --with-http_sub_module --with-http_v2_module --with-mail --with-mail_ssl_module --with-stream --with-stream_realip_module --with-stream_ssl_module --with-stream_ssl_preread_module --with-cc-opt='-O2 -g -pipe -Wall -Wp,-D_FORTIFY_SOURCE=2 -fexceptions -fstack-protector-strong --param=ssp-buffer-size=4 -grecord-gcc-switches -m64 -mtune=generic -fPIC' --with-ld-opt='-Wl,-z,relro -Wl,-z,now -pie'
源码安装 nginx-1.14.2
# 安装 nginx 依赖包,以及 patch 包

[root@lb02 ~]# yum install -y gcc glibc gcc-c++ pcre-devel openssl-devel patch

# 下载 nginx-1.14.2 源码安装包,下载 nginx_upstream_check_module 模块补丁

[root@lb01 ~]# wget http://nginx.org/download/nginx-1.14.2.tar.gz

[root@lb01 ~]# wget https://github.com/yaoweibin/nginx_upstream_check_module/archive/master.zip

# 解压 nginx 源码包,以及第三方模块 nginx_upstream_check_module

[root@lb01 ~]# tar xf nginx-1.14.2.tar.gz

[root@lb01 ~]# unzip master.zip

# 进入 nginx-1.14.2 目录,打补丁(-p1 表示源码安装包和补丁文件的绝对路径中,不同的目录的层数)

[root@lb01 ~]# cd nginx-1.14.2/

[root@lb01 nginx-1.14.2]# patch -p1 <../nginx_upstream_check_module-master/check_1.14.0+.patch

# 生成,将第三方模块加入

[root@lb01 nginx-1.14.2]# ./configure --prefix=/app/nginx-1.14.2  --user=www --group=www --with-compat --with-file-aio --with-threads --with-http_addition_module --with-http_auth_request_module --with-http_dav_module --with-http_flv_module --with-http_gunzip_module --with-http_gzip_static_module --with-http_mp4_module --with-http_random_index_module --with-http_realip_module --with-http_secure_link_module --with-http_slice_module --with-http_ssl_module --with-http_stub_status_module --with-http_sub_module --with-http_v2_module --with-mail --with-mail_ssl_module --with-stream --with-stream_realip_module --with-stream_ssl_module --with-stream_ssl_preread_module --add-module=/root/nginx_upstream_check_module-master --with-cc-opt='-O2 -g -pipe -Wall -Wp,-D_FORTIFY_SOURCE=2 -fexceptions -fstack-protector-strong --param=ssp-buffer-size=4 -grecord-gcc-switches -m64 -mtune=generic -fPIC' --with-ld-opt='-Wl,-z,relro -Wl,-z,now -pie'

# 编译

[root@lb01 nginx-1.14.2]# make

# 安装

[root@lb01 nginx-1.14.2]# make install

# 给安装后的目录 创建一个软链接

[root@lb01 ~]# ln -s /app/nginx-1.14.2 /app/nginx

# 添加环境变量

[root@lb01 ~]# echo 'export PATH="$PATH:/app/nginx/sbin/"' > /etc/profile.d/path.sh

[root@lb01 ~]# echo $PATH

/usr/local/sbin:/usr/local/bin:/usr/sbin:/usr/bin:/app/nginx/sbin/:/root/bin

# 修改 nginx.conf 主配置文件

[root@lb01 ~]# cat /app/nginx/conf/nginx.conf

user  www;

worker_processes  1;

error_log  logs/error.log;

#error_log  logs/error.log  notice;

#error_log  logs/error.log  info;

pid        logs/nginx.pid;

events {

    worker_connections  1024;

}

http {

    include       mime.types;

    default_type  application/octet-stream;

    log_format  main  '$remote_addr - $remote_user [$time_local] "$request" '

                      '$status $body_bytes_sent "$http_referer" '

                      '"$http_user_agent" "$http_x_forwarded_for"';

    access_log  logs/access.log  main;

    sendfile        on;

    #tcp_nopush     on;

    #keepalive_timeout  0;

    keepalive_timeout  65;

    #gzip  on;

    include conf.d/*.conf;

}

# 创建 conf.d 子配置文件目录

[root@lb01 ~]# mkdir /app/nginx/conf/conf.d

# 编辑子配置文件

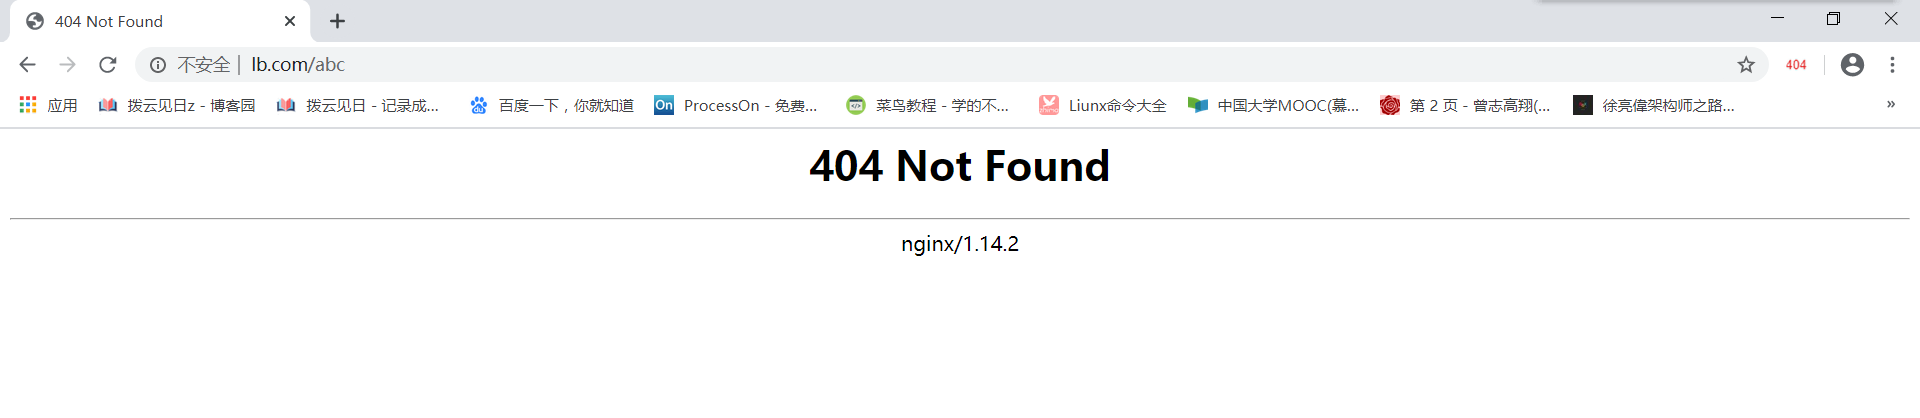
[root@lb01 conf.d]# vi default.conf      <--------  # 方便在浏览器看 nginx 版本号

server {

	listen 80;

	server_name lb.com;

	root html;

	index index.html;

}

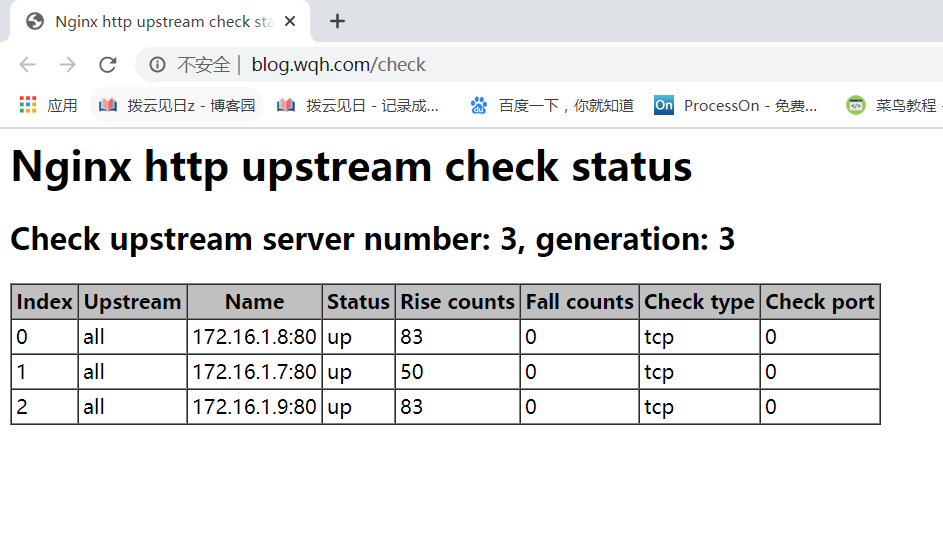
[root@lb01 ~]# vi /app/nginx/conf/conf.d/all.conf

upstream all {

	server 172.16.1.8;

	server 172.16.1.7;

	server 172.16.1.9;

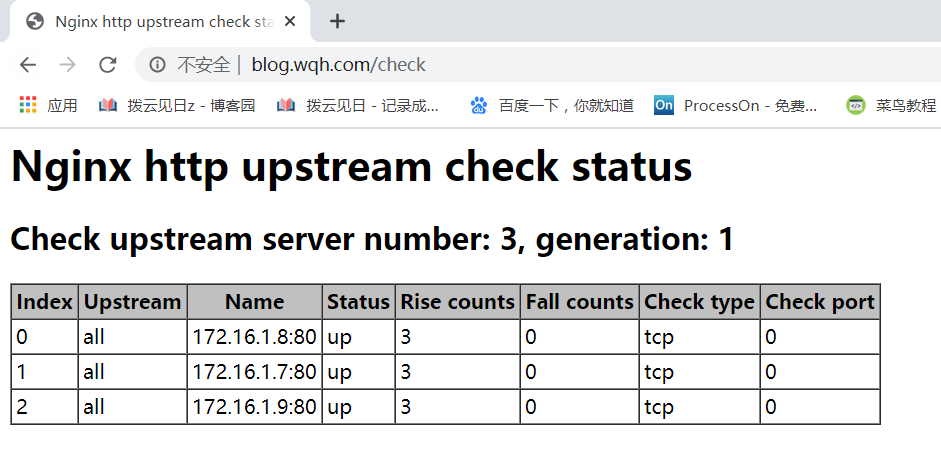
	check interval=3000 rise=2 fall=3 timeout=1000 type=tcp;

}

server {

        listen  80;

        server_name wecenter.wqh.com blog.wqh.com phpmyadmin.com;

        location / {

                proxy_pass http://all;

                include proxy_params;

        }

	    location /check {

        	check_status;

    	}

}

# 编写 proxy_params 文件

[root@lb01 ~]# vi /app/nginx/conf/proxy_params

proxy_set_header HOST $host;

proxy_set_header X-Forwarded-For $proxy_add_x_forwarded_for;

proxy_connect_timeout 60s;

proxy_read_timeout 60s;

proxy_send_timeout 60s;

proxy_buffering on;

proxy_buffers 8 4k;

proxy_buffer_size 4k;

# 启动 nginx 或者 重新加载 nginx 配置文件

[root@lb01 ~]# nginx

[root@lb01 ~]# nginx -s reload
版本升级 nginx-1.16.1
# 下载 nginx-1.14.2 源码安装包

[root@lb01 ~]# wget http://nginx.org/download/nginx-1.16.1.tar.gz

# 解压源码包

[root@lb01 ~]# tar xf nginx-1.16.1.tar.gz

# 进入 nginx-1.16.1 目录,打补丁

[root@lb01 nginx-1.16.1]# patch -p1 <../nginx_upstream_check_module-master/check_1.16.1+.patch

#  生成,并将第三方模块加入

[root@lb01 nginx-1.16.1]# ./configure --prefix=/app/nginx-1.16.1  --user=www --group=www --with-compat --with-file-aio --with-threads --with-http_addition_module --with-http_auth_request_module --with-http_dav_module --with-http_flv_module --with-http_gunzip_module --with-http_gzip_static_module --with-http_mp4_module --with-http_random_index_module --with-http_realip_module --with-http_secure_link_module --with-http_slice_module --with-http_ssl_module --with-http_stub_status_module --with-http_sub_module --with-http_v2_module --with-mail --with-mail_ssl_module --with-stream --with-stream_realip_module --with-stream_ssl_module --with-stream_ssl_preread_module --add-module=/root/nginx_upstream_check_module-master --with-cc-opt='-O2 -g -pipe -Wall -Wp,-D_FORTIFY_SOURCE=2 -fexceptions -fstack-protector-strong --param=ssp-buffer-size=4 -grecord-gcc-switches -m64 -mtune=generic -fPIC' --with-ld-opt='-Wl,-z,relro -Wl,-z,now -pie'

# 编译

[root@lb01 nginx-1.16.1]# make

# 安装

[root@lb01 nginx-1.16.1]# make install

# 将 pid 文件 拷贝到新的安装目录

[root@lb01 ~]# \cp /app/nginx/logs/nginx.pid /app/nginx-1.16.1/logs/

# 将 nginx.conf 主配置文件 拷贝到新的安装目录

[root@lb01 ~]# \cp /app/nginx/conf/nginx.conf /app/nginx-1.16.1/conf/

# 将 nginx.conf 子配置文件目录 拷贝到新的安装目录

[root@lb01 ~]# \cp -r /app/nginx/conf/conf.d /app/nginx-1.16.1/conf/

# 将 proxy_params 拷贝到新的安装目录

[root@lb01 ~]# \cp  /app/nginx/conf/proxy_params /app/nginx-1.16.1/conf/

# 将 站点目录 拷贝到新的安装目录

[root@lb01 conf.d]# \cp -r /app/nginx/html /app/nginx-1.16.1/

# 重置软链接文件

[root@lb01 ~]# cd /app/

[root@lb01 app]# ll

total 0

lrwxrwxrwx  1 root root  12 May 28 17:50 nginx -> nginx-1.14.2

drwxr-xr-x 11 root root 151 May 28 18:29 nginx-1.14.2

drwxr-xr-x  6 root root  54 May 28 20:07 nginx-1.16.1

[root@lb01 app]# rm -rf nginx && ln -s nginx-1.16.1/ nginx

[root@lb01 app]# ll

total 0

lrwxrwxrwx  1 root root  13 May 28 20:25 nginx -> nginx-1.16.1/

drwxr-xr-x 11 root root 151 May 28 18:29 nginx-1.14.2

drwxr-xr-x  6 root root  54 May 28 20:07 nginx-1.16.1

# 快速重启 nginx

[root@lb01 ~]# nginx -s stop && nginx

版本回滚
# 重置软链接文件

[root@lb01 ~]# cd /app/

[root@lb01 app]# rm -rf nginx && ln -s nginx-1.14.2/ nginx

# 快速重启 nginx

[root@lb01 ~]# nginx -s stop && nginx
Nginx 版本回滚的更多相关文章
- nginx之热部署,以及版本回滚
热部署的概念:当从老版本替换为新版本的nginx的时候,如果不热部署的话,会需要取消nginx服务并重启服务才能替换成功,这样的话会使正在访问的用户在断开连接,所以为了不影响用户的体验,且需要版本升级 ...
- TortoiseSVN 版本回滚
尝试用TortoiseSVN进行版本回滚,回滚到的版本和实际的内容有出入,可能是点了太多次给点乱了,囧~ 不过发现一个比较靠谱的方法,如下: 右键点击文件TortoiseSVN->showlog ...
- svn 日志版本回滚
[root@v01 online]# svn diff -r 9:8 Index: index.html =============================================== ...
- git---远程仓库版本回滚
开发中,发现有错误版本提交带远程分支master,怎么处理? 1 简介 最近在使用git时遇到了远程分支需要版本回滚的情况,于是做了一下研究,写下这篇博客. 2 问题 如果提交了一个错误的版本,怎么回 ...
- SVN系列之—-SVN版本回滚的办法
例:SVN版本为:TortoiseSVN 1.9.7 一.SVN简介 subversion(简称svn)是一种跨平台的集中式版本控制工具,支持linux和windows. 版本控制解决了:*代码管理混 ...
- SVN版本回滚实战
天在使用SVN发布的时候不小心修改了一些不正确的东西,新增和编辑了一些错误的文件,由于文件数量比较多,并且目录复杂,不可能单个进行处理,所以想到了SVN版本回滚. 回滚本地工作目录: 1.右键工作目录 ...
- 用Helm部署Kubernetes应用,支持多环境部署与版本回滚
1 前言 Helm是优秀的基于Kubernetes的包管理器.利用Helm,可以快速安装常用的Kubernetes应用,可以针对同一个应用快速部署多套环境,还可以实现运维人员与开发人员的职责分离.现在 ...
- git版本回滚
本地版本回滚 git reset --hard <版本号> (git log 可查看版本号,版本号不用写全) 远程仓库版本回滚 先在本地将版本回滚 ,然后git push -f 强制提交
- SVN版本回滚~
如果你在svn上对文件进行编辑作了修改,想撤销,那么有两种方法可以还原:1) svn revert <yourfile>2) 手动删除该文件,重新执行svn up(rm <yourf ...
随机推荐
- 在Jetbrain IDE中自定义TODO功能
好的IDE能为开发以及学习源码带来效率的提升,今天要介绍的就是Jetbrain家族中IDE自带的TODO功能,我认为利用好它,能够大大的提升阅读源码的效率. 假设我现在需要去阅读源代码,看了半天我终于 ...
- vue路由切换和用location切换url的区别
最近的业务涉及到了axios的拦截器,要在request.js里面要根据状态码来跳转页面,这时候我就面对了几种跳转选择: 1.使用location.href='/url'来跳转,简单方便,但是刷新了页 ...
- Nacos 服务配置中心
1.因为项目是微服务分布式项目,每个微服务都需要用到配置中心,所以第一步我们先在common中添加相应的依赖 <dependency> <groupId>com.alibaba ...
- Oracle 常用命令大全(持续更新)
数据库 ----数据库启动 & 关闭 启动数据库 SQL> startup nomount; SQL> alter database mount; SQL> alter da ...
- LoadRunner监控Centos和Ubuntu资源之服务器配置
Centos 我用的版本是Centos6.8 首先更新源以及基础操作我就不说了,直接上步骤: Step 1 安装相关程序 执行命令:yum install inetd,这一步是为了安装rstatd ...
- 什么是 MVC 模式
概述 MVC,即 Model 模型.View 视图,及 Controller 控制器. View:视图,为用高糊提供使用界面,与用户直接进行交互. Model:模型,承载数据,并对用户提交请求进行计算 ...
- SpringMVC听课笔记(SpringMVC 表单标签 & 处理静态资源)
1.springmvc表单标签,可以快速开发,表单回显,但是感触不深 2.静态资源的获取,主要是要配置这个
- fastHttp服务端处理请求的过程
Github 地址 https://github.com/valyala/fasthttp fastHttp 服务端的处理请求的过程 工作过程 主要代码 设置监听地址 server.go func ( ...
- Java面试(解答题二)
1.一个用户具有多个角色,请查询出该表中具有该用户的所有角色的其他用户.备注:用户表:tb,角色字段为role,主键为id.请写出sql语句. 解答: 2.概述MVC体系结构 解答: MVC包括三类对 ...
- (29)Vim 5
Vim显示行号方法详解1.编辑时显示行号 在命令模式下输入":set nu"即可显示每一行的行号 如果想要取消行 号,则再次输入":set nonu"即可.2. ...