iOS开发 首次启动显示用户引导,第二次启动直接进入App,UIScrollView,UIPageControl,NSUserDefaults
首先创建一个引导图的控制器类
UserGuideViewController.h和UserGuideViewController.m

#import <UIKit/UIKit.h>

#import "firstViewController.h"

#define WIDTH self.view.frame.size.width

#define HEIGHT self.view.frame.size.height

@interface UserGuideViewController : UIViewController<UIScrollViewDelegate>

@end
#import "UserGuideViewController.h"

@interface UserGuideViewController ()

@property(strong,nonatomic)UIScrollView *scrollView;

@property(strong,nonatomic)UIPageControl *page;

@property(strong,nonatomic)UIImageView *image1;

@property(strong,nonatomic)UIImageView *image2;

@property(strong,nonatomic)UIImageView *image3;

@property(strong,nonatomic)UIButton *btn;

@end

@implementation UserGuideViewController

- (void)viewDidLoad {

    [super viewDidLoad];

    //加载用户引导图

    [self initScroll];

}

-(void)initScroll{

    self.image1=[[UIImageView alloc]initWithFrame:CGRectMake(0, 0, WIDTH, HEIGHT)];

    self.image1.image=[UIImage imageNamed:@"1"];

    self.image2=[[UIImageView alloc]initWithFrame:CGRectMake(WIDTH, 0, WIDTH, HEIGHT)];

    self.image2.image=[UIImage imageNamed:@"2"];

    self.image3=[[UIImageView alloc]initWithFrame:CGRectMake(WIDTH*2, 0, WIDTH, HEIGHT)];

    self.image3.image=[UIImage imageNamed:@"3"];

    self.scrollView=[[UIScrollView alloc]initWithFrame:self.view.frame];

    self.scrollView.backgroundColor=[UIColor redColor];

    self.scrollView.contentSize=CGSizeMake(WIDTH*3, HEIGHT);

    //锁定滚动方向

    self.scrollView.directionalLockEnabled=YES;

    //设置分页

    self.scrollView.pagingEnabled=YES;

    //隐藏滚动条

    self.scrollView.showsHorizontalScrollIndicator=NO;

    //设置是否回弹

    self.scrollView.bounces=NO;

    //添加按钮

    self.btn=[[UIButton alloc]initWithFrame:CGRectMake(80, 600, 230, 37)];

        [self.btn setTitle:@"立即体验" forState:0];

    self.btn.titleLabel.font=[UIFont boldSystemFontOfSize:20];

    [self.btn setTitleColor:[UIColor colorWithRed:1.000 green:0.886 blue:0.107 alpha:1.000] forState:0];

    self.btn.backgroundColor=[UIColor redColor];

    [self.btn addTarget:self action:@selector(firstpressed) forControlEvents:UIControlEventTouchUpInside];

    [self.image3 addSubview:self.btn];

    //设置分页各个属性

    self.page=[[UIPageControl alloc]init];

    CGSize pageSize=CGSizeMake(120, 44);

    self.page.frame=CGRectMake((WIDTH-pageSize.width)*0.5, HEIGHT-pageSize.height-40, pageSize.width, pageSize.height);

    self.page.backgroundColor=[UIColor clearColor];

    //设置分页页数

    self.page.numberOfPages=3;

    self.page.currentPage=0;

    self.scrollView.delegate=self;

    [self.scrollView addSubview:self.image1];

    [self.scrollView addSubview:self.image2];

    [self.scrollView addSubview:self.image3];

    [self.view addSubview:self.scrollView];

    [self.view addSubview:self.page];

    //打开用户交互,否则下面的button无法响应

    self.image3.userInteractionEnabled=YES;

}

//按钮的处罚时间

-(void)firstpressed{

    //跳转至正文

    [self presentViewController:[firstViewController new] animated:YES completion:^{

    }];

}

-(void)scrollViewDidScroll:(UIScrollView *)scrollView{

    //设置分页

    self.page.currentPage=(int)(scrollView.contentOffset.x/WIDTH);

}

- (void)didReceiveMemoryWarning {

    [super didReceiveMemoryWarning];

    // Dispose of any resources that can be recreated.

}

/*

#pragma mark - Navigation

// In a storyboard-based application, you will often want to do a little preparation before navigation

- (void)prepareForSegue:(UIStoryboardSegue *)segue sender:(id)sender {

    // Get the new view controller using [segue destinationViewController].

    // Pass the selected object to the new view controller.

}

*/

@end
正文页firstViewController.h和firstViewController.m
#import <UIKit/UIKit.h>

@interface firstViewController : UIViewController

@end
#import "firstViewController.h"

@interface firstViewController ()

@end

@implementation firstViewController

- (void)viewDidLoad {

    [super viewDidLoad];

    self.view.backgroundColor=[UIColor redColor];

}

- (void)didReceiveMemoryWarning {

    [super didReceiveMemoryWarning];

    // Dispose of any resources that can be recreated.

}

/*

#pragma mark - Navigation

// In a storyboard-based application, you will often want to do a little preparation before navigation

- (void)prepareForSegue:(UIStoryboardSegue *)segue sender:(id)sender {

    // Get the new view controller using [segue destinationViewController].

    // Pass the selected object to the new view controller.

}

*/

@end
AppDelegate.mAppDelegate.h文件
#import <UIKit/UIKit.h>

#import "firstViewController.h"

#import "UserGuideViewController.h"

@interface AppDelegate : UIResponder <UIApplicationDelegate>

@property(strong,nonatomic)firstViewController *firstVc;

@property (strong, nonatomic) UIWindow *window;

@end
#import "AppDelegate.h"

@interface AppDelegate ()

@end

@implementation AppDelegate

- (BOOL)application:(UIApplication *)application didFinishLaunchingWithOptions:(NSDictionary *)launchOptions {

    self.firstVc=[[firstViewController alloc]init];

    //判断应用是否是第一次启动

    if (![[NSUserDefaults standardUserDefaults] boolForKey:@"firstLaunch"]) {

        [[NSUserDefaults standardUserDefaults]setBool:YES forKey:@"firstLaunch"];

        NSLog(@"第一次启动");

        //如果是第一次启动的话,使用UserGuideViewController(用户引导页面) 作为根视图

        UserGuideViewController *userViewController=[[UserGuideViewController alloc]init];

        self.window.rootViewController=userViewController;

    }else{

        NSLog(@"不是第一次启动");

        //如果不是第一次启动的话,使用first作为根视图

        firstViewController *first=[[firstViewController alloc]init];

        self.window.rootViewController=first;

    }

    self.window.backgroundColor=[UIColor whiteColor];

    [self.window makeKeyAndVisible];

    return YES;

}

- (void)applicationWillResignActive:(UIApplication *)application {

    // Sent when the application is about to move from active to inactive state. This can occur for certain types of temporary interruptions (such as an incoming phone call or SMS message) or when the user quits the application and it begins the transition to the background state.

    // Use this method to pause ongoing tasks, disable timers, and throttle down OpenGL ES frame rates. Games should use this method to pause the game.

}

- (void)applicationDidEnterBackground:(UIApplication *)application {

    // Use this method to release shared resources, save user data, invalidate timers, and store enough application state information to restore your application to its current state in case it is terminated later.

    // If your application supports background execution, this method is called instead of applicationWillTerminate: when the user quits.

}

- (void)applicationWillEnterForeground:(UIApplication *)application {

    // Called as part of the transition from the background to the inactive state; here you can undo many of the changes made on entering the background.

}

- (void)applicationDidBecomeActive:(UIApplication *)application {

    // Restart any tasks that were paused (or not yet started) while the application was inactive. If the application was previously in the background, optionally refresh the user interface.

}

- (void)applicationWillTerminate:(UIApplication *)application {

    // Called when the application is about to terminate. Save data if appropriate. See also applicationDidEnterBackground:.

}

@end
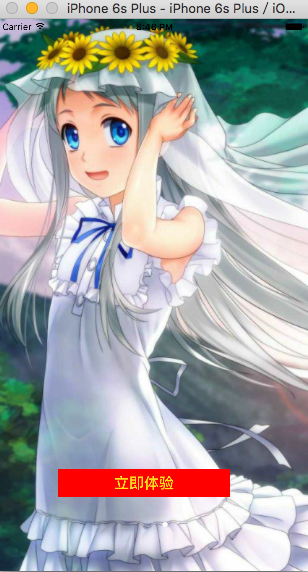
运行效果
第一次运行
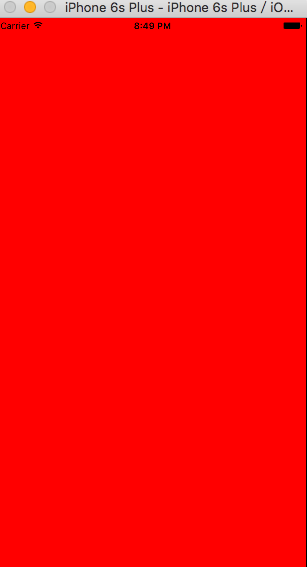
第二次运行
iOS开发 首次启动显示用户引导,第二次启动直接进入App,UIScrollView,UIPageControl,NSUserDefaults的更多相关文章
- iOS开发之应用首次启动显示用户引导
这个功能的重点就是在如何判断应用是第一次启动的. 其实很简单 我们只需要在一个类里面写好用户引导页面 基本上都是使用UIScrollView 来实现, 新建一个继承于UIViewController ...
- iOS开发--应用设置及用户默认设置——转载
[链接]iOS开发--应用设置及用户默认设置[1.bundlehttp://www.jianshu.com/p/6f2913f6b218 在iphone里面,应用都会在“设置”里面有个专属的应用设置, ...
- iOS-王云鹤 APP首次启动显示用户指导
这个功能的重点就是在如何判断应用是第一次启动的. 其实很简单 我们只需要在一个类里面写好用户引导页面 基本上都是使用UIScrollView 来实现, 新建一个继承于UIViewController ...
- iOS开发--应用设置及用户默认设置【2、读取应用中的设置】
在上一节中,我们通过探讨应用的系统设置的基本功能,了解运用bundle捆绑包以及plist文件的基本开发.用户能够使用设置应用来声明他们的偏好设置,那么我们怎样去调用用户所设置的参数呢 ...
- IOS开发之自动布局显示网络请求内容
在上一篇博客中详细的介绍了IOS开发中的相对布局和绝对布局,随着手机屏幕尺寸的改变,在App开发中为了适应不同尺寸的手机屏幕,用自动布局来完成我们想要实现的功能和效果显得尤为重要.本人更喜欢使用相对布 ...
- iOS开发——UI进阶篇(七)程序启动原理、打电话、发短信
一.Info.plist常见的设置 1.建立一个工程后,会在Supporting files文件夹下看到一个“工程名-Info.plist”的文件,该文件对工程做一些运行期的配置,非常重要,不能删除 ...
- iOS开发证书都显示“此证书的签发者无效”,更新WWDR Certificate证书后还是显示无效
1.首先iOS开发证书显示"此证书的签发者无效".是因为WWDR Certificate证书过期导致的,须要更新WWDR Certificate证书! 1)下载最新WWDR Cer ...
- iOS开发之工具篇-20个可以帮你简化移动app开发流程的工具
如果想进入移动app开发这个领域,你总能从别的开发者或者网上或者书上找到各种各样的方法和工具,对于新手来说,还没有摸清门路就已经陷入迷茫了.这里推荐20个可以帮你简化app开发流程的工具.很多开发者都 ...
- iOS开发--应用设置及用户默认设置【1、bundle的运用】
在iphone里面,应用都会在“设置”里面有个专属的应用设置,选择该菜单界面,用户便可以在其中输入和更改各种选项,协助用户更便捷设置个人喜好与习惯. 在这一节中,希望能通过对捆绑包(bu ...
随机推荐
- [MISS静IOS开发原创文摘]-AppDelegate存储全局变量和 NSUserDefaults standardUserDefaults 通过模型保存和读取数据,存储自定义的对象
由于app开发的需求,需要从api接口获得json格式数据并保存临时的 app的主题颜色 和 相关url 方案有很多种: 1, 通过AppDelegate保存为全局变量,再获取 2,使用NSUSerD ...
- mysql 批量插入数据存储过程
create procedure pFastCreateNums (cnt int unsigned) begin declare s int unsigned default 1; truncate ...
- 手机客户端UI测试常见的测试点
1.各种分辨率下,显示正常.现市场上主流的塞班V3系统手机为240*320.320*240.WM系统主要为240*320.320*480.Android系统主要为320*480,Iphone系统为32 ...
- USE INSTAVPN TO DESPLOY VPN server IN amazon EC2
Requirements Ubuntu 14.04 512 MB RAM Install curl -sS https://raw.githubusercontent.com/sockeye44/in ...
- 160个crackme-之Acid burn.exe
工具: Ollydbg(OD) 中文版 运行: 我们拿到一个小程序时,总要看看它到底有什么功能,或者说它阻碍了我们什么,也就是寻找突破口! 这就是程序运行后的主界面 我们进入Serial/Name后, ...
- 面试复习(C++)之归并排序
#include <iostream> #include<stdlib.h>//引入malloc using namespace std; void Merge(int *a, ...
- onBackPressed
onBackPressed()此为进行返回当前的activity 看源码
- 查找n个数字中的最大值
闲来无事,试试用arg_list查找n个数字中的最大者. 又因为本人喜欢模板, 所以就早早的写了以下代码, 没有经过严格测试. /*********************************** ...
- Selenium+Python的环境配置
因为项目的原因,最近较多的使用了UFT来进行自动化测试工作,半年没有使用Selenium了,于是在自己的电脑上重新配置了基于python3.x的selenium环境,配置过程大致如下: 1. Sele ...
- EasyUI加载树控件自动展开所有目录
在这里如何加载树控件就不在熬述,在加载树控件后,树的节点全部展开,要在OnLoadSuccess事件中写代码: