
fragment基础 fragment生命周期 兼容低版本
fragment入门
public class FirstFragment extends Fragment {

	@Override

	public View onCreateView(LayoutInflater inflater, ViewGroup container,

			Bundle savedInstanceState) {

        //inflater就是把一个xml文件打气成一个view 而且返回值本就是view

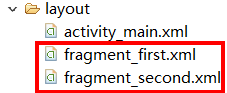
		View view = inflater.inflate(R.layout.fragment_first, null);

		return view;

	}

}<LinearLayout xmlns:android="http://schemas.android.com/apk/res/android"
android:orientation="horizontal"
android:layout_width="match_parent"
android:layout_height="match_parent">
<fragment android:name="com.itheima.fragment.FirstFragment" <!--指向要显示的fragment 要用fragment的全类名 -->
android:id="@+id/list"
android:layout_weight="1"
android:layout_width="0dp"
android:layout_height="match_parent" />
<fragment android:name="com.itheima.fragment.SecondFragment"
android:id="@+id/viewer"
android:layout_weight="1"
android:layout_width="0dp"
android:layout_height="match_parent" />
</LinearLayout>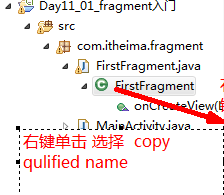
<?xml version="1.0" encoding="utf-8"?>

<RelativeLayout xmlns:android="http://schemas.android.com/apk/res/android"

    android:layout_width="match_parent"

    android:layout_height="match_parent" >

    <TextView

        android:id="@+id/tv_text"

        android:layout_width="wrap_content"

        android:layout_height="wrap_content"

        android:text="第一个fragment"/>

</RelativeLayout>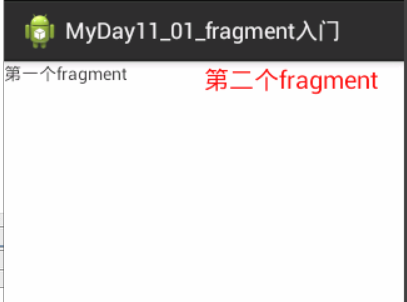
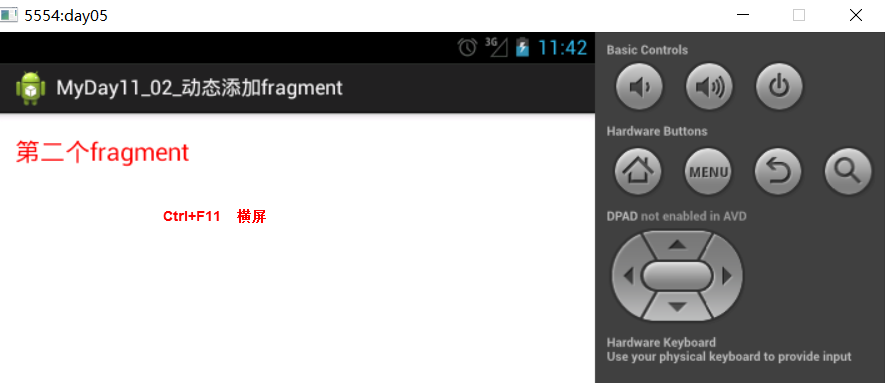
2 动态替换fragment
activity_main
<RelativeLayout xmlns:android="http://schemas.android.com/apk/res/android"

    xmlns:tools="http://schemas.android.com/tools"

    android:layout_width="match_parent"

    android:layout_height="match_parent"

    android:paddingBottom="@dimen/activity_vertical_margin"

    android:paddingLeft="@dimen/activity_horizontal_margin"

    android:paddingRight="@dimen/activity_horizontal_margin"

    android:paddingTop="@dimen/activity_vertical_margin"

    tools:context=".MainActivity" >

    <LinearLayout

        android:id="@+id/ll_layout"

        android:layout_width="wrap_content"

        android:layout_height="wrap_content" />

</RelativeLayout>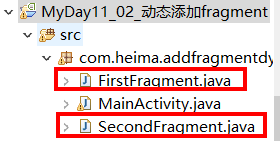
public class MainActivity extends Activity {

    @Override

    protected void onCreate(Bundle savedInstanceState) {

        super.onCreate(savedInstanceState);

        setContentView(R.layout.activity_main);

        Point outSize = new Point();

        //新api 获取屏幕宽高  传入 Point 这行代码执行之后  point中就保存了 屏幕的宽高

		getWindowManager().getDefaultDisplay().getSize(outSize);

		int width = outSize.x;

		int height = outSize.y;

        //获取FragmentMananger fragment管理器

        FragmentManager  manager = getFragmentManager();

        //通过FragmentManager 开启一个fragment的事务

        FragmentTransaction transaction = manager.beginTransaction();

        if(height>width){

			System.out.println("竖屏");

			//android.R 系统定义好的资源id

			transaction.replace(R.id.ll_layout, new FstFragment());

		}else{

			System.out.println("横屏");

			transaction.replace(R.id.ll_layout, new SecondFragment());

		}

        //记住一定要commit提交 否则没效果

        transaction.commit();

    }
3 使用fragment创建一个选项卡页面
<LinearLayout xmlns:android="http://schemas.android.com/apk/res/android"

    xmlns:tools="http://schemas.android.com/tools"

    android:layout_width="match_parent"

    android:layout_height="match_parent"

    android:orientation="vertical"

    tools:context=".MainActivity" >

    <RelativeLayout

        android:id="@+id/rl_layout"

        android:layout_width="match_parent"

        android:layout_height="0dp"

        android:layout_weight="1" >

    </RelativeLayout>

    <LinearLayout

        android:layout_width="match_parent"

        android:layout_height="wrap_content"

        android:orientation="horizontal" >

        <ImageView

            android:id="@+id/iv_wx"

            android:layout_width="0dp"

            android:layout_height="wrap_content"

            android:layout_weight="1"

            android:src="@drawable/weixin_pressed"

            />

         <ImageView

            android:id="@+id/iv_contact"

            android:layout_width="0dp"

            android:layout_height="wrap_content"

            android:layout_weight="1"

            android:src="@drawable/contact_list_normal"/>

          <ImageView

            android:id="@+id/iv_find"

            android:layout_width="0dp"

            android:layout_height="wrap_content"

            android:layout_weight="1"

            android:src="@drawable/find_normal"/>

           <ImageView

            android:id="@+id/iv_me"

            android:layout_width="0dp"

            android:layout_height="wrap_content"

            android:layout_weight="1"

            android:src="@drawable/profile_normal"/>

    </LinearLayout>

</LinearLayout>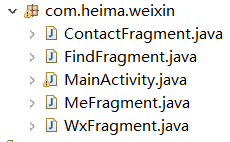
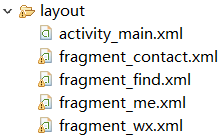

public class MainActivity extends Activity implements OnClickListener {

	private ImageView iv_wx;

	private ImageView iv_contact;

	private ImageView iv_find;

	private ImageView iv_me;

	private WxFragment wxFragment;

	private FindFragment findFragment;

	private ContactFragment contactFragment;

	private MEFragment meFragment;

	@Override

	protected void onCreate(Bundle savedInstanceState) {

		super.onCreate(savedInstanceState);

		setContentView(R.layout.activity_main);

		// 找到底部的四个按钮

		iv_wx = (ImageView) findViewById(R.id.iv_wx);

		iv_contact = (ImageView) findViewById(R.id.iv_contact);

		iv_find = (ImageView) findViewById(R.id.iv_find);

		iv_me = (ImageView) findViewById(R.id.iv_me);

		iv_contact.setOnClickListener(this);

		iv_find.setOnClickListener(this);

		iv_me.setOnClickListener(this);

		iv_wx.setOnClickListener(this);

		//用代码的方式点一下按钮

		iv_wx.performClick();

	}

	@Override

	public boolean onCreateOptionsMenu(Menu menu) {

		// Inflate the menu; this adds items to the action bar if it is present.

		getMenuInflater().inflate(R.menu.main, menu);

		return true;

	}

	@Override

	public void onClick(View v) {

		//把所有图片设置为初始状态

		clearImage();

		//获得fragmentmanager

		FragmentManager manager = getFragmentManager();

		//开启fragment事务

		FragmentTransaction transaction = manager.beginTransaction();

		switch (v.getId()) {

		case R.id.iv_wx:

			if(wxFragment == null){

				wxFragment = new WxFragment();

			}

			transaction.replace(R.id.rl_layout, wxFragment);

			iv_wx.setImageResource(R.drawable.weixin_pressed);

			break;

		case R.id.iv_contact:

			if(contactFragment == null){

				contactFragment = new ContactFragment();

			}

			transaction.replace(R.id.rl_layout, contactFragment);

			iv_contact.setImageResource(R.drawable.contact_list_pressed);

			break;

		case R.id.iv_find:

			if(findFragment==null){

				findFragment = new FindFragment();

			}

			transaction.replace(R.id.rl_layout, findFragment);

			iv_find.setImageResource(R.drawable.find_pressed);

			break;

		case R.id.iv_me:

			if(meFragment==null){

				meFragment = new MEFragment();

			}

			transaction.replace(R.id.rl_layout, meFragment);

			iv_me.setImageResource(R.drawable.profile_pressed);

			break;

		}

		//提交

		transaction.commit();

	}

//把所有的图标设置为初始状态

	private void clearImage(){

		iv_contact.setImageResource(R.drawable.contact_list_normal);

		iv_find.setImageResource(R.drawable.find_normal);

		iv_me.setImageResource(R.drawable.profile_normal);

		iv_wx.setImageResource(R.drawable.weixin_normal);

	}

}
4 使用fragment兼容低版本的写法

import android.support.v4.app.FragmentActivity;  //导包要导入support包中的fragment相关的类

import android.support.v4.app.FragmentManager;

import android.support.v4.app.FragmentTransaction;

import android.view.Menu;

//必须继承

public class MainActivity extends FragmentActivity {
FragmentManager fragmentManager = getSupportFragmentManager();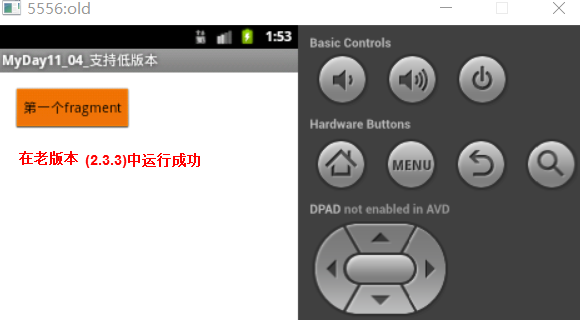
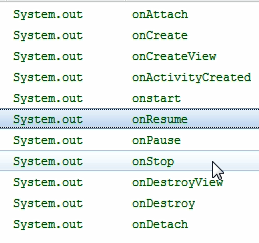
public class FirstFragment extends Fragment {

	//这个方法运行 这个fragment就跟activity建立了练习

	//attach 依附 粘

	@Override

	public void onAttach(Activity activity) {

		super.onAttach(activity);

		System.out.println("onAttach");

        //获得绑定的activity的引用

	}

	@Override

	public void onCreate(Bundle savedInstanceState) {

		super.onCreate(savedInstanceState);

		System.out.println("onCreate");

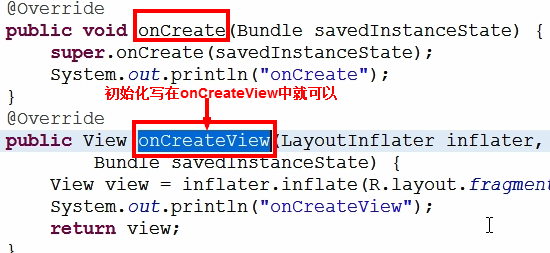
        //创建fragment,并初始化

	}

    //返回一个fragmentUI

	@Override

	public View onCreateView(LayoutInflater inflater, ViewGroup container,

			Bundle savedInstanceState) {

		View view = inflater.inflate(R.layout.fragment_first, null);

		System.out.println("onCreateView");

		return view;

	}

	@Override

	public void onActivityCreated(Bundle savedInstanceState) {

		super.onActivityCreated(savedInstanceState);

		System.out.println("onActivityCreated");

        //当activity和fragment都被创建以后才会调用

        //当同时需要activity和fragment中的控件时,可在此方法中调用

	}

	@Override

	public void onStart() {

		super.onStart();

		System.out.println("onstart");

	}

	@Override

	public void onResume() {

		super.onResume();

		System.out.println("onResume");

	}

	@Override

	public void onPause() {

		super.onPause();

		System.out.println("onPause");

	}

	@Override

	public void onStop() {

		super.onStop();

		System.out.println("onStop");

	}

	@Override

	public void onDestroyView() {

		super.onDestroyView();

		System.out.println("onDestroyView");

	}

	@Override

	public void onDestroy() {

		super.onDestroy();

		System.out.println("onDestroy");

	}

	@Override

	public void onDetach() {

		super.onDetach();

		System.out.println("onDetach");

	}

}
<wiz_tmp_tag id="wiz-table-range-border" contenteditable="false" style="display: none;">
fragment基础 fragment生命周期 兼容低版本的更多相关文章
- [转]AppCompat 22.1,Goole暴走,MD全面兼容低版本
AppCompat 22.1,Goole暴走,MD全面兼容低版本 分类: Android2015-04-24 09:48 1354人阅读 评论(0) 收藏 举报 android 目录(?)[+] ...
- android 在使用ViewAnimationUtils.createCircularReveal()无法兼容低版本的情况下,另行实现圆形scale动画
ViewAnimationUtils.createCircularReveal()的简介: ViewAnimationUtils.createCircularReveal()是安卓5.0才引入的,快速 ...
- 模拟实现兼容低版本IE浏览器的原生bind()函数功能
模拟实现兼容低版本IE浏览器的原生bind()函数功能: 代码如下: if(!Function.prototype.bind){ Function.prototype.bind=function( ...
- Vue2+Webpack+ES6 兼容低版本浏览器(IE9)解决方案
Vue2+Webpack+ES6 兼容低版本浏览器(IE9)解决方案 解决方式:安装 "babel-polyfill" 即可. 命令:npm install --save-dev ...
- Fundebug前端JavaScript插件更新至1.8.0,兼容低版本的Android浏览器
摘要: 兼容低版本Android浏览器,请大家及时更新. Fundebug前端BUG监控服务 Fundebug是专业的程序BUG监控平台,我们JavaScript插件可以提供全方位的BUG监控,可以帮 ...
- 兼容低版本IE浏览器的一些心得体会(持续更新)
前言: 近期工作中,突然被要求改别人的代码,其中有一项就是兼容IE低版本浏览器,所以优雅降级吧. 我相信兼容低版本IE是许多前端开发的噩梦,尤其是改别人写的代码,更是痛不欲生. 本文将介绍一些本人兼容 ...
- 使用fragment兼容低版本的写法
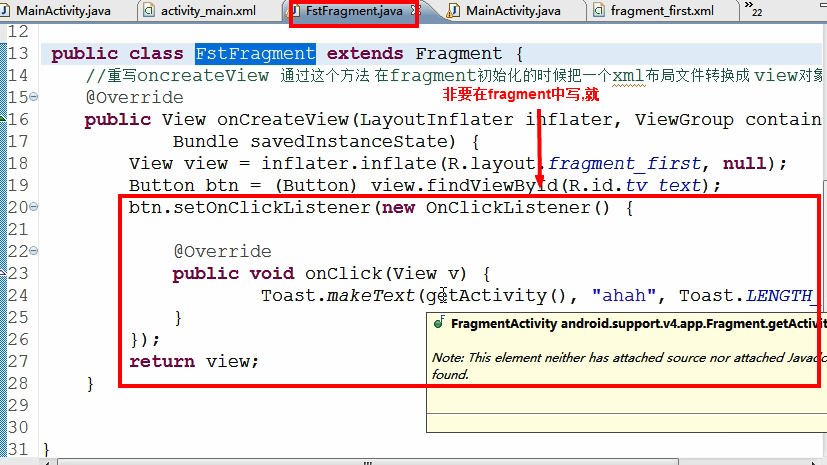
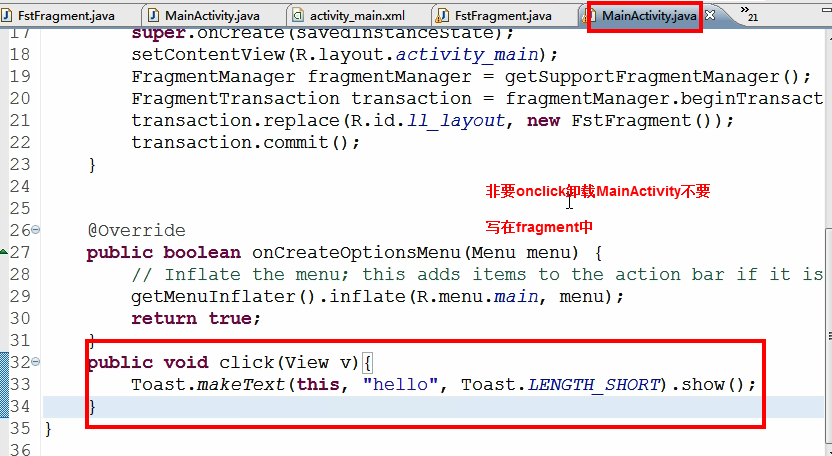
[1]定义fragment继承V4包中的Fragment [2]定义的activity要继承v4包中的FragmentActivity [3]通过这个方法getSupportFragme ...
- Android Fragment详解(二):Fragment创建及其生命周期
Fragments的生命周期 每一个fragments 都有自己的一套生命周期回调方法和处理自己的用户输入事件. 对应生命周期可参考下图: 创建片元(Creating a Fragment) To c ...
- Android开发 - Fragment与Activity生命周期比较
1. Fragment的生命周期 见下图 2. 与Activity生命周期的对比 见下图 3. 代码场景演示实例 切换到该Fragment: AppListFragment(7649): onAtta ...
随机推荐
- 对 p 开 n 次方 (数学推论)
#include<stdio.h> #include<string.h> #include<algorithm> #include<math.h> us ...
- js中call、apply、bind的区别
var Person = { name : 'alice', say : function(txt1,txt2) { console.info(txt1+txt2); console.info(thi ...
- Linux—Ubuntu14.0.5安装Redis
1.前言 Redis是常用基于内存的Key-Value数据库,比Memcache更先进,支持多种数据结构,高效,快速.用Redis可以很轻松解决高并发的数据访问问题:做为时时监控信号处理也非常不错. ...
- Balanced Number
Balanced Number Time Limit: 10000/5000 MS (Java/Others) Memory Limit: 65535/65535 K (Java/Others) ...
- net_->ForwardBackward()的大致梳理
net_->ForwardBackward()方法在net.hpp文件中 Dtype ForwardBackward() { Dtype loss; Forward(&loss); Ba ...
- POJ2391 Ombrophobic Bovines 网络流拆点+二分+floyed
题目链接: id=2391">poj2391 题意: 有n块草地,每块草地上有一定数量的奶牛和一个雨棚,并给出了每一个雨棚的容(牛)量. 有m条路径连接这些草地 ,这些路径是双向的, ...
- sass基础教程
1. 使用变量; $highlight-color: #F90; .selected { border: 1px solid $highlight-color; } //编译后 .selected { ...
- HDU2191_悼念512汶川大地震遇难同胞——珍惜如今,感恩生活(背包/多重背包)
解题报告 题目传送门 题意: 中文不多说; 思路: 基础多重背包,每一个物品有多个能够选.转换成01背包解. #include <iostream> #include <cstrin ...
- 数学之路-python计算实战(4)-Lempel-Ziv压缩(2)
Format characters have the following meaning; the conversion between C and Python values should be o ...
- Linux学习笔记——例说makefile 索引博文
0.前言 从学习C语言開始就慢慢開始接触makefile.查阅了非常多的makefile的资料但总感觉没有真正掌握makefile,假设自己动手写一个makefile总认为非常吃力.所以特意借 ...