Spring整合hibernate -SessionFactory
本文目录
1 本文采用 hibernate4 整合 Spring3.1
2 把Spring获取datasource通过class="org.springframework.orm.hibernate3.annotation.AnnotationSessionFactoryBean"把datasource注入给hibernate的sessionfactory
3 注入后,配置sessionfactory的相关属性,例如实体类,properties
4 实体类上添加注解
5 编写测试类,测试通过
一 构建sessionFactory
1 datasource注入sessionfactory
a 把datasource注入到class="org.springframework.orm.hibernate3.LocalSessionFactoryBean"
注意: LocalSessionFactoryBean是hibernate3使用XML时使用的sessionfactory,所以不支持annotation----------------hibernate3的时候不推荐使用,hibernate4的时候自带annotation实现
b 把datasource注入到class="org.springframework.orm.hibernate3.annotation.AnnotationSessionFactoryBean" ----------------hibernate3的时候推荐使用
我使用的是hibernate4,编译的时候出了一个错误如下:
注意: java.lang.NoClassDefFoundError: Lorg/hibernate/cache/CacheProvider; (hibernate4整合spring3.1)
查了一下相关资料,原来发现hibernate4已经将hibernate3的一些功能改掉了,在hibernate4已经不使用CacheProvider了,所以做了以下修改,
原先:<bean id="sessionFactory"
class="org.springframework.orm.hibernate3.annotation.AnnotationSessionFactoryBean">
改成:<bean id="sessionFactory"
class="org.springframework.orm.hibernate4.LocalSessionFactoryBean">
问题解决,可以正常使用(本文是采用hibernate4整合spring3.1)
LocalSessionFactoryBean配置
<beans>

    <bean id="myDataSource" class="org.apache.commons.dbcp.BasicDataSource" destroy-method="close">

        <property name="driverClassName" value="org.hsqldb.jdbcDriver"/>

        <property name="url" value="jdbc:hsqldb:hsql://localhost:9001"/>

        <property name="username" value="sa"/>

        <property name="password" value=""/>

    </bean>

    <bean id="mySessionFactory" class="org.springframework.orm.hibernate3.LocalSessionFactoryBean">

        <property name="dataSource" ref="myDataSource"/>

        <property name="mappingResources">

            <list>

                <value>product.hbm.xml</value>

            </list>

        </property>

        <property name="hibernateProperties">

            <value>

                hibernate.dialect=org.hibernate.dialect.HSQLDialect

            </value>

        </property>

    </bean>

</beans>
AnnotationSessionFactoryBean(推荐)
    <bean id="mySessionFactory"

        class="org.springframework.orm.hibernate3.annotation.AnnotationSessionFactoryBean">    <!--这个支持annotation-->

        <property name="dataSource" ref="dataSource" />

        <property name="mappingResources">

            <list>

                <value>product.hbm.xml</value>

            </list>

        </property>

        <property name="hibernateProperties">

            <value>

                hibernate.dialect=org.hibernate.dialect.HSQLDialect

            </value>

        </property>

    </bean>
2 注入hibernate需要的proptity的参数
<property name="hibernateProperties">

            <value>

                hibernate.dialect=org.hibernate.dialect.MySQLDialect

                hibernate.show_sql=true

            </value>

</property>
3 注入实体类
annotatedClasses是注入类
mappingResource是注入XML
<property name="annotatedClasses">

            <list>

                <value>com.entity.User</value>

            </list>

 </property>
也可以使用自动扫描的方式注入实体类
 <property name="packagesToScan">

            <list>

                    <value>com.entity</value>

            </list>

        </property>
同时在实体类上添上注解
package com.entity;

import javax.persistence.Entity;

import javax.persistence.Id;

@Entity

public class User {

    @Id

    private int id;

    private String name;

    private String remark;

    public String getName() {

        return name;

    }

    public void setName(String name) {

        this.name = name;

    }

    public String getRemark() {

        return remark;

    }

    public void setRemark(String remark) {

        this.remark = remark;

    }

    public int getId() {

        return id;

    }

    public void setId(int id) {

        this.id = id;

    }

}
4 引入hibernate包
5 最后附上所有代码
beans.xml
<?xml version="1.0" encoding="UTF-8"?>

<beans xmlns="http://www.springframework.org/schema/beans"

    xmlns:xsi="http://www.w3.org/2001/XMLSchema-instance"

    xmlns:aop="http://www.springframework.org/schema/aop"

    xmlns:context="http://www.springframework.org/schema/context"

    xsi:schemaLocation="http://www.springframework.org/schema/beans

        http://www.springframework.org/schema/beans/spring-beans.xsd

        http://www.springframework.org/schema/context

        http://www.springframework.org/schema/context/spring-context.xsd

        ">

        <context:component-scan base-package="com.*"></context:component-scan>

    <bean id="mappings"

        class="org.springframework.beans.factory.config.PropertyPlaceholderConfigurer">

        <property name="locations">

            <value>classpath:jdbc.properties</value>

        </property>

    </bean>

<!--    <bean id="dataSource" class="org.apache.commons.dbcp.BasicDataSource" destroy-method="close">-->

<!--        <property name="driverClassName" value="com.mysql.jdbc.Driver"/>-->

<!--        <property name="url" value="jdbc:mysql://localhost:3306/spring"/>-->

<!--        <property name="username" value="root"/>-->

<!--        <property name="password" value="root"/>-->

<!--    </bean>-->

    <bean id="dataSource" class="org.apache.commons.dbcp.BasicDataSource" destroy-method="close">

        <property name="driverClassName" value="${jdbc.driverClassName}"/>

        <property name="url" value="${jdbc.url}"/>

        <property name="username" value="${jdbc.username}"/>

        <property name="password" value="${jdbc.password}"/>

    </bean>

    <bean id="mySessionFactory"

        class="org.springframework.orm.hibernate4.LocalSessionFactoryBean">

        <property name="dataSource" ref="dataSource" />

        <property name="annotatedClasses">

            <list>

                <value>com.entity.User</value>

            </list>

        </property>

        <property name="hibernateProperties">

            <value>

                hibernate.dialect=org.hibernate.dialect.MySQLDialect

                hibernate.show_sql=true

            </value>

        </property>

    </bean>

</beans>
service
package com.serviceImpl;

import javax.annotation.PostConstruct;

import javax.annotation.PreDestroy;

import javax.annotation.Resource;

import org.springframework.context.annotation.Scope;

import org.springframework.stereotype.Component;

import com.dao.UserDao;

import com.entity.User;

@Component

public class UserServiceImpl {

    private UserDao userDao;

    public void add(User user) {

        userDao.save(user);

    }

    public void update(User user) {

        userDao.update(user);

    }

    public void init() {// 初始方法

        System.out.println("init");

    }

    public void destroy() {// 销毁方法

        System.out.println("destory");

    }

    public UserDao getUserDao() {

        return userDao;

    }

    @Resource(name="userDaoImpl2")

    public void setUserDao(UserDao userDao) {

        this.userDao = userDao;

    }

}
userDaoImpl2
package com.daoImpl;

import javax.annotation.Resource;

import org.hibernate.Session;

import org.hibernate.SessionFactory;

import org.springframework.stereotype.Component;

import com.dao.UserDao;

import com.entity.User;

@Component

public class UserDaoImpl2 implements UserDao{

    SessionFactory mySessionFactory;

    public void save(User user) {

        System.out.println(user.getName()+"-->"+user.getRemark()+"  save --调用UserDaoImpl2!");

//        Session s = mySessionFactory.getCurrentSession();
//    这里没有用getCurrentSession是因为配置文件没有配置,在property中配置hibernate.current_session_context_class=thread即可,比较推荐

        Session s = mySessionFactory.openSession();

        s.beginTransaction();

        s.save(user);

        s.getTransaction().commit();

    }

    public void update(User user) {

        System.out.println(user.getName()+"-->"+user.getRemark()+"  update  --调用UserDaoImpl2!");

    }

    public SessionFactory getMySessionFactory() {

        return mySessionFactory;

    }

     @Resource

    public void setMySessionFactory(SessionFactory mySessionFactory) {

        this.mySessionFactory = mySessionFactory;

    }

}
测试类
package com.serviceImpl.test;

import org.junit.Before;

import org.junit.Test;

import org.springframework.context.support.ClassPathXmlApplicationContext;

import com.entity.User;

import com.serviceImpl.UserServiceImpl;

public class UserServiceImplTest {

    User user;

    @Before

    public void setUp() throws Exception {

        user = new User();

        user.setName("testName");

        user.setRemark("testRemark");

    }

    @Test

    public void testAdd() {

        ClassPathXmlApplicationContext app = new ClassPathXmlApplicationContext("beans.xml");

         UserServiceImpl UserServiceImpl = (UserServiceImpl)app.getBean("userServiceImpl");

         UserServiceImpl.add(user);//调用方法

         UserServiceImpl.update(user);//调用方法

    }

}
执行结果
testName-->testRemark save --调用UserDaoImpl2!
Hibernate: insert into User (name, remark, id) values (?, ?, ?)
testName-->testRemark update --调用UserDaoImpl2!
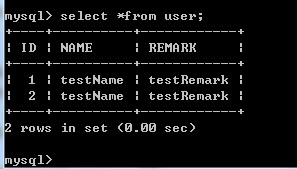
hibernate4 整合 Spring3.1 SessionFactory完成
回顾一下步骤
1 本文采用 hibernate4 整合 Spring3.1
2 把Spring获取datasource通过class="org.springframework.orm.hibernate3.annotation.AnnotationSessionFactoryBean"把datasource注入给hibernate的sessionfactory
3 注入后,配置sessionfactory的相关属性,例如实体类,properties
4 实体类上添加注解
5 编写测试类,测试通过
Spring整合hibernate -SessionFactory的更多相关文章
- 【Java EE 学习 53】【Spring学习第五天】【Spring整合Hibernate】【Spring整合Hibernate、Struts2】【问题:整合hibernate之后事务不能回滚】
一.Spring整合Hibernate 1.如果一个DAO 类继承了HibernateDaoSupport,只需要在spring配置文件中注入SessionFactory就可以了:如果一个DAO类没有 ...
- spring整合hibernate的详细步骤
Spring整合hibernate需要整合些什么? 由IOC容器来生成hibernate的sessionFactory. 让hibernate使用spring的声明式事务 整合步骤: 加入hibern ...
- spring整合hibernate
spring整合hibernate包括三部分:hibernate的配置.hibernate核心对象交给spring管理.事务由AOP控制 好处: 由java代码进行配置,摆脱硬编码,连接数据库等信息更 ...
- spring 整合hibernate
1. Spring 整合 Hibernate 整合什么 ? 1). 有 IOC 容器来管理 Hibernate 的 SessionFactory2). 让 Hibernate 使用上 Spring 的 ...
- Spring 整合 Hibernate
Spring 整合 Hibernate •Spring 支持大多数流行的 ORM 框架, 包括 Hibernate JDO, TopLink, Ibatis 和 JPA. •Spring 对这些 OR ...
- 使用Spring整合Hibernate,并实现对数据表的增、删、改、查的功能
1.1 问题 使用Spring整合Hibernate,并实现资费表的增.删.改.查. 1.2 方案 Spring整合Hibernate的步骤: 1.3 步骤 实现此案例需要按照如下步骤进行. 采用的环 ...
- Spring整合Hibernate详细步骤
阅读目录 一.概述 二.整合步骤 回到顶部 一.概述 Spring整合Hibernate有什么好处? 1.由IOC容器来管理Hibernate的SessionFactory 2.让Hibernate使 ...
- SSH整合之spring整合hibernate
SSH整合要导入的jar包: MySQL中创建数据库 create database ssh_db; ssh_db 一.spring整合hibernate带有配置文件hibernate.cfg.xml ...
- 3、Spring整合Hibernate
经过前面的两节分析:1.Hibernate之生成SessionFactory源码追踪 和 2.Spring的LocalSessionFactoryBean创建过程源码分析 .我们可以得到这样一个结论, ...
随机推荐
- Internationalization(i18n) support in SAP CRM,UI5 and Hybris
i18n(其来源是英文单词 internationalization的首末字符i和n,18为中间的字符数)是"国际化"的简称.对程序来说,在不修改内部代码的情况下,能根据不同语言及 ...
- 轻松搞定Struts 2:三步走上手小入门
零.Struts 2是啥? SSH.SSM.SSI如雷贯耳,Struts 2 —— 是的,就这样了... 一.Hello Struts2 1.核心包 2.struts.xml核心控制器配置 <f ...
- 如果CDN服务器出了问题,怎么做不影响自己的网站
<script src="https://ajax.googleapis.com/ajax/libs/jquery/1.4.3.jquery.min.js"></ ...
- js 生成随机数解决缓存的问题
对于缓存有一个解决方法是在链接后添加随机数 例如登陆后跳转到链接/home,但是有缓存上次用户的登陆名,于是在/home后面加上一个随机数 var href = '/home?'+Math.rando ...
- bzoj AC倒序
Search GO 说明:输入题号直接进入相应题目,如需搜索含数字的题目,请在关键词前加单引号 Problem ID Title Source AC Submit Y 1000 A+B Problem ...
- 编译防火墙——C++的Pimpl惯用法解析
http://blog.csdn.net/lihao21/article/details/47610309 Pimpl(pointer to implementation, 指向实现的指针)是一种常用 ...
- python_68_迭代器
''' 我们已经知道,可以直接作用于for循环的数据类型有以下几种: 一类是集合数据类型,如list.tuple.dict.set.str等: 一类是generator,包括生成器和带yield的ge ...
- python_49_三种编程方式及面向过程与面向函数区别.py
''' 三种编程方式:1.面向对象 (类:class)2.面向过程 (过程:def)3.函数式编程(函数:def) 编程语言中函数的定义:函数是逻辑结构化和过程化的一种编程方法 过程与函数的区别,过程 ...
- angular2的生命周期钩子的使用情况
angular 2 Directive Lifecycleangular2 中组建继承于指令,并扩展了与ui视图相关的属性.angular2 指令的生命周期是用来记录指令从创建,应用及销毁的过程.an ...
- JQuery模拟点击页面上的所有a标签,触发onclick事件
注意: 这种方法需要给所有的a标签加上id属性 页面加载完成模拟点击所有的a标签: <script> $(function () { // 模拟点击页面上的所有a标签,触发onclick事 ...