elementUI slider组件,带范围选择实现双向绑定
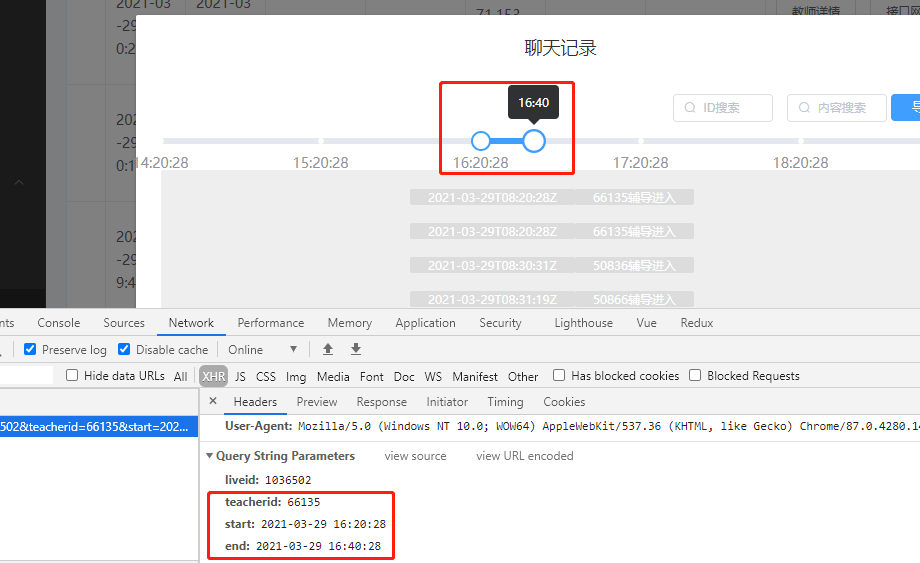
网上查过很多相关文章都没有一章是写element ui滑块带范围实现双向绑定 二个滑块二头的数据怎么得到 我的需求是做个时间轴要滑动选择不同的时间 开始很难做最后一点一点摸索得出的结论 好在写出来了先给大家看实体图
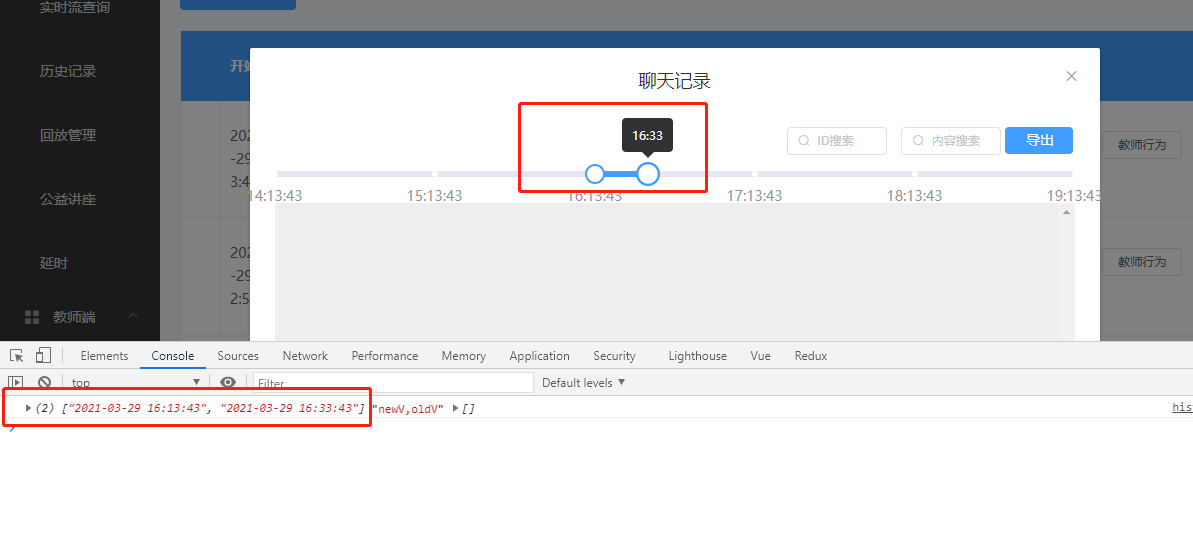
就是这样的 给大家贴代码 多余的代码我就不贴了 就给你们看主要的
 <div>

      <el-dialog

        title="聊天记录"

        :visible.sync="showFlag"

        width="850px"

        @close="closeDialog"

        center

      >

        <div>

          <div class="block">

            <el-slider

              v-model="value"

              range

              :marks="marks"

              :max="300"

              :step="1"

              @change="schedule()"

              style="margin-bottom:10px;"

              :format-tooltip="formatTooltip"

            >

            </el-slider>

          </div>

        </div>

      </el-dialog>

    </div>
再是函数方法里面的
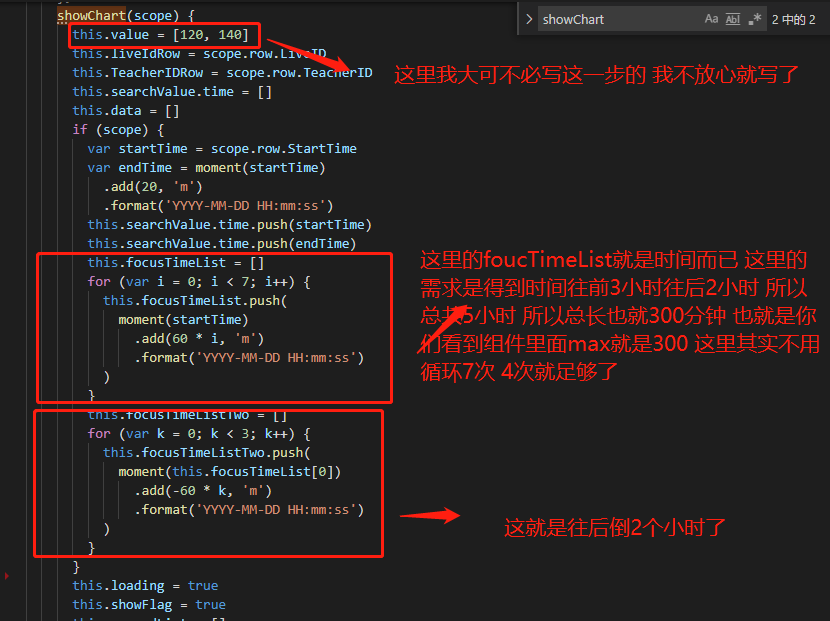
这是点击按钮进入聊天弹框触发的函数
showChart(scope) {
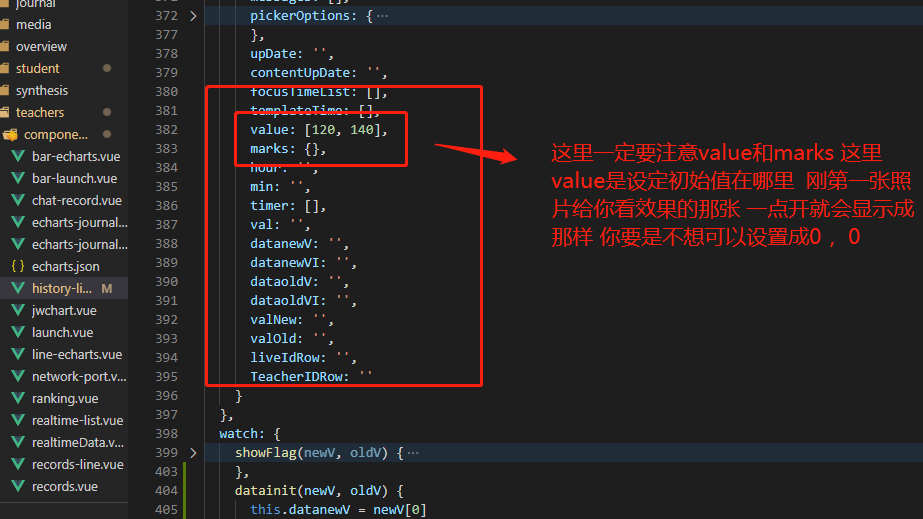
this.value = [120, 140]
this.liveIdRow = scope.row.LiveID
this.TeacherIDRow = scope.row.TeacherID
this.searchValue.time = []
this.data = []
if (scope) {
var startTime = scope.row.StartTime
var endTime = moment(startTime)
.add(20, 'm')
.format('YYYY-MM-DD HH:mm:ss')
this.searchValue.time.push(startTime)
this.searchValue.time.push(endTime)
this.focusTimeList = []
for (var i = 0; i < 7; i++) {
this.focusTimeList.push(
moment(startTime)
.add(60 * i, 'm')
.format('YYYY-MM-DD HH:mm:ss')
)
}
this.focusTimeListTwo = []
for (var k = 0; k < 3; k++) {
this.focusTimeListTwo.push(
moment(this.focusTimeList[0])
.add(-60 * k, 'm')
.format('YYYY-MM-DD HH:mm:ss')
)
}
}
this.loading = true
this.showFlag = true
this.recordList = []
var body = {
liveid: this.liveIdRow,
teacherid: this.TeacherIDRow,
start: this.searchValue.time[0],
end: this.searchValue.time[1]
}
return request({
method: 'get',
url: '/api/teacher/chat',
params: body
}).then(res => {
if (res.Content) {
this.messages = res.Content
this.messages.forEach(item => {
var num = parseInt(19 * Math.random())
item.img = require(`../../../assets/auter/icon-test_${num}.png`)
item.msgs = item.msg
.replace(/\[e\]em_/g, '<img src=../../../static/faces/em_')
.replace(/\[e\]/g, '.png>')
})
this.recordList = this.messages
this.loading = false
} else {
this.$message({
message: '无分析结果!',
type: 'warning'
})
this.loading = false
}
})
},
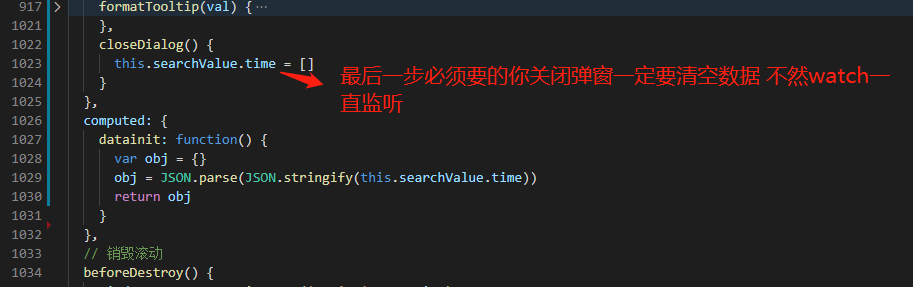
这是滑块自带的函数你可以去elementui官网看一下了解一下大概就是你滑动一下滑块每次都触发的函数
formatTooltip(val) {
this.val = val
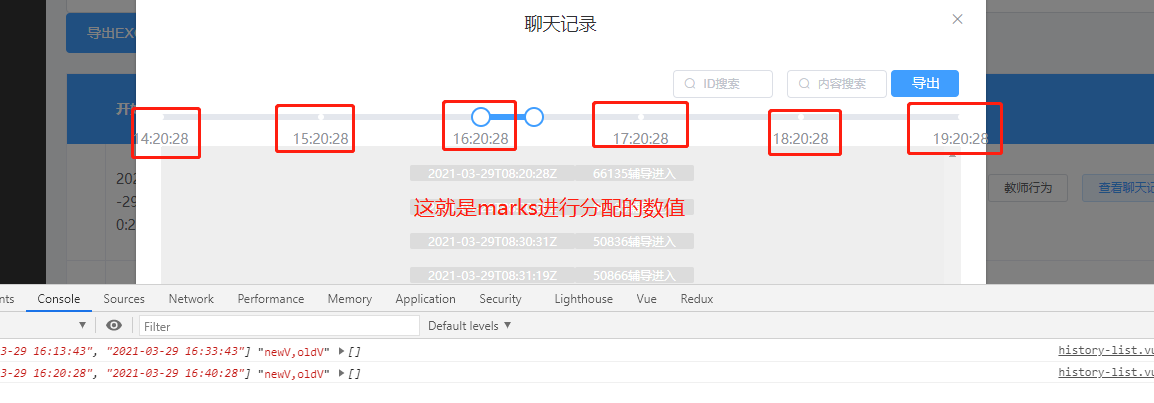
this.marks = {
0: this.focusTimeListTwo[2].substring(11, 19),
60: this.focusTimeListTwo[1].substring(11, 19),
120: this.focusTimeList[0].substring(11, 19),
180: this.focusTimeList[1].substring(11, 19),
240: this.focusTimeList[2].substring(11, 19),
300: this.focusTimeList[3].substring(11, 19)
}
if (val != null) {
var hour = this.focusTimeListTwo[2].substring(11, 13)
var min = this.focusTimeListTwo[2].substring(14, 16)
if (val < 60 || val == 60) {
min = min * 1 + val
if (min == 60) {
min = 0
hour = this.focusTimeListTwo[1].substring(11, 13) * 1
}
hour = hour * 1
if (min > 60) {
min = min - 60
hour = hour + 1
}
}
if ((val > 60 && val < 120) || val == 120) {
min = this.focusTimeListTwo[1].substring(14, 16) * 1
hour = this.focusTimeListTwo[1].substring(11, 13) * 1
min = min * 1 + val - 60
if (min == 60) {
min = 0
hour = this.focusTimeList[0].substring(11, 13) * 1
}
if (min > 60) {
min = min - 60
hour = hour + 1
}
}
if ((val > 120 && val < 180) || val == 120) {
min = this.focusTimeList[0].substring(14, 16) * 1
min = min * 1 + val - 120
hour = this.focusTimeList[0].substring(11, 13) * 1
if (min == 60) {
min = 0
hour = this.focusTimeList[1].substring(11, 13) * 1
}
if (min > 60) {
min = min - 60
hour = hour + 1
}
}
if ((val > 180 && val < 240) || val == 180) {
min = this.focusTimeList[1].substring(14, 16) * 1
min = min * 1 + val - 180
hour = this.focusTimeList[1].substring(11, 13) * 1
if (min == 60) {
min = 0
hour = this.focusTimeList[2].substring(11, 13) * 1
}
if (min > 60) {
min = min - 60
hour = hour + 1
}
}
if ((val > 240 && val < 300) || val == 240) {
min = this.focusTimeList[2].substring(14, 16) * 1
min = min * 1 + val - 240
hour = this.focusTimeList[2].substring(11, 13) * 1
if (min == 60) {
min = 0
hour = this.focusTimeList[3].substring(11, 13) * 1
}
if (min > 60) {
min = min - 60
hour = hour + 1
}
}
if (val == 300) {
min = this.focusTimeList[3].substring(14, 16) * 1
min = min * 1 + val - 300
hour = this.focusTimeList[3].substring(11, 13) * 1
if (min > 60) {
min = min - 60
hour = hour + 1
}
}
if (hour < 10) {
hour = '0' + hour
}
if (min < 10) {
min = '0' + min
}
this.hour = hour
this.min = min
const time = hour + ':' + min
return time
} else {
hour = 0
min = 0
hour = this.focusTimeList[0].substring(11, 13)
min = this.focusTimeList[0].substring(14, 16)
const time = hour + ':' + min
return time
}
},
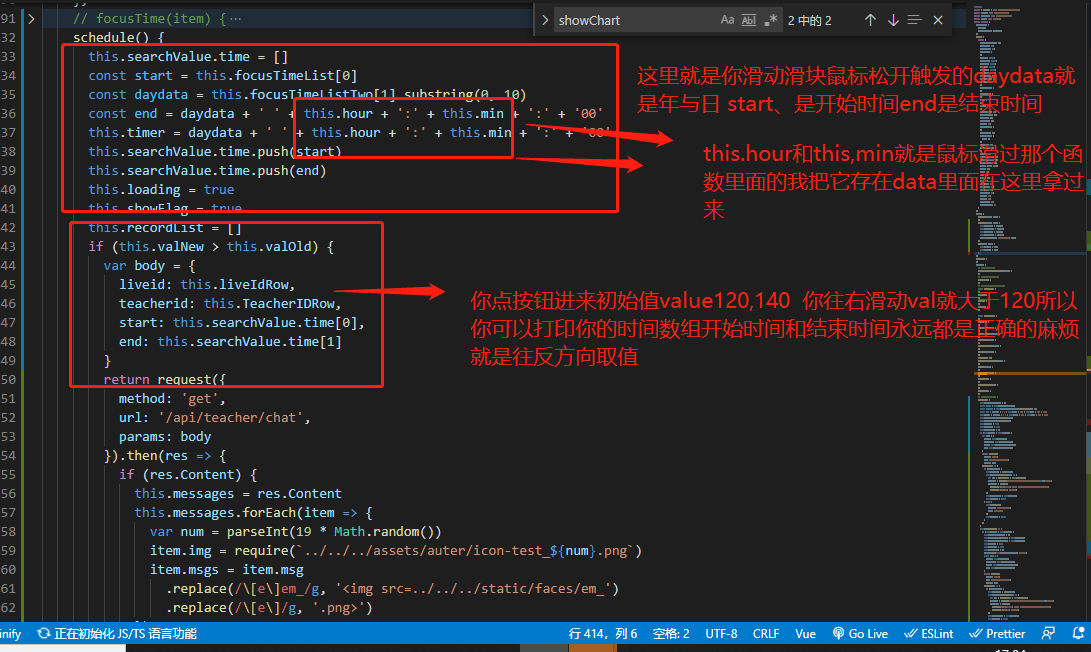
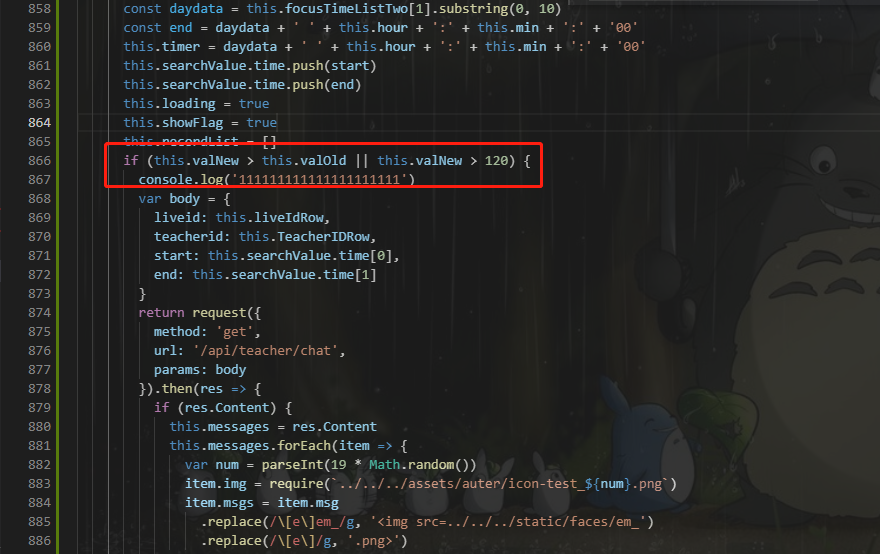
下面也是elementui自带函数大概意思就是你拖动划款松开鼠标触发的
schedule() {
this.searchValue.time = []
const start = this.focusTimeList[0]
const daydata = this.focusTimeListTwo[1].substring(0, 10)
const end = daydata + ' ' + this.hour + ':' + this.min + ':' + '00'
this.timer = daydata + ' ' + this.hour + ':' + this.min + ':' + '00'
this.searchValue.time.push(start)
this.searchValue.time.push(end)
this.loading = true
this.showFlag = true
this.recordList = []
if (this.valNew > this.valOld) {
var body = {
liveid: this.liveIdRow,
teacherid: this.TeacherIDRow,
start: this.searchValue.time[0],
end: this.searchValue.time[1]
}
return request({
method: 'get',
url: '/api/teacher/chat',
params: body
}).then(res => {
if (res.Content) {
this.messages = res.Content
this.messages.forEach(item => {
var num = parseInt(19 * Math.random())
item.img = require(`../../../assets/auter/icon-test_${num}.png`)
item.msgs = item.msg
.replace(/\[e\]em_/g, '<img src=../../../static/faces/em_')
.replace(/\[e\]/g, '.png>')
})
this.recordList = this.messages
this.loading = false
} else {
this.$message({
message: '无分析结果!',
type: 'warning'
})
this.loading = false
}
})
}
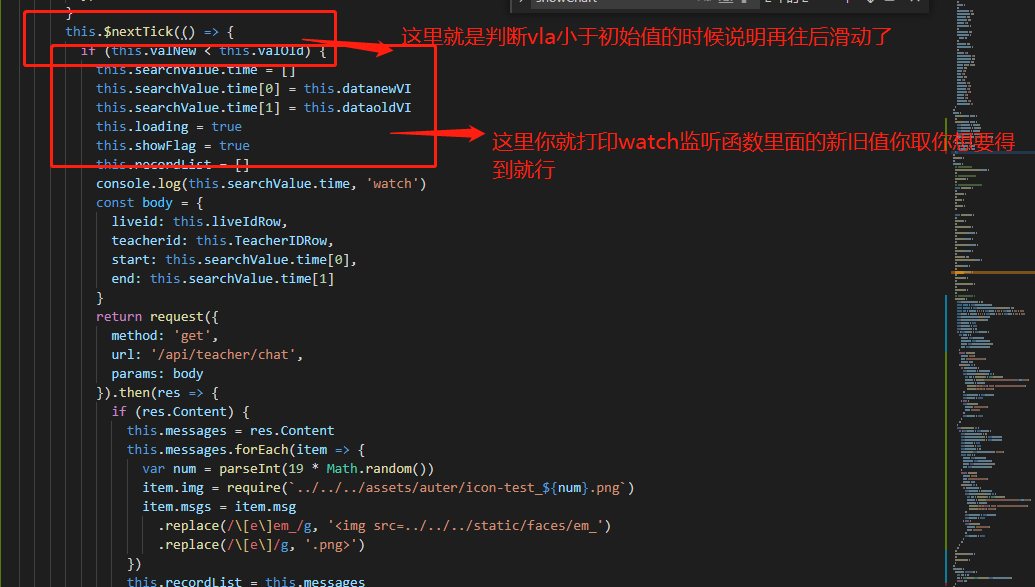
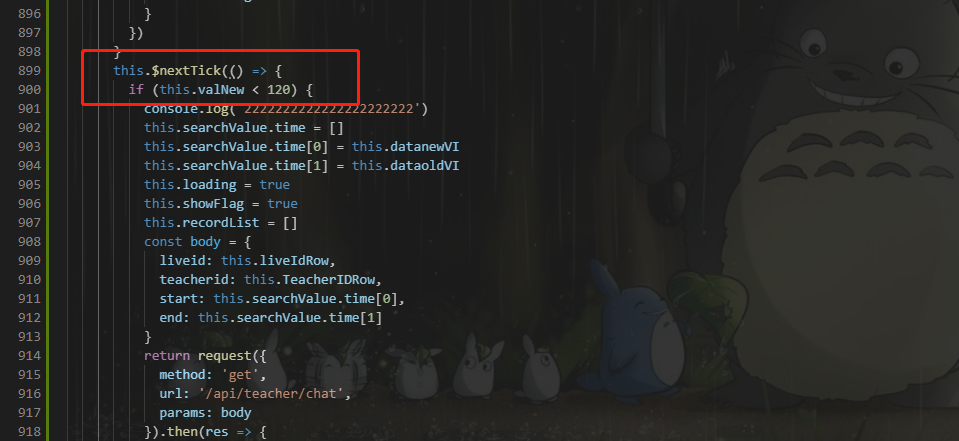
this.$nextTick(() => {
if (this.valNew < this.valOld) {
this.searchValue.time = []
this.searchValue.time[0] = this.datanewVI
this.searchValue.time[1] = this.dataoldVI
this.loading = true
this.showFlag = true
this.recordList = []
console.log(this.searchValue.time, 'watch')
const body = {
liveid: this.liveIdRow,
teacherid: this.TeacherIDRow,
start: this.searchValue.time[0],
end: this.searchValue.time[1]
}
return request({
method: 'get',
url: '/api/teacher/chat',
params: body
}).then(res => {
if (res.Content) {
this.messages = res.Content
this.messages.forEach(item => {
var num = parseInt(19 * Math.random())
item.img = require(`../../../assets/auter/icon-test_${num}.png`)
item.msgs = item.msg
.replace(/\[e\]em_/g, '<img src=../../../static/faces/em_')
.replace(/\[e\]/g, '.png>')
})
this.recordList = this.messages
this.loading = false
} else {
this.$message({
message: '无分析结果!',
type: 'warning'
})
this.loading = false
}
})
}
})
},
这个是计算函数 大概作用就是深拷贝
,
computed: {
datainit: function() {
var obj = {}
obj = JSON.parse(JSON.stringify(this.searchValue.time))
return obj
}
},
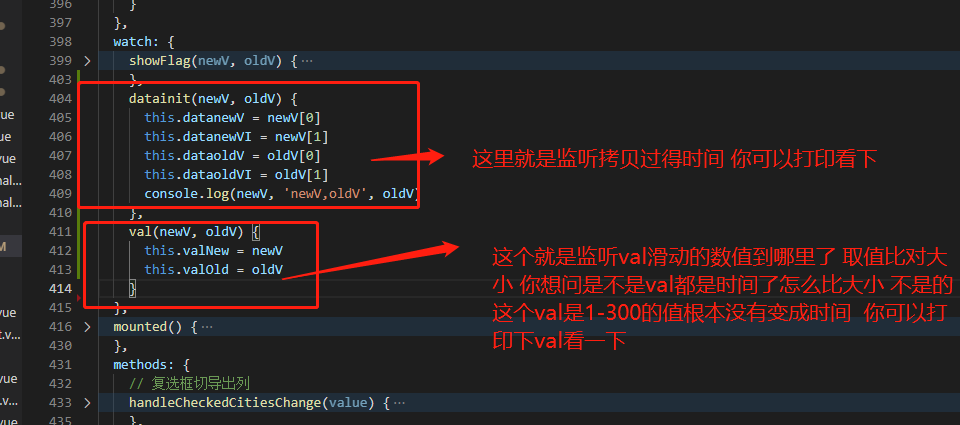
下面是监听函数 这就不用多说了 大家都懂监听
watch: {
datainit(newV, oldV) {
this.datanewV = newV[0]
this.datanewVI = newV[1]
this.dataoldV = oldV[0]
this.dataoldVI = oldV[1]
console.log(newV, 'newV,oldV', oldV)
},
val(newV, oldV) {
this.valNew = newV
this.valOld = oldV
}
},
贴代码是方便你们copy 下面就是带图讲解


完成上面这些你就可以随便滑动得到时间显示时间了
其实这个都很简单主要是取值问题是往后滑动没问题 怎么都能去取到值 就是往前拖动我怎么都拿不到前面的值 最后我想了办法把时间存起来深拷贝一下 再进行监听和新旧元素对比 这样就可以完美得到值了

这是刚开始进来

这是往前

这是往后

最后回去发现一开始进去就往左滑动会有bug进行改动改了就判断的地方
改成小于120还有大于120 这样就可以 但是bug还是有我服了 只能一开始进来右边滑块只能往右滑动 左边滑块只能往左滑动才能得到正确数据 一开始右边滑块往左移动和一开始进来左边滑块往右移动都拿不到正确数据 我枯了 求大神carry
3月31改动
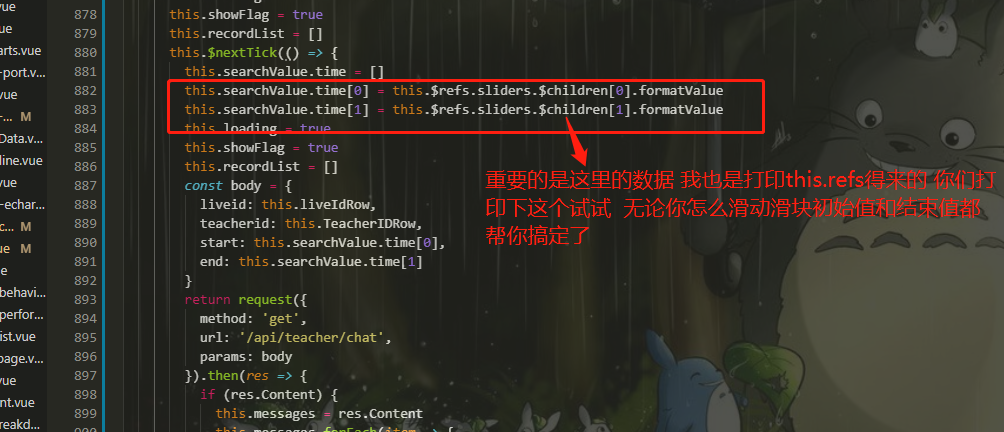
终于经过我不懈努力 终于完美实现滑块怎么动都可以拿到值 我也是无意之中想到的 在元素上绑定ref利用ref来得到数值 特别特别的方便
给大家看改过的代码 只改动这里就够了之前写了太多多余的代码了
schedule() {

      this.searchValue.time = []

      const start = this.focusTimeList[0]

      const daydata = this.focusTimeListTwo[1].substring(0, 10)

      const end = daydata + ' ' + this.hour + ':' + this.min + ':' + '00'

      this.searchValue.time.push(start)

      this.searchValue.time.push(end)

      this.loading = true

      this.showFlag = true

      this.recordList = []

      this.$nextTick(() => {

        this.searchValue.time = []

        this.searchValue.time[0] = this.$refs.sliders.$children[0].formatValue

        this.searchValue.time[1] = this.$refs.sliders.$children[1].formatValue

        this.loading = true

        this.showFlag = true

        this.recordList = []

        const body = {

          liveid: this.liveIdRow,

          teacherid: this.TeacherIDRow,

          start: this.searchValue.time[0],

          end: this.searchValue.time[1]

        }

        return request({

          method: 'get',

          url: '/api/teacher/chat',

          params: body

        }).then(res => {

          if (res.Content) {

            this.messages = res.Content

            this.messages.forEach(item => {

              var num = parseInt(19 * Math.random())

              item.img = require(`../../../assets/auter/icon-test_${num}.png`)

              item.msgs = item.msg

                .replace(/\[e\]em_/g, '<img src=../../../static/faces/em_')

                .replace(/\[e\]/g, '.png>')

            })

            this.recordList = this.messages

            this.loading = false

          } else {

            this.$message({

              message: '无分析结果!',

              type: 'warning'

            })

            this.loading = false

          }

        })

      })

    },

终于大功告成了
感谢大家 要觉得不错右侧打赏一下把
elementUI slider组件,带范围选择实现双向绑定的更多相关文章
- vue2.X props 数据传递 实现组件内数据与组件外的数据的双向绑定
vue2.0 禁止 子组件修改父组件数据 在Vue2中组件的props的数据流动改为了只能单向流动,即只能由组件外(调用组件方)通过组件的DOM属性attribute传递props给组件内,组件内只能 ...
- elementUI tree组件获取当前选择所有选中(check)和半选中(indeterminate)的节点
网上查了半天,一大堆都说要改源码的,最后发现有方法不用改源码的 获取方法如下 this.$refs.tree.getCheckedKeys().concat(this.$refs.tree.getHa ...
- vue.js组件之间通讯的数据双向绑定----父亲把数据传递给儿子,儿子更改数据后,重新发送给父亲,父亲数据更改后,属性会重新发送个儿子,儿子刷新新数据
vue组件是相互独立的,如果要交互通讯,这时候,就需要组件之间数据互通了 往常我们讲的都是数据传递,子传父,父传子,都没有说子和父,父与子之间的数据互通 父亲传递给儿子数据,儿子触发一个父亲方法,将最 ...
- 如何在Vue2中实现组件props双向绑定
Vue学习笔记-3 前言 Vue 2.x相比较Vue 1.x而言,升级变化除了实现了Virtual-Dom以外,给使用者最大不适就是移除的组件的props的双向绑定功能. 以往在Vue1.x中利用pr ...
- (复习)父子组件传值使用v-modal双向绑定,报错Avoid mutating a prop directly解决方案
报错:Avoid mutating a prop directly since the value will be overwritten whenever the parent component. ...
- Blazor和Vue对比学习(基础1.5):双向绑定
这章我们来学习,现代前端框架中最精彩的一部分,双向绑定.除了掌握原生HTML标签的双向绑定使用,我们还要在一个自定义的组件上,手撸实现双向绑定.双向绑定,是前两章知识点的一个综合运用(父传子.子传父) ...
- VUE JS 使用组件实现双向绑定
1.VUE 前端简单介绍 VUE JS是一个简洁的双向数据绑定框架,他的性能超过ANGULARJS,原因是实现的机制和ANGULARJS 不同,他在初始化时对数据增加了get和set方法,在数据se ...
- element-ui dialog组件添加可拖拽位置 可拖拽宽高
edge浏览器下作的gifhttp://www.lanourteam.com/%E6... 有几个点需要注意一下 每个弹窗都要有唯一dom可操作 指令可以做到 拖拽时要添加可拖拽区块 header 由 ...
- Elementui tabs组件内添加组件
1. Elementui tabs组件内添加组件 1.1. 需求 今天的一个需求是在后台框架的基础上添加tab页,结果页面如下 原本上述红框内的内容是不存在的,直接点击左侧菜单栏进行页面跳转,现加了t ...
- 自定义组件实现双向绑定v-model
自定义组件实现 v-model 双向绑定,首先要先明白 v-model,这个指令到底实现了什么? v-model实际做的事情就是:传入一个value属性值,然后监听input事件返回一个值,用该返回值 ...
随机推荐
- Hadoop HDFS 3.2的部署
之前写过HDFS 2.6的部署,最近项目中尝试使用最新的HDFS 3.2.1做离线存储,部署方式略有不同,所以这里再简单写一下,这里只涉及到存储因此不再配置yarn,只配置HDFS最基本的服务Name ...
- 力扣6(java)-Z字形变换(中等)
题目: 将一个给定字符串 s 根据给定的行数 numRows ,以从上往下.从左到右进行 Z 字形排列. 比如输入字符串为 "PAYPALISHIRING" 行数为 3 时,排列如 ...
- 连续两年入选Gartner公共云容器,阿里云在边缘容器方面做了什么?
最近,Gartner发布了2020年公共云容器报告,阿里云连续两年成为唯一入选的中国企业.报告显示,阿里云容器服务在中国市场表现强劲,产品形态丰富,在 Serverless 容器.服务网格.安全沙箱容 ...
- 行业实战 | 5G+边缘计算+“自由视角” 让体育赛事更畅快
简介: 世界本是多维的.进入5G时代,观众对多维度视觉体验的需求日益增长,5G MEC网络与边缘计算的结合,具备大带宽.低延迟特性,使视频多维视觉呈现成为现实.在第二十三届CUBA中国大学生篮球联赛期 ...
- 作业帮基于 DeltaLake 的数据湖建设最佳实践
简介:作业帮是一家以科技为载体的在线教育公司,其大数据中台作为基础系统中台,主要负责建设公司级数仓,向各个产品线提供面向业务主题的数据信息.本文主要分享了作业帮基于 DeltaLake 的数据湖建设 ...
- UOS 开启 VisualStudio 远程调试 .NET 应用之旅
本文记录的是在 Windows 系统里面,使用 VisualStudio 2022 远程调试运行在 UOS 里面 dotnet 应用的配置方法 本文写于 2024.03.19 如果你阅读本文的时间距离 ...
- 使用 SizeBench 分析 Exe 文件体积
本文将介绍微软开源免费的 SizeBench 工具,使用 SizeBench 工具可以用来分析 Exe 二进制文件的体积,分析 Exe 文件大小里面有哪些是可以优化的 下载安装方式: 请前往应用商店安 ...
- element-ui表单重置函数 resetFields 无效解决
由element-ui文档中能看到重置表单使用的是如下函数 this.$refs[formName].resetFields(); 但是有时使用它却可能会失效 解决: form-item中要加上pro ...
- RT-Thead的启动流程
一.RT-Thread启动流程 由于RT-Thread文档中心已经将得很详细了,这里我就不过多描述,有需要的可以看RT-Thread 文档中心,启动流程如下图所示: 从图中可以看出RT-Thread是 ...
- Oracle和达梦:相似度函数:UTL_MATCH
UTL_MATCH介绍: Oracle的UTL_MATCH包是一个提供字符串匹配和相似度计算功能的工具包.它包含了一系列函数,用于执行字符串比较.相似度计算和模式匹配等操作. UTL_MATCH包中的 ...