第一个WP8程序,照相机
安装win8 64位,vs2013(包含wp8 sdk),百度各种得到学生开发者账户之后,终于可以试一下将自己的app部署到手机上的感觉了。
首先来个简单练练手的照相机功能
- 照相
即从主界面进入到照相机界面,进行拍照,并对照片进行保存
- 相册
对已拍照片管理,查看,删除
- 界面设计
MainPage.xaml
<phone:PhoneApplicationPage

    x:Class="OpenCamera.MainPage"

    xmlns="http://schemas.microsoft.com/winfx/2006/xaml/presentation"

    xmlns:x="http://schemas.microsoft.com/winfx/2006/xaml"

    xmlns:phone="clr-namespace:Microsoft.Phone.Controls;assembly=Microsoft.Phone"

    xmlns:shell="clr-namespace:Microsoft.Phone.Shell;assembly=Microsoft.Phone"

    xmlns:d="http://schemas.microsoft.com/expression/blend/2008"

    xmlns:mc="http://schemas.openxmlformats.org/markup-compatibility/2006"

    mc:Ignorable="d"

    FontFamily="{StaticResource PhoneFontFamilyNormal}"

    FontSize="{StaticResource PhoneFontSizeNormal}"

    Foreground="{StaticResource PhoneForegroundBrush}"

    SupportedOrientations="Portrait" Orientation="Portrait"

    shell:SystemTray.IsVisible="True">

    <Grid>

        <Button Width="200" Height="200" Content="拍照" Click="ButtonBase_OnClick"></Button>

    </Grid>

</phone:PhoneApplicationPage>
MainPage.xaml.cs
public partial class MainPage : PhoneApplicationPage

    {

        // 构造函数

        public MainPage()

        {

            InitializeComponent();

        }

        private void ButtonBase_OnClick(object sender, RoutedEventArgs e)

        {

            this.NavigationService.Navigate(new Uri("/Camera.xaml", UriKind.RelativeOrAbsolute));

        }

    }
意思就很简单了,点击拍照,就进入照相界面
下面拍照界面Camera.xaml
<Grid x:Name="LayoutRoot" Background="Transparent">

        <Grid.RowDefinitions>

            <RowDefinition/>

            <RowDefinition Height="200"/>

        </Grid.RowDefinitions>

        <Canvas>

            <Canvas.Background>

                <VideoBrush x:Name="VideoBrush"></VideoBrush>

            </Canvas.Background>

        </Canvas>

        <StackPanel Grid.Row="1">

            <Button Width="200" Height="200" Content="拍照" Click="ButtonBase_OnClick">

            </Button>

        </StackPanel>

    </Grid>
一个Canvas用于显示照相机捕捉到的图像
一个按钮,用于拍照
- PhotoCamera
上MSDN查询:http://msdn.microsoft.com/zh-cn/library/microsoft.devices.photocamera(v=vs.92).aspx
备注中提到一些实用方法,其中提到了几个方法
OnNavigatedTo(导航到本页面时触发)
OnNavigatedFrom(离开本页面后触发)
OnNavigatingFrom(离开本页面之前触发)
在Camera.xaml.cs中依次重写了3个方法,都打上断点,看执行顺序,发现执行过程是 点击拍照按钮=》OnNavigatedTo=》点击返回=>OnNavigatingFrom=》OnNavigatedFrom
好,现在就明白了,在OnNavigatedTo中来初始化PhotoCamera对象实例,并捕捉图像到Canvas上
protected override void OnNavigatedTo(NavigationEventArgs e)

        {

            _cam = new PhotoCamera(CameraType.Primary);

            VideoBrush.SetSource(_cam);

            base.OnNavigatedTo(e);

        }
好,此刻已按捺不住激动的心情了,编译,在模拟器中调试....,但是,程序出错。再次查看MSDN,发现这里
有个东西需要设置一下

好,现在在编译,运行,模拟器中如下
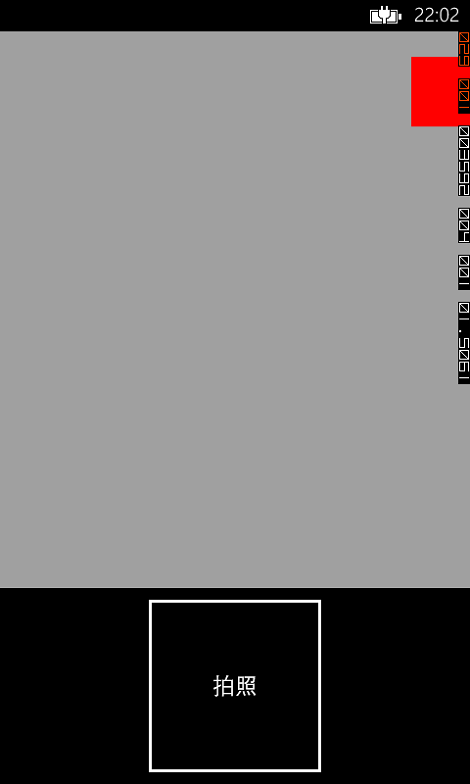
心想,这该没有什么问题了吧,插上手机,部署

运行,果然能够显示图像了。有点小兴奋。
- 拍照
拍照就很简单了,调用一个方法即可
private void ButtonBase_OnClick(object sender, RoutedEventArgs e)

        {

            _cam.CaptureImage();

        }
- 保存照片
调用了CaptrueImage方法,本以为会返回照片,但是继续查看MSDN发现需要注册一个事件,来获得图片。
这里还用到了一个类MediaLibrary:http://msdn.microsoft.com/query/dev12.query?appId=Dev12IDEF1&l=ZH-CN&k=k(Microsoft.Xna.Framework.Media.MediaLibrary);k(TargetFrameworkMoniker-WindowsPhone,Version%3Dv8.0);k(DevLang-csharp)&rd=true
但是,这里需要注意一下,使用MediaLibrary来保存数据还需要这一步设置,如下图:

这样,MediaLibrary才能正常使用(MSDN上没有说明这个:坑呀)
这里注册图片可用事件
protected override void OnNavigatingFrom(NavigatingCancelEventArgs e)

        {

            if (_cam != null)

            {

                _cam.Dispose();

                _cam.Initialized -= _cam_Initialized;

                _cam.CaptureCompleted -= _cam_CaptureCompleted;

                _cam.CaptureImageAvailable -= _cam_CaptureImageAvailable;

                _cam.CaptureThumbnailAvailable -= _cam_CaptureThumbnailAvailable;

            }

            base.OnNavigatingFrom(e);

        }

        protected override void OnNavigatedTo(NavigationEventArgs e)

        {

            _cam = new PhotoCamera(CameraType.Primary);

            _library = new MediaLibrary();

            VideoBrush.SetSource(_cam);

            _cam.Initialized += _cam_Initialized;

            _cam.CaptureCompleted += _cam_CaptureCompleted;//照相完成事件

            _cam.CaptureImageAvailable += _cam_CaptureImageAvailable;//图片可用事件

            _cam.CaptureThumbnailAvailable += _cam_CaptureThumbnailAvailable;//缩略图可用事件

            base.OnNavigatedTo(e);

        }
在OnNvaigatingForm中取消订阅事件
现在主要关注CaptureImageAvailable事件,该事件当照相生成的图片可以使用时触发,先不要关注注释部分的代码,这样就能将照片保存到手机相册里了
void _cam_CaptureImageAvailable(object sender, ContentReadyEventArgs e)

        {

            string fileName = string.Format("{0}-{1}-{2}", DateTime.Now.Hour, DateTime.Now.Minute, DateTime.Now.Second) + ".jpg";

            _library.SavePictureToCameraRoll(fileName, e.ImageStream);

            #region 独立存储

            //string floderName = "Photo";

            //string fileName = string.Format("{0}-{1}-{2}", DateTime.Now.Hour, DateTime.Now.Minute, DateTime.Now.Second) + ".jpg";

            //string fullName = Path.Combine(floderName, fileName);

            //using (IsolatedStorageFile file = IsolatedStorageFile.GetUserStoreForApplication())

            //{

            //    if (!file.DirectoryExists(floderName))

            //    {

            //        file.CreateDirectory(floderName);

            //    }

            //    if (!file.FileExists(fullName))

            //    {

            //        using (IsolatedStorageFileStream fileStream = file.OpenFile(fullName, FileMode.Create, FileAccess.Write))

            //        {

            //            byte[] readBuffer = new byte[4069];

            //            int bytesRead = -1;

            //            while ((bytesRead = e.ImageStream.Read(readBuffer, 0, readBuffer.Length)) > 0)

            //            {

            //                fileStream.Write(readBuffer, 0, bytesRead);

            //            }

            //        }

            //    }

            //}

            #endregion

            e.ImageStream.Close();

        }
但是,我们要制作自己的相册,就需要独立存储。
- 独立存储
独立存储这一块请看MSDN吧,http://msdn.microsoft.com/zh-cn/library/system.io.isolatedstorage.isolatedstoragefile(v=vs.110).aspx
注释部分的代码就是将图片保存到独立存储中,而不是手机的相册中。
- 相册
相册就是将所拍的照片展示出来,暂时用ListBox实现
界面Photo.xaml
<Grid x:Name="LayoutRoot" Background="Transparent">

        <Grid.RowDefinitions>

            <RowDefinition Height="Auto"/>

            <RowDefinition Height="*"/>

        </Grid.RowDefinitions>

        <!--TitlePanel 包含应用程序的名称和页标题-->

        <StackPanel Grid.Row="0" Orientation="Horizontal" Margin="12,17,0,28">

            <TextBlock Text="相册" Margin="9,-7,0,0" Style="{StaticResource PhoneTextTitle1Style}"/>

            <Image x:Name="TestImage"></Image>

        </StackPanel>

        <!--ContentPanel - 在此处放置其他内容-->

        <Grid x:Name="ContentPanel" Grid.Row="1" Margin="12,0,12,0">

            <ListBox ItemsSource="{Binding AllPhoto}">

                <ListBox.ItemTemplate>

                    <DataTemplate>

                        <StackPanel>

                            <Image Source="{Binding}"></Image>

                        </StackPanel>

                    </DataTemplate>

                </ListBox.ItemTemplate>

            </ListBox>

        </Grid>

    </Grid>
Photo.xaml.cs
#region 字段

        private ObservableCollection<BitmapImage> _allPhoto;

        #endregion

        #region 属性

        public ObservableCollection<BitmapImage> AllPhoto

        {

            get

            {

                return _allPhoto;

            }

            set

            {

                _allPhoto = value;

                OnPropertyChanged("AllPhoto");

            }

        }

        #endregion

        public Photos()

        {

            InitializeComponent();

            this.DataContext = this;

            AllPhoto=new ObservableCollection<BitmapImage>();

        }

        #region 导航事件

        protected override void OnNavigatedTo(NavigationEventArgs e)

        {

            using(IsolatedStorageFile file=IsolatedStorageFile.GetUserStoreForApplication())

            {

                if (file.DirectoryExists("PhotoTH"))

                {

                    string[] fileNames = file.GetFileNames("/PhotoTH/");

                    foreach (var fileName in fileNames)

                    {

                        using (IsolatedStorageFileStream fileStream = file.OpenFile("/PhotoTH/" + fileName, FileMode.Open))

                        {

                            BitmapImage bitmapImage=new BitmapImage();

                            bitmapImage.SetSource(fileStream);

                            AllPhoto.Add(bitmapImage);

                        }

                    }

                }

            }

            base.OnNavigatedTo(e);

        }

        #endregion

        public event PropertyChangedEventHandler PropertyChanged;

        private void OnPropertyChanged(string propertyName)

        {

            if (PropertyChanged != null)

            {

                PropertyChanged(this,new PropertyChangedEventArgs(propertyName));

            }

        }
这样就能将图所拍照片的图片显示出来了。
- 相片删除
这里一般都是长按相片,然后弹出菜单可以选择“删除”选项,这个就用到类似于WPF的ContextMenu,但是弄死在WP8项目中就是没有ContextMenu,各种百度之后,得知需要引用MicroSoft.Phone.Control.ToolKit
该Dll在http://www.nuget.org/packages/wptoolkit
下载之后,我们的Photo界面就要稍微修改,下面是修改之后的Photo.xaml
<!--LayoutRoot 是包含所有页面内容的根网格-->

    <Grid x:Name="LayoutRoot" Background="Transparent">

        <Grid.RowDefinitions>

            <RowDefinition Height="Auto"/>

            <RowDefinition Height="*"/>

        </Grid.RowDefinitions>

        <!--TitlePanel 包含应用程序的名称和页标题-->

        <StackPanel Grid.Row="0" Orientation="Horizontal" Margin="12,17,0,28">

            <TextBlock Text="相册" Margin="9,-7,0,0" Style="{StaticResource PhoneTextTitle1Style}"/>

            <Image x:Name="TestImage"></Image>

        </StackPanel>

        <!--ContentPanel - 在此处放置其他内容-->

        <Grid x:Name="ContentPanel" Grid.Row="1" Margin="12,0,12,0">

            <ListBox ItemsSource="{Binding AllPhoto}">

                <ListBox.ItemTemplate>

                    <DataTemplate>

                        <Button Width="200" Height="200">

                            <Button.Template>

                                <ControlTemplate TargetType="Button">

                                    <Grid>

                                        <Grid.Background>

                                            <ImageBrush ImageSource="{Binding Source}">

                                                <ImageBrush.RelativeTransform>

                                                    <CompositeTransform CenterX="0.5" CenterY="0.5" Rotation="90"></CompositeTransform>

                                                </ImageBrush.RelativeTransform>

                                            </ImageBrush>

                                        </Grid.Background>

                                    </Grid>

                                </ControlTemplate>

                            </Button.Template>

                            <toolkit:ContextMenuService.ContextMenu>

                                <toolkit:ContextMenu>

                                    <toolkit:MenuItem Header="删除" Click="MenuItem_OnClick" Tag="{Binding}"></toolkit:MenuItem>

                                </toolkit:ContextMenu>

                            </toolkit:ContextMenuService.ContextMenu>

                        </Button>

                    </DataTemplate>

                </ListBox.ItemTemplate>

            </ListBox>

        </Grid>

    </Grid>
这里需要注意一下,一开始我们直接绑定的BitmapImage来获取图片,但是这样在删除的时候,不仅要从集合中删除BitmapImage,还要从独立存储中删除该图片,而BitmapImage获取UriSource不到(希望有同学解释一下),这里只能变通一下,创建类Photo
public class Photo

    {

        public string FileName

        {

            get;

            set;

        }

        public string FullName

        {

            get;

            set;

        }

        public BitmapImage Source

        {

            get;

            set;

        }

    }
这样我们集合中存储的就是该Photo类型的变量,有文件名,还有包含整个路径的文件名,还有BitmapImage对象,这样删除的时候,就非常容易了,下面是删除图片的代码
private void MenuItem_OnClick(object sender, RoutedEventArgs e)

        {

            MenuItem item = sender as MenuItem;

            Photo photo = item.Tag as Photo;

            AllPhoto.Remove(photo);

            using (IsolatedStorageFile file = IsolatedStorageFile.GetUserStoreForApplication())

            {

                if (file.FileExists(photo.FullName))

                {

                    file.DeleteFile(photo.FullName);

                }

            }

        }
好了,至此,大致的功能就完成了。以为是一个很简单的东西,其实其中还包含了一些未知的东西,如独立存储,还有配置文件(勾选相机功能可用的那个)等等,目前也就是学了个大概,后面还要慢慢深入。
Demo:http://files.cnblogs.com/HelloMyWorld/OpenCamera.rar
人生还有无限可能,不要放弃努力。
第一个WP8程序,照相机的更多相关文章
- 关于 WP上应用调试时报错“指定的通信资源(端口)”已由另一个应用程序使用 问题
问题来源 碰到这个问题是调试wp7项目的时候,之前因为安装的是wp8.0的sdk 包括wp7.5所以wp7的也能用,后来不知道怎么回事wp7项目就不能调试了总是显示启动而不是 device或者是虚拟机 ...
- DirectX游戏编程(一):创建一个Direct3D程序
一.环境 Visual Studio 2012,DirectX SDK (June 2010) 二.准备 1.环境变量(如没有配置请添加) 变量名:DXSDK_DIR 变量值:D:\Software\ ...
- 第一个python程序
一个python程序的两种执行方式: 1.第一种方式是通过python解释器: cmd->python->进入python解释器->编写python代码->回车. 2.第二种方 ...
- 编写第一个MapReduce程序—— 统计气温
摘要:hadoop安装完成后,像学习其他语言一样,要开始写一个“hello world!” ,看了一些学习资料,模仿写了个程序.对于一个C#程序员来说,写个java程序,并调用hadoop的包,并跑在 ...
- 1.3 第一个C#程序
几乎没一门编程语言的第一个程序都叫“你好,世界”,所以先在visual studio 中创建一个Helloworld程序. 各部分的详细内容: Main方法是程序运行的起点,最重要的代码就写在Main ...
- 一个.net程序员的安卓之旅-Eclipse设置代码智能提示功能
一个.net程序员的安卓之旅-代码智能提示功能 过完年回来就决心开始学安卓开发,就网上买了个内存条加在笔记本上(因为笔记本原来2G内存太卡了,装了vs2010.SQL Server 2008.orac ...
- MFC-01-Chapter01:Hello,MFC---1.3 第一个MFC程序(02)
1.3.1 应用程序对象 MFC应用程序的核心就是基于CWinApp类的应用程序对象,CWinApp提供了消息循环来检索消息并将消息调度给应用程序的窗口.当包含头文件<afxwin.h>, ...
- Go! new Hello World, 我的第一个Go程序
以下语句摘自百度百科: Go语言是谷歌2009发布的第二款开源编程语言. Go语言专门针对多处理器系统应用程序的编程进行了优化,使用Go编译的程序可以媲美C或C++代码的速度,而且更加安全.支持并行进 ...
- 搭建java开发环境、使用eclipse编写第一个java程序
搭建java开发环境.使用eclipse编写第一个java程序 一.Java 开发环境的搭建 1.首先安装java SDK(简称JDK). 点击可执行文件 jdk-6u24-windows-i586. ...
随机推荐
- windows下vagrant使用及工作环境配置
环境搭建记录(2014-08-01) 操作系统: Win7旗舰版 Vagrant版本: 1.6 搭建过程 安装vagrant 右键打开安装包按照提示安装即可 安装后会自动把vagrant添加到环境变量 ...
- Dev Grid拖拽移动行
效果图 源码下载 拖拽时带行截图效果实现代码 /// <summary> /// 拖拽帮助类 /// </summary> public static class DragHe ...
- CIO的职责、条件及价值
从ERP项目的成功率中,我们可以知道企业的信息化道路是漫长的:从企业对ERP的投资热情中,我们可以知道企业信息化已经是企业的生死之战.对于信息化的成功,许多专家.学者都在强调“一把手”工程,ISO要“ ...
- Effective Java 54 Use native methods judiciously
Java Native Interface(JNI) allows Java applications to call native methods, which are special method ...
- JavaScript Patterns 3.7 Primitive Wrappers
Primitive value types: number, string, boolean, null, and undefined. // a primitive number var n = 1 ...
- Ajax详解及其案例分析------如何获得Ajax对象,使用Ajax对象发送GET和POST请求,校验用户名,POST和GET请求时的乱码处理,实现级联的下拉列表
本节主要内容预览: 1 获得Ajax对象 2 使用Ajax对象发送GET请求 3 使用Ajax对象发送POST请求 4 使用Ajax校验用户名 5 POST请求时的乱码处理 6 GET请求时的乱码处理 ...
- zoj 3229 Shoot the Bullet(无源汇上下界最大流)
题目:Shoot the Bullet 收藏:http://www.tuicool.com/articles/QRr2Qb 把每一天看成一个点,每个女孩也看成一个点,增加源和汇s.t,源向每一天连上[ ...
- PHP Cannot redeclare class CLassName
可能导致Cannot redeclare class CLassName错误的原因: 1.在同一个文件中重复声明了两次同名的类: class Extend {} class Extend {} new ...
- 二分+DP HDU 3433 A Task Process
HDU 3433 A Task Process Time Limit: 2000/1000 MS (Java/Others) Memory Limit: 32768/32768 K (Java/ ...
- codeforces 710E E. Generate a String(dp)
题目链接: E. Generate a String time limit per test 2 seconds memory limit per test 512 megabytes input s ...