SharePreference是如何实现的——序列化XML文件
还记得上一篇我们讲到了用SharePreference来存储数据,那么究竟它是如何实现的呢,今天我们就来仔细看看其实现的细节,我们给它一个准确的名字,叫做XML序列化器(XmlSerializer)。
不同于上面一篇的保存用户的登录名以及密码,这次我们保存设备中的信息,但是由于现在知识有限,我还不能够实现对设备中信息的读取,那么我就在程序中自己生成若干条信息,对这些生成的信息进行读取,并保存到位于SD卡的backup.xml文件中。在这里我是用两种方法对其进行存储并比较两种方法的优缺点,当然作为开发,我更建议使用待会讲到的第二种方法。
先来看看我们需要做到什么样的效果:
图一
第一种方法:使用StringBuffer,将所有的内容逐一追加到该字符流中。
 public void backUpSms1(View view){

         StringBuffer sb=new StringBuffer();

         sb.append("<?xml version=\"1.0\" encoding=\"UTF-8\" ?>");

         sb.append("<smss>");

         for (SmsInfo smsinfo: smsInfo) {

             sb.append("<sms>");

             sb.append("<address>");

             sb.append(smsinfo.getAddress());

             sb.append("</address>");

             sb.append("<date>");

             sb.append(smsinfo.getDate());

             sb.append("</date>");

             sb.append("<content>");

             sb.append(smsinfo.getContent());

             sb.append("</content>");

             sb.append("<type>");

             sb.append(smsinfo.getType());

             sb.append("</type>");

             sb.append("</sms>");

         }

         sb.append("</smss>");

         try {

             File file =new File(Environment.getExternalStorageDirectory(), "backUp1.xml");

             FileOutputStream fos =new FileOutputStream(file);

             fos.write(sb.toString().getBytes());

             fos.close();

             Toast.makeText( this, "备份成功",0).show();

         } catch (Exception e) {

             e.printStackTrace();

             Toast.makeText( this, "备份失败",0).show();

         }

     }
第一种方法相当简单,只是用了一个字符流,将所有的内容逐一追加就行了,可是当我们的短信中出现了一些比较特殊的字符,例如:"<"或者是">"那么在读取并写入到xml文件的时候就会出错,这个时候打开该xml文件的时候将会报错;另外当我们需要在sms标签中加入一些属性,如图一所示,那么这个时候仅仅利用字符流来写就会变得冗杂,而且逻辑关系就不严谨了,所以这个时候我们就需要用到第二种方法了。
第二种方法(推荐):XML序列化器(使用XmlSerializer编辑xml文件)
 public void backUpSms2(View view) {

         try {

             //初始化序列号器,指定xml写入到哪个文件并指定写入的编码格式

             XmlSerializer xmlSerializer =Xml.newSerializer();

             File file =new File(Environment.getExternalStorageDirectory(), "backUp2.xml");

             FileOutputStream fos=new FileOutputStream(file);

             xmlSerializer.setOutput(fos,"utf-8");

             xmlSerializer.startDocument("utf-8", true);//开始声明文件

             xmlSerializer.startTag(null, "smss");//开始最外层标签

             for (SmsInfo sms : smsInfo) {

                 xmlSerializer.startTag(null, "sms");//写入第一个标签

                 xmlSerializer.attribute(null, "id", sms.getId()+"");//第一个标签的属性

                 xmlSerializer.startTag(null, "address");//写入内一层的标签

                 xmlSerializer.text(sms.getAddress());

                 xmlSerializer.endTag(null, "address");

                 xmlSerializer.startTag(null, "date");//写入内一层的标签

                 xmlSerializer.text(sms.getDate()+"");

                 xmlSerializer.endTag(null, "date");

                 xmlSerializer.startTag(null, "content");//写入内一层的标签

                 xmlSerializer.text(sms.getContent());

                 xmlSerializer.endTag(null, "content");

                 xmlSerializer.startTag(null, "type");//写入内一层的标签

                 xmlSerializer.text(sms.getType()+"");

                 xmlSerializer.endTag(null, "type");

                 xmlSerializer.endTag(null, "sms");//结束标签

             }

             xmlSerializer.endTag(null, "smss");//结束最外层标签

             xmlSerializer.endDocument();//结束声明文件

             fos.close();//记得一定要关闭输出流

             Toast.makeText( this, "备份成功",0).show();

         } catch (Exception e) {

             e.printStackTrace();

             Toast.makeText( this, "备份失败",0).show();

         }

     }
使用XmlSerializer的时候有几个步骤:1、首先需要找到输出流,即通过setOutput方法将输出流以及编码格式传入;2、接着需要声明文件以及结束声明,这是通过startDocument以及endDocument这两个方法来实现的;3、接着就可以通过startTag以及startTag方法来声明标签以及结束标签,要声明标签的内容的时候可以通过text方法,当然这个方法只能允许传入String类型,所以对于其他数据类型,需要先对其进行转换;4、最后一点就是上面讲到的——要在标签中添加属性,那就需要通过attribute方法声明id属性。
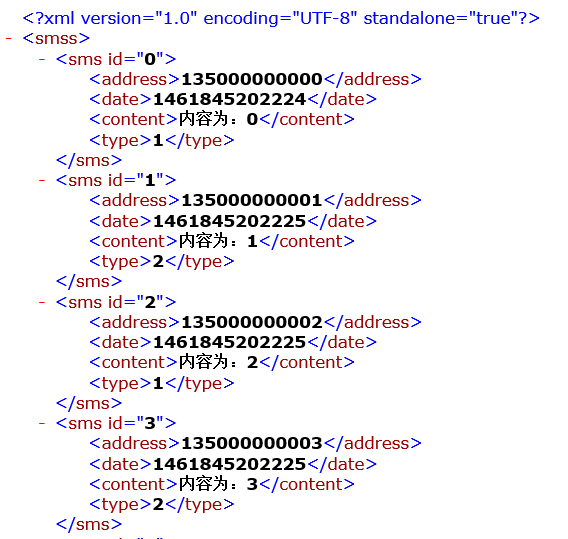
通过以上的讲解,我们可以得到以下的xml文件:
 <?xml version="1.0" encoding="UTF-8" standalone="true"?>

 -<smss>

 -<sms id="0">

 <address>135000000000</address>

 <date>1461845202224</date>

 <content>内容为:0</content>

 <type>1</type>

 </sms>

 -<sms id="1">

 <address>135000000001</address>

 <date>1461845202225</date>

 <content>内容为:1</content>

 <type>2</type>

 </sms>

 -<sms id="2">

 <address>135000000002</address>

 <date>1461845202225</date>

 <content>内容为:2</content>

 <type>1</type>

 </sms>

 -<sms id="3">

 <address>135000000003</address>

 <date>1461845202225</date>

 <content>内容为:3</content>

 <type>2</type>

 </sms>

 -<sms id="4">

 <address>135000000004</address>

 <date>1461845202225</date>

 <content>内容为:4</content>

 <type>2</type>

 </sms>

 -<sms id="5">

 <address>135000000005</address>

 <date>1461845202225</date>

 <content>内容为:5</content>

 <type>2</type>

 </sms>

 -<sms id="6">

 <address>135000000006</address>

 <date>1461845202225</date>

 <content>内容为:6</content>

 <type>2</type>

 </sms>

 -<sms id="7">

 <address>135000000007</address>

 <date>1461845202225</date>

 <content>内容为:7</content>

 <type>2</type>

 </sms>

 -<sms id="8">

 <address>135000000008</address>

 <date>1461845202225</date>

 <content>内容为:8</content>

 <type>1</type>

 </sms>

 -<sms id="9">

 <address>135000000009</address>

 <date>1461845202225</date>

 <content>内容为:9</content>

 <type>2</type>

 </sms>

 -<sms id="10">

 <address>135000000010</address>

 <date>1461845202225</date>

 <content>内容为:10</content>

 <type>1</type>

 </sms>

 -<sms id="11">

 <address>135000000011</address>

 <date>1461845202225</date>

 <content>内容为:11</content>

 <type>2</type>

 </sms>

 -<sms id="12">

 <address>135000000012</address>

 <date>1461845202225</date>

 <content>内容为:12</content>

 <type>2</type>

 </sms>

 -<sms id="13">

 <address>135000000013</address>

 <date>1461845202225</date>

 <content>内容为:13</content>

 <type>2</type>

 </sms>

 -<sms id="14">

 <address>135000000014</address>

 <date>1461845202225</date>

 <content>内容为:14</content>

 <type>2</type>

 </sms>

 -<sms id="15">

 <address>135000000015</address>

 <date>1461845202225</date>

 <content>内容为:15</content>

 <type>1</type>

 </sms>

 -<sms id="16">

 <address>135000000016</address>

 <date>1461845202225</date>

 <content>内容为:16</content>

 <type>1</type>

 </sms>

 -<sms id="17">

 <address>135000000017</address>

 <date>1461845202225</date>

 <content>内容为:17</content>

 <type>1</type>

 </sms>

 -<sms id="18">

 <address>135000000018</address>

 <date>1461845202225</date>

 <content>内容为:18</content>

 <type>2</type>

 </sms>

 -<sms id="19">

 <address>135000000019</address>

 <date>1461845202225</date>

 <content>内容为:19</content>

 <type>1</type>

 </sms>

 </smss>
2016-04-29
BOB
--开始忙碌的五一
SharePreference是如何实现的——序列化XML文件的更多相关文章
- 如何引用XML文件生成C#类
目录 XSD File Generate Class File Simply. 1 Why use XSD file to create C# classes?... 2 How to convert ...
- Android 使用xml序列化器生成xml文件
在<Android 生成xml文件>一文中使用流的形式写入xml格式文件,但是存在一定的问题,那就是在短信内容中不能出现<>之类的括号,本文使用xml序列化器来解决 xml序列 ...
- 使用XML序列化器生成XML文件和利用pull解析XML文件
首先,指定XML格式,我指定的XML格式如下: <?xml version='1.0' encoding='utf-8' standalone='yes' ?> <message&g ...
- XML文件序列化和反序列化的相关内容
问题缘由: XML反序列化出错,XML 文档(2, 2)中有错误,不应有 <configuration xmlns=''> 解决方法: 其实这个是很简单的,因为一般来说都是XML文档书写错 ...
- 使用XMl序列化器生成xml文件
生成XML文件 创建几个虚拟的短信对象,存在list中 备份数据通常都是备份至sd卡 使用StringBuffer拼接字符串 把整个xml文件所有节点append到sb对象里 sb.append(&q ...
- WebAPI调用笔记 ASP.NET CORE 学习之自定义异常处理 MySQL数据库查询优化建议 .NET操作XML文件之泛型集合的序列化与反序列化 Asp.Net Core 轻松学-多线程之Task快速上手 Asp.Net Core 轻松学-多线程之Task(补充)
WebAPI调用笔记 前言 即时通信项目中初次调用OA接口遇到了一些问题,因为本人从业后几乎一直做CS端项目,一个简单的WebAPI调用居然浪费了不少时间,特此记录. 接口描述 首先说明一下,基于 ...
- Android中XML文件的序列化生成与解析
xml文件是非常常用的,在android中json和xml是非常常用的两种封装数据的形式,从服务器中获取数据也经常是这两种形式的,所以学会生成和解析xml和json是非常有用的,json相对来说是比较 ...
- XML文件的写,集合XML序列化(写)。XML文件的读,递归遍历
XML文件:必须要有一个节点.检验xml文件,可以用浏览器打开,能打开表示对,否则错. 处理方法: DOM:XmlDocument文档对象模型 Sax(事件驱动,XmlReader) XmlSeria ...
- Android -- 创建XML文件对象及其序列化, pull解析XML文件
1. 创建XML文件对象及其序列化 示例代码:(模拟以xml格式备份短信到SD卡) SmsInfo.java, bean对象 /** * 短信的业务bean * @author Administrat ...
随机推荐
- SQL:一句话删除重复的数据
--构造原始数据 )) --插入数据 INSERT INTO #T (N)VALUES ('A') --方式一:一句话删除重复数据(无主键) --方式二:采用CTQ,with的写法删除 ;
- iOS-上拉刷新,下拉加载-----------详解
一.使用的第三方库 1.AFNetworking ----> 网络请求 2. MJRefresh ----> 刷新 3. MBProgressHUD -- ...
- Android 学习笔记多媒体技术之 Drawable类+Tween(补间动画)+Frame(帧动画)
学习内容: 1.了解Drawable类的作用 2.如何使用Drawable... 3.了解Tween动画... 4.如何创建和使用Tween动画... 1.Drawable类... Drawabl ...
- Tools Function
public static void TraceLog(string message, string logFileName) { string tmppath = AppDomain.Current ...
- scrum1.4---Sprint 计划
燃尽图
- SCRUM项目 4.0
4.0----------------------------------------------- 1.准备看板. 形式参考图4. 2.任务认领,并把认领人标注在看板上的任务标签上. 先由个人主动领 ...
- JS Date.Format
// 对Date的扩展,将 Date 转化为指定格式的String // 月(M).日(d).小时(h).分(m).秒(s).季度(q) 可以用 1-2 个占位符, // 年(y)可以用 1-4 个占 ...
- How to remove replication in SyteLine V2
以前曾经写了一篇<How to remove replication in Syteline>http://www.cnblogs.com/insus/archive/2011/12/20 ...
- extjs grid renderer用法
extjs grid renderer用法 摘自:http://www.cnblogs.com/ljian/archive/2011/10/27/2226959.html var cm = new E ...
- [水]用vb写了个PCB
这学期我们学操作系统,所以得写个PCB. 于是我借鉴了一下windows的PCB,写了这个 Imports System.Runtime.InteropServices ''' <summary ...