springboot+mybatis+maven角色权限框架
概述
详细
一、前言
1,java服务端开发人员
2,初级人员开发人员
3,了解spring springboot+maven+mybatis+shrio
3,对框架基本掌握
(2) 你需要准备什么?
1,积极主动学习
2,java框架搭建部署
3,java后端几大框架掌握如(spring springboot maven mybatis)
二、前期准备工作
软件环境:eclipse
官方下载:https://www.eclipse.org/downloads/
1丶基本需求
1,实现后台权限管理
用户管理:用户是系统操作者,该功能主要完成系统用户配置。
机构管理:配置系统组织机构(公司、部门、小组),树结构展现,可随意调整上下级。
区域管理:系统城市区域模型,如:国家、省市、地市、区县的维护。
菜单管理:配置系统菜单,操作权限,按钮权限标识等。
角色管理:角色菜单权限分配、设置角色按机构进行数据范围权限划分。
字典管理:对系统中经常使用的一些较为固定的数据进行维护,如:是否、男女、类别、级别等。
操作日志:系统正常操作日志记录和查询;系统异常信息日志记录和查询。
连接池监视:监视当期系统数据库连接池状态,可进行分析SQL找出系统性能瓶颈。
工作流引擎:实现业务工单流转、在线流程设计器。
前端
1. Bootstrap
2. jQuery
3. bootstrap-table
4. layer
5. jsTree
6. summernote
7. jquery-validate
8. jquery-treegrid
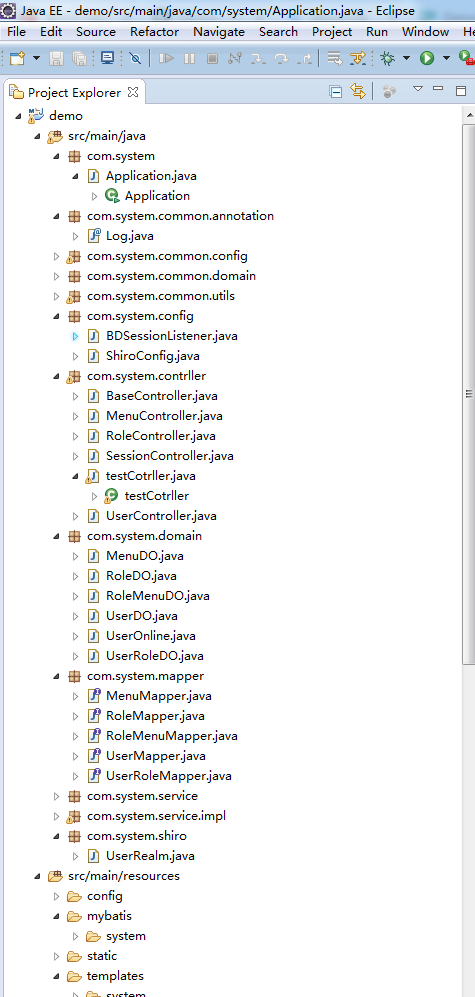
三、项目结构
项目目录结构
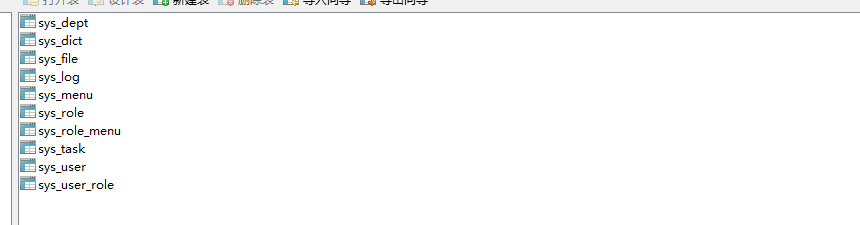
数据库表
eclipse导入,选择到项目以后,选择maven,一路默认选择到打开项目
sql文件复制并在mysql中运行创建好数据库表
打开application-dev.yml文件,修改其中的数据库连接+用户名+密码。另外一个application-pro.yml文件是 生产环境使用,具体使用哪一个是在application.yml中指定
server:

  port: 8080

  tomcat:

    uri-encoding: utf-8

  context-path: /

spring:

  thymeleaf:

    mode: LEGACYHTML5

    cache: false

  jackson:

    time-zone: GMT+8

    date-format: yyyy-MM-dd HH:mm:ss

  profiles:

    active: dev

  http:

    multipart:

      max-file-size: 30Mb

      max-request-size: 30Mb

  devtools:

    restart:

      enabled: true

mybatis:

  configuration:

    map-underscore-to-camel-case: true

  mapper-locations: mybatis/**/*Mapper.xml

  typeAliasesPackage: com.system.**.domain
四、程序实现
loginCotrller 登录接口
package com.system.contrller;

import java.util.List;

import org.apache.shiro.SecurityUtils;

import org.apache.shiro.authc.AuthenticationException;

import org.apache.shiro.authc.UsernamePasswordToken;

import org.apache.shiro.subject.Subject;

import org.slf4j.Logger;

import org.slf4j.LoggerFactory;

import org.springframework.beans.factory.annotation.Autowired;

import org.springframework.stereotype.Controller;

import org.springframework.ui.Model;

import org.springframework.web.bind.annotation.GetMapping;

import org.springframework.web.bind.annotation.PostMapping;

import org.springframework.web.bind.annotation.ResponseBody;

import com.system.common.annotation.Log;

import com.system.common.domain.Tree;

import com.system.common.utils.MD5Utils;

import com.system.common.utils.R;

import com.system.common.utils.ShiroUtils;

import com.system.domain.MenuDO;

import com.system.service.MenuService;

@Controller

public class loginCotrller extends BaseController {

	private final Logger logger = LoggerFactory.getLogger(this.getClass());

	@Autowired

	MenuService menuService;

	@GetMapping({ "/", "" })

	String welcome(Model model) {

		return "redirect:/login";

	}

	@Log("请求访问主页")

	@GetMapping({ "/index" })

	String index(Model model) {

		List<Tree<MenuDO>> menus = menuService.listMenuTree(getUserId());

		model.addAttribute("menus", menus);

		model.addAttribute("name", getUser().getName());

		model.addAttribute("username", getUser().getUsername());

		return "index_v1";

	}

	@GetMapping("/login")

	String login() {

		return "login";

	}

	@Log("登录")

	@PostMapping(value="/login")

	@ResponseBody

	R ajaxLogin(String username, String password) {

		password = MD5Utils.encrypt(username, password);

		UsernamePasswordToken token = new UsernamePasswordToken(username, password);

		Subject subject = SecurityUtils.getSubject();

		try {

			subject.login(token);

			return R.ok();

		} catch (AuthenticationException e) {

			return R.error("用户或密码错误");

		}

	}

	@GetMapping("/logout")

	String logout() {

		ShiroUtils.logout();

		return "redirect:/login";

	}

	@GetMapping("/main")

	String main() {

		return "main";

	}

	@GetMapping("/403")

	String error403() {

		return "403";

	}

}
如何配置让shiro执行我们的自定义sessionManager呢?下面看ShiroConfig类。
import at.pollux.thymeleaf.shiro.dialect.ShiroDialect;

import org.apache.shiro.cache.ehcache.EhCacheManager;

import org.apache.shiro.mgt.SecurityManager;

import org.apache.shiro.session.SessionListener;

import org.apache.shiro.session.mgt.SessionManager;

import org.apache.shiro.session.mgt.eis.MemorySessionDAO;

import org.apache.shiro.session.mgt.eis.SessionDAO;

import org.apache.shiro.spring.LifecycleBeanPostProcessor;

import org.apache.shiro.spring.security.interceptor.AuthorizationAttributeSourceAdvisor;

import org.apache.shiro.spring.web.ShiroFilterFactoryBean;

import org.apache.shiro.web.mgt.DefaultWebSecurityManager;

import org.apache.shiro.web.session.mgt.DefaultWebSessionManager;

import org.springframework.aop.framework.autoproxy.DefaultAdvisorAutoProxyCreator;

import org.springframework.beans.factory.annotation.Qualifier;

import org.springframework.context.annotation.Bean;

import org.springframework.context.annotation.Configuration;

import com.system.shiro.UserRealm;

import java.util.ArrayList;

import java.util.Collection;

import java.util.LinkedHashMap;

@Configuration

public class ShiroConfig {

	@Bean

	public EhCacheManager getEhCacheManager() {

		EhCacheManager em = new EhCacheManager();

		em.setCacheManagerConfigFile("classpath:config/ehcache.xml");

		return em;

	}

	@Bean

	UserRealm userRealm(EhCacheManager cacheManager) {

		UserRealm userRealm = new UserRealm();

		userRealm.setCacheManager(cacheManager);

		return userRealm;

	}

	@Bean

	SessionDAO sessionDAO() {

		MemorySessionDAO sessionDAO = new MemorySessionDAO();

		return sessionDAO;

	}

	@Bean

	public SessionManager sessionManager() {

		DefaultWebSessionManager sessionManager = new DefaultWebSessionManager();

		Collection<SessionListener> listeners = new ArrayList<SessionListener>();

		listeners.add(new BDSessionListener());

		sessionManager.setSessionListeners(listeners);

		sessionManager.setSessionDAO(sessionDAO());

		return sessionManager;

	}

	@Bean

	SecurityManager securityManager(UserRealm userRealm) {

		DefaultWebSecurityManager manager = new DefaultWebSecurityManager();

		manager.setRealm(userRealm);

		manager.setCacheManager(getEhCacheManager());

		manager.setSessionManager(sessionManager());

		return manager;

	}

	@Bean

	ShiroFilterFactoryBean shiroFilterFactoryBean(SecurityManager securityManager) {

		ShiroFilterFactoryBean shiroFilterFactoryBean = new ShiroFilterFactoryBean();

		shiroFilterFactoryBean.setSecurityManager(securityManager);

		shiroFilterFactoryBean.setLoginUrl("/login");

		shiroFilterFactoryBean.setSuccessUrl("/index");

		shiroFilterFactoryBean.setUnauthorizedUrl("/403");

		LinkedHashMap<String, String> filterChainDefinitionMap = new LinkedHashMap<>();

		filterChainDefinitionMap.put("/css/**", "anon");

		filterChainDefinitionMap.put("/js/**", "anon");

		filterChainDefinitionMap.put("/fonts/**", "anon");

		filterChainDefinitionMap.put("/img/**", "anon");

		filterChainDefinitionMap.put("/qrimg/**", "anon");

		filterChainDefinitionMap.put("/docs/**", "anon");

		filterChainDefinitionMap.put("/druid/**", "anon");

		filterChainDefinitionMap.put("/upload/**", "anon");

		filterChainDefinitionMap.put("/files/**", "anon");

		filterChainDefinitionMap.put("/logout", "logout");

		filterChainDefinitionMap.put("/", "anon");

		filterChainDefinitionMap.put("/blog", "anon");

		filterChainDefinitionMap.put("/wx/**", "anon");

		filterChainDefinitionMap.put("/dist/**", "anon");

		filterChainDefinitionMap.put("/blog/open/**", "anon");

		filterChainDefinitionMap.put("/**", "anon");

		filterChainDefinitionMap.put("/swagger-ui/**", "anon");

		shiroFilterFactoryBean.setFilterChainDefinitionMap(filterChainDefinitionMap);

		return shiroFilterFactoryBean;

	}

	@Bean("lifecycleBeanPostProcessor")

	public LifecycleBeanPostProcessor lifecycleBeanPostProcessor() {

		return new LifecycleBeanPostProcessor();

	}

	@Bean

	public DefaultAdvisorAutoProxyCreator defaultAdvisorAutoProxyCreator() {

		DefaultAdvisorAutoProxyCreator proxyCreator = new DefaultAdvisorAutoProxyCreator();

		proxyCreator.setProxyTargetClass(true);

		return proxyCreator;

	}

	@Bean

	public ShiroDialect shiroDialect() {

		return new ShiroDialect();

	}

	@Bean

	public AuthorizationAttributeSourceAdvisor authorizationAttributeSourceAdvisor(

			@Qualifier("securityManager") SecurityManager securityManager) {

		AuthorizationAttributeSourceAdvisor authorizationAttributeSourceAdvisor = new AuthorizationAttributeSourceAdvisor();

		authorizationAttributeSourceAdvisor.setSecurityManager(securityManager);

		return authorizationAttributeSourceAdvisor;

	}

}
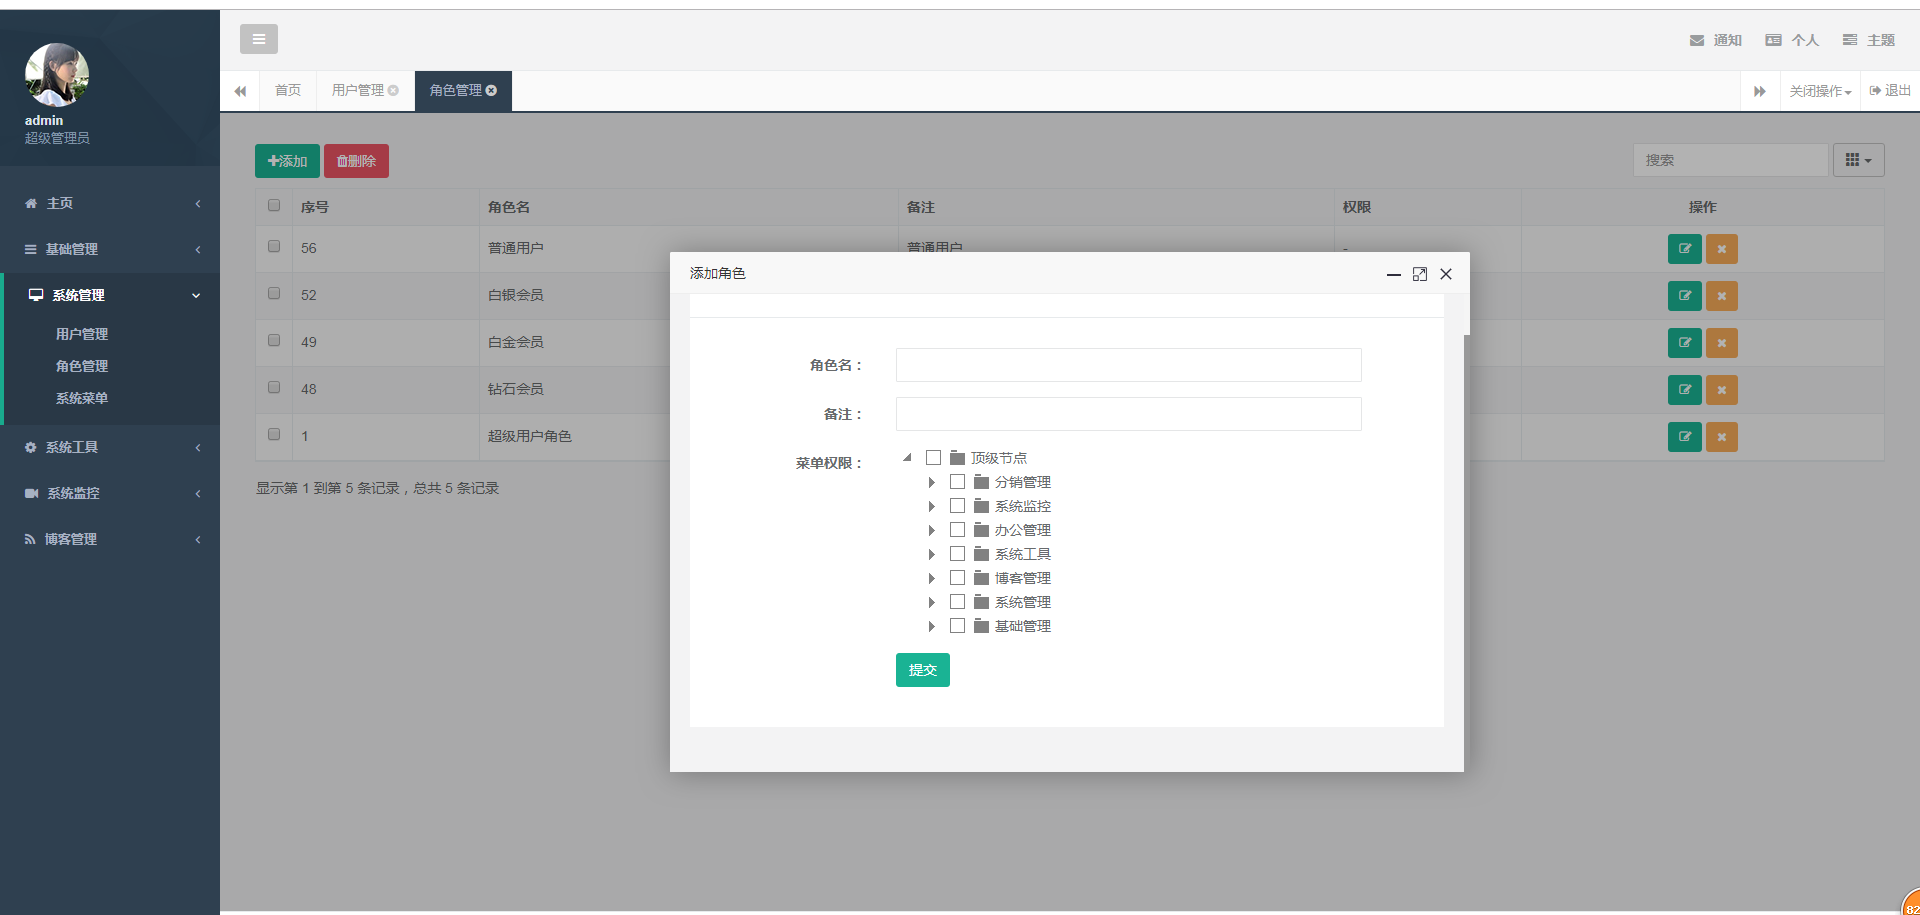
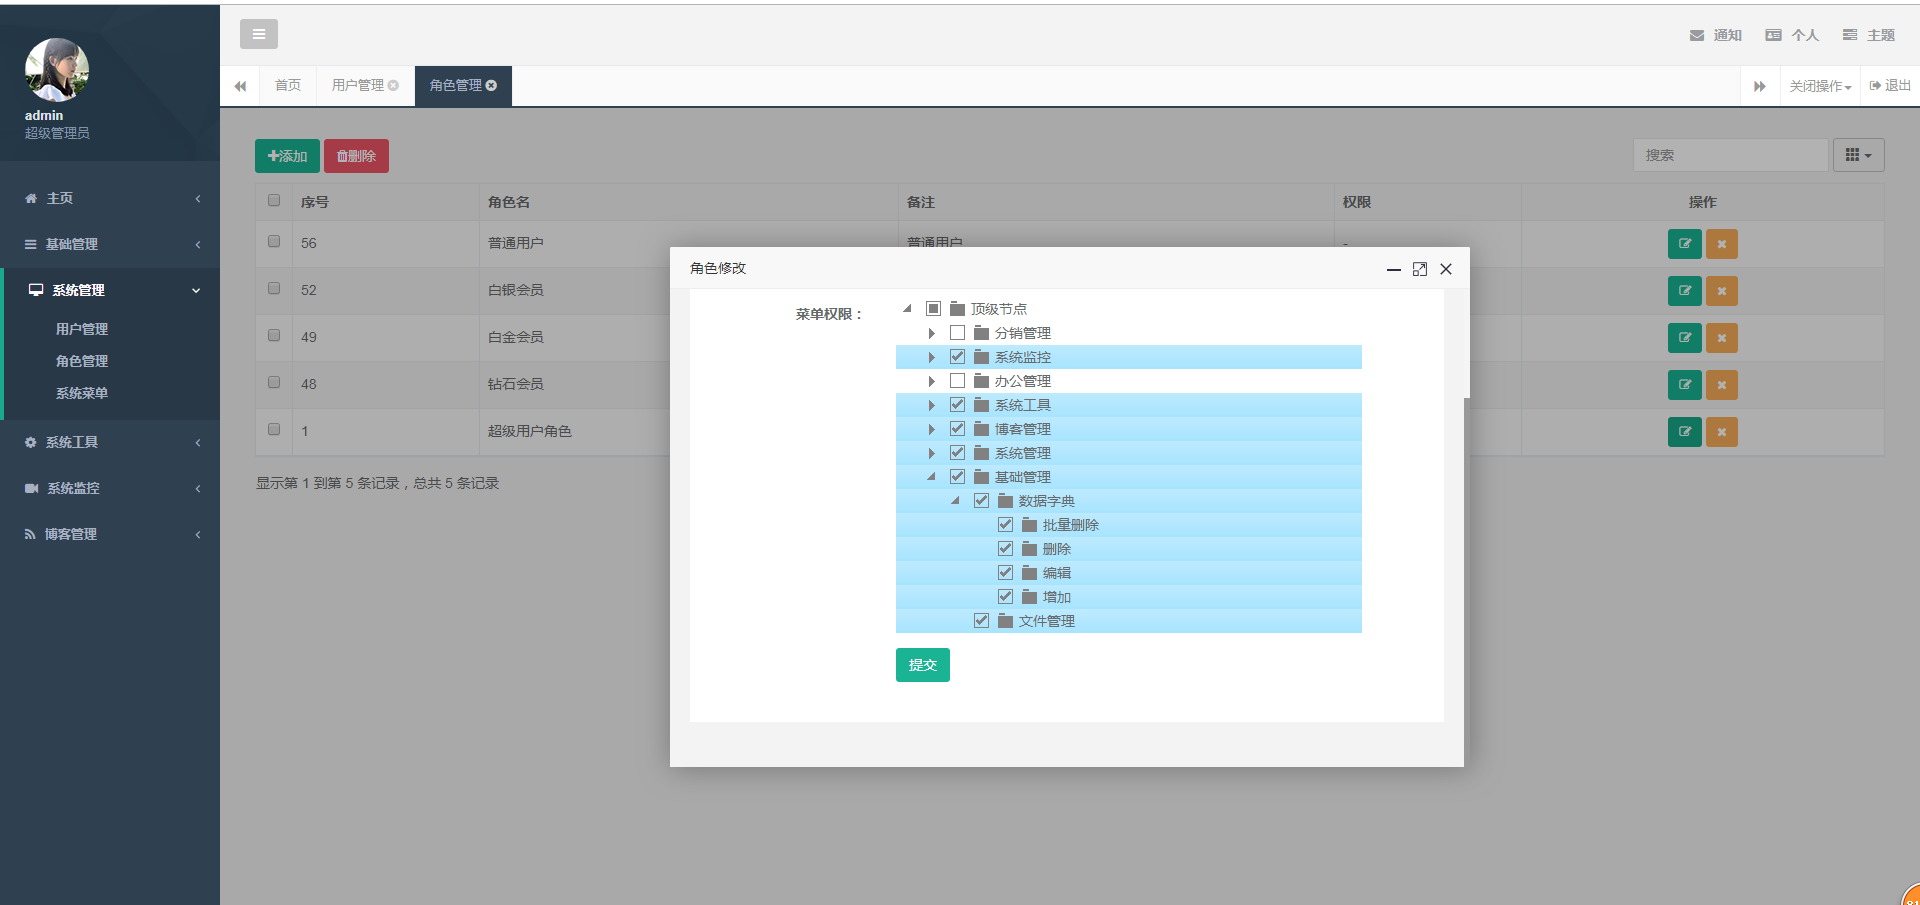
五、项目运行效果
代码太多不一一贴出来了让我们看下展示效果
访问地址 localhost:8080 如图
1,用户管理

2,角色管理
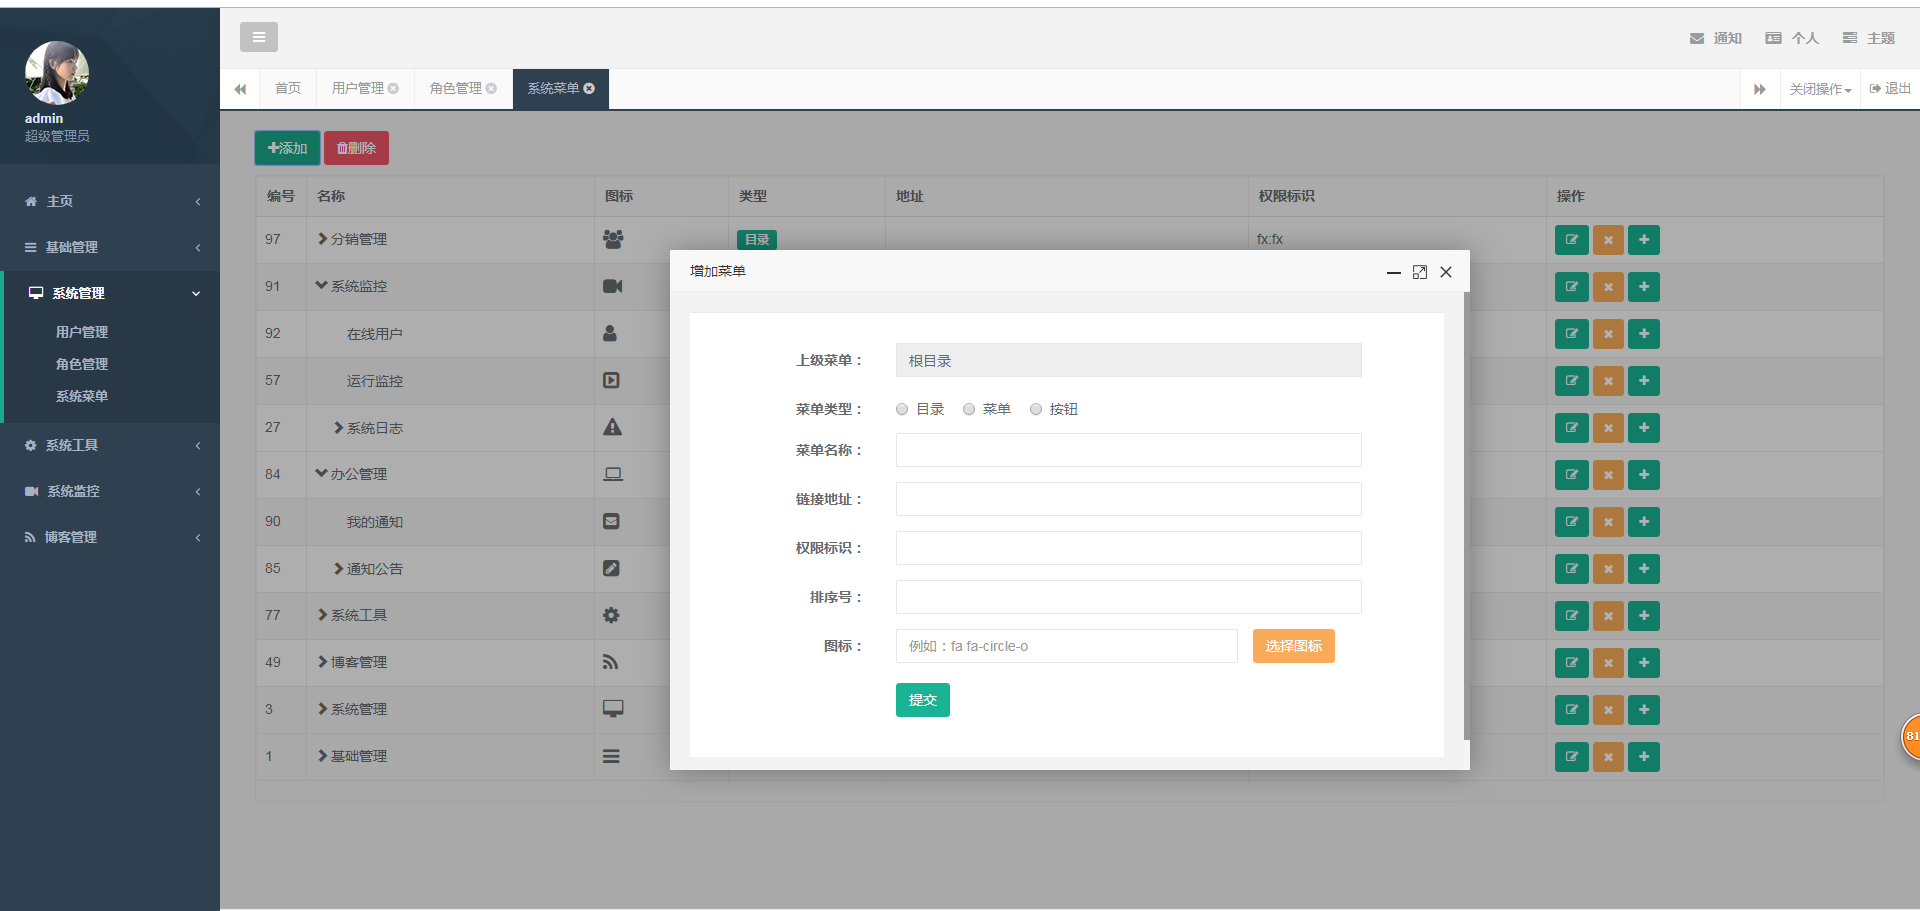
3,系统菜单
注:本文著作权归作者,由demo大师发表,拒绝转载,转载需要作者授权
springboot+mybatis+maven角色权限框架的更多相关文章
- IDEA+SpringBoot+Mybatis+maven分布式项目框架的搭建
参考文章:https://blog.csdn.net/qq_34410726/article/details/98214992 一.maven分布式工程的基本架构 demo #父工程模块,主要用来定 ...
- 基于Maven的Springboot+Mybatis+Druid+Swagger2+mybatis-generator框架环境搭建
基于Maven的Springboot+Mybatis+Druid+Swagger2+mybatis-generator框架环境搭建 前言 最近做回后台开发,重新抓起以前学过的SSM(Spring+Sp ...
- 菜鸟——springboot+mybatis+maven
网上找了很多资料,学习如何搭建springboot,由于刚刚接触springboot,不是很熟练,通过参考网上别人搭建的例子,自己也搭建了一个简单的springboot+mybaits+maven 网 ...
- SpringBoot+Mybatis+Maven+MySQL逆向工程实现增删改查
SpringBoot+Mybatis+MySQL+MAVEN逆向工程实现增删改查 这两天简单学习了下SpringBoot,发现这玩意配置起来是真的方便,相比于SpringMVC+Spring的配置简直 ...
- Spring-boot+Mybatis+Maven+MySql搭建实例
转自:https://www.jianshu.com/p/95fb7be049ae 最近读了spring-boot开发手册,spring-boot相比于spring-mvc封装了很多常用的依赖,并且内 ...
- SpringBoot+Mybatis+Maven+MySql小案例
数据准备: 建表t_user ,插入数据..... 创建工程 构建pom.xml <?xml version="1.0" encoding="UTF-8" ...
- Java微服务(Spring-boot+MyBatis+Maven)入门教程
1,项目创建 新建maven项目,如下图: 选择路径,下一步 输入1和2的内容,点完成 项目创建完毕,结构如下图所示: 填写pom.xml里内容,为了用于打包,3必须选择jar,4和5按图上填写 ...
- springboot+mybatis+druid+atomikos框架搭建及测试
前言 因为最近公司项目升级,需要将外网数据库的信息导入到内网数据库内.于是找了一些springboot多数据源的文章来看,同时也亲自动手实践.可是过程中也踩了不少的坑,主要原因是我看的文章大部分都是s ...
- springboot mybatis 后台框架平台 集成代码生成器 shiro 权限
1.代码生成器: [正反双向](单表.主表.明细表.树形表,快速开发利器)freemaker模版技术 ,0个代码不用写,生成完整的一个模块,带页面.建表sql脚本.处理类.service等完整模块2. ...
随机推荐
- Oracle选择性系统授权
Selective System Grants 问题: 我只想授予XX用户alter system set user_dump_dest 权限! I want to give users the ab ...
- 混合开发 Hybird Cordova PhoneGap web 跨平台 MD
Markdown版本笔记 我的GitHub首页 我的博客 我的微信 我的邮箱 MyAndroidBlogs baiqiantao baiqiantao bqt20094 baiqiantao@sina ...
- C++类中的访问权限问题
纠结的东西: private,public,protected方法的访问范围.(public继承下)private: 只能由该类中的函数.其友元函数访问,不能被任何其他访问,该类的对象也不能访问. p ...
- NLP 中的embedding layer
https://blog.csdn.net/chuchus/article/details/78386059 词汇是语料库的基本元素, 所以, 使用embedding layer来学习词嵌入, 将一个 ...
- windows无法访问vmware搭建好虚拟机linux web服务器
[前置条件] vmware搭建好虚拟机web服务器 ,但是本机就是无法访问的解决办法. linux虚拟机的网络选择Bridged 桥接到本机网卡. 具体情况如下 : 1.本机能ping通虚拟机 2.虚 ...
- GitHub最新命令使用教程
一.创建github仓库并提交代码 1.在github创建public仓库 2.会生成一个git地址 https://github.com/ae6623/Zebra.git 3.在本地打开命令,在文件 ...
- 浅谈压缩感知(十五):感知矩阵之spark常数
在压缩感知中,有一些用来评价感知矩阵(非测量矩阵)的指标,如常见的RIP等,除了RIP之外,spark常数也能够用来衡量能否成为合适的感知矩阵. 0.相关概念与符号 1.零空间条件NULL Space ...
- ThinkPHP3.2多域名 Virtual .htaccess 匹配 RewriteCond %{HTTP_HOST}
<Files *> Options -Indexes </Files> <IfModule mod_headers.c> <FilesMatch " ...
- JPA的配置文件
一.引入包 <dependencies> <!-- https://mvnrepository.com/artifact/org.hibernate.javax.persistenc ...
- 使用MAVEN打JAR,直接使用
一.简单的方法: 首先在pom.xml里面添加: <build> <plugins> <plugin> <artifactId>maven-assemb ...