SpringBoot+Shiro入门小栗子
写一个不花里胡哨的纯粹的Springboot+Shiro的入门小栗子
效果如图:
首页:有登录注册
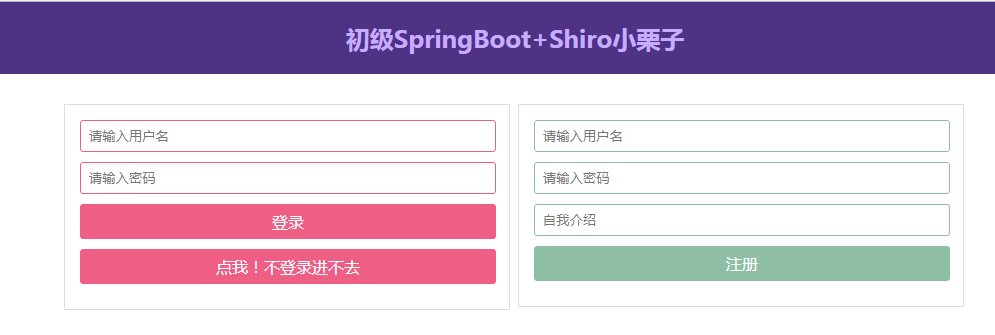
先注册一个,然后登陆

登录,成功自动跳转到home页
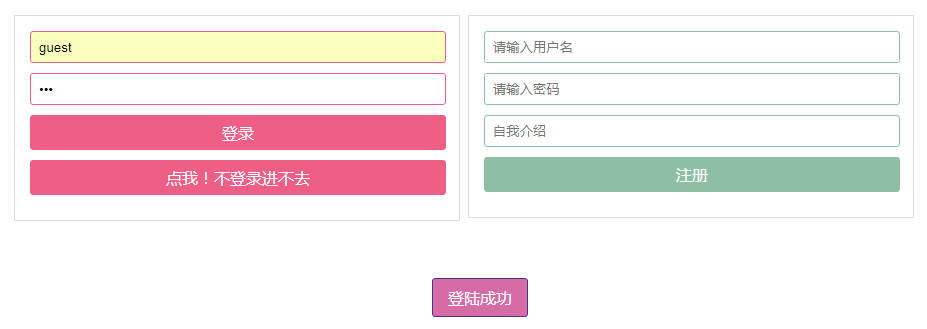
home页:通过认证之后才可以进

代码部分:
依赖:
<?xml version="1.0" encoding="UTF-8"?>

<project xmlns="http://maven.apache.org/POM/4.0.0" xmlns:xsi="http://www.w3.org/2001/XMLSchema-instance"

    xsi:schemaLocation="http://maven.apache.org/POM/4.0.0 http://maven.apache.org/xsd/maven-4.0.0.xsd">

    <modelVersion>4.0.0</modelVersion>

    <groupId>com.example</groupId>

    <artifactId>demo</artifactId>

    <version>0.0.1-SNAPSHOT</version>

    <packaging>jar</packaging>

    <name>demo</name>

    <description>Demo project for Spring Boot</description>

    <parent>

        <groupId>org.springframework.boot</groupId>

        <artifactId>spring-boot-starter-parent</artifactId>

        <version>2.0.3.RELEASE</version>

        <relativePath/> <!-- lookup parent from repository -->

    </parent>

    <properties>

        <project.build.sourceEncoding>UTF-8</project.build.sourceEncoding>

        <project.reporting.outputEncoding>UTF-8</project.reporting.outputEncoding>

        <java.version>1.8</java.version>

    </properties>

    <dependencies>

        <dependency>

            <groupId>org.springframework.boot</groupId>

            <artifactId>spring-boot-starter-data-redis</artifactId>

        </dependency>

        <dependency>

            <groupId>org.springframework.boot</groupId>

            <artifactId>spring-boot-starter-thymeleaf</artifactId>

        </dependency>

        <dependency>

            <groupId>org.springframework.boot</groupId>

            <artifactId>spring-boot-starter-web</artifactId>

        </dependency>

        <!-- https://mvnrepository.com/artifact/org.apache.shiro/shiro-all -->

        <dependency>

            <groupId>org.apache.shiro</groupId>

            <artifactId>shiro-all</artifactId>

            <version>1.3.2</version>

        </dependency>

        <!-- https://mvnrepository.com/artifact/com.alibaba/fastjson -->

        <dependency>

            <groupId>com.alibaba</groupId>

            <artifactId>fastjson</artifactId>

            <version>1.2.47</version>

        </dependency>

        <!-- https://mvnrepository.com/artifact/net.sf.ehcache/ehcache -->

        <dependency>

            <groupId>net.sf.ehcache</groupId>

            <artifactId>ehcache</artifactId>

            <version>2.10.5</version>

        </dependency>

        <dependency>

            <groupId>org.springframework.boot</groupId>

            <artifactId>spring-boot-devtools</artifactId>

            <scope>runtime</scope>

        </dependency>

        <dependency>

            <groupId>org.springframework.boot</groupId>

            <artifactId>spring-boot-starter-test</artifactId>

            <scope>test</scope>

        </dependency>

    </dependencies>

    <build>

        <plugins>

            <plugin>

                <groupId>org.springframework.boot</groupId>

                <artifactId>spring-boot-maven-plugin</artifactId>

            </plugin>

        </plugins>

    </build>

</project>
Java配置类:
package com.example.demo.conf;

import com.example.demo.auth.PermissionRealm;

import org.apache.shiro.authc.credential.HashedCredentialsMatcher;

import org.apache.shiro.cache.CacheManager;

import org.apache.shiro.cache.ehcache.EhCacheManager;

import org.apache.shiro.realm.AuthorizingRealm;

import org.apache.shiro.spring.LifecycleBeanPostProcessor;

import org.apache.shiro.spring.web.ShiroFilterFactoryBean;

import org.apache.shiro.web.mgt.DefaultWebSecurityManager;

import org.springframework.aop.framework.autoproxy.DefaultAdvisorAutoProxyCreator;

import org.springframework.context.annotation.Bean;

import org.springframework.context.annotation.Configuration;

import org.springframework.context.annotation.DependsOn;

import java.util.LinkedHashMap;

/**

 * @program: boot-shiro

 * @description:

 * @author: 001977

 * @create: 2018-07-17 18:22

 */

@Configuration

public class ShiroConfig {

    /**

     * 1. 配置SecurityManager

     * @return

     */

    @Bean

    public DefaultWebSecurityManager securityManager(){

        DefaultWebSecurityManager securityManager = new DefaultWebSecurityManager();

        securityManager.setRealm(realm());

        return securityManager;

    }

    /**

     * 2. 配置缓存

     * @return

     */

    @Bean

    public CacheManager cacheManager(){

        EhCacheManager ehCacheManager = new EhCacheManager();

        ehCacheManager.setCacheManagerConfigFile("classpath:ehcache.xml");

        return ehCacheManager;

    }

    /**

     * 3. 配置Realm

     * @return

     */

    @Bean

    public AuthorizingRealm realm(){

        PermissionRealm realm = new PermissionRealm();

        HashedCredentialsMatcher matcher = new HashedCredentialsMatcher();

        // 指定加密算法

        matcher.setHashAlgorithmName("MD5");

        // 指定加密次数

        matcher.setHashIterations(10);

        // 指定这个就不会报错

        matcher.setStoredCredentialsHexEncoded(true);

        realm.setCredentialsMatcher(matcher);

        return realm;

    }

    /**

     * 4. 配置LifecycleBeanPostProcessor,可以来自动的调用配置在Spring IOC容器中 Shiro Bean 的生命周期方法

     * @return

     */

    @Bean

    public LifecycleBeanPostProcessor lifecycleBeanPostProcessor(){

        return new LifecycleBeanPostProcessor();

    }

    /**

     * 5. 启用IOC容器中使用Shiro的注解,但是必须配置第四步才可以使用

     * @return

     */

    @Bean

    @DependsOn("lifecycleBeanPostProcessor")

    public DefaultAdvisorAutoProxyCreator defaultAdvisorAutoProxyCreator(){

        return new DefaultAdvisorAutoProxyCreator();

    }

    /**

     * 6. 配置ShiroFilter

     * @return

     */

    @Bean

    public ShiroFilterFactoryBean shiroFilterFactoryBean(){

        LinkedHashMap<String, String> map = new LinkedHashMap<>();

        // 静态资源

        map.put("/css/**", "anon");

        map.put("/js/**", "anon");

        // 公共路径

        map.put("/login", "anon");

        map.put("/register", "anon");

        //map.put("/*", "anon");

        // 登出,项目中没有/logout路径,因为shiro是过滤器,而SpringMVC是Servlet,Shiro会先执行

        map.put("/logout", "logout");

        // 授权

        map.put("/user/**", "authc,roles[user]");

        map.put("/admin/**", "authc,roles[admin]");

        // everything else requires authentication:

        map.put("/**", "authc");

        ShiroFilterFactoryBean factoryBean = new ShiroFilterFactoryBean();

        // 配置SecurityManager

        factoryBean.setSecurityManager(securityManager());

        // 配置权限路径

        factoryBean.setFilterChainDefinitionMap(map);

        // 配置登录url

        factoryBean.setLoginUrl("/");

        // 配置无权限路径

        factoryBean.setUnauthorizedUrl("/unauthorized");

        return factoryBean;

    }

}
Realm类:
package com.example.demo.auth;

import com.example.demo.common.entity.User;

import com.example.demo.service.UserService;

import org.apache.shiro.authc.*;

import org.apache.shiro.authz.AuthorizationInfo;

import org.apache.shiro.authz.SimpleAuthorizationInfo;

import org.apache.shiro.realm.AuthorizingRealm;

import org.apache.shiro.subject.PrincipalCollection;

import org.apache.shiro.util.ByteSource;

import org.springframework.beans.factory.annotation.Autowired;

import java.util.HashSet;

import java.util.Set;

/**

 * @program: boot-shiro

 * @description:

 * @author: 001977

 * @create: 2018-07-12 13:03

 */

public class PermissionRealm extends AuthorizingRealm {

    @Autowired

    private UserService userService;

    @Override

    protected AuthorizationInfo doGetAuthorizationInfo(PrincipalCollection principalCollection) {

        Object principal = principalCollection.getPrimaryPrincipal();

        User user = (User) principal;

        Set<String> roles = new HashSet<>();

        roles.add("user");

        SimpleAuthorizationInfo info = new SimpleAuthorizationInfo(roles);

        return info;

    }

    @Override

    protected AuthenticationInfo doGetAuthenticationInfo(AuthenticationToken authenticationToken) throws AuthenticationException {

        UsernamePasswordToken uToken = (UsernamePasswordToken) authenticationToken;

        String username = uToken.getUsername();

        String password = String.valueOf(uToken.getPassword());

        User user = userService.login(new User(username,password));

        if(user == null){

            throw new AuthenticationException("用户名密码不存在");

        }

        //认证的实体信息

        Object principal = user;

        //从数据库获取的密码

        Object hashedCredentials = user.getPassword();

        //盐值

        ByteSource credentialsSalt = ByteSource.Util.bytes(user.getUsername());

        //当前Realm对象的name,调用父类的getName方法

        String realmName = getName();

        SimpleAuthenticationInfo info = new SimpleAuthenticationInfo(principal, hashedCredentials, credentialsSalt, realmName);

        return info;

    }

}
Controller:
package com.example.demo.controller;

import com.example.demo.common.TempStorage;

import com.example.demo.common.entity.User;

import com.example.demo.common.response.BaseResponse;

import com.example.demo.service.UserService;

import org.apache.shiro.SecurityUtils;

import org.apache.shiro.authc.UsernamePasswordToken;

import org.apache.shiro.subject.Subject;

import org.springframework.beans.factory.annotation.Autowired;

import org.springframework.web.bind.annotation.RequestBody;

import org.springframework.web.bind.annotation.RequestMapping;

import org.springframework.web.bind.annotation.RestController;

import org.springframework.web.servlet.ModelAndView;

/**

 * @program: boot-shiro

 * @description:

 * @author: 001977

 * @create: 2018-07-12 13:02

 */

@RestController

public class SimpleController {

    @Autowired

    private UserService userService;

    @RequestMapping("/")

    public ModelAndView index(){

        return new ModelAndView("index");

    }

    @RequestMapping("/login")

    public BaseResponse<String> login(@RequestBody User user){

        BaseResponse<String> response = new BaseResponse<>(0,"登陆成功");

        Subject subject = SecurityUtils.getSubject();

        UsernamePasswordToken token = new UsernamePasswordToken(

                user.getUsername(), user.getPassword());

        subject.login(token);

        response.setData("/home");

        return response;

    }

    @RequestMapping("/register")

    public BaseResponse register(@RequestBody User user){

        userService.addUser(user);

        return new BaseResponse(0,"注册成功");

    }

    @RequestMapping("/home")

    public ModelAndView home(){

        ModelAndView mv = new ModelAndView("home");

        mv.addObject("users", TempStorage.getInstance().getMap());

        return mv;

    }

}
其余代码参见GitHub
SpringBoot+Shiro入门小栗子的更多相关文章
- SpringBoot+Shiro+Redis共享Session入门小栗子
在单机版的Springboot+Shiro的基础上,这次实现共享Session. 这里没有自己写RedisManager.SessionDAO.用的 crazycake 写的开源插件 pom.xml ...
- Java IO 与 NIO 服务器&客户端通信小栗子
本篇包含了入门小栗子以及一些问题的思考 BIO package com.demo.bio; import java.io.*; import java.net.ServerSocket; import ...
- SpringBoot介绍,快速入门小例子,目录结构,不同的启动方式,SpringBoot常用注解
SpringBoot介绍 引言 为了使用ssm框架去开发,准备ssm框架的模板配置 为了Spring整合第三方框架,单独的去编写xml文件 导致ssm项目后期xml文件特别多,维护xml文件的成本也是 ...
- springboot+shiro
作者:纯洁的微笑 出处:http://www.ityouknow.com/ 这篇文章我们来学习如何使用Spring Boot集成Apache Shiro.安全应该是互联网公司的一道生命线,几乎任何的公 ...
- Spring Cloud之路:(七)SpringBoot+Shiro实现登录认证和权限管理
版权声明:本文为博主原创文章,未经博主允许不得转载. https://blog.csdn.net/sage_wang/article/details/79592269一.Shiro介绍1.Shiro是 ...
- Shiro入门指引
最近项目中用到Shiro,专门对其研究了一番,颇有收获,以下是笔者最近写的博客,希望对大家入门有所帮助. Shiro入门资源整理 Shiro在SpringBoot中的使用 Shiro源码解析-登录篇 ...
- 前端基于vue,后台采用springboot+shiro的方式搭建的一个移动端商品展示平台
基于vue实现的移动端商品展示页,可以web-view的方式嵌入到小程序中,布局简约.大气,减少初学者或开发者不必要的工作量.后台维护采用的springboot+shiro的方式,为广大爱好者提供展示 ...
- SpringBoot+Shiro学习(七):Filter过滤器管理
SpringBoot+Shiro学习(七):Filter过滤器管理 Hiwayz 关注 0.5 2018.09.06 19:09* 字数 1070 阅读 5922评论 1喜欢 20 先从我们写的一个 ...
- SpringBoot&Shiro实现权限管理
SpringBoot&Shiro实现权限管理 引言 相信大家前来看这篇文章的时候,是有SpringBoot和Shiro基础的,所以本文只介绍整合的步骤,如果哪里写的不好,恳请大家能指出错误,谢 ...
随机推荐
- 关于jenkins旧的构建导致磁盘空间不足问题
简述: Jenkins在每一次的执行构建后,都会对该构建的项目生成一个历史构建记录以及生成一份历史构建的项目发布包,长期累积可能会占用大量磁盘空间 jenkins构建jobs路径如下图: 解决办法: ...
- comparable和comparator
Comparable Comparable可以认为是一个内部比较器,实现了Comparable接口的类有一个特点,就是这些类是可以和自己比较的,在compareTo方法中指定具体的比较方法. comp ...
- chrome中 GET /undefined 404
Chrome中调试网站,会出现 这是由 crxMouse Chrome™ 手势 引起的,关闭即可
- Lodop输出页面input文本框的最新值
默认使用Lodop打印页面上的文本框等,会发现虽然页面上文本框输入了值,打印预览却是空的,这是由于没有把最新的值传入Lodop. 如图,演示的是Lodop如何输出文本框内的新值,这里整个页面只有inp ...
- Eclipse配置C++时的三个关键环境变量
ECLIPSE下载很简单,然后装上MinGW,安装就完成了,关键是要配置三个环境变量 include——C:\MinGW\include lib——C:\MinGW\lib path——C:\MinG ...
- Clover file list
/Volumes/EFI//EFI: total 4 drwxrwxrwx 1 jianweiliu staff 512 Apr 20 12:17 APPLE drwxrwxrwx@ 1 jianwe ...
- Nintex History in Form Table
一.设置参数 二.调用WebService 三.For Each 调用 四.拼写HTML Table 结果: 特别提示:过滤人只要根据人来循环即可
- vuex2.0 基本使用(2) --- mutation 和 action
我们的项目非常简单,当点击+1按钮的时候,count 加1,点击-1按钮的时候,count 减1. 1, mutation The only way to actually change state ...
- codeforces158C
Cd and pwd commands CodeForces - 158C Vasya is writing an operating system shell, and it should have ...
- ScheduledThreadPoolExecutor 吞异常
线程挂掉不一定会输出日志到控制台,比如ScheduledThreadPoolExecutor,如果在执行的任务中有未捕获的异常抛出,就行停止调度,没有任何错误输出到控制台或日志文件.在项目中这会导致一 ...