
CRAP-API——如何在Linux服务器部署CRAP-API教程
前言
之前一直用的eolinker的免费版,但是人数有限,所以想找个免费开源的API管理平台,然后就选择了CRAP-API。
步骤
部署环境
LNMT部署
我的环境是之前部署的是LNMP,后面又增加的JDK和Tomcat没部署的朋友可以使用oneinstack一键自动部署来安装好。
Maven部署
Maven部署 | 其实正常来说,直接下载编译好的安装包更改下数据库配置就阔以了,但是我当时用NGINX忘记将静态资源跳转,一直加载不到静态资源,所以克隆了源码,用Maven重新又打了包。
创建虚拟主机
# cd oneinstack

# ./vhost.sh

#######################################################################

#       OneinStack for CentOS/RedHat 6+ Debian 8+ and Ubuntu 14+      #

#       For more information please visit https://oneinstack.com      #

#######################################################################

Please choose to use environment:

        1. Use php

        2. Use java

Please input a number:(Default 1 press Enter) 1

What Are You Doing?

        1. Use HTTP Only

        2. Use your own SSL Certificate and Key

        3. Use Let's Encrypt to Create SSL Certificate and Key

        q. Exit

Please input the correct option: 3

Please input domain(example: www.example.com): <域名>

domain=<域名>

Please input the directory for the domain:<域名> :

(Default directory: /data/wwwroot/<域名>):

Virtual Host Directory=/data/wwwroot/<域名>

Create Virtul Host directory......

set permissions of Virtual Host directory......

Do you want to add more domain name? [y/n]: n

Do you want to redirect all HTTP requests to HTTPS? [y/n]: n

[2019年 10月 16日 星期三 09:27:58 CST] Single domain='<域名>'

[2019年 10月 16日 星期三 09:27:58 CST] Getting domain auth token for each domain

[2019年 10月 16日 星期三 09:27:58 CST] Getting webroot for domain='<域名>'

[2019年 10月 16日 星期三 09:27:58 CST] Getting new-authz for domain='<域名>'

[2019年 10月 16日 星期三 09:28:00 CST] The new-authz request is ok.

[2019年 10月 16日 星期三 09:28:00 CST] Verifying:<域名>

[2019年 10月 16日 星期三 09:28:05 CST] Pending

[2019年 10月 16日 星期三 09:28:08 CST] Pending

[2019年 10月 16日 星期三 09:28:10 CST] Pending

[2019年 10月 16日 星期三 09:28:13 CST] Pending

[2019年 10月 16日 星期三 09:28:16 CST] Pending

[2019年 10月 16日 星期三 09:28:19 CST] Pending

[2019年 10月 16日 星期三 09:28:22 CST] Success

[2019年 10月 16日 星期三 09:28:22 CST] Verify finished, start to sign.

[2019年 10月 16日 星期三 09:28:24 CST] Cert success.

-----BEGIN CERTIFICATE-----

xxxxxxxxxxxxxxxx

-----END CERTIFICATE-----

[2019年 10月 16日 星期三 09:28:24 CST] Your cert is in  /root/.acme.sh/<域名>/<域名>.cer

[2019年 10月 16日 星期三 09:28:24 CST] Your cert key is in  /root/.acme.sh/<域名>/<域名>.key

[2019年 10月 16日 星期三 09:28:25 CST] The intermediate CA cert is in  /root/.acme.sh/<域名>/ca.cer

[2019年 10月 16日 星期三 09:28:25 CST] And the full chain certs is there:  /root/.acme.sh/<域名>/fullchain.cer

Do you want to add hotlink protection? [y/n]: n

Allow Rewrite rule? [y/n]: n

Allow Nginx/Tengine/OpenResty access_log? [y/n]: y

You access log file=/data/wwwlogs/<域名>_nginx.log

nginx: the configuration file /usr/local/nginx/conf/nginx.conf syntax is ok

nginx: configuration file /usr/local/nginx/conf/nginx.conf test is successful

Reload Nginx......

#######################################################################

#       OneinStack for CentOS/RedHat 6+ Debian 8+ and Ubuntu 14+      #

#       For more information please visit https://oneinstack.com      #

#######################################################################

Your domain:                  <域名>

Virtualhost conf:             /usr/local/nginx/conf/vhost/<域名>.conf

Directory of:                 /data/wwwroot/<域名>

Let's Encrypt SSL Certificate:/usr/local/nginx/conf/ssl/<域名>.crt

SSL Private Key:              /usr/local/nginx/conf/ssl/<域名>.key
修改NGINX配置
注意静态资源的跳转不要忘记了!!!不要忘记了!!!不要忘记了!!!我就掉在这个坑里过...修改完成后,重新载入下配置文件。
# cd /usr/local/nginx/conf/vhost/

# vi <域名>.conf

server {

  listen 80;

  listen 443 ssl http2;

  ssl_certificate /usr/local/nginx/conf/ssl/xxxxx.crt;

  ssl_certificate_key /usr/local/nginx/conf/ssl/xxxxx.key;

  ssl_protocols TLSv1 TLSv1.1 TLSv1.2 TLSv1.3;

  ssl_ciphers TLS13-AES-256-GCM-SHA384:TLS13-CHACHA20-POLY1305-SHA256:TLS13-AES-128-GCM-SHA256:TLS13-AES-128-CCM-8-SHA256:TLS13-AES-128-CCM-SHA256:EECDH+CHACHA20:EECDH+AES128:RSA+AES128:EECDH+AES256:RSA+AES256:EECDH+3DES:RSA+3DES:!MD5;

  ssl_prefer_server_ciphers on;

  ssl_session_timeout 10m;

  ssl_session_cache builtin:1000 shared:SSL:10m;

  ssl_buffer_size 1400;

  add_header Strict-Transport-Security max-age=15768000;

  ssl_stapling on;

  ssl_stapling_verify on;

  server_name xxxx;

  access_log /data/wwwlogs/xxxxxx_nginx.log combined;

  index index.html index.htm index.jsp;

  root /data/wwwroot/xxxxx/;

  #error_page 404 /404.html;

  #error_page 502 /502.html;

  location / {

                   proxy_set_header  Host $host:80;

                   proxy_set_header  X-Real-IP $remote_addr;

                   proxy_set_header x-forwarded-for $remote_addr;

                   proxy_pass http://127.0.0.1:8080;

                }

   location ~ [^/]\.php(/|$) {

                    # comment try_files $uri =404; to enable pathinfo

                    try_files $uri =404;

                    fastcgi_pass  unix:/tmp/php-cgi.sock;

                    fastcgi_index index.php;

                    include fastcgi.conf;

                    #include pathinfo.conf;

                }

      location ~ .*\.(gif|jpg|jpeg|png|bmp|swf)$ {

                     proxy_pass http://127.0.0.1:8080;

                     expires      30d;

                }

      location ~ .*\.(js|css)?$ {

                     proxy_pass http://127.0.0.1:8080;

                     expires      12h;

                }

}

# service nginx reload
下载CRAP
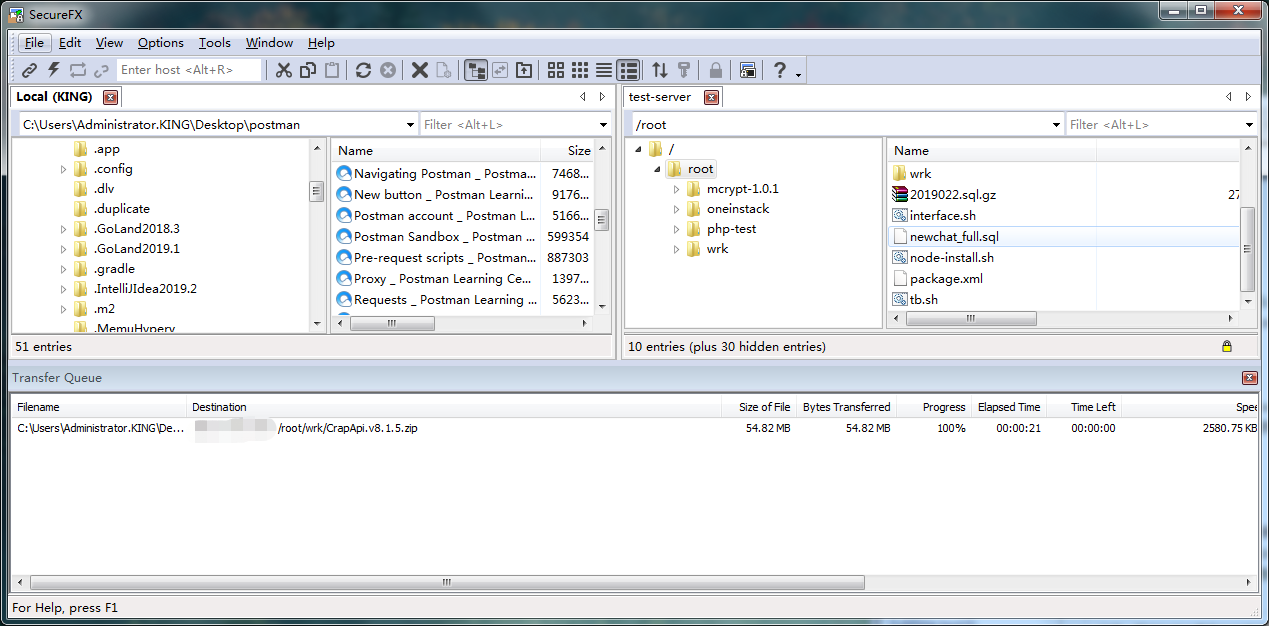
CRAP历史版本源码|安装包下载 | 我这边部署的时候,使用的是最新的包v8.1.5版本的,这边推荐直接下载编译好的包,并通过远程工具SCRT上传到服务器上。
创建数据库
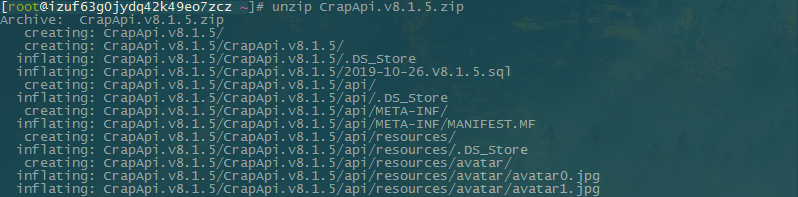
解压压缩文件
# unzip CrapApi.v8.1.5.zip
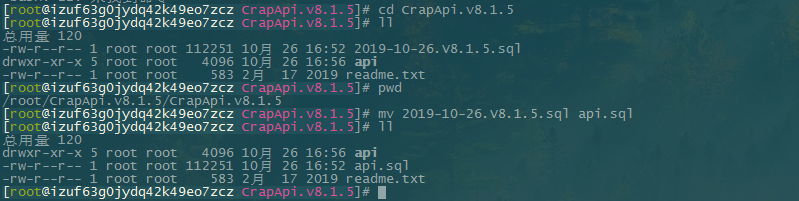
查看SQL文件
这是便于后面方便直接导入sql文件。
# cd CrapApi.v8.1.5

# ll

总用量 120

-rw-r--r-- 1 root root 112251 10月 26 16:52 2019-10-26.V8.1.5.sql

drwxr-xr-x 5 root root   4096 10月 26 16:56 api

-rw-r--r-- 1 root root    583 2月  17 2019 readme.txt

# pwd

/root/CrapApi.v8.1.5/CrapApi.v8.1.5

# mv 2019-10-26.V8.1.5.sql api.sql

# ll

总用量 120

drwxr-xr-x 5 root root   4096 10月 26 16:56 api

-rw-r--r-- 1 root root 112251 10月 26 16:52 api.sql

-rw-r--r-- 1 root root    583 2月  17 2019 readme.txt
建库并导入SQL文件
# mysql -uroot -p

Enter password:

Welcome to the MySQL monitor.  Commands end with ; or \g.

Your MySQL connection id is 150536

Server version: 5.6.42-log MySQL Community Server (GPL)

Copyright (c) 2000, 2018, Oracle and/or its affiliates. All rights reserved.

Oracle is a registered trademark of Oracle Corporation and/or its

affiliates. Other names may be trademarks of their respective

owners.

Type 'help;' or '\h' for help. Type '\c' to clear the current input statement.

MySQL [(none)]> create database api_test;

Query OK, 1 row affected (0.00 sec)

MySQL [(none)]> use api_test;

Database changed

MySQL [api_test]>  source /root/CrapApi.v8.1.5/CrapApi.v8.1.5/api.sql

Query OK, 0 rows affected (0.00 sec)

:

:

:

Query OK, 0 rows affected (0.00 sec)

MySQL [api_test]>
修改CRAP-API配置
这里只修改了数据的配置文件config.properties ,日志的未做修改。
# cd api/WEB-INF/classes/

# vi config.properties

配置Tomcat
删除webapps下的所有文件
# cd /usr/local/tomcat/webapps/

# rm -rvf *
修改编译包名
# cd /root/CrapApi.v8.1.5/CrapApi.v8.1.5

# mv api ROOT

# ll

总用量 120

-rw-r--r-- 1 root root 112251 10月 26 16:52 api.sql

-rw-r--r-- 1 root root    583 2月  17 2019 readme.txt

drwxr-xr-x 5 root root   4096 10月 26 16:56 ROOT
移包并启动服务
# cd CrapApi.v8.1.5/CrapApi.v8.1.5/

# cp -rvf ROOT/ /usr/local/tomcat/webapps/

# cd /usr/local/tomcat/bin/

# ./ startup.sh
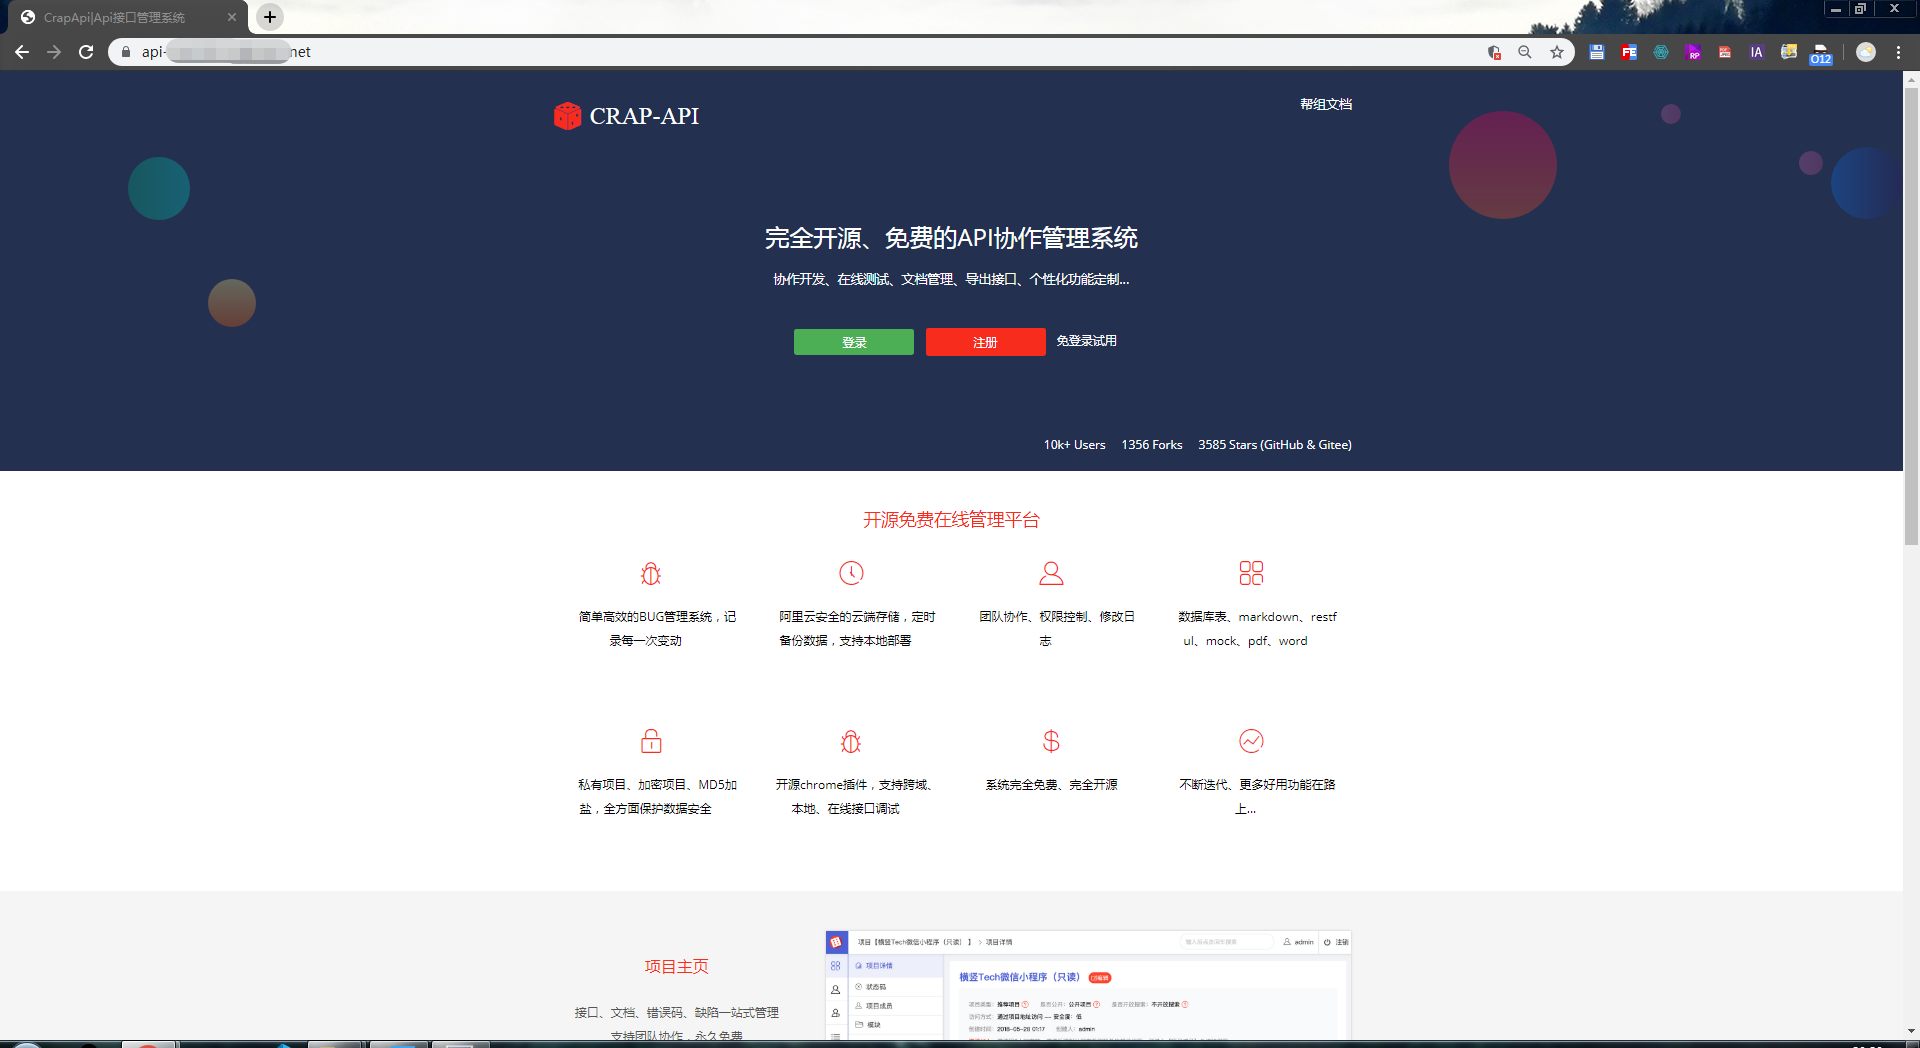
访问页面
CRAP-API——如何在Linux服务器部署CRAP-API教程的更多相关文章
- 如何在linux服务器部署Rstudio server,配置ODBC远程访问win 服务器上的SQL server
如何在linux服务器部署Rstudio server,配置ODBC后通过RODBC包远程访问SQL server 背景介绍:之前写过一篇文章,提到近期要部署Rstudio server(搭建数据分析 ...
- 如何在Linux服务器上部署禅道
最近换了新的项目团队,由于新团队比较年轻化,没有实行正规的项目管理,于是我自告奋勇要为团队管理出一份力,帮助团队建立敏捷化的项目管理,经过多方考究和对比后,选择了目前较受欢迎的开源项目管理软件:禅道. ...
- linux服务器部署tomcat和Nginx
项目需要,申请了三台测试机器,好在测试机里面光秃秃的什么都没有,我就可以好好的学习一把玩一把了!接下来以图文的形式讲一下我所碰到的坑以及小小的收获吧! 一.准备工作 首先你得有一台可以玩的linux服 ...
- 如何在Linux服务器中隐藏PHP版本
通常,大多数默认设置安装的web服务器存在信息泄露,这其中之一就是PHP.PHP 是如今流行的服务端html嵌入式语言(之一?).在如今这个充满挑战的时代,有许多攻击者会尝试发现你服务端的漏洞.因此, ...
- 如何在linux服务器上使用hanlp
关于如何在linux服务器上使用hanlp也有分享过一篇,但分享的内容与湘笑的这篇还是不同的.此处分享一下湘笑的这篇hanlp在linux服务器上使用的文章,供新手朋友学习之用. 本文主要工作是在li ...
- Linux服务器部署系列之八—Sendmail篇
Sendmail是目前Linux系统下面用得最广的邮件系统之一,虽然它存在一些不足,不过,目前还是有不少公司在使用它.对它的学习,也能让我们更深的了解邮件系统的运作.下面我们就来看看sendmail邮 ...
- Linux服务器部署系列之七—OpenLDAP篇
LDAP(轻量级目录访问服务),通过配置这个服务,我们也可以在linux下面使用目录的形式管理用户,就像windows下面的AD一样,方便我们管理.下面我们就一起来配置openldap服务.本文运行环 ...
- Linux服务器部署系列之一—Apache篇(下)
接上篇 linux服务器部署系列之一—Apache篇(上) 四.管理日志文件 Apache日志分为访问日志和错误日志两种: 1)访问日志 用于记录客户端的访问信息,文件名默认为access_lo ...
- Linux服务器部署系列之二—MySQL篇
MySQL是linux环境中使用最广泛的数据库之一,著名的“LAMP黄金组合”就要用到MySQL.关于MySQL的优点及作用,我就不多讲了,网上很多这样的文章. 今天我们要谈的是MySQL服务器的部署 ...
随机推荐
- GCN(Graph Convolutional Network)的简单公式推导
第一步:从前一个隐藏层到后一个隐藏层,对结点进行特征变换 第二步:对第一步进行具体实现 第三步:对邻接矩阵进行归一化(行之和为1) 邻接矩阵A的归一化,可以通过度矩阵D来实现(即通过D^-1*A来实现 ...
- python 判断矩阵中每行非零个数的方法
python 判断矩阵中每行非零个数的方法: # -*- coding: utf-8 -*- # @Time : 2018/5/17 15:05 # @Author : Sizer # @Site : ...
- POJ-动态规划-典型问题模板
动态规划典型问题模板 一.最长上升子序列(Longest increasing subsequence) 状态(最关键):f[N]为动规数组,f[i]表示从第一个字符开始,以a[i]为最后一个字符的序 ...
- CentOS7 下 yum 安装 Docker CE
前言 Docker 使用越来越多,安装也很简单,本次记录一下基本的步骤. Docker 目前支持 CentOS 7 及以后的版本,内核要求至少为 3.10. Docker 官网有安装步骤,本文只是记录 ...
- 实现一个特殊的栈,要求push,poll , getMin方法时间复杂度都是O(N)
借助两个栈来实现 public class GetMinStack { private Stack<Integer> stackData; private Stack<Integer ...
- java 对象参数去空格方式
import java.lang.reflect.Field; import java.lang.reflect.Method; public class Test { /** * 去掉bean中所有 ...
- 命令(Command)模式
命令模式又称为行动(Action)模式或者交易(Transaction)模式. 命令模式把一个请求或者操作封装到一个对象中.命令模式允许系统使用不同的请求把客户端参数化,对请求排队或者记录请求日志,可 ...
- Delphi 开发微信公众平台 (二)- 用户管理
一.用户标签管理 开发者可以使用用户标签管理的相关接口,实现对公众号的标签进行创建.查询.修改.删除等操作,也可以对用户进行打标签.取消标签等操作. 1.创建标签 /// <summary> ...
- MATBLAB学习笔记----基础绘图
整理自台大生机系郭彦甫.MATLAB系列教程,吐血推荐看这个视频,非计算机专业也能看懂,全程干货 MATLAB图形来自于“数据”,MATLAB不能理解函数. MATLAB绘图原理: 1.在特定范围生成 ...
- npm是干什么的(转)
原文:https://zhuanlan.zhihu.com/p/24357770 网上的 npm 教程主要都在讲怎么安装.配置和使用 npm,却不告诉新人「为什么要使用 npm」.今天我就来讲讲这个话 ...