QT+FFMPEG+SDL2.0实现视频播放
开发环境:MinGW+QT5.9+FFMPEG20190212+SDL2.0.9
一、开发环境搭建
(1)下载工具
在https://ffmpeg.zeranoe.com/builds/下载对应版本。链接方式有三种,
Static:这个版本只包含了ffmpeg.exe、ffplay.exe、ffprobe.exe三个可执行程序,没有头文件和库文件。
Shared:这个版本包含了ffmpeg.exe、ffplay.exe、ffprobe.exe三个可执行程序和相关动态库文件。
Dev:开发版,这个包含了头文件和库文件。
我们需要下载Shared和Dev两个版本,Dev有我们程序开发需要的头文件和库文件,这里面包含的库是动态调用的,所依赖的动态库在Shared这个版本里面,所以两个版本都要下载。
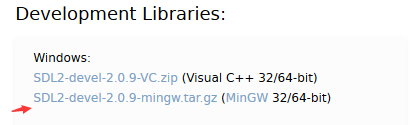
在http://www.libsdl.org/download-2.0.php下载SDL库,选择
(2)添加库
将下载的文件解压缩,然后新建一个QT工程,在pro添加lib目录和include目录的路径。
INCLUDEPATH +="E:\\Lib\\ffmpeg\\include"

INCLUDEPATH +="E:\\Lib\\SDL2-2.0.9\\include"

LIBS += -LE:\Lib\ffmpeg\lib -lavutil -lavformat -lavcodec -lavdevice -lavfilter -lpostproc -lswresample -lswscale

LIBS += -LE:\Lib\SDL2-2.0.\lib\x86 -lSDL2
然后将ffmpeg的dll和SDL2.dll放到exe目录下。
二、代码实现:
在QT界面上放置一个widget和一个按钮,点击按钮时实现下面功能:
extern "C"{

#include <libavcodec/avcodec.h>

#include <libavformat/avformat.h>

#include <libswscale/swscale.h>

#include <libavutil/imgutils.h>

#include <SDL.h>

}

void MainWindow::on_btnPlay_clicked()

{

    AVFormatContext    *pFormatCtx;

    int                i, videoindex;

    AVCodecContext    *pCodecCtx;

    AVCodec            *pCodec;

    AVFrame    *pFrame, *pFrameYUV;

    unsigned char *out_buffer;

    AVPacket *packet;

    int ret, got_picture;

    struct SwsContext *img_convert_ctx;

    char filepath[] = "E:\\media\\1.avi";

    //初始化编解码库

    av_register_all();

    //已经无需使用的函数?

    //avformat_network_init();

    //创建AVFormatContext对象,与码流相关的结构。

    pFormatCtx = avformat_alloc_context();

    //初始化pFormatCtx结构

    if (avformat_open_input(&pFormatCtx, filepath, NULL, NULL) != ){

        printf("Couldn't open input stream.\n");

        return ;

    }

    //获取音视频流数据信息

    if (avformat_find_stream_info(pFormatCtx, NULL) < ){

        printf("Couldn't find stream information.\n");

        return ;

    }

    videoindex = -;

    //nb_streams视音频流的个数,这里当查找到视频流时就中断了。

    for (i = ; i < pFormatCtx->nb_streams; i++)

        if (pFormatCtx->streams[i]->codec->codec_type == AVMEDIA_TYPE_VIDEO){

            videoindex = i;

            break;

    }

    if (videoindex == -){

        printf("Didn't find a video stream.\n");

        return ;

    }

    //获取视频流编码结构

    pCodecCtx = pFormatCtx->streams[videoindex]->codec;

    //查找解码器

    pCodec = avcodec_find_decoder(pCodecCtx->codec_id);

    if (pCodec == NULL){

        printf("Codec not found.\n");

        return ;

    }

    //用于初始化pCodecCtx结构

    if (avcodec_open2(pCodecCtx, pCodec, NULL) < ){

        printf("Could not open codec.\n");

        return ;

    }

    //创建帧结构,此函数仅分配基本结构空间,图像数据空间需通过av_malloc分配

    pFrame = av_frame_alloc();

    pFrameYUV = av_frame_alloc();

    //创建动态内存,创建存储图像数据的空间

    //av_image_get_buffer_size获取一帧图像需要的大小

    out_buffer = (unsigned char *)av_malloc(av_image_get_buffer_size(AV_PIX_FMT_YUV420P, ui->widget->width(), ui->widget->height(), ));

    av_image_fill_arrays(pFrameYUV->data, pFrameYUV->linesize, out_buffer,

        AV_PIX_FMT_YUV420P, ui->widget->width(), ui->widget->height(), );

    packet = (AVPacket *)av_malloc(sizeof(AVPacket));

    //Output Info-----------------------------

    printf("--------------- File Information ----------------\n");

    //此函数打印输入或输出的详细信息

    av_dump_format(pFormatCtx, , filepath, );

    printf("-------------------------------------------------\n");

    //初始化img_convert_ctx结构

    img_convert_ctx = sws_getContext(pCodecCtx->width, pCodecCtx->height, pCodecCtx->pix_fmt,

        ui->widget->width(), ui->widget->height(), AV_PIX_FMT_YUV420P, SWS_BICUBIC, NULL, NULL, NULL);

    //SDL---------------------------

    SDL_Window *screen;

    SDL_Renderer* sdlRenderer;

    SDL_Texture* sdlTexture;

    SDL_Rect sdlRect;

    if (SDL_Init(SDL_INIT_VIDEO | SDL_INIT_AUDIO | SDL_INIT_TIMER)) {

        printf("Could not initialize SDL - %s\n", SDL_GetError());

        return;

    }

    screen = SDL_CreateWindowFrom((void *)ui->widget->winId());

    if(screen==NULL)

    {

        printf("Could not create window - %s\n", SDL_GetError());

        return;

    }

    sdlRenderer = SDL_CreateRenderer(screen, -, );

    sdlTexture = SDL_CreateTexture(sdlRenderer, SDL_PIXELFORMAT_IYUV, SDL_TEXTUREACCESS_STREAMING, pCodecCtx->width, pCodecCtx->height);

    sdlRect.x = ;

    sdlRect.y = ;

    sdlRect.w = pCodecCtx->width;

    sdlRect.h = pCodecCtx->height;

    //end SDL-----------------------

    //av_read_frame读取一帧未解码的数据

    while (av_read_frame(pFormatCtx, packet) >= ){

        //如果是视频数据

        if (packet->stream_index == videoindex){

            //解码一帧视频数据

            ret = avcodec_decode_video2(pCodecCtx, pFrame, &got_picture, packet);

            if (ret < ){

                printf("Decode Error.\n");

                return ;

            }

            if (got_picture){

                sws_scale(img_convert_ctx, (const unsigned char* const*)pFrame->data, pFrame->linesize, , pCodecCtx->height,

                    pFrameYUV->data, pFrameYUV->linesize);

                SDL_UpdateYUVTexture(sdlTexture, &sdlRect,

                    pFrameYUV->data[], pFrameYUV->linesize[],

                    pFrameYUV->data[], pFrameYUV->linesize[],

                    pFrameYUV->data[], pFrameYUV->linesize[]);

                SDL_RenderClear(sdlRenderer);

                SDL_RenderCopy(sdlRenderer, sdlTexture, NULL, &sdlRect);

                SDL_RenderPresent(sdlRenderer);

                SDL_Delay();

            }

        }

        av_free_packet(packet);

    }

    sws_freeContext(img_convert_ctx);

    av_frame_free(&pFrameYUV);

    av_frame_free(&pFrame);

    avcodec_close(pCodecCtx);

    avformat_close_input(&pFormatCtx);

}
QT+FFMPEG+SDL2.0实现视频播放的更多相关文章
- [原]如何在Android用FFmpeg+SDL2.0解码图像线程
关于如何在Android上用FFmpeg+SDL2.0解码显示图像参考[原]如何在Android用FFmpeg+SDL2.0解码显示图像 ,关于如何在Android使用FFmpeg+SDL2.0解码声 ...
- [原]如何在Android用FFmpeg+SDL2.0解码声音
关于如何在Android上用FFmpeg+SDL2.0解码显示图像参考[原]如何在Android用FFmpeg+SDL2.0解码显示图像 ,本文是基于上述文章和[原]零基础学习视频解码之解码声音 来移 ...
- [原]如何在Android用FFmpeg+SDL2.0之同步音频
同步音频的原理可以参考:http://dranger.com/ffmpeg/tutorial05.html 本文是在 [原]如何在Android用FFmpeg+SDL2.0之同步视频 的基础上面继续 ...
- [原]如何在Android用FFmpeg+SDL2.0解码显示图像
如何在Android上使用FFmpeg解码图像参考文章[原]如何在Android用FFmpeg解码图像 ,如何在Android上使用SDL2.0来显示图像参考[原]零基础学习SDL开发之在Androi ...
- FFmpeg + SDL2 实现的视频播放器「视音频同步」
文章转自:http://blog.csdn.net/i_scream_/article/details/52760033 日期:2016.10.8 作者:isshe github:github.com ...
- [原]如何在Android用FFmpeg+SDL2.0之同步视频
关于视频同步的原理可以参考http://dranger.com/ffmpeg/tutorial05.html 和 [原]基础学习视频解码之同步视频 这两篇文章,本文是在这两篇的基础上移植到了Andro ...
- 最简单的基于FFMPEG+SDL的视频播放器 ver2 (採用SDL2.0)
===================================================== 最简单的基于FFmpeg的视频播放器系列文章列表: 100行代码实现最简单的基于FFMPEG ...
- 最简单的基于FFMPEG+SDL的视频播放器 ver2 (采用SDL2.0)
===================================================== 最简单的基于FFmpeg的视频播放器系列文章列表: 100行代码实现最简单的基于FFMPEG ...
- 基于<最简单的基于FFMPEG+SDL的视频播放器 ver2 (采用SDL2.0)>的一些个人总结
最近因为项目接近收尾阶段,所以变的没有之前那么忙了,所以最近重新拿起了之前的一些FFMPEG和SDL的相关流媒体播放器的例子在看. 同时自己也用FFMPEG2.01,SDL2.01结合MFC以及网上罗 ...
随机推荐
- CRAP-API——如何在Linux服务器部署CRAP-API教程
前言 之前一直用的eolinker的免费版,但是人数有限,所以想找个免费开源的API管理平台,然后就选择了CRAP-API. 步骤 部署环境 LNMT部署 我的环境是之前部署的是LNMP,后面又增加的 ...
- docker 服务无法启动
重装以后仍然不行,dockerd可以运行,但是systemctl start docker.service不行,后来在编辑一个文件时,提示没有空间可以保存,结果一查,发现服务器空间基本占满了, 通过 ...
- [Javascript] Private Variables with IIFEs
An IIFE (immediately invoked function expression) is when a function is called immediately after it ...
- MySQL的简单概念及软件安装
数据库的简介 一.数据库的基本概念:数据.数据库.数据库管理系统.数据库系统 数据:数据(Data)是用来记录信息的可识别符号,是信息的具体表现形式. 数据库:(1)数据库(Database,DB)是 ...
- cc2530的I/O中断
通用I/O的中断 cc2530的CPU有18个中断源,每个中断都可以分别使能和控制. 18个中断源的优先级 18个中断源分为6个组,每一组有3个中断源,中断优先级可以通过配置相应寄存器来实现 中断源的 ...
- A1128 | 逻辑想象能力、简洁高效美观的代码、memset的使用情景
写了三遍才AC,这真是对智商极大的侮辱 C++代码: #include <stdio.h> #include <memory.h> #include <math.h> ...
- HustOJ二次开发之修改相关Logo
比如将如图中的HUSTOJ进行修改: 在Linux上修改,通过关键字搜索,会获取如下两个重要文件,找到都有的文字进行修改即可: grep -rn "HUSTOJ" * cd /ho ...
- css选择指定元素
.butSpan:){ margin-left: 10px; } nth-child(n+2)括号内可以是公式 可是是数字
- Policy Gradient Algorithms
Policy Gradient Algorithms 2019-10-02 17:37:47 This blog is from: https://lilianweng.github.io/lil-l ...
- 网页版查看Android源码地址
Android社区 http://www.androidos.net.cn/sourcecode