ssm小小整合
ssm整合:
首先是创建数据库:
CREATE TABLE `user` (

  `id` int() NOT NULL,

  `username` varchar() NOT NULL,

  `password` varchar() NOT NULL

) ;

ALTER TABLE `user`

  ADD PRIMARY KEY (`id`);

ALTER TABLE `user`

  MODIFY `id` int() NOT NULL AUTO_INCREMENT;
插入一条测试数据:

在me中创建一个新的web工程
springmvc的基本jar
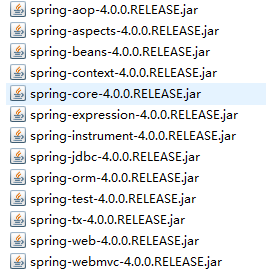
mybatis基本jar

mybatis-spring整合jar

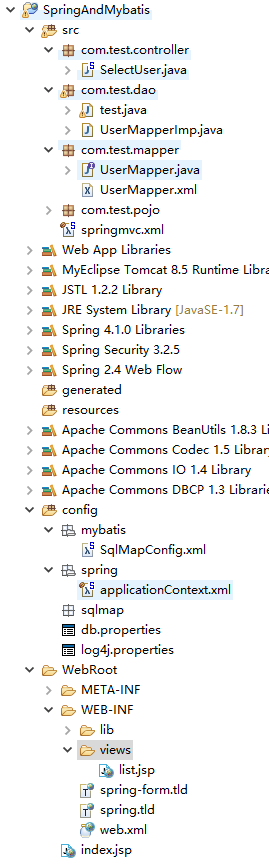
工程目录:
MyEclipse可以自动导入jar
mybatis的jar还需要自己手动导入到lib文件中
有些配置文件是系统自动生成
无须追求一致
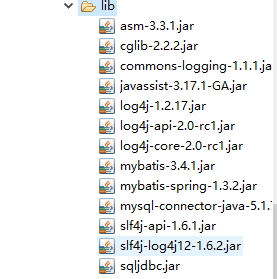
lib文件夹
基于mappe开发
1.spring和mybatis的整合:
SqlMapConfig.xml
此时可以根据自己的需要去设置<setting>......
根据自己开发的需求
<?xml version="1.0" encoding="UTF-8" ?>

<!DOCTYPE configuration

PUBLIC "-//mybatis.org//DTD Config 3.0//EN"

"http://mybatis.org/dtd/mybatis-3-config.dtd">

<configuration>

     <!-- 加载 映射文件 -->

     <mappers>

           <package name="com.test.mapper"/>

     </mappers>

</configuration>
mapper和java文件需要在同一个目录(mybatis知识)
applicationContext.xml
<?xml version="1.0" encoding="UTF-8"?>

<beans xmlns="http://www.springframework.org/schema/beans"

    xmlns:xsi="http://www.w3.org/2001/XMLSchema-instance"

    xmlns:p="http://www.springframework.org/schema/p"

    xmlns:aop="http://www.springframework.org/schema/aop"

    xmlns:context="http://www.springframework.org/schema/context"

    xmlns:jdbc="http://www.springframework.org/schema/jdbc"

    xmlns:mvc="http://www.springframework.org/schema/mvc"

    xmlns:tx="http://www.springframework.org/schema/tx"

    xmlns:util="http://www.springframework.org/schema/util"

    xsi:schemaLocation="http://www.springframework.org/schema/jdbc http://www.springframework.org/schema/jdbc/spring-jdbc-4.1.xsd

        http://www.springframework.org/schema/mvc http://www.springframework.org/schema/mvc/spring-mvc-4.1.xsd

        http://www.springframework.org/schema/beans http://www.springframework.org/schema/beans/spring-beans-4.1.xsd

        http://www.springframework.org/schema/context http://www.springframework.org/schema/context/spring-context-4.1.xsd

        http://www.springframework.org/schema/aop http://www.springframework.org/schema/aop/spring-aop-4.1.xsd

        http://www.springframework.org/schema/tx http://www.springframework.org/schema/tx/spring-tx-4.1.xsd

        http://www.springframework.org/schema/util http://www.springframework.org/schema/util/spring-util-4.1.xsd">

<!-- 加载配置文件 -->

<context:property-placeholder location="classpath:db.properties"/>

<!-- 数据源 -->

<bean id="dataSource" class="org.apache.commons.dbcp.BasicDataSource" destroy-method="close">

         <property name="driverClassName" value="${jdbc.driver}" />

           <property name="url" value="${jdbc.url}" />

           <property name="username" value="${jdbc.username}" />

           <property name="password" value="${jdbc.password}" />

           <property name="maxActive" value="" />

           <property name="maxIdle" value="" />

</bean>

<!-- 配置sqlSessinFactory -->

     <!-- org.mybatis.spring.SqlSessionFactoryBean -->

     <bean id="sqlSessionFactory" class="org.mybatis.spring.SqlSessionFactoryBean">

           <!-- 加载mybatis的配置文件 -->

           <property name="configLocation" value="mybatis/SqlMapConfig.xml" />

           <!-- 数据源 -->

           <property name="dataSource" ref="dataSource" />

     </bean>

<!-- mapper配置

     MapperFactoryBean:根据mapper接口生成代理对象

-->

     <!-- mapperInterface指定mapper接口 -->

     <bean id="userMapper" class="org.mybatis.spring.mapper.MapperFactoryBean">

           <property name="mapperInterface" value="com.test.mapper.UserMapper"/>

           <property name="sqlSessionFactory" ref="sqlSessionFactory"/>

     </bean>

</beans>
此时的整合基本结束
整合测试:
UserMapper.java
public interface UserMapper {

         //根据id查询用户信息

         public User findUserById(int id) throws Exception;

         public List<User> findUserAll() throws Exception;

}
UserMapper.xml
<?xml version="1.0" encoding="UTF-8" ?>

<!DOCTYPE mapper

PUBLIC "-//mybatis.org//DTD Mapper 3.0//EN"

"http://mybatis.org/dtd/mybatis-3-mapper.dtd">

<mapper namespace="com.test.mapper.UserMapper">

     <select id="findUserById" parameterType="int" resultType="com.test.pojo.User">

           SELECT * FROM USER WHERE id=#{value}

     </select>

     <select id="findUserAll" parameterType="int" resultType="com.test.pojo.User">

           SELECT * FROM USER

     </select>

</mapper>
测试:
public class test {

    public static void main(String[] args) throws Exception {

          ApplicationContext app = new ClassPathXmlApplicationContext("spring/applicationContext.xml");

                   UserMapper user = (UserMapper) app.getBean("userMapper");

                   User u = user.findUserById();

                   System.out.println(u);

    }

}
DEBUG [main] - Closing non transactional SqlSession [org.apache.ibatis.session.defaults.DefaultSqlSession@6b81ce95]

DEBUG [main] - Returning JDBC Connection to DataSource

User [id=1, username=user, password=1234]
此时数据是可以成功从数据库中查询!
2.关于web网页实现测试
配置web.xml
<?xml version="1.0" encoding="UTF-8"?>

<web-app xmlns:xsi="http://www.w3.org/2001/XMLSchema-instance"
 xmlns="http://xmlns.jcp.org/xml/ns/javaee"
xsi:schemaLocation="http://xmlns.jcp.org/xml/ns/javaee
http://xmlns.jcp.org/xml/ns/javaee/web-app_3_1.xsd" version="3.1">

  <!-- 配置DispatcherServlet -->

  <servlet>

         <servlet-name>springDispatcherServlet</servlet-name>

         <servlet-class>org.springframework.web.servlet.DispatcherServlet</servlet-class>

         <init-param>

           <param-name>contextConfigLocation</param-name>

           <param-value>classpath:springmvc.xml</param-value>

         </init-param>

         <load-on-startup></load-on-startup>

  </servlet>

  <servlet-mapping>

         <servlet-name>springDispatcherServlet</servlet-name>

         <url-pattern>/</url-pattern>

  </servlet-mapping>

  <welcome-file-list>

      <welcome-file>index.jsp</welcome-file>

  </welcome-file-list>

</web-app>
基本的配置也就是 这些了,其他的根据自己项目的需求去设置。
配置springmvc.xml
<?xml version="1.0" encoding="UTF-8"?>

<beans xmlns="http://www.springframework.org/schema/beans"

    xmlns:xsi="http://www.w3.org/2001/XMLSchema-instance"

    xmlns:p="http://www.springframework.org/schema/p"

    xmlns:aop="http://www.springframework.org/schema/aop"

    xmlns:context="http://www.springframework.org/schema/context"

    xmlns:jdbc="http://www.springframework.org/schema/jdbc"

    xmlns:mvc="http://www.springframework.org/schema/mvc"

    xmlns:tx="http://www.springframework.org/schema/tx"

    xmlns:util="http://www.springframework.org/schema/util"

    xsi:schemaLocation="http://www.springframework.org/schema/jdbc http://www.springframework.org/schema/jdbc/spring-jdbc-4.1.xsd

        http://www.springframework.org/schema/mvc http://www.springframework.org/schema/mvc/spring-mvc-4.1.xsd

        http://www.springframework.org/schema/beans http://www.springframework.org/schema/beans/spring-beans-4.1.xsd

        http://www.springframework.org/schema/context http://www.springframework.org/schema/context/spring-context-4.1.xsd

        http://www.springframework.org/schema/aop http://www.springframework.org/schema/aop/spring-aop-4.1.xsd

        http://www.springframework.org/schema/tx http://www.springframework.org/schema/tx/spring-tx-4.1.xsd

        http://www.springframework.org/schema/util http://www.springframework.org/schema/util/spring-util-4.1.xsd">

<!-- 配置自动扫描的包 -->

<context:component-scan base-package="com.test"></context:component-scan>
<!--注解开发驱动-->

<mvc:annotation-driven></mvc:annotation-driven>

<!-- 配置视图解析器 -->

<bean class="org.springframework.web.servlet.view.InternalResourceViewResolver">

     <property name="prefix" value="/WEB-INF/views/"></property>

     <property name="suffix" value=".jsp"></property>

</bean>

</beans>
配置handler
SelectUser.java
@Controller

public class SelectUser {

    @RequestMapping("/list")

    public String selectList(Model model) throws Exception{return "list";

    }

}
此时先进行代码的测试
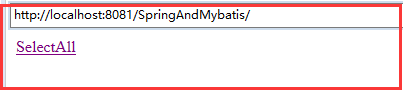
index.jsp
  <body>

   <a href="<%=request.getContextPath() %>/list">SelectAll</a>

  </body>
list.jsp
<body>

hello

</body>
然后把项目放在tomcat上运行
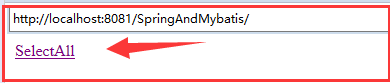
点击超链接进行跳转

此时可以成功跳转
<%=request.getContextPath() %>加上,否则跳转的路径可能会出问题
在进行数据的查询测试:
UserMapperImp.java
把数据库的查询以及相关返回均放在一个类中!
public class UserMapperImp {

     static ApplicationContext app = new ClassPathXmlApplicationContext("spring/applicationContext.xml");

        //查询全部

        public static List<User> getUsers() throws Exception{

            UserMapper um = (UserMapper) app.getBean("userMapper");

            List<User> u =  um.findUserAll();

            return u;

        }

}
SelectUser.java
@Controller

public class SelectUser {

    @RequestMapping("/list")

    public String selectList(Model model) throws Exception{

        model.addAttribute("users", UserMapperImp.getUsers());

        return "list";

    }

}
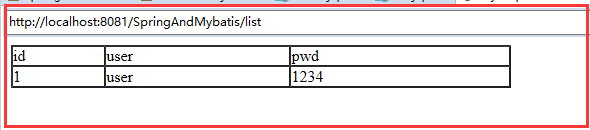
list.jsp
对数据库进行循环遍历的获取!
<table border="" cellpadding="" cellspacing="" width="">

        <tr>

            <td>id</td>

            <td>user</td>

            <td>pwd</td>

        </tr>

        <c:forEach items="${users}" var="u">

            <tr>

                <td>${u.id}</td>

                <td>${u.username}</td>

                <td>${u.password}</td>

            </tr>

        </c:forEach>

    </table>
此时再次重新启动tomcat
点击超链接
ssm小小整合的更多相关文章
- SSM项目整合基本步骤
SSM项目整合 1.基本概念 1.1.Spring Spring 是一个开源框架, Spring 是于 2003 年兴起的一个轻量级的 Java 开发框架,由 Rod Johnson 在其著作 ...
- SSM框架整合项目 :租房管理系统
使用ssm框架整合,oracle数据库 框架: Spring SpringMVC MyBatis 导包: 1, spring 2, MyBatis 3, mybatis-spring 4, fastj ...
- 基于maven的ssm框架整合
基于maven的ssm框架整合 第一步:通过maven建立一个web项目. 第二步:pom文件导入jar包 (1 ...
- JavaWeb之ssm框架整合,用户角色权限管理
SSM框架整合 Spring SpringMVC MyBatis 导包: 1, spring 2, MyBatis 3, mybatis-spring 4, fastjson 5, aspectwea ...
- SSM框架整合环境构建——基于Spring4和Mybatis3
目录 环境 配置说明 所需jar包 配置db.properties 配置log4j.properties 配置spring.xml 配置mybatis-spring.xml 配置springmvc.x ...
- ssm+redis整合(通过aop自定义注解方式)
此方案借助aop自定义注解来创建redis缓存机制. 1.创建自定义注解类 package com.tp.soft.common.util; import java.lang.annotation.E ...
- SSM框架整合篇
目录 SSM整合 框架搭建步骤 SSM整合 Author:SimpleWu github(已上传SSMrest风格简单增删该查实例):https://gitlab.com/450255266/code ...
- springmvc(二) ssm框架整合的各种配置
ssm:springmvc.spring.mybatis这三个框架的整合,有耐心一步步走. --WH 一.SSM框架整合 1.1.整合思路 从底层整合起,也就是先整合mybatis与spring,然后 ...
- ssm+redis整合(通过cache方式)
这几天的研究ssm redis 终于进入主题了,今天参考了网上一些文章搭建了一下ssm+redis整合,特别记录下来以便以后可以查询使用,有什么不足请大牛们提点 项目架构 1.pom.xml < ...
随机推荐
- java编写简单的语法分析预测程序
编译原理课程中,编了一个简单的语法分析预测程序,这个程序时根据固定的文法得到预测分析表,然后编写程序来判断表达式是否会正确推到出来. 前提是程序没有左递归符合LL(1)文法: 文法如下: E→TE' ...
- java_对象序列化、反序列化
1.概念 序列化:将对象转化为字节序列的过程 反序列化:将字节序列转化为对象的过程 用途: A:将对象转化为字节序列保存在硬盘上,如文件中,如文本中的例子就是将person对象序列化成字节序列,存在p ...
- servlet开发(四)之ServletContext
接上一篇. 2.3.4 利用ServletContext对象读取资源文件 比如我们要读取web项目中的配置文件. 项目目录结构如下: 使用ServletContext对象读取资源文件的示例代码如下: ...
- C#学习笔记14
1.在多个线程的同步数据中,避免使用this.typeof(type).string进行同步锁,使用这3个容易造成死锁. 2.使用Interlocked类:我们一般使用的互斥锁定模式(同步数据)为Lo ...
- ES5 object方法整理
Object.getPrototypeOf(object):调用对象父类原型上的方法; function Person(){ this.method1 = function(){alert(1)} } ...
- 1004. 填充矩形 (Standard IO)
题目描述 已知矩形的大小为n×m,现用a×a的正方形填充该矩形.输入三个正整数n,m,a(n,m,a≤10^9),计算至多能填入多少正方形?(正方形可以正好碰到矩形边界,但不能超出矩形外) 输入 一行 ...
- Office - Word 2013
1. 使用 Quick Parts 向Word中添加自定义属性: 2.
- 使用Axure管理团队项目以及分享原型
第一部分:使用Axure管理团队项目 首先,你要有一个Axure账户 呵呵哒.注册地址:http://share.axure.com 发起团队项目 在浏览器登录 Axure share(网速很卡很卡) ...
- SQL Server ->> OFFSET & FETCH子句
SQL Server 2012引入OFFSET + FETCH字句.它俩出现在SELECT .... ORDER BY ...后面.作用是告诉SQL Server在结果集中忽略前N行然后取前M行出来. ...
- 【Leetcode】【Medium】Binary Tree Zigzag Level Order Traversal
Given a binary tree, return the zigzag level order traversal of its nodes' values. (ie, from left to ...