jenkins+docker+git+etcd实现应用配置文件管理
两台机器:
一台机器安装gitlab: http://www.cnblogs.com/cjsblogs/p/8716932.html
另一台机器安装etcd+docker+jenkins
jenkins-docker: https://www.cnblogs.com/cjsblogs/p/8717602.html
防火墙端口启动;
firewall-cmd --zone=public --add-port=2379/tcp --permanent

firewall-cmd --zone=public --add-port=2380/tcp --permanent

firewall-cmd --reload
安装etcd:
yum install etcd -y

systemctl start etcd
安装setuptools
wget --no-check-certificate https://pypi.python.org/packages/69/56/f0f52281b5175e3d9ca8623dadbc3b684e66350ea9e0006736194b265e99/setuptools-38.2.4.zip#md5=e8e05d4f8162c9341e1089c80f742f64

unzip setuptools-38.2.4.zip

cd setuptools-38.2.4

python setup.py install

cd ..
安装pip
wget --no-check-certificate https://github.com/pypa/pip/archive/1.5.5.tar.gz

tar -xvf 1.5.5.tar.gz #解压文件

cd pip-1.5.5/

python setup.py install
安装python etcd模块:
pip install python-etcd
在git创建dev组,以及dev_etcd项目, 并且制作好的etcd脚本:
git目录如下:
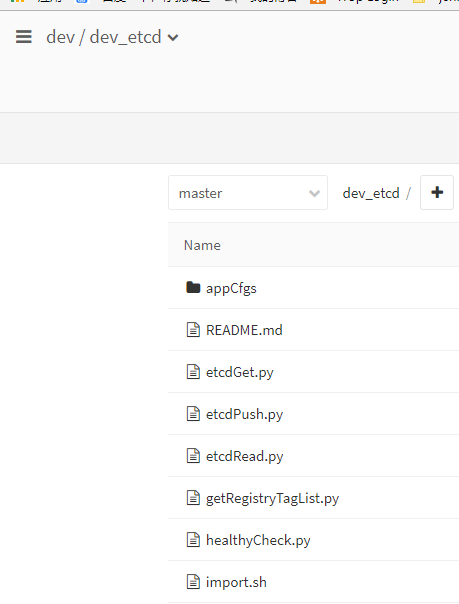
etcdGet.py
#!/usr/bin/env python2.7

# -*- coding:utf-8 -*-

from __future__ import print_function

import etcd

import sys

import os

import re

etcdCli=etcd.Client(host=sys.argv[1],port=2379)

f = open(sys.argv[3],'wb')

f.write(etcdCli.get('%s' % sys.argv[2]).value.encode('utf-8'))

f.close()
etcdPush.py
#!/usr/bin/env python2.7

# -*- coding:utf-8 -*-

from __future__ import print_function

import etcd

import sys

import time

import os

import re

reload (sys)

etcdCli=etcd.Client(host=sys.argv[1],port=2379)

def push(local_dir, top_path='/', with_local_path=False):

    try:

        for root, dirs, files in os.walk(local_dir):

            if '.' not in dirs and '.' not in root:

                for name in files:

                    file = os.path.join(root, name)

                    f = open(file)

                    content = f.read()

                    f.close()

                    if not with_local_path:

                        etcd_path = '/' + top_path.strip('/') + '/' + file[re.match(local_dir, file).end():].strip(

                            '/')

                    else:

                        etcd_path = '/' + top_path.strip('/') + '/' + file.strip('/')

                    print(etcd_path)

                    etcdCli.write(etcd_path, content)

    except Exception as e:

        etcd.EtcdException(e)

push(sys.argv[2],top_path=sys.argv[3])
etcdRead.py
#!/usr/bin/env python

import etcd

import sys

import time

import os

import re

reload (sys)

def getValue(host,port,location):

    etcdCli=etcd.Client(host=host,port=port)

    context=etcdCli.read(location).value

    return context

envValue=getValue(host=sys.argv[1],port=int(sys.argv[2]),location=sys.argv[3])

print(envValue)
getRegistryTagList.py
#!/usr/bin/env python2.7

import requests

import json

import sys

def getRegistryTagList():

    registry="http://harbor.xxx.com"

    res=requests.get(registry+"/v2/")

    assert res.status_code == 200

    res=requests.get(registry+"/v2/_catalog?n=1000")

    assert res.status_code == 200

    repositories = res.json().get("repositories",[])

    for repository in repositories:

        res = requests.get(registry + "/v2/{}/tags/list".format(repository))

        tags = res.json().get("tags",None)

        if tags:

            for tag in tags:

                image = format(repository)

                tag = format(tag)

                if len(sys.argv) <2:

                    print (image+":"+tag)

                else:

                    AppTargetName=sys.argv[1]

                    if image.endswith(AppTargetName):

                        print (image+":"+tag)

if __name__ == "__main__":

    getRegistryTagList()
此处需要修改对应的私有docker仓库地址
healthyCheck.py
#!/usr/bin/env python

import requests,sys,os

def healthyCheck():

  if len(sys.argv) < 2: sys.exit("need 1 argument")

  url = sys.argv[1]

  try:

    code = requests.get(url,timeout=1).status_code

    if code >= 200 and code < 400:

      print "healthy check ok , status_code:%s" % code

    else:

      print "healthy check not ok, status_code:%s" % code

      sys.exit("healthy check not ok")

  except Exception,e:

    print "e"

if __name__ == "__main__":

  healthyCheck()
import.sh
/opt/dev_etcd/etcdPush.py 172.16.5.113 appCfgs /xxx.com/instances
此处建立etcd推送的配置文件服务器以及路径
以上所有的脚本全部完毕
接下来需要在jenkins上创建job结合git的webhooks推送应用配置文件
jenkins创建job:

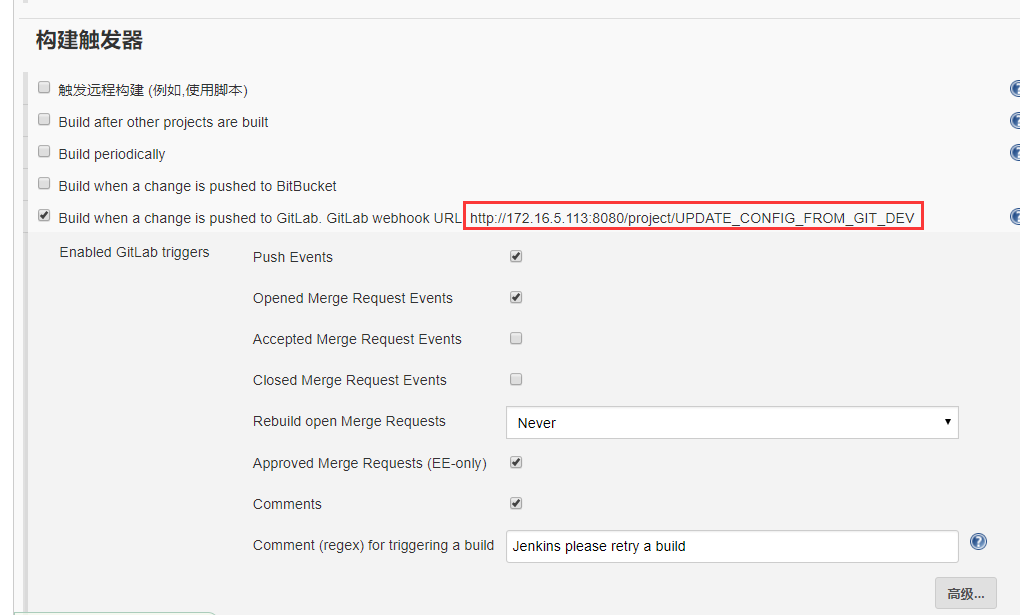
截图处创建git的webhooks能用到
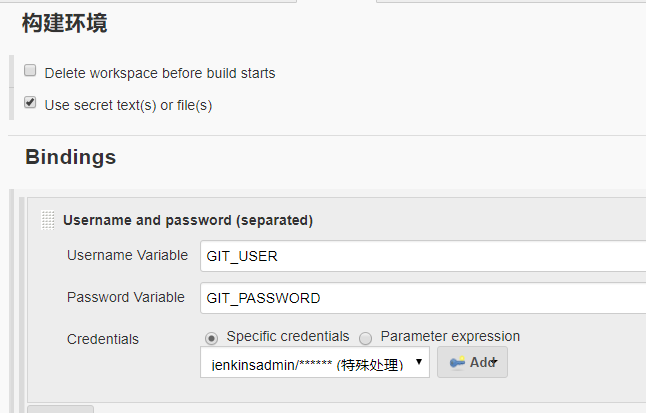
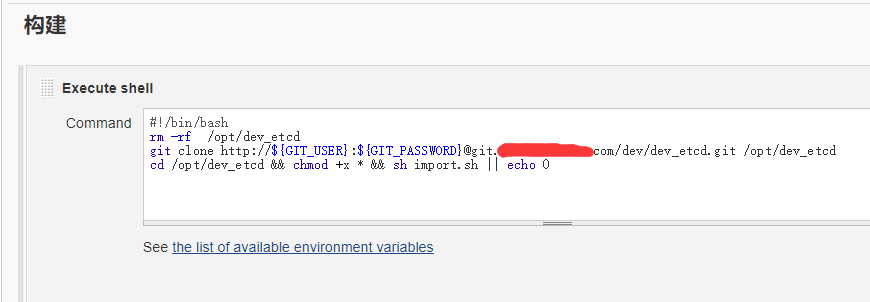
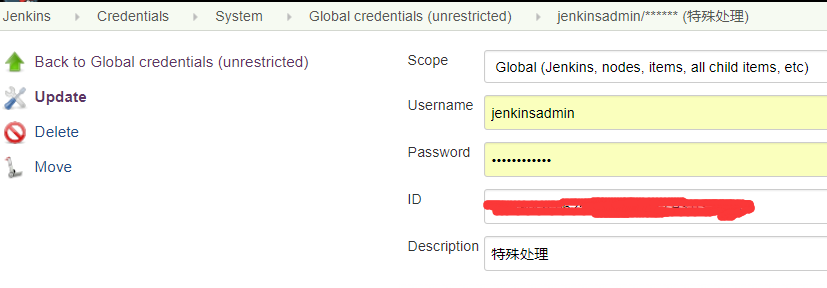
以上git clone直接提交用户名和密码拉取git代码, 其中我的密码带有@符号, git clone无法识别@符号, 需要将@转义为%40故账号需要特殊处理:
最后在git上创建webhooks

综上全部创建完毕, 在jenkins上点击job立即构建测试吧
jenkins+docker+git+etcd实现应用配置文件管理的更多相关文章
- 基于 Jenkins+Docker+Git 的CI流程初探
在如今的互联网时代,随着软件开发复杂度的不断提高,软件开发和发布管理也越来越重要.目前已经形成一套标准的流程,最重要的组成部分就是持续集成(Continuous Integration,CI)及持续部 ...
- 从0到1体验Jenkins+Docker+Git+Registry实现CI自动化发布
一.前言 Jenkins是一款开源 CI&CD 软件,用于自动化各种任务,包括构建.测试和部署软件.Jenkins 支持各种运行方式,可通过系统包.Docker 或者通过一个独立的 Java ...
- Jenkins+Docker+Git+Registry
从0到1体验Jenkins+Docker+Git+Registry实现CI自动化发布 笔者:@拿着保温瓶的年轻人 目录: 一.前言 二.发布流程 三.环境准备 四.部署思路梳理 五.三台机器上操作 ...
- Jenkins+Docker+Git+Harbor流水线打包
Jenkins+Docker+Git+Harbor流水线打包 环境: CentOS Linux release 7.6.1810 (Core) 192.168.247.214 Jenkins+dock ...
- Jenkins+Docker+Git 自动化部署
Jenkins+Docker+Git 自动化部署图文教程 https://blog.csdn.net/qq_38252039/article/details/89791247 前言: 通过几天的学习和 ...
- Docker 搭建 etcd 集群配置
#关闭selinux.防火墙 systemctl stop firewalld.service systemctl disable firewalld.service firewall-cmd --s ...
- jenkins+docker+git+harbor构建及代码回滚(未完)
目录 一.部署 环境工作流程介绍 部署harbor 一.部署 前提环境说明 192.168.111.3 该机器为git本地仓库,及git远程仓库(git用户创建),及Harbor镜像仓库 192.16 ...
- jenkins+docker持续集成实验
在互联网时代,对于每一家公司,软件开发和发布的重要性不言而喻,目前已经形成一套标准的流程,最重要的组成部分就是持续集成(CI)及持续部署.交付(CD).本文基于Jenkins+Docker+Git实现 ...
- Jenkins 基于 Docker git JAVA CI/CD
准备两台机器 192.168.31.200 centos7 docker harbor git 192.168.31.201 centos7 docker jenkins maven git Ha ...
随机推荐
- Hdu 5884
hdu 5884 Sort 题意: n个有序序列的归并排序.每次可以选择不超过k个序列进行合并,合并代价为这些序列的长度和,总的合并代价不能超过T, 问k最小是多少. 解法: 1:首先想到的是二分这个 ...
- 【洛谷4001】 [ICPC-Beijing 2006]狼抓兔子(最小割)
传送门 洛谷 Solution 直接跑最小割板子就好了. 代码实现 #include<stdio.h> #include<stdlib.h> #include<strin ...
- OpenDayLight安装Features
OpenDayLight 0.4.4-Beryllium-SR4 opendaylight-user@root>feature:install odl-restconf opendaylight ...
- Oracle用户被锁解决方法
.查看用户的proifle是哪个,一般是default: sql>SELECT username,PROFILE FROM dba_users; .查看指定概要文件(如default)的密码有效 ...
- 深入解析 composer 的自动加载原理
PHP 自5.3的版本之后,已经重焕新生,命名空间.性状(trait).闭包.接口.PSR 规范.以及 composer 的出现已经让 PHP 变成了一门现代化的脚本语言.PHP 的生态系统也一直在演 ...
- 在js中创建命名空间的几种写法
在JavaScript中全局变量经常会引起命名冲突,甚至有时侯重写变量也不是按照你想像中的顺序来的,可以看看下面的例子: var sayHello = function() { return 'H ...
- 微信小程序之状态管理A
其实这个标题 不是很对 主要是最近小程序项目中 有这么一个状态 所有商品都共用一个商品详情页面 大概就是这样子 为了公司 保险起见,一些展示的内容已经处理 但是无伤大雅 就是这么两个按钮 左侧粉色 ...
- Java:基础知识点
1. 面向对象的特征 (1)封装:把过程和数据包围起来,对数据的访问只能通过已定义的界面.即现实世界可以被描绘成一系列完全自治.封装的对象,这些对象通过一个受保护的接口访问其他对象:(2)继承:是一种 ...
- 启动eclipse导致Tomcat的配置文件重置
转: 启动eclipse导致Tomcat的配置文件重置 导入一个项目,需要在Tomcat的配置文件中配置JNDI数据源,需要修改Tomcat下的server.xml文件.但是当我们修改完后重启Tomc ...
- set_multicycle_path语法说明【转载】
(转载) (其实多看手册就知道原因了) Q:多周期路径中的检查保持时间时刻,为什么默认是在建立时间检查的前一个cycle?请大家谈谈自己的理解. 如:Set_multicycle_path -setu ...