SVN搭建以及客户端使用
第1章 CentOS下搭建SVN服务器
1.1 SVN简介
SVN是Subversion的简称,是一个开放源代码的版本控制系统,相较于RCS、CVS,它采用了分支管理系统,它的设计目标就是取代CVS。互联网上很多版本控制服务已从CVS迁移到Subversion。说得简单一点SVN就是用于多个人共同开发同一个项目,共用资源的目的
1.2 SVN安装
官网下载: http://subversion.apache.org/packages.html
SVN客户端TortoiseSVN :https://tortoisesvn.net/downloads.html
1.2.1 系统环境
[root@Alex ~]# cat /etc/redhat-release

CentOS Linux release 7.1.1503 (Core)

[root@Alex ~]# uname -r

3.10.0-229.el7.x86_64

[root@Alex ~]# systemctl status firewalld

firewalld.service - firewalld - dynamic firewall daemon

   Loaded: loaded (/usr/lib/systemd/system/firewalld.service; disabled)

   Active: inactive (dead)

Oct 30 22:13:43 Alex systemd[1]: Starting firewalld - dynamic firewall daemon...

Oct 30 22:13:48 Alex systemd[1]: Started firewalld - dynamic firewall daemon.

Oct 30 22:44:11 Alex systemd[1]: Stopping firewalld - dynamic firewall daemon...

Oct 30 22:44:12 Alex systemd[1]: Stopped firewalld - dynamic firewall daemon.

[root@Alex ~]# getenforce

Permissive
1.2.2 安装
使用yum命令安装svn
$ yum install subversion -y
新建svn存储目录
$ mkdir /svn
新建一个测试仓库
$ svnadmin create /svn/test/

$ ll /svn/test/

total 16

drwxr-xr-x. 2 root root   51 Oct 31 12:45 conf

drwxr-sr-x. 6 root root 4096 Oct 31 12:45 db

-r--r--r--. 1 root root    2 Oct 31 12:45 format

drwxr-xr-x. 2 root root 4096 Oct 31 12:45 hooks

drwxr-xr-x. 2 root root   39 Oct 31 12:45 locks

-rw-r--r--. 1 root root  229 Oct 31 12:45 README.txt
以下关于目录的说明:
hooks目录:放置hook脚步文件的目录
locks目录:用来放置subversion的db锁文件和db_logs锁文件的目录,用来追踪存取文件库的客户端
format目录:是一个文本文件,里边只放了一个整数,表示当前文件库配置的版本号
conf目录:是这个仓库配置文件(仓库用户访问账户,权限)
1.2.3 配置SVN配置文件
$ cd /svn/test/conf

$ vim svnserve.conf

### This file controls the configuration of the svnserve daemon, if you

### use it to allow access to this repository.  (If you only allow

### access through http: and/or file: URLs, then this file is

### irrelevant.)

### Visit http://subversion.tigris.org/ for more information.

[general]

### These options control access to the repository for unauthenticated

### and authenticated users.  Valid values are "write", "read",

### and "none".  The sample settings below are the defaults.

anon-access = read         ##注意前边不要有空格,要顶齐

auth-access = write         ##注意前边不要有空格,要顶齐

### The password-db option controls the location of the password

### database file.  Unless you specify a path starting with a /,

### the file's location is relative to the directory containing

### this configuration file.

### If SASL is enabled (see below), this file will NOT be used.

### Uncomment the line below to use the default password file.

password-db = passwd        ##注意前边不要有空格,要顶齐

### The authz-db option controls the location of the authorization

### rules for path-based access control.  Unless you specify a path

### starting with a /, the file's location is relative to the the

### directory containing this file.  If you don't specify an

### authz-db, no path-based access control is done.

### Uncomment the line below to use the default authorization file.

authz-db = authz           #授权文件

### This option specifies the authentication realm of the repository.

### If two repositories have the same authentication realm, they should

### have the same password database, and vice versa.  The default realm

### is repository's uuid.

realm = This is My First Test Repository   ##这个是提示信息

[sasl]

### This option specifies whether you want to use the Cyrus SASL

### library for authentication. Default is false.

### This section will be ignored if svnserve is not built with Cyrus

### SASL support; to check, run 'svnserve --version' and look for a line

### reading 'Cyrus SASL authentication is available.'

# use-sasl = true

### These options specify the desired strength of the security layer

### that you want SASL to provide. 0 means no encryption, 1 means

### integrity-checking only, values larger than 1 are correlated

### to the effective key length for encryption (e.g. 128 means 128-bit

### encryption). The values below are the defaults.

# min-encryption = 0

# max-encryption = 256
1.2.4 配置访问用户及密码
$ cd /svn/test/conf

$ vim passwd

### This file is an example password file for svnserve.

### Its format is similar to that of svnserve.conf. As shown in the

### example below it contains one section labelled [users].

### The name and password for each user follow, one account per line.

[users]

# harry = harryssecret

# sally = sallyssecret

dev = 123456

test1 = 123456

test2 = 123456
1.2.5 配置新用户的授权文件
$ cd /svn/test/conf

### This file is an example authorization file for svnserve.

### Its format is identical to that of mod_authz_svn authorization

### files.

### As shown below each section defines authorizations for the path and

### (optional) repository specified by the section name.

### The authorizations follow. An authorization line can refer to:

###  - a single user,

###  - a group of users defined in a special [groups] section,

###  - an alias defined in a special [aliases] section,

###  - all authenticated users, using the '$authenticated' token,

###  - only anonymous users, using the '$anonymous' token,

###  - anyone, using the '*' wildcard.

###

### A match can be inverted by prefixing the rule with '~'. Rules can

### grant read ('r') access, read-write ('rw') access, or no access

### ('').

[aliases]

# joe = /C=XZ/ST=Dessert/L=Snake City/O=Snake Oil, Ltd./OU=Research Institute/CN=Joe Average

[groups]

# harry_and_sally = harry,sally

# harry_sally_and_joe = harry,sally,&joe

# [/foo/bar]

# harry = rw

# &joe = r

# * =

# [repository:/baz/fuz]

# @harry_and_sally = rw

# * = r

admin = dev,test1

user = test2

[/svn/test/]

@admin = rw

@user = r

* = r
说明:
[repo0:/] 代表对repo0所有版本库设置权限权限
[repo0:/21yunwei] 代表对repo0版本库下的21yunwei项目设置权限
[repo0:/21yunwei/demo] 代表对repo0版本库下的21yunwei项目的demo目录设置权限
admin = lqb,test2 创建admin组,组成员为:lqb,test2
user = test1 创建用户组,用户成员:test1
[test:/] 赋予根权限,为了便于管理和权限的控制,可以把权限细化到版本库中相应的目录,如[test:/test]这就是test项目下的一个目录
@admin = rw admin组有读写的权限
@user = r user组只有读的权限
*= 表示除了上面设置的权限用户组以外,其他所有用户都设置空权限,空权限表示禁止访问本目录,这很重要一定要加上
1.2.6 启动svn
$ svnserve -d -r /svn
注意:更改svnserver.conf时需要重启SVN服务,更改authz,passwd文件时则不需要重启服务
第2章 通过客户端进行连接
2.1 下载客户端并安装
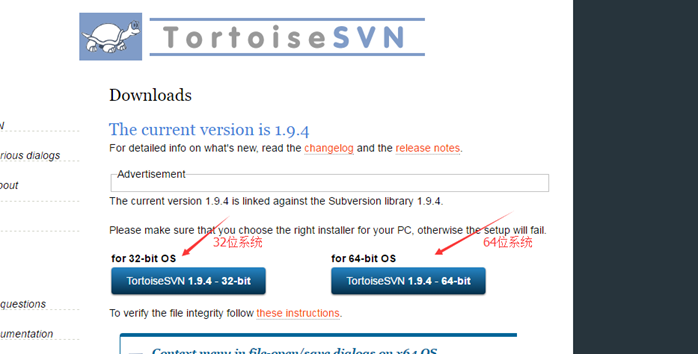
首先安装SVN客户端,windows一般选择乌龟客户端https://tortoisesvn.net/downloads.html。
根据系统位数选择相应客户端进行安装
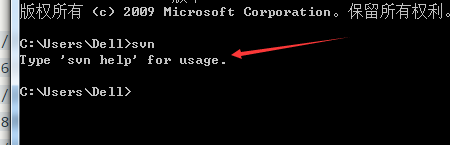
如果你喜欢用命令行操作,请务必记得勾选command line client tool为will be install on local hard driver,不用命令行的跳过这一步

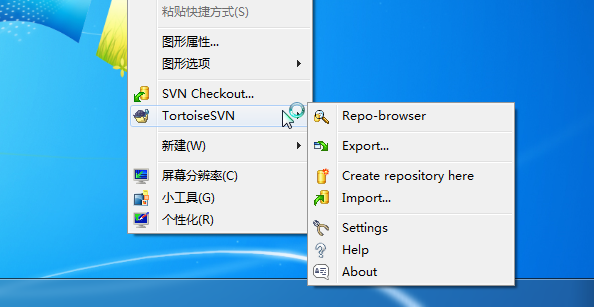
然后一路next即可安装。安装完毕后,在任意地方右键查看快捷菜单。发现TortoiseSVN即表示安装成功。
如果勾选了安装命令行工具,那么输入命令SVN,有如下提示也表示安装成功
2.2 中文设置
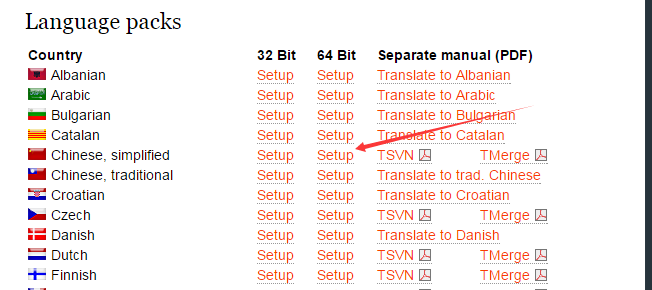
但是此时菜单全是英文的,如果你不习惯英文,可以去下载语言包,记得下对系统位数
官网下载,上面有地址
安装完语言包之后,可以右键进入setting设置
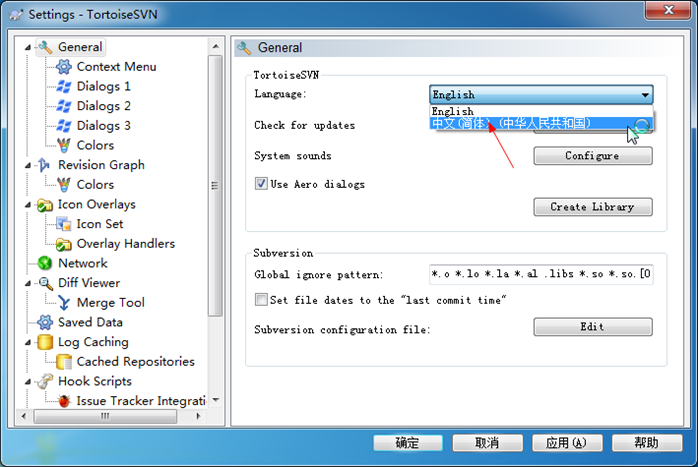
选择你喜欢的语言(比如中文),然后确定,不出意外,现在的语言已经切换到中文了

安装教程到此结束,下面开始介绍SVN的使用
2.3 使用说明
2.3.1 检出项目
假如项目已经在服务器的仓库里,那么现在你要做的就是把它检出到本地。
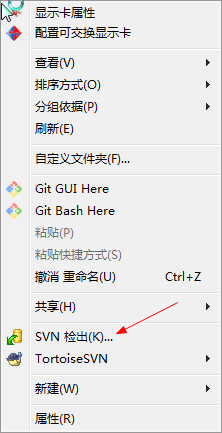
首先创建一个空文件夹。在空文件夹内右键,选择SVN检出
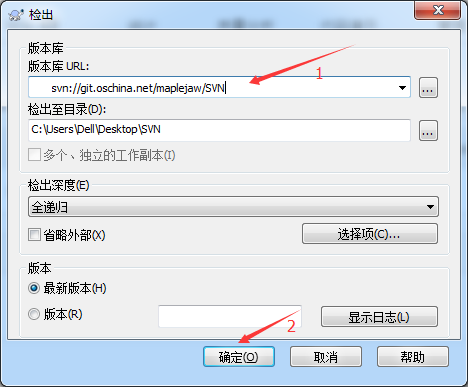
现在你看到应该是这个界面,填入版本库地址,选择确定
此时会弹出一个对话框让你输入账号密码,输入你的账号密码即可。记得勾选保存认证,不然每次操作都会让你输入。

等几分钟就可以检出完毕

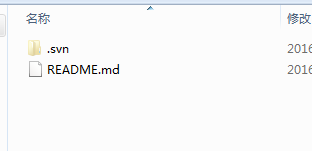
此时在你的目录下就能看到你的项目,现在可以开始愉快的工作了
2.3.2 导入项目
但是有时候你已经在本地建立好了项目,需要把你项目推到SVN上,此时应怎么做呢?
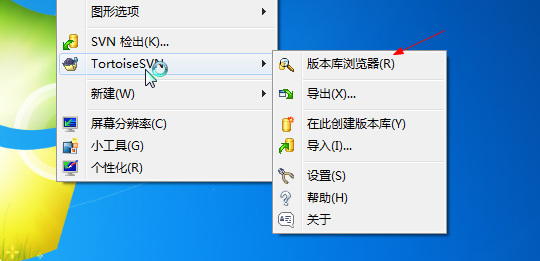
右键选择版本库浏览器。
在相应目录下,右键,加入文件/加入文件夹,选择相应目录即可
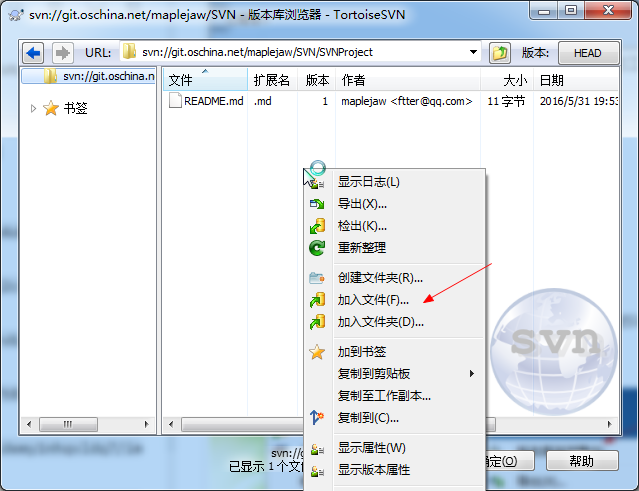
比如我现在有个项目叫SVNProject,我想把它传到SVN上

那么我只需选择加入文件夹即可。

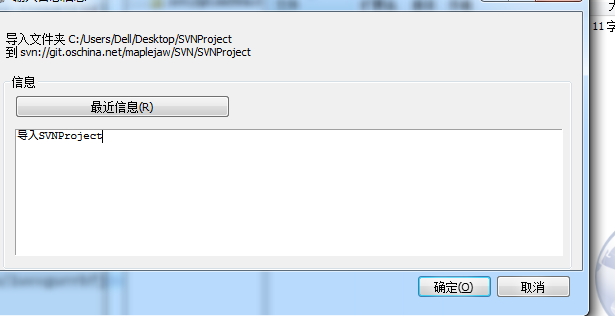
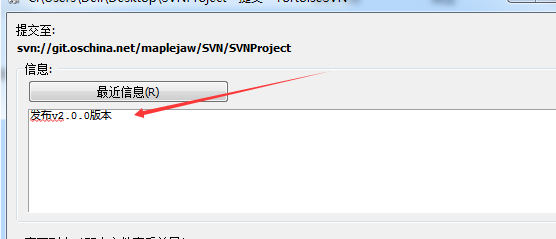
务必要输入提交信息。这样别人才能知道你干了什么
导入成功就能看到目录。

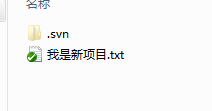
但是,不要以为导入成功就可以了。你还得重新检出,重新检出的项目才是受SVN控制的,务必记得检出

在SVNProject上右键检出到本地,然后在里面进行修改。现在就可以愉快的工作了。
检出过后的右键菜单变成了这样。
绿色表示当前文件没有被修改过(看不见颜色的重启下电脑就好了)。
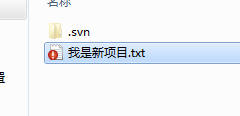
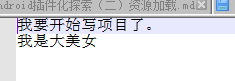
假如我现在在我是新项目.txt中加了一行字,然后保存
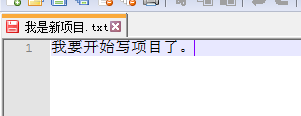
发现现在变成了红色,红色表示已修改
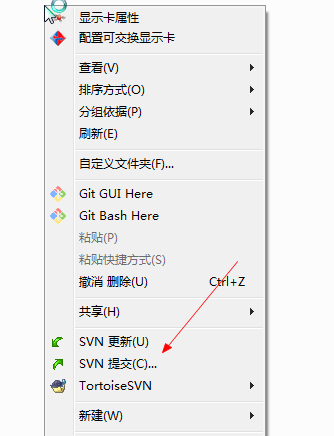
怎么提交修改?
在根目录下,右键选择提交。
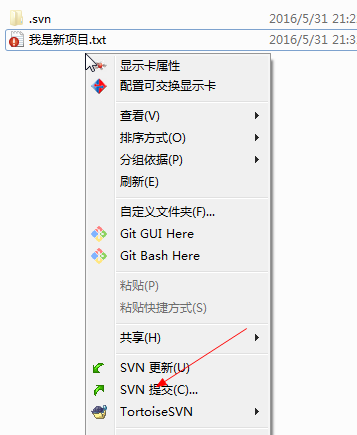
务必记得输入提交信息(虽然不输入也能提交),提交信息可以方便日后查看。

提交完毕后,可以发现又恢复到了绿色

假如现在加入了一个新文件。可以看出是蓝色的。蓝色表示不属于版本库的未知文件,未知文件是不能提交的。
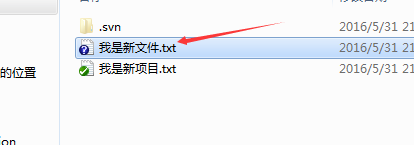
记住选择增加把它加入到版本库里面去

增加完毕后,变成了蓝色加号,表示新增加的版本库文件

接下来,只需写代码,然后提交即可。
删除文件也应该右键提交,如下。
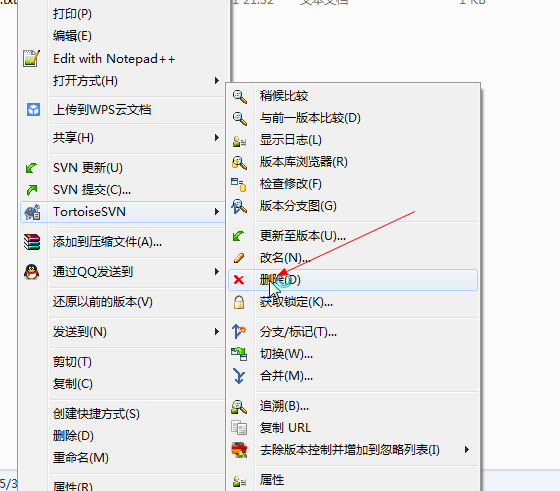
记得随时检查你的文件状态,如果没有添加到版本控制里要及时添加进去,不然你的文件提交不上去。
2.3.3 更新
假如你和B同学在协作。B同学写完代码提交到了SVN上,如果你想获取最新修改,就需要选择更新(如果服务器上已经有别人提交过的新的,你是提交不上去的,必须先更新再提交)。
怎么知道服务器有没有更新?你可以直接选择更新,有没有更新一下就知道。或者右键检查修改,然后检查版本库,就能看到服务器上改了哪些文件

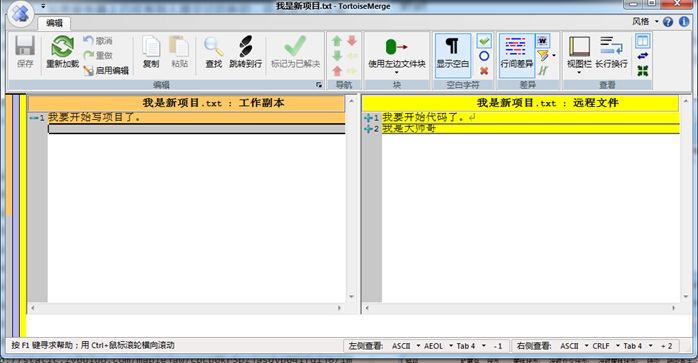
右键选择HEAD和BASE比较。

左边的表示你的代码,右边的表示服务器上的代码
如果有修改记得及时更新到本地然后再继续工作
但是有时候更新会冲突,比如你和服务器上的改了同一个地方。
这时候你需要更新下来解决冲突。

它会提示你哪个文件冲突,你只需打开那个文件,按照需求解决冲突即可
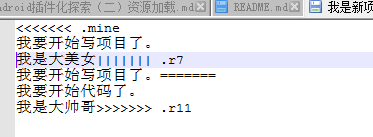
<<<<<<.mine到====表示你的代码,其他表示服务器的代码。你只需改成你想要的
然后选择解决,告诉SVN我已经解决冲突了就行了

剩下的就是团队协作间的更新提交操作,这里不做赘述
2.3.4 查看日志
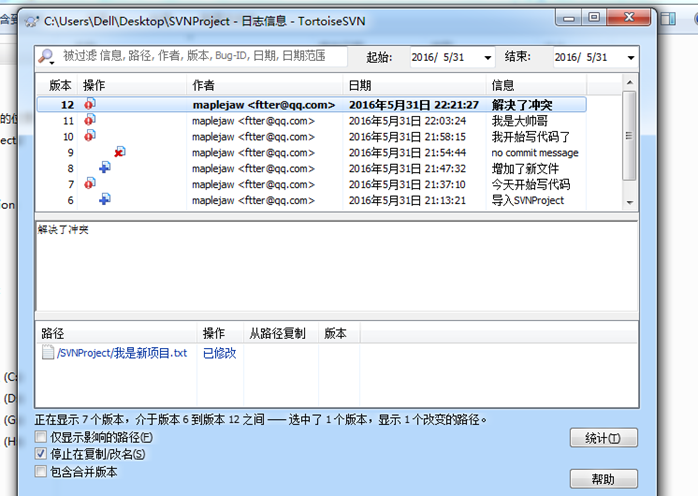
选择显示日志,可以看出团队里面的人干了什么

可以看出谁谁谁,什么时间,干了什么事。最后那一列信息是自己提交的时候写的。建议大家提交时务必要填写提交信息,这样别人一看就知道你干了什么。提交信息对于自己也是有好处的,时间长了也能看到当初做了什么。
2.3.5 版本回滚
如果你改了东西,但是还没有提交,可以使用还原功能。
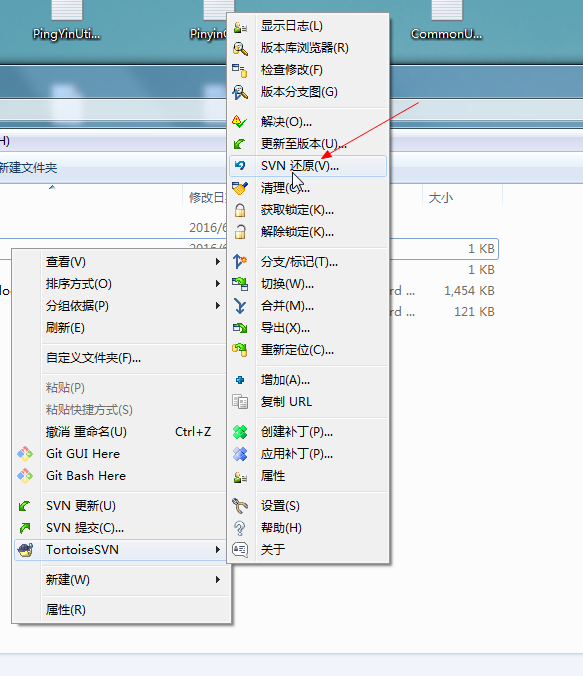
但是如果我们写错了东西并且提交了上去怎么办?通过版本回滚可以将文件恢复到
以前的版本。右键更新至版本,通过查看日志来选择版本,然后回滚即可

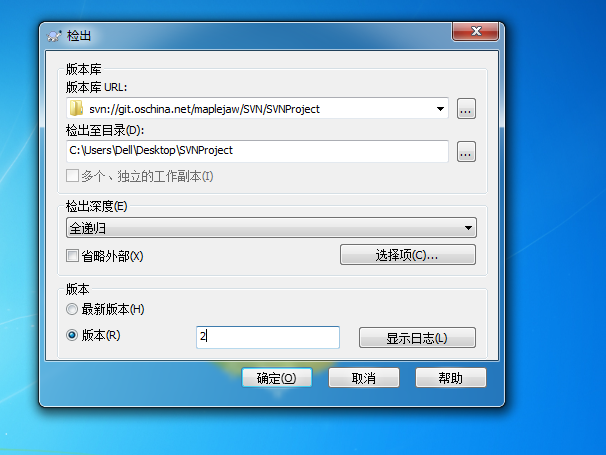
有时候我们需要查看以前版本的代码。此时我们可以新建个文件夹检出到指定版本
2.3.6 版本控制
版本控制有好几种方法,如下。
在提交发布版本时添加版本信息,这是最简单的一种方法。
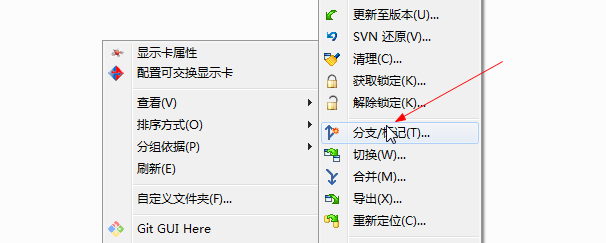
打标签
每次发布版本时应该打标签。右键选择分支/标记。在至路径以版本号打上标签即可
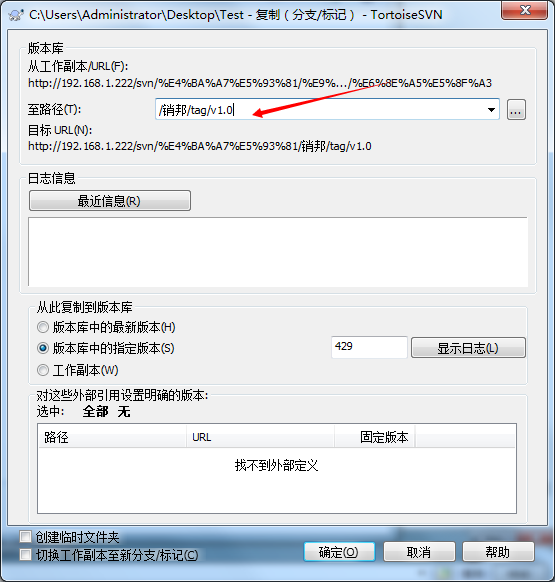
这样你就有了一个v1.0版本的标签。
以后如果你想查看某个版本的代码,只需切换过去就行

部分摘自这位大佬的博客:https://blog.csdn.net/maplejaw_/article/details/52874348
SVN搭建以及客户端使用的更多相关文章
- svn 服务器的搭建以及客户端的使用
1.svn 服务器的搭建以及客户端的使用,安装见下面的博客 https://blog.csdn.net/zh123456zh789/article/details/80921179 说明:服务器只是用 ...
- centos7搭建svn服务器及客户端设置
centos7搭建svn服务器及客户端设置 centos7貌似预装了svn服务(有待确认),因此我们直接启动该服务即可 一.svn服务端配置(服务器IP假设为192.168.100.1) 步骤1:创建 ...
- window系统下SVN服务器和客户端的搭建和使用
SVN服务器下载地址: http://subversion.apache.org/packages.html 这里我选用VisualSVN server 服务端和 TortoiseSVN客户端搭配使用 ...
- 转载-Linux下svn搭建配置流程
Linux下svn搭建配置流程 一. 源文件编译安装.源文件共两个,为: 1. 下载subversion源文件 subversion-1.6.1.tar.gz http://d136 ...
- svn搭建
原文:svn搭建 二.Subversion的安装与测试 Subversion的配置方式有很多种,同时也可以配置不同的操作系统之上,本文我讲解的是Subversion 1.5.4 for Apache2 ...
- Svn———搭建及配置
一.Svn介绍 subversion(简称svn)是近几年崛起的版本管理软件,是cvs的接班人,目前绝大多数开源软件都使用svn作为代码版本管理软件.Subversion支持linux和windows ...
- jenkins和svn搭建自动代码构建发布
jenkins安装和配置 .安装jenkins .yum install java wget -O /etc/yum.repos.d/jenkins.repo https://pkg.jenkins. ...
- Docker+Jenkins+Maven+SVN搭建持续集成环境
Docker+Jenkins+Maven+SVN搭建持续集成环境 环境拓扑图(实验项目使用PHP环境) 发布流程图 环境说明 系统:Centos 7.4 x64 Docker版本:18.09.0 Ma ...
- SVN学习---使用 Visual SVN 搭建SVN服务器
1.1. 使用 Visual SVN 搭建SVN服务器 搭建纯粹SVN服务器 --- svn:// 访问资源 将SVN 和 Apache服务器整合 ,搭建web SVN服务器 ---- https: ...
随机推荐
- Centos7.2 MQTT的学习之Mosquitto搭建&集群搭建&使用
下载安装包http://mosquitto.org/files/source/ 安装依赖yum install -y gcc gcc-c++ libstdc++-develyum install -y ...
- Ingreslock后门漏洞
一.简介 1524端口 ingreslock Ingres 数据库管理系统(DBMS)锁定服务 利用telnet命令连接目标主机的1524端口,直接获取root权限. Ingreslock后门程序监听 ...
- 【Adobe Air程序开发】用Adobe Flex3开发AIR应用程序–入门指南
1 安装Adobe AIR 运行时,和java的JVM类似.Adobe AIR 运行时允许在桌面运行AIR应用程序,脱离游览器的束缚.下载安装文件http://labs.adobe.com/downl ...
- 深入理解C语言-深入理解内存四区
数组与指针 当数组做函数参数的时候,会退化为一个指针 此时在函数内是得不到数组大小的 因此,数组做函数参数的时候需要传递数组大小,也就是多传递一个参数 void func(int arr[], int ...
- MySQL连接处理方式及最佳并发连接数设置
MySQL连接处理方式及最佳并发连接数设置 mysql是单进程,多线程的架构,通过创建多个线程来服务不同的用户连接,通常情况下,随着用户连接数的增加,mysql内部用于处理用户连接的线程也会同步的增长 ...
- MySQL_数据表命令
目录 数据表操作 1.创建数据表: 2. 修改表结构: 数据表查看 1.查看数据库中所有表的信息 2.查看表结构 3.查看创建表时所输入的命令 4.删除数据表 数据表操作 关于Mysql的数据类型,点 ...
- C语言Ⅰ博客作业11
这个作业属于那个课程 C语言程序设计II 这个作业要求在哪里 https://edu.cnblogs.com/campus/zswxy/CST2019-3/homework/10130 我在这个课程的 ...
- 多边形求重心 HDU1115
http://acm.hdu.edu.cn/showproblem.php?pid=1115 引用博客:https://blog.csdn.net/ysc504/article/details/881 ...
- 【转帖】Linux的桌面环境gnome、kde、xfce、lxde 等等使用比较
Linux的桌面环境gnome.kde.xfce.lxde 等等使用比较 https://www.cnblogs.com/chenmingjun/p/8506995.html 文章目录 图形界面架起用 ...
- CENTOS 6-7的本地YUM源配置
本文档适合CENTOS 6-7的本地YUM源配置 cd /media cd CentOS_6.8_Final/ cd Packages 创建目录拷贝文件 mkdir /yum cp * /yum 配置 ...