junit断言和junit注释assert
JUnit - 使用断言
断言
所有的断言都包含在 Assert 类中
public class Assert extends java.lang.Object这个类提供了很多有用的断言方法来编写测试用例。只有失败的断言才会被记录。Assert 类中的一些常用的方法列式如下:
| 序号 | 方法和描述 |
| 1 | void assertEquals(boolean expected, boolean actual) 检查两个变量或者等式是否平衡 |
|
2 |
void assertTrue(boolean expected, boolean actual) 检查条件为真 |
|
3 |
void assertFalse(boolean condition) 检查条件为假 |
|
4 |
void assertNotNull(Object object) 检查对象不为空 |
|
5 |
void assertNull(Object object) 检查对象为空 |
|
6 |
void assertSame(boolean condition) assertSame() 方法检查两个相关对象是否指向同一个对象 |
|
7 |
void assertNotSame(boolean condition) assertNotSame() 方法检查两个相关对象是否不指向同一个对象 |
|
8 |
void assertArrayEquals(expectedArray, resultArray) assertArrayEquals() 方法检查两个数组是否相等 |
待测试类
 /**

  *

  * @author Administrator

  * junit测试用例类

  */

 public class Demo {

     /**

      * 获取两数之和

      * @param numOne int.

      * @param numTwo int.

      * @return int numOne+numTwo.

      */

     public int getAdd(int numOne,int numTwo) {

         return numOne+numTwo;

     }

     /**

      * 获取两数比较的真假

      * @param numOne int.

      * @param numTwo int.

      * @return boolean numOne>numTwo.

      */

     public boolean getDifference(int numOne,int numTwo) {

         return numOne>numTwo;

     }

     /**

      * 获取一个字符串

      * @return String.

      */

     public String getString() {

         return "不提也罢";

     }

 }
junit测试类
 import static org.hamcrest.CoreMatchers.*;

 import static org.junit.Assert.*;//静态导入类的所有静态方法

 import org.junit.Test;

 /*junit测试类*/

 public class DemoTest {

     Demo demo = new Demo();

     @Test

     public void testGetAdd() {

         int add = demo.getAdd(2, 3);

         assertThat(add,is(5));//变量是否等于指定值

         assertThat(add, not(4));//变量是否不等于指定值

     }

     @Test

     public void testGetDifference() {

         boolean difference = demo.getDifference(3, 2);

         assertTrue(difference);//判断真假

     }

     @Test

     public void testGetString() {

         String string = demo.getString();

         //测试变量是否包含指定字符

         assertThat(string, containsString("也"));

         //测试变量是否已指定字符串开头

         assertThat(string, startsWith("不"));

         //测试变量是否以指定字符串结尾

         assertThat(string, endsWith("罢"));

         //测试变量是否等于指定字符串

         assertThat(string, equalTo("不提也罢"));

     }

 }
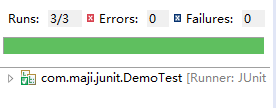
结果通过,无错误。如图:
注释
注释就好像你可以在你的代码中添加并且在方法或者类中应用的元标签。JUnit 中的这些注释为我们提供了测试方法的相关信息,哪些方法将会在测试方法前后应用,哪些方法将会在所有方法前后应用,哪些方法将会在执行中被忽略。
JUnit 中的注释的列表以及他们的含义:
| 序号 | 注释和描述 |
| 1 | @Test 这个注释说明依附在 JUnit 的 public void 方法可以作为一个测试案例。 |
| 2 | @Before 有些测试在运行前需要创造几个相似的对象。在 public void 方法加该注释是因为该方法需要在 test 方法前运行。 |
| 3 | @After 如果你将外部资源在 Before 方法中分配,那么你需要在测试运行后释放他们。在 public void 方法加该注释是因为该方法需要在 test 方法后运行。 |
| 4 | @BeforeClass 在 public void 方法加该注释是因为该方法需要在类中所有方法前运行。 |
| 5 | @AfterClass 它将会使方法在所有测试结束后执行。这个可以用来进行清理活动。 |
| 6 | @Ignore 这个注释是用来忽略有关不需要执行的测试的。 |
 import static org.junit.Assert.*;

 import org.junit.After;

 import org.junit.AfterClass;

 import org.junit.Before;

 import org.junit.BeforeClass;

 import org.junit.Ignore;

 import org.junit.Test;

 public class ClassDemoTest {

     //在类加载前,只执行一次

        @BeforeClass

        public static void beforeClass() {

           System.out.println("类加载前");

        }

        //在类加载后,只执行一次

        @AfterClass

        public static void  afterClass() {

           System.out.println("类加载后");

        }

        //在每一个测试方法执行前执行一次

        @Before

        public void before() {

           System.out.println("测试方法执行前");

        }

        //在每一个测试方法执行前执行一次

        @After

        public void after() {

           System.out.println("测试方法执行后");

        }

        //测试单元1

        @Test

        public void testCase1() {

           System.out.println("测试单元1");

        }

        //测试单元2

        @Test

        public void testCase2() {

           System.out.println("测试单元2");

        }

        @Ignore

        public void testIgnore() {

            System.out.println("Ignore");

        }

 }
执行结果如下:

junit断言和junit注释assert的更多相关文章
- The <classpath> or <modulepath> for <junit> must include junit.jar if not in Ant's own classpath
The <classpath> or <modulepath> for <junit> must include junit.jar if not in Ant's ...
- pytest测试框架 -- assert断言和fixture固件
一.断言 (1)使用assert语句进行断言 # test_run.py @pytest.mark.assert def test_assert(self): r = requests.get(&qu ...
- JUnit实战(2) - JUnit核心(使用Suite来组合测试)
创建Java Project项目:ch02-internals MasterTestSuite.java package com.manning.junitbook.ch02.internals; i ...
- JUnit实战(1) - JUnit起步(Parameterized参数化测试)
创建Java Project项目,项目名称:ch01-jumpstart Calculator.java public class Calculator { public double add(dou ...
- junit学习之junit的基本介绍
Junit目前在一些大的公司或者相对规范的软件中使用的比较多,相当多的小公司并没有把单元测试看的太重要.在大点的公司开发人员每天上班后,第一件事情就是从svn上把自己负责的代码checkout下来,然 ...
- junit 常用注解 + junit 断言详解
@Test: 在junit3中,是通过对测试类和测试方法的命名来确定是否是测试,且所有的测试类必须继承junit的测试基类.在junit4中,定义一个测试方法变得简单很多,只需要在方法前加上@Test ...
- [JUnit] Introduce to Junit and it annotations
Check the get started guid https://junit.org/junit5/docs/current/user-guide/#overview-getting-help p ...
- Junit 学习1 junit的简单使用
package junit; import java.sql.Connection; import java.sql.SQLException; import org.junit.Test; impo ...
- Spring是如何整合JUnit的?JUnit源码关联延伸阅读
上一篇我们回答了之前在梳理流程时遇到的一些问题,并思考了为什么要这么设计. 本篇是<如何高效阅读源码>专题的第十二篇,通过项目之间的联系来进行扩展阅读,通过项目与项目之间的联系更好的理解项 ...
随机推荐
- Objective-C不能以new开头命名属性
ARC是在Xcode4.2推出的方便内存管理的一个特性,支持OS10.6及iOS4以后版本.引入ARC之后,相对应的内存管理使用方面做了必要的调整,这里不一一赘述:其中有一项就是文章题目说的,为了与手 ...
- 对比PG数据库结构是否一致的方法
如果版本升级涉及数据库更新,测试时要对比旧版数据库更新后是否和全新安装的是否一致,但是数据库结构很复杂的时候对比就很麻烦,postgre可以使用以下方法对比:pg_dump.exe –h 数据库IP ...
- 使用Angular2的Http发送AJAX请求
使用Angular2的Http发送AJAX请求 Angular的文档并不详细,甚至API文档也有一些错误.经过查阅资料并经大量实验,终于明确了Angular的Http发送Ajax请求的方式方法.本文描 ...
- SpringBoot HttpServletResponse Header Cookie输出问题
问题: 在一次Response写入header和cookie的时候,发现部分信息没有被输出 工具类: CookieUtils: import java.io.IOException; import j ...
- Codeforces 40 E. Number Table
题目链接:http://codeforces.com/problemset/problem/40/E 妙啊... 因为已经确定的格子数目严格小于了$max(n,m)$,所以至少有一行或者一列是空着的, ...
- Foxmail7.2新建的文件夹不见了
Foxmail在客户端上,新建了几个文件夹,并把相应的邮件都都选择了“总是把**邮件转移到”这个选项. 今天早上打开电脑一看,所有的邮件连同对应的文件夹都找不到了 Foxmail中没显示因为默认是隐藏 ...
- 腾讯云服务器突然远程连不上(包含ssh,拒绝访问)
版权声明:本文转载自 https://blog.csdn.net/Alexwu555/article/details/78448113, 暂时这样 , 以后再来整理.不太习惯不能直接贴截图啊 配置安 ...
- Asp.net core 学习笔记 SignalR
refer : https://kimsereyblog.blogspot.com/2018/07/signalr-with-asp-net-core.html https://github.com/ ...
- Qgis练手
师妹推荐了一个神器 Qgis,因为看我拿Echarts和Excel缝缝补补效率实在太低下. 还记得,以前写过一个“echarts画中国地图并上色”的笔记,那个应付一下事还行,真正需要精细画图的时候还得 ...
- 最全面的移动APP测试点
随着互联网,大数据时代的不断推进,演化.移动开发领域得到普遍普及,APP开发如潮水般涌现.下面我将详细介绍app的测试点: 首先我们先熟悉app测试基本流程: 1.1流程图 1.2测试周期 测试周期可 ...