【netcore基础】ubuntu 16.04 搭建.net core 2.1 linux 运行环境 nginx反向代理 supervisor配置自启动
今天来整理下 netcore 在 linux(ubuntu) 上的运行环境搭建
对应版本
ubuntu 16.04
.net core 2.1
nginx version: nginx/1.10.3 (Ubuntu)
supervisor 配置开机重启服务自启动
Supervisor
http://supervisord.org/
是用Python开发的一个client/server服务,是Linux/Unix系统下的一个进程管理工具,不支持Windows系统。
它可以很方便的监听、启动、停止、重启一个或多个进程。
用Supervisor管理的进程,当一个进程意外被杀死,supervisort监听到进程死后,会自动将它重新拉起,很方便的做到进程自动恢复的功能,不再需要自己写shell脚本来控制。
其实以前也整理过一些简单的运行环境搭建,只是SDK的安装和netcore命令行运行
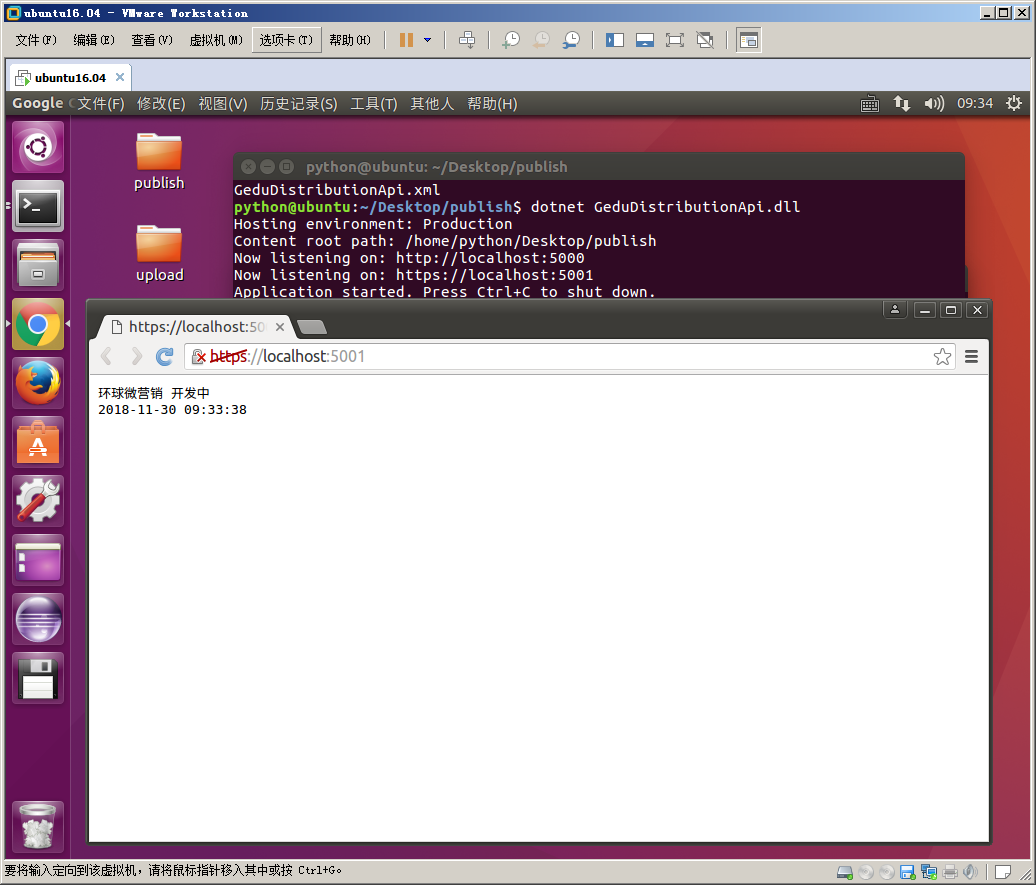
例如切换到发布目录,执行下面的命令
python@ubuntu:~/Desktop/publish$ dotnet GeduDistributionApi.dll

Hosting environment: Production

Content root path: /home/python/Desktop/publish

Now listening on: http://localhost:5000

Now listening on: https://localhost:5001

Application started. Press Ctrl+C to shut down.
执行上面的命令行,就可以临时开启服务,访问就可以看到 https://localhost:5001/
基础配置,具体可参考之前的博文
【.NetCore学习】ubuntu16.04 搭建.net core mvc api 运行环境
上面仅仅能运行而已,并不能作为稳定的服务给我们用,所以我们需要下面的操作
● 使用 nginx 作为反向代理绑定 ip 和我们的 netcore 服务
● 使用 supervisor 配置系统自启动服务,在关机开机、重启、程序崩溃等情况下,能自动启动服务,不需要我们手动操作
今天重点讲下这两点的配置
这里需要注意的是配置时最好使用 root 用户,因为其他用户有很多权限问题,会导致配置失败
使用 root 用户能避免那些莫名其妙的问题
python@ubuntu:~$ sudo su root
[sudo] python 的密码:
root@ubuntu:/home/python# service supervisor stop
使用这个命令,我们可以看到之前的python用户切换成了 root 用户
Nginx
安装、卸载通用命令
sudo apt-get install xxx

sudo apt-get remove xxx
通过下面的命令
sudo apt-get install nginx
然后配置转发到我们的端口
配置文件路径 /etc/nginx/sites-available/default
这里需要注意的是文件权限问题,如果没有权限,需要用下面命令给编辑权限
sudo chmod /etc/nginx/sites-available/default
文件原内容如下
##

# You should look at the following URL's in order to grasp a solid understanding

# of Nginx configuration files in order to fully unleash the power of Nginx.

# http://wiki.nginx.org/Pitfalls

# http://wiki.nginx.org/QuickStart

# http://wiki.nginx.org/Configuration

#

# Generally, you will want to move this file somewhere, and start with a clean

# file but keep this around for reference. Or just disable in sites-enabled.

#

# Please see /usr/share/doc/nginx-doc/examples/ for more detailed examples.

##

# Default server configuration

#

server {

    listen  default_server;

    listen [::]: default_server;

    # SSL configuration

    #

    # listen  ssl default_server;

    # listen [::]: ssl default_server;

    #

    # Note: You should disable gzip for SSL traffic.

    # See: https://bugs.debian.org/773332

    #

    # Read up on ssl_ciphers to ensure a secure configuration.

    # See: https://bugs.debian.org/765782

    #

    # Self signed certs generated by the ssl-cert package

    # Don't use them in a production server!

    #

    # include snippets/snakeoil.conf;

    root /var/www/html;

    # Add index.php to the list if you are using PHP

    index index.html index.htm index.nginx-debian.html;

    server_name _;

    location / {

        # First attempt to serve request as file, then

        # as directory, then fall back to displaying a .

        try_files $uri $uri/ =;

    }

    # pass the PHP scripts to FastCGI server listening on 127.0.0.1:

    #

    #location ~ \.php$ {

    #    include snippets/fastcgi-php.conf;

    #

    #    # With php7.-cgi alone:

    #    fastcgi_pass 127.0.0.1:;

    #    # With php7.-fpm:

    #    fastcgi_pass unix:/run/php/php7.-fpm.sock;

    #}

    # deny access to .htaccess files, if Apache's document root

    # concurs with nginx's one

    #

    #location ~ /\.ht {

    #    deny all;

    #}

}

# Virtual Host configuration for example.com

#

# You can move that to a different file under sites-available/ and symlink that

# to sites-enabled/ to enable it.

#

#server {

#    listen ;

#    listen [::]:;

#

#    server_name example.com;

#

#    root /var/www/example.com;

#    index index.html;

#

#    location / {

#        try_files $uri $uri/ =;

#    }

#}
我们按照格式配置修改成如下内容,指定把 80 端口的请求转发给我们的 netcore 默认端口 5000,保存配置文件
server {

    listen ;

    location / {

        proxy_pass http://127.0.0.1:5000;

        proxy_http_version 1.1;

        proxy_set_header Upgrade $http_upgrade;

        proxy_set_header Connection keep-alive;

        proxy_set_header Host $host;

        proxy_cache_bypass $http_upgrade;

    }

}
然后我们重新加载 nginx 配置生效
sudo nginx -t

sudo nginx -s reload
至此我们 nginx 的配置基本结束了,我们访问 http://localhost/ 可以看到 nginx 的提示信息
<html>
<head><title>502 Bad Gateway</title></head>
<body bgcolor="white">
<center><h1>502 Bad Gateway</h1></center>
<hr><center>nginx/1.10.3 (Ubuntu)</center>
</body>
</html>
如果我们把服务启动,就可以看到请求转发到我们的 netcore 了,下面我们配置开机自启动
Supervisor
同样用下面命令安装
sudo apt-get install supervisor
安装完之后我们配置自启动配置文件,配置文件目录为: /etc/supervisor/conf.d/
我们命名为:GeduDistributionApi.conf
文件内容,主要修改一下 执行的目录、命令行、日志输出文件等
[program:GeduDistributionApi]

command=dotnet GeduDistributionApi.dll

directory=/home/python/publish

environment=ASPNETCORE__ENVIRONMENT=Production

user=root

stopsignal=INT

autostart=true

autorestart=true

startsecs=

stderr_logfile=/var/log/GeduDistributionApi.err.log

stdout_logfile=/var/log/GeduDistributionApi.out.log
重启生效
sudo service supervisor stop

sudo service supervisor start
配置好之后我们加入系统自动启动的配置文件 /etc/rc.local
在这个配置文件的 exit 0 前面一行加上

service supervisor start

保存。
好像没有加也能启动,不知道为什么,应该是配置目录下的 .conf 文件自动生效了
发布文件之后重启生效的命令
service supervisor restart
其他参考博客
.Net Core 部署到Ubuntu 16.04 中的步骤
【netcore基础】ubuntu 16.04 搭建.net core 2.1 linux 运行环境 nginx反向代理 supervisor配置自启动的更多相关文章
- 【netcore基础】CentOS 7.6.1810 搭建.net core 2.1 linux 运行环境 nginx反向代理 supervisor配置自启动
之前写过一篇Ubuntu的环境搭建博客,感觉一些配置大同小异,这里重点记录下 nginx 作为静态 angular 项目文件服务器的配置 参考链接 [netcore基础]ubuntu 16.04 搭建 ...
- 【.NetCore学习】ubuntu16.04 搭建.net core mvc api 运行环境
查看linux内核版本 uname -a 打印结果 python@ubuntu:~$ uname -a Linux ubuntu 4.4.0-31-generic #50-Ubuntu SMP Wed ...
- 【转】64位Ubuntu 16.04搭建嵌入式交叉编译环境arm-linux-gcc过程图解
64位Ubuntu 16.04搭建嵌入式交叉编译环境arm-linux-gcc过程图解,开发裸机环境之前需要先搭建其开发环境,毕竟工欲善其事必先利其器嘛. 安装步骤 1.准备工具安装目录 下载 ar ...
- Ubuntu 16.04搭建php5.6 Web服务器环境
Ubuntu 16.04默认安装php7.0环境,但是php7目前兼容性并不是很好,如果自行安装php5需要清除php7的已安装包,否则会报错. 移除默认及已安装的PHP包 sudo dpkg -l ...
- 阿里云ubuntu 16.04搭建odoo11服务器
ubuntu 16.04 具体如何搭建odoo11网站的具体步骤可以参考这一篇文章 按上面的文章配置环境后,自己网站的启动具体步骤如下: 1.登录阿里云 [远程连接],进入命令行界面1 2.cd到目录 ...
- Ubuntu 16.04 搭建KVM环境
在Ubuntu 16.04下搭建KVM环境过程记录. 1 查看CPU是否支持KVM egrep "(svm|vmx)" /proc/cpuinfo 有结果输出,如下图: 2 安 ...
- Ubuntu 16.04搭建OpenVPN服务器以及客户端的使用
说明:启动时注意用户权限,比如root用户启动. Ubuntu: 服务器环境:Ubuntu 16.04 64位系统 内网IP:10.143.80.116 外网IP:203.195.1.2 OpenVP ...
- CentOS 6.9/Ubuntu 16.04搭建OpenVPN服务器以及客户端的使用
说明: 1.发现一个很奇怪的现象,CentOS和Ubuntu有着对用户不同的管理理念,比如CentOS中安装一切软件都是以root优先(su -),而Ubuntu则以当前用户优先,安装软件以sudo开 ...
- 1、Ubuntu 16.04 安装.net core
Register the Microsoft key register the product repository Install required dependencies 参考网址:https: ...
随机推荐
- python-校验密码小练习
#校验密码是否合法的小练习#1.密码长度5到10位:#2.密码里面必须包含,大写字母,小写字母,数字#3.最多输入5次 写程序过程中遇到了两个问题,第二个循环里的P是把password的值循环传到p里 ...
- sencha cmd 创建项目
一.软件支持 1.下载并解压Sencha Touch(浏览器支持Chrome.Safari.Internet Explorer 10或11.) 2.Sencha Cmd(Sencha Touch 2. ...
- ORACLE数据恢复方法(提交事务也可以)
今天在操作数据库的时候,发现数据操作错误,想要恢复,但是没有用事务,按理说,设置成不默认提交事务,此时所做的各种操作都没有反应到数据库中.这时,你可以rollback事务,撤销所有未提交的修改.不过, ...
- 【UML】Java代码与UML模型相互转换方法
最近重温了一下设计模式,看到大家的博客里面都是Java代码+UML视图,UML表达整体框架,然后再秀出具体的代码,点面结合.一目了然.所以也研究了一下Java代码与UML模型相互转换方法. 一.常用的 ...
- ORA-12514 TNS:LISTENER DOES NOT CURRENTLY KNOW OF SERVICE REQUESTED IN CONNE
对比Oracle服务器地址,端口号,还有实例名(也就是服务名).修改tnsnames.ora 在Oracle客户端的安装目录底下. 然后用sqlplus [用户名]/[密码]@[服务命名] 服务命名 ...
- Unity应用架构设计(5)——ViewModel之间如何共享数据
对于客户端应用程序而言,单页应用程序(Single Page Application)是最常见的表现形式.有经验的开发人员往往会把一个View分解多个SubView.那么,如何在多个SubView之间 ...
- webview调起浏览器
调起浏览器 url = "intent://" + url +"#Intent;scheme=http;action=android.intent.action.VIEW ...
- Fluent动网格【11】:弹簧光顺
动网格除了前面讲了很多的关于运动指定之外,另一个重要主题则为网格的更新. 在部件运动之后,不可避免的会造成网格形状的变化,如若不对网格加以控制,在持续运动的过程中,则可能造成网格极度变形.歪曲率过大, ...
- Troubleshooting Scheduler Autotask Issues (Doc ID 1561498.1)
In this Document Purpose Troubleshooting Steps References APPLIES TO: Oracle Database - Enterp ...
- Intellij 高亮显示与选中字符串相同的内容
如下图所示,我的是 2018,不同版本,Schema 可能要 Save As一下