【netcore基础】ubuntu 16.04 搭建.net core 2.1 linux 运行环境 nginx反向代理 supervisor配置自启动
今天来整理下 netcore 在 linux(ubuntu) 上的运行环境搭建
对应版本
ubuntu 16.04
.net core 2.1
nginx version: nginx/1.10.3 (Ubuntu)
supervisor 配置开机重启服务自启动
Supervisor
http://supervisord.org/
是用Python开发的一个client/server服务,是Linux/Unix系统下的一个进程管理工具,不支持Windows系统。
它可以很方便的监听、启动、停止、重启一个或多个进程。
用Supervisor管理的进程,当一个进程意外被杀死,supervisort监听到进程死后,会自动将它重新拉起,很方便的做到进程自动恢复的功能,不再需要自己写shell脚本来控制。
其实以前也整理过一些简单的运行环境搭建,只是SDK的安装和netcore命令行运行
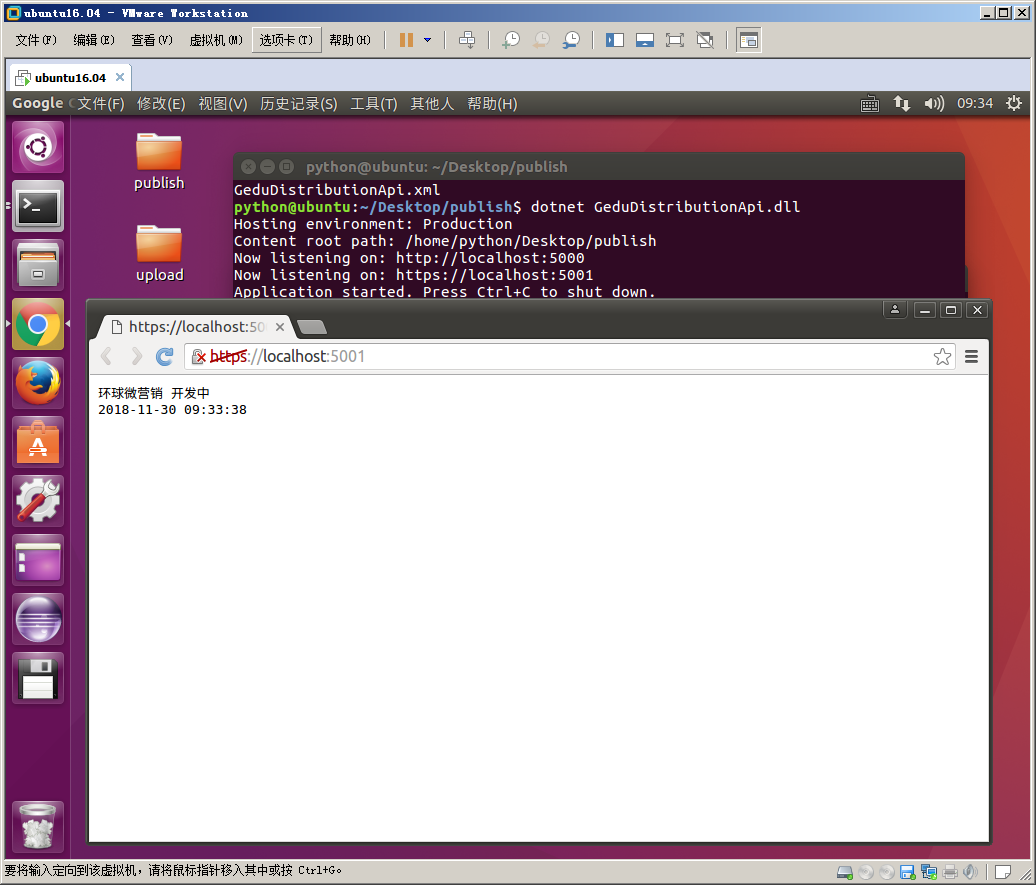
例如切换到发布目录,执行下面的命令
python@ubuntu:~/Desktop/publish$ dotnet GeduDistributionApi.dll

Hosting environment: Production

Content root path: /home/python/Desktop/publish

Now listening on: http://localhost:5000

Now listening on: https://localhost:5001

Application started. Press Ctrl+C to shut down.
执行上面的命令行,就可以临时开启服务,访问就可以看到 https://localhost:5001/
基础配置,具体可参考之前的博文
【.NetCore学习】ubuntu16.04 搭建.net core mvc api 运行环境
上面仅仅能运行而已,并不能作为稳定的服务给我们用,所以我们需要下面的操作
● 使用 nginx 作为反向代理绑定 ip 和我们的 netcore 服务
● 使用 supervisor 配置系统自启动服务,在关机开机、重启、程序崩溃等情况下,能自动启动服务,不需要我们手动操作
今天重点讲下这两点的配置
这里需要注意的是配置时最好使用 root 用户,因为其他用户有很多权限问题,会导致配置失败
使用 root 用户能避免那些莫名其妙的问题
python@ubuntu:~$ sudo su root
[sudo] python 的密码:
root@ubuntu:/home/python# service supervisor stop
使用这个命令,我们可以看到之前的python用户切换成了 root 用户
Nginx
安装、卸载通用命令
sudo apt-get install xxx

sudo apt-get remove xxx
通过下面的命令
sudo apt-get install nginx
然后配置转发到我们的端口
配置文件路径 /etc/nginx/sites-available/default
这里需要注意的是文件权限问题,如果没有权限,需要用下面命令给编辑权限
sudo chmod /etc/nginx/sites-available/default
文件原内容如下
##

# You should look at the following URL's in order to grasp a solid understanding

# of Nginx configuration files in order to fully unleash the power of Nginx.

# http://wiki.nginx.org/Pitfalls

# http://wiki.nginx.org/QuickStart

# http://wiki.nginx.org/Configuration

#

# Generally, you will want to move this file somewhere, and start with a clean

# file but keep this around for reference. Or just disable in sites-enabled.

#

# Please see /usr/share/doc/nginx-doc/examples/ for more detailed examples.

##

# Default server configuration

#

server {

    listen  default_server;

    listen [::]: default_server;

    # SSL configuration

    #

    # listen  ssl default_server;

    # listen [::]: ssl default_server;

    #

    # Note: You should disable gzip for SSL traffic.

    # See: https://bugs.debian.org/773332

    #

    # Read up on ssl_ciphers to ensure a secure configuration.

    # See: https://bugs.debian.org/765782

    #

    # Self signed certs generated by the ssl-cert package

    # Don't use them in a production server!

    #

    # include snippets/snakeoil.conf;

    root /var/www/html;

    # Add index.php to the list if you are using PHP

    index index.html index.htm index.nginx-debian.html;

    server_name _;

    location / {

        # First attempt to serve request as file, then

        # as directory, then fall back to displaying a .

        try_files $uri $uri/ =;

    }

    # pass the PHP scripts to FastCGI server listening on 127.0.0.1:

    #

    #location ~ \.php$ {

    #    include snippets/fastcgi-php.conf;

    #

    #    # With php7.-cgi alone:

    #    fastcgi_pass 127.0.0.1:;

    #    # With php7.-fpm:

    #    fastcgi_pass unix:/run/php/php7.-fpm.sock;

    #}

    # deny access to .htaccess files, if Apache's document root

    # concurs with nginx's one

    #

    #location ~ /\.ht {

    #    deny all;

    #}

}

# Virtual Host configuration for example.com

#

# You can move that to a different file under sites-available/ and symlink that

# to sites-enabled/ to enable it.

#

#server {

#    listen ;

#    listen [::]:;

#

#    server_name example.com;

#

#    root /var/www/example.com;

#    index index.html;

#

#    location / {

#        try_files $uri $uri/ =;

#    }

#}
我们按照格式配置修改成如下内容,指定把 80 端口的请求转发给我们的 netcore 默认端口 5000,保存配置文件
server {

    listen ;

    location / {

        proxy_pass http://127.0.0.1:5000;

        proxy_http_version 1.1;

        proxy_set_header Upgrade $http_upgrade;

        proxy_set_header Connection keep-alive;

        proxy_set_header Host $host;

        proxy_cache_bypass $http_upgrade;

    }

}
然后我们重新加载 nginx 配置生效
sudo nginx -t

sudo nginx -s reload
至此我们 nginx 的配置基本结束了,我们访问 http://localhost/ 可以看到 nginx 的提示信息
<html>
<head><title>502 Bad Gateway</title></head>
<body bgcolor="white">
<center><h1>502 Bad Gateway</h1></center>
<hr><center>nginx/1.10.3 (Ubuntu)</center>
</body>
</html>
如果我们把服务启动,就可以看到请求转发到我们的 netcore 了,下面我们配置开机自启动
Supervisor
同样用下面命令安装
sudo apt-get install supervisor
安装完之后我们配置自启动配置文件,配置文件目录为: /etc/supervisor/conf.d/
我们命名为:GeduDistributionApi.conf
文件内容,主要修改一下 执行的目录、命令行、日志输出文件等
[program:GeduDistributionApi]

command=dotnet GeduDistributionApi.dll

directory=/home/python/publish

environment=ASPNETCORE__ENVIRONMENT=Production

user=root

stopsignal=INT

autostart=true

autorestart=true

startsecs=

stderr_logfile=/var/log/GeduDistributionApi.err.log

stdout_logfile=/var/log/GeduDistributionApi.out.log
重启生效
sudo service supervisor stop

sudo service supervisor start
配置好之后我们加入系统自动启动的配置文件 /etc/rc.local
在这个配置文件的 exit 0 前面一行加上

service supervisor start

保存。
好像没有加也能启动,不知道为什么,应该是配置目录下的 .conf 文件自动生效了
发布文件之后重启生效的命令
service supervisor restart
其他参考博客
.Net Core 部署到Ubuntu 16.04 中的步骤
【netcore基础】ubuntu 16.04 搭建.net core 2.1 linux 运行环境 nginx反向代理 supervisor配置自启动的更多相关文章
- 【netcore基础】CentOS 7.6.1810 搭建.net core 2.1 linux 运行环境 nginx反向代理 supervisor配置自启动
之前写过一篇Ubuntu的环境搭建博客,感觉一些配置大同小异,这里重点记录下 nginx 作为静态 angular 项目文件服务器的配置 参考链接 [netcore基础]ubuntu 16.04 搭建 ...
- 【.NetCore学习】ubuntu16.04 搭建.net core mvc api 运行环境
查看linux内核版本 uname -a 打印结果 python@ubuntu:~$ uname -a Linux ubuntu 4.4.0-31-generic #50-Ubuntu SMP Wed ...
- 【转】64位Ubuntu 16.04搭建嵌入式交叉编译环境arm-linux-gcc过程图解
64位Ubuntu 16.04搭建嵌入式交叉编译环境arm-linux-gcc过程图解,开发裸机环境之前需要先搭建其开发环境,毕竟工欲善其事必先利其器嘛. 安装步骤 1.准备工具安装目录 下载 ar ...
- Ubuntu 16.04搭建php5.6 Web服务器环境
Ubuntu 16.04默认安装php7.0环境,但是php7目前兼容性并不是很好,如果自行安装php5需要清除php7的已安装包,否则会报错. 移除默认及已安装的PHP包 sudo dpkg -l ...
- 阿里云ubuntu 16.04搭建odoo11服务器
ubuntu 16.04 具体如何搭建odoo11网站的具体步骤可以参考这一篇文章 按上面的文章配置环境后,自己网站的启动具体步骤如下: 1.登录阿里云 [远程连接],进入命令行界面1 2.cd到目录 ...
- Ubuntu 16.04 搭建KVM环境
在Ubuntu 16.04下搭建KVM环境过程记录. 1 查看CPU是否支持KVM egrep "(svm|vmx)" /proc/cpuinfo 有结果输出,如下图: 2 安 ...
- Ubuntu 16.04搭建OpenVPN服务器以及客户端的使用
说明:启动时注意用户权限,比如root用户启动. Ubuntu: 服务器环境:Ubuntu 16.04 64位系统 内网IP:10.143.80.116 外网IP:203.195.1.2 OpenVP ...
- CentOS 6.9/Ubuntu 16.04搭建OpenVPN服务器以及客户端的使用
说明: 1.发现一个很奇怪的现象,CentOS和Ubuntu有着对用户不同的管理理念,比如CentOS中安装一切软件都是以root优先(su -),而Ubuntu则以当前用户优先,安装软件以sudo开 ...
- 1、Ubuntu 16.04 安装.net core
Register the Microsoft key register the product repository Install required dependencies 参考网址:https: ...
随机推荐
- idea其他人把jar更新之后更新不到
昨天下午开始就发现这个问题,其他同事把jar更新了之后,我一直获取不到更新之后的内容.尝试了很多方法,删除具体的更新不到的jar,一直不停的mvn clean install -U -Dmaven.t ...
- Vue(五)模板
模板 1. 简介 Vue.js使用基于HTML的模板语法,可以将DOM绑定到Vue实例中的数据 模板就是{{}},用来进行数据绑定,显示在页面中 也称为Mustache语法 2. 数据绑定的方式 a. ...
- Sqoop: ERROR manager.SqlManager: Error reading from database: java.sql.SQLException:
sqoop import --connect jdbc:mysql://122.206.79.212:3306/dating --username root --password 123456 --t ...
- 使用CGlib实现Bean拷贝(BeanCopier)
在做业务的时候,我们有时为了隔离变化,会将DAO查询出来的Entity,和对外提供的DTO隔离开来.大概90%的时候,它们的结构都是类似的,但是我们很不喜欢写很多冗长的b.setF1(a.getF1( ...
- 【TCP ZeroWindow】与【TCP window Full】
1.作为接收方,有接收窗口,也就是接收缓冲区,win=xxx 告诉对方,我的接收窗口大小. 2.当我的接收窗口满了,也就是win=0,Wireshark显示[TCP ZeroWindow],这个时候, ...
- Nginx——location匹配与在配置中的优先级
1. location表达式类型 location ^~ /api/v7/ { proxy_next_upstream http_404 http_500 http_502 http_503 http ...
- 评分卡模型剖析之一(woe、IV、ROC、信息熵)
信用评分卡模型在国外是一种成熟的预测方法,尤其在信用风险评估以及金融风险控制领域更是得到了比较广泛的使用,其原理是将模型变量WOE编码方式离散化之后运用logistic回归模型进行的一种二分类变量的广 ...
- 关于VC预定义常量_WIN32,WIN32,_WIN64
VC2012 下写 Windows 程序时,有时需要判断编译环境.在之前的文章<判断程序是否运行在 Windows x64 系统下.>里说过如何在运行期间判断系统环境,但在编译时如何判断? ...
- MySQL技术内幕读书笔记(二)——InnoDB存储引擎
目录 InnoDB存储引擎 InnoDB存储架构 Checkpoint技术 Master Thread 工作方式 InnoDB关键特性(放一下,感觉看后面,再看总结吧) InnoDB存储引擎 Inno ...
- 转-编写CGI小结
由于Carl要用到我的程序,我们便合作工作.但是他写的程序是Python的,我写的程序是Java的,必须得找一种方式进行通信.尽管有Jython这些东西,但是Carl认为还是CGI最简便.于是,前阵子 ...