Pytest(12)pytest缓存
前言
pytest 运行完用例之后会生成一个 .pytest_cache 的缓存文件夹,用于记录用例的ids和上一次失败的用例。
方便我们在运行用例的时候加上--lf 和 --ff 参数,快速运行上一次失败的用例。
--lf, --last-failed 只重新运行上次运行失败的用例(或如果没有失败的话会全部跑)
--ff, --failed-first 运行所有测试,但首先运行上次运行失败的测试(这可能会重新测试,从而导致重复的fixture setup/teardown)
cache
pytest -h 查看命令行参数,关于 cache 参数的使用方式
> pytest -h

--lf, --last-failed   rerun only the tests that failed at the last

                      run (or all if none failed)

--ff, --failed-first  run all tests, but run the last failures first.

                      This may re-order tests and thus lead to repeated fixture                                   											setup/teardown.

--nf, --new-first     run tests from new files first, then the rest of the tests sorted by 												file mtime

--cache-show=[CACHESHOW]

                      show cache contents, don't perform collection or tests. Optional      											argument: glob(default: '*').

--cache-clear         remove all cache contents at start of test run.
参数说明:
- --lf 也可以使用
--last-failed仅运行上一次失败的用例 - --ff 也可以使用
--failed-first运行全部的用例,但是上一次失败的用例先运行 - --nf 也可以使用
--new-first根据文件插件的时间,新的测试用例会先运行 - --cache-show=[CACHESHOW] 显示.pytest_cache文件内容,不会收集用例也不会测试用例,选项参数: glob (默认: '*')
- --cache-clear 测试之前先清空.pytest_cache文件
--cache-show
案例
def test_01():

    a = "hello"

    b = "hello"

    assert a == b

def test_02():

    a = "hello"

    b = "hello world"

    assert a == b

def test_03():

    a = "hello"

    b = "hello world"

    assert a in b

def test_04():

    a = "hello"

    b = "hello world"

    assert a not in b
命令行输入 运行完成后,会有2个用例失败,2个用例成功
collecting ...

 case/test_1.py ✓                                                                                                                                                                                         25% ██▌

 case/test_1.py ⨯✓                                                                                                                                                                                        75% ███████▌

 case/test_1.py ⨯                                                                                                                                                                                        100% ██████████
运行完成后,会在当前的目录生成一个 .pytest_cache 的缓存文件夹,层级结构如下
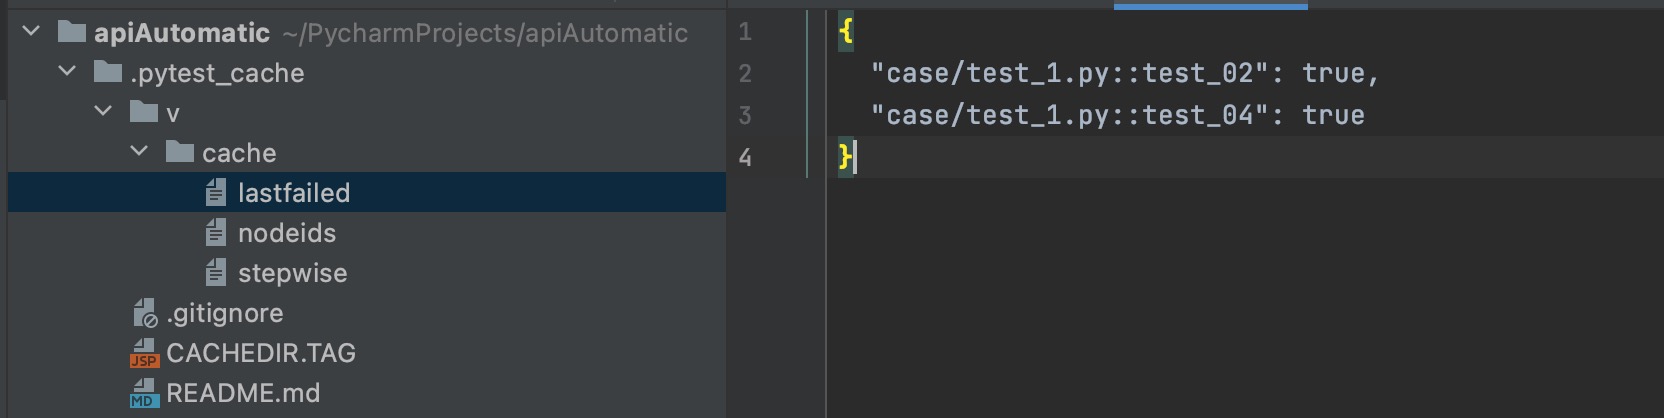
lastfailed 文件记录上一次运行失败的用例
{

  "test_x.py::test_02": true,

  "test_x.py::test_04": true

}
nodeids 文件记录所有用例的节点
[

  "test_x.py::test_01",

  "test_x.py::test_02",

  "test_x.py::test_03",

  "test_x.py::test_04"

]
于是可以通过 pytest --cache-show 命令查看cache目录
(pytest_env) ➜  apiAutomatic pytest --cache-show

Test session starts (platform: darwin, Python 3.7.6, pytest 6.2.1, pytest-sugar 0.9.4)

rootdir: /Users/jkc/PycharmProjects/apiAutomatic, configfile: pytest.ini

plugins: assume-2.4.2, sugar-0.9.4, rerunfailures-9.1.1, base-url-1.4.2, html-3.1.1, metadata-1.11.0, ordering-0.6, cov-2.10.1, repeat-0.9.1, xdist-2.2.0, forked-1.3.0, allure-pytest-2.8.29

cachedir: /Users/jkc/PycharmProjects/apiAutomatic/.pytest_cache

------------------------------------------------------------------------------------------------- cache values for '*' -------------------------------------------------------------------------------------------------

cache/lastfailed contains:

  {'case/test_1.py::test_02': True, 'case/test_1.py::test_04': True}

cache/nodeids contains:

  ['case/test_1.py::test_01',

   'case/test_1.py::test_02',

   'case/test_1.py::test_03',

   'case/test_1.py::test_04']

cache/stepwise contains:

  []

Results (0.02s):
--cache-clear
--cache-clear 用于在测试用例开始之前清空cache的内容
查看pytest关于cache的更多文档https://docs.pytest.org/en/latest/cache.html
Pytest(12)pytest缓存的更多相关文章
- pytest 12 函数传参和fixture传参数request
前沿: 有的case,需要依赖于某些特定的case才可以执行,比如,登陆获取到的cookie,每次都需要带着他,为了确保是同一个用户,必须带着和登陆获取到的同一个cookies. 大部分的用例都会先登 ...
- pytest(12)-Allure常用特性allure.attach、allure.step、fixture、environment、categories
上一篇文章pytest Allure生成测试报告我们学习了Allure中的一些特性,接下来继续学习其他常用的特性. allure.attach allure.attach用于在测试报告中添加附件,补充 ...
- 二、为什么要选用pytest以及 pytest与unittest比较
为什么要选择pytest,我看中的如下: 写case,不需要像unittest那样,创建测试类,继承unittest.TestCase pytest中的fixture(类似于setUp.tearDow ...
- pytest 用 @pytest.mark.usefixtures("fixtureName")或@pytest.fixture(scope="function", autouse=True)装饰,实现类似setup和TearDown的功能
conftest.py import pytest @pytest.fixture(scope="class") def class_auto(): print("&qu ...
- pytest 用 @pytest.mark.usefixtures("fixtureName")装饰类,可以让执行每个case前,都执行一遍指定的fixture
conftest.py import pytest import uuid @pytest.fixture() def declass(): print("declass:"+st ...
- suse 12 利用缓存创建本地源供内网服务使用
文章目录 服务端获取 添加源 刷新源 清除缓存 安装软件 获取rpm包 客户端测试 zypper --help 前言: 其实,咱也不知道为啥写了这篇博客,咱就是想学一学suse,咱也不会,咱也只能学, ...
- pytest配置文件pytest.ini
说明: pytest.ini是pytest的全局配置文件,一般放在项目的根目录下 是一个固定的文件-pytest.ini 可以改变pytest的运行方式,设置配置信息,读取后按照配置的内容去运行 py ...
- python笔记-12 redis缓存
一.redis引入 1.简要概括redis 1.1 redis默认端口:6379 1.2 redis实现的效果:资源共享 1.3 redis实现的基本原理:不同的进程和一个公共的进程之间建立socke ...
- 12 Memcached 缓存无底洞现象
一:Memcached 缓存无底洞现象(1)facebook的工作人员反应的,facebook在2010年左右,memcached节点就已经达到了3000个,存储的数据进千G的数据存储. 他们发现一个 ...
- docker(12)使用Dockerfile创建jenkins+python3+pytest环境
前言 之前我们用docker手动安装了jenkins环境,在jenkins中又安装了python3环境和各种安装包,如果我们想要在其他3台机器上安装,又是重复操作,重复劳动,那会显得很low,这里可以 ...
随机推荐
- 解决黑群晖"抱歉,您所指定的页面不存在"-记一次黑群晖修复案例
起因 搞了一个usb外接硬盘准备备份数,刚好看到群晖有个工具软件"USB Copy". 安装后设置拷贝docker文件夹,然后就悲剧了,nas主页抛出提示 一开始也是直接网上搜索标 ...
- MongoDB按照嵌套数组中的map的某个key无法正常排序的问题
前阵子同事有一个需求: 在一个数组嵌套map的结构中,首先按照map中的某个key进行筛选,再按照map中的某个key进行排序,但是奇怪的是数据总是乱序的. 再检查了代码和数据之后并没有发现什么错误, ...
- P3714 [BJOI2017]树的难题 点分治+线段树合并
题目描述 题目传送门 分析 路径问题考虑点分治 对于一个分治中心,我们可以很容易地得到从它开始的一条路径的价值和长度 问题就是如何将不同的路径合并 很显然,对于同一个子树中的所有路径,它们起始的颜色是 ...
- Docker学习笔记之使用Docker数据卷
Docker数据卷将数据存储到主机而非容器,多个容器需要共享数据时,常常使用数据卷. 1. 为容器设置数据卷(不指定主机目录) 2. 容器与主机之间.容器与容器之间共享数据卷(指定主机目录) 3. 使 ...
- .NET斗鱼直播弹幕客户端(2021)
.NET斗鱼直播弹幕客户端(2021) 离之前更新的两篇<.NET斗鱼直播弹幕客户端>已经有一段时间,近期有许多客户向我反馈刚好有这方面的需求,但之前的代码不能用了--但网上许多流传的No ...
- 【Oracle】查看oracle用户相关权限
系统权限 SELECT * FROM DBA_SYS_PRIVS WHERE GRANTEE = 'CHAXUN' UNION ALL SELECT * FROM DBA_SYS_PRIVS WHER ...
- 利用容器逃逸实现远程登录k8s集群节点
某天, 某鱼说要吃瞄, 于是...... 李国宝:边缘计算k8s集群SuperEdge初体验 zhuanlan.zhihu.com 图标 照着上一篇文章来说,我这边边缘计算集群有一堆节点. 每个节 ...
- Docker 如何动态给SpringBoot项目传参
关于SpringBoot配置数据源 在项目开发中,我们往往需要配置多套不同的配置环境例如:本地开发.测试环境.部署环境.每一个环境的数据源配置可能都不同,因此需要写不同的数据源配置.如果用Docker ...
- 关于springboot2.X使用外部tomcat服务器进行部署的操作详细步骤
1.修改pom.xml文件(4个地方) ①<packaging>war</packaging>将其中的jar该为war ②<dependency> <grou ...
- C++ 中assert断言函数的基本用法
在我们的实际开发过程之中,常常会出现一些隐藏得很深的BUG,或者是一些概率性发生的BUG,通常这些BUG在我们调试的过程中不会出现很明显的问题,但是如果我们将其发布,在用户的各种运行环境下,这些程序可 ...