
Vue项目图片剪切上传——vue-cropper的使用
最近自己在研究vue,然后做了一个小型的后台管理系统用来练手,开发过程中,想到了剪切图片上传用户头像的需求。上网百度了一番,发现好多用的都是vue-cropper。我也就用了,个人感觉还是挺好用的。现在在这里用一个简单的小demo演示一下vue-cropper的使用方法。
其中上传用户头像的接口是java写的,感兴趣的话可以参考我的2017年12月2号的博客:前后端分离跨服务器文件上传-Java SpringMVC版
1、安装vue-cropper
使用npm本地安装vue-cropper
npm install vue-cropper --save-dev
2、新建一个test.vue文件
该文件只做用来演示剪切上传图片的功能,下面直接贴出代码
test.vue:
<template>

  <div style="display:flex;">

    <div class="info-item" style="flex:1;">

      <div style="width:120px;height:120px;border-radius:50%;overflow:hidden;margin-left:123px;border:1px solid #ddd">

        <img style="width:120px;height:120px;" :src="headImg" alt="头像">

      </div>

    </div>

    <div class="info-item" style="flex:1;margin-left:-160px;margin-top:30px;">

      <label class="btn btn-orange" for="uploads" style="display:inline-block;width: 70px;padding: 0;text-align: center;line-height: 28px;">选择图片</label>

      <input type="file" id="uploads" :value="imgFile" style="position:absolute; clip:rect(0 0 0 0);" accept="image/png, image/jpeg, image/gif, image/jpg" @change="uploadImg($event, 1)">

      <input type="button" class="oper" style="height:20px;width:23px;font-size:20px;margin:3px 5px;" value="+" title="放大" @click="changeScale(1)">

      <input type="button" class="oper" style="height:20px;width:23px;font-size:20px;margin:3px 5px;" value="-" title="缩小" @click="changeScale(-1)">

      <input type="button" class="oper" style="height:20px;width:23px;font-size:20px;margin:3px 5px;" value="↺" title="左旋转" @click="rotateLeft">

      <input type="button" class="oper" style="height:20px;width:23px;font-size:20px;margin:3px 5px;" value="↻" title="右旋转" @click="rotateRight">

      <input type="button" class="oper" style="height:20px;width:23px;font-size:20px;margin:3px 5px;" value="↓" title="下载" @click="down('blob')">

      <input type="button" class="btn btn-blue" value="上传头像" @click="finish('blob')">

      <div class="line" style="margin-left: -280px;margin-top: 85px;">

        <div class="cropper-content" style="margin-top:-60px;margin-left:260px;">

          <div class="cropper">

            <vueCropper

              ref="cropper"

              :img="option.img"

              :outputSize="option.size"

              :outputType="option.outputType"

              :info="true"

              :full="option.full"

              :canMove="option.canMove"

              :canMoveBox="option.canMoveBox"

              :original="option.original"

              :autoCrop="option.autoCrop"

              :autoCropWidth="option.autoCropWidth"

              :autoCropHeight="option.autoCropHeight"

              :fixedBox="option.fixedBox"

              @realTime="realTime"

              @imgLoad="imgLoad"

            ></vueCropper>

          </div>

          <div style="margin-left:20px;">

            <div class="show-preview" :style="{'width': '150px', 'height':'155px',  'overflow': 'hidden', 'margin': '5px'}">

              <div :style="previews.div" class="preview">

                <img :src="previews.url" :style="previews.img">

              </div>

            </div>

          </div>

        </div>

      </div>

    </div>

  </div>

</template>

<script>

  import VueCropper from 'vue-cropper'

  import Api from '@/js/api.js' //接口url配置文件

  export default {

    data() {

      return {

        headImg:'',

        //剪切图片上传

        crap: false,

        previews: {},

        option: {

          img: '',

          outputSize:1, //剪切后的图片质量(0.1-1)

          full: false,//输出原图比例截图 props名full

          outputType: 'png',

          canMove: true,

          original: false,

          canMoveBox: true,

          autoCrop: true,

          autoCropWidth: 150,

          autoCropHeight: 150,

          fixedBox: true

        },

        fileName:'',  //本机文件地址

        downImg: '#',

        imgFile:'',

        uploadImgRelaPath:'', //上传后的图片的地址(不带服务器域名)

      }

    },

    components: {

      VueCropper

    },

    methods: {

      //放大/缩小

      changeScale(num) {

        console.log('changeScale')

        num = num || 1;

        this.$refs.cropper.changeScale(num);

      },

      //坐旋转

      rotateLeft() {

        console.log('rotateLeft')

        this.$refs.cropper.rotateLeft();

      },

      //右旋转

      rotateRight() {

        console.log('rotateRight')

        this.$refs.cropper.rotateRight();

      },

      //上传图片(点击上传按钮)

      finish(type) {

        console.log('finish')

        let _this = this;

        let formData = new FormData();

        // 输出

        if (type === 'blob') {

          this.$refs.cropper.getCropBlob((data) => {

            let img = window.URL.createObjectURL(data)

            this.model = true;

            this.modelSrc = img;

            formData.append("file", data, this.fileName);

            this.$http.post(Api.uploadSysHeadImg.url, formData, {contentType: false, processData: false, headers:{'Content-Type': 'application/x-www-form-urlencoded'}})

            .then((response)=>{

              var res = response.data;

              if(res.success == 1){

                $('#btn1').val('');

                _this.imgFile = '';

                _this.headImg = res.realPathList[0];  //完整路径

                _this.uploadImgRelaPath = res.relaPathList[0];  //非完整路径

                _this.$message({  //element-ui的消息Message消息提示组件

                  type: 'success',

                  message: '上传成功'

                });

              }

            })

          })

        } else {

          this.$refs.cropper.getCropData((data) => {

            this.model = true;

            this.modelSrc = data;

          })

        }

      },

      // 实时预览函数

      realTime(data) {

        console.log('realTime')

        this.previews = data

      },

      //下载图片

      down(type) {

        console.log('down')

        var aLink = document.createElement('a')

        aLink.download = 'author-img'

        if (type === 'blob') {

          this.$refs.cropper.getCropBlob((data) => {

            this.downImg = window.URL.createObjectURL(data)

            aLink.href = window.URL.createObjectURL(data)

            aLink.click()

          })

        } else {

          this.$refs.cropper.getCropData((data) => {

            this.downImg = data;

            aLink.href = data;

            aLink.click()

          })

        }

      },

      //选择本地图片

      uploadImg(e, num) {

        console.log('uploadImg');

        var _this = this;

        //上传图片

        var file = e.target.files[0]

        _this.fileName = file.name;

        if (!/\.(gif|jpg|jpeg|png|bmp|GIF|JPG|PNG)$/.test(e.target.value)) {

          alert('图片类型必须是.gif,jpeg,jpg,png,bmp中的一种')

          return false

        }

        var reader = new FileReader();

        reader.onload =(e) => {

          let data;

          if (typeof e.target.result === 'object') {

            // 把Array Buffer转化为blob 如果是base64不需要

            data = window.URL.createObjectURL(new Blob([e.target.result]))

          }

          else {

            data = e.target.result

          }

          if (num === 1) {

            _this.option.img = data

          } else if (num === 2) {

            _this.example2.img = data

          }

        }

        // 转化为base64

        // reader.readAsDataURL(file)

        // 转化为blob

        reader.readAsArrayBuffer(file);

      },

      imgLoad (msg) {

        console.log('imgLoad')

        console.log(msg)

      }

    },

  }

</script>

<style lang="less">

  .info {

    width: 720px;

    margin: 0 auto;

    .oper-dv {

      height:20px;

      text-align:right;

      margin-right:100px;

      a {

        font-weight: 500;

        &:last-child {

          margin-left: 30px;

        }

      }

    }

    .info-item {

      margin-top: 15px;

      label {

        display: inline-block;

        width: 100px;

        text-align: right;

      }

      .sel-img-dv {

        position: relative;

        .sel-file {

          position: absolute;

          width: 90px;

          height: 30px;

          opacity: 0;

          cursor: pointer;

          z-index: 2;

        }

        .sel-btn {

          position: absolute;

          cursor: pointer;

          z-index: 1;

        }

      }

    }

  }

  .cropper-content{

    display: flex;

    display: -webkit-flex;

    justify-content: flex-end;

    -webkit-justify-content: flex-end;

    .cropper{

      width: 260px;

      height: 260px;

    }

    .show-preview{

      flex: 1;

      -webkit-flex: 1;

      display: flex;

      display: -webkit-flex;

      justify-content: center;

      -webkit-justify-content: center;

      .preview{

        overflow: hidden;

        border-radius: 50%;

        border:1px solid #cccccc;

        background: #cccccc;

        margin-left: 40px;

      }

    }

  }

  .cropper-content .show-preview .preview {margin-left: 0;}

</style>
其中,js/api.js文件是配置的接口地址
3、效果
1、打开页面效果

2、点击选择图片按钮,选择完本地图片后的效果
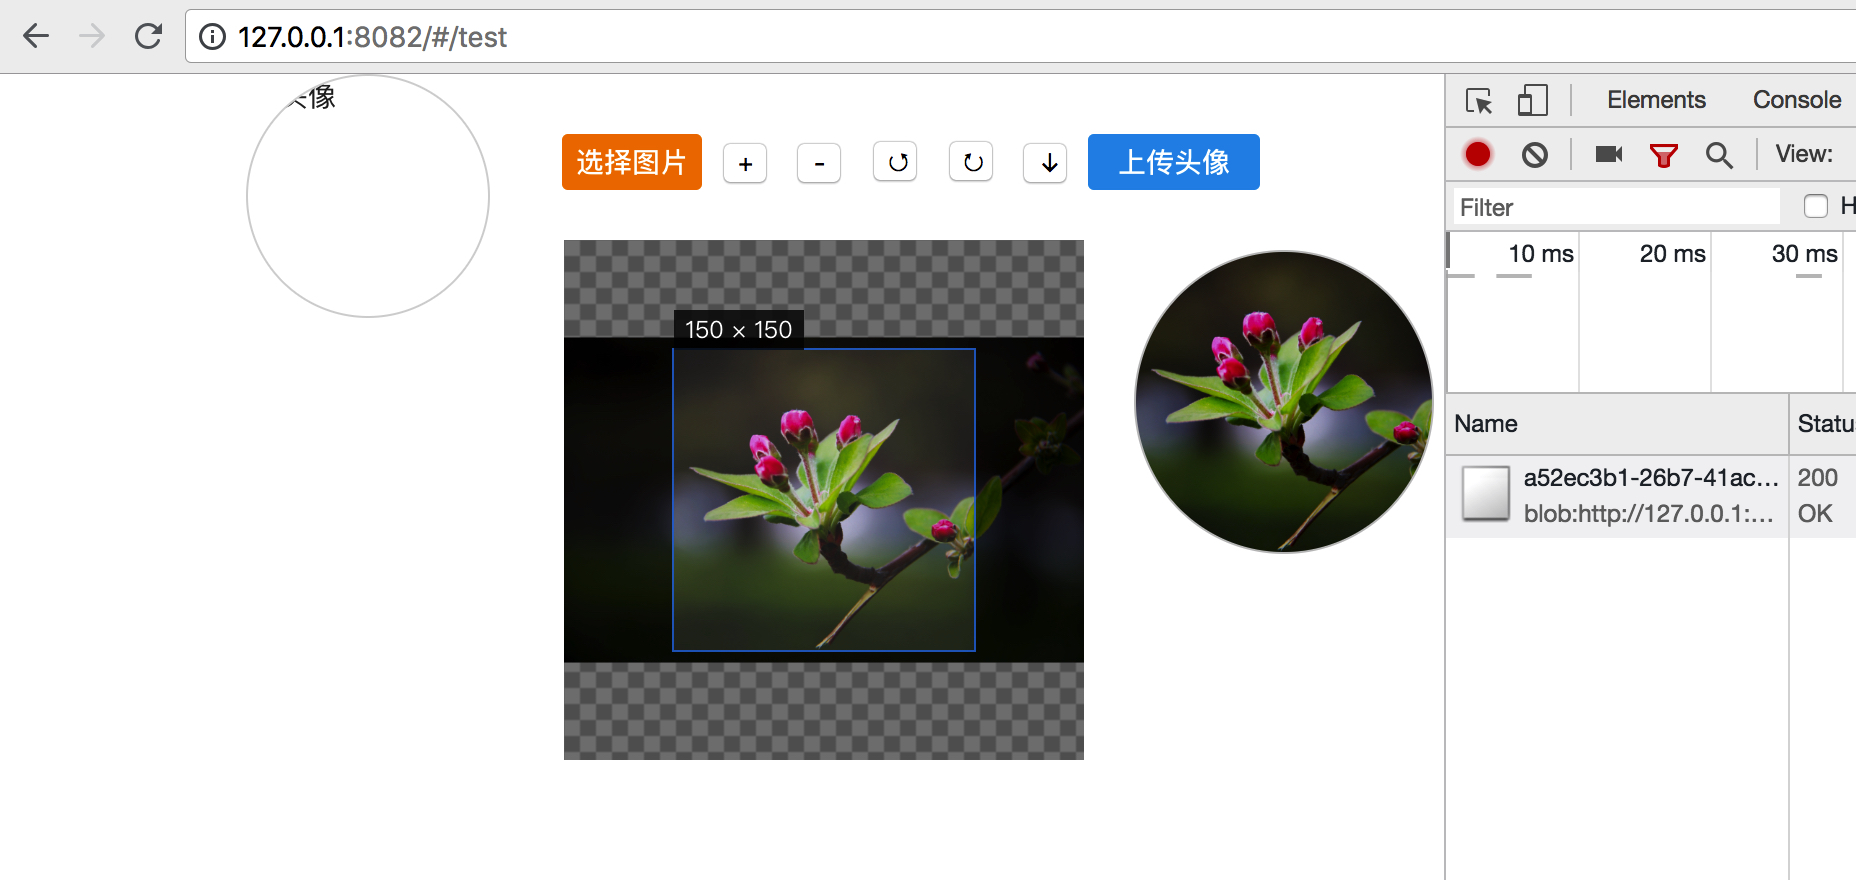
选择完图片后,就可以对图片进行放大,缩小以及旋转等,并且可以移动选中框,选择上传图片的任意部分
3、点击上传头像按钮,即可调用上传头像的接口,把头像上传到文件服务器
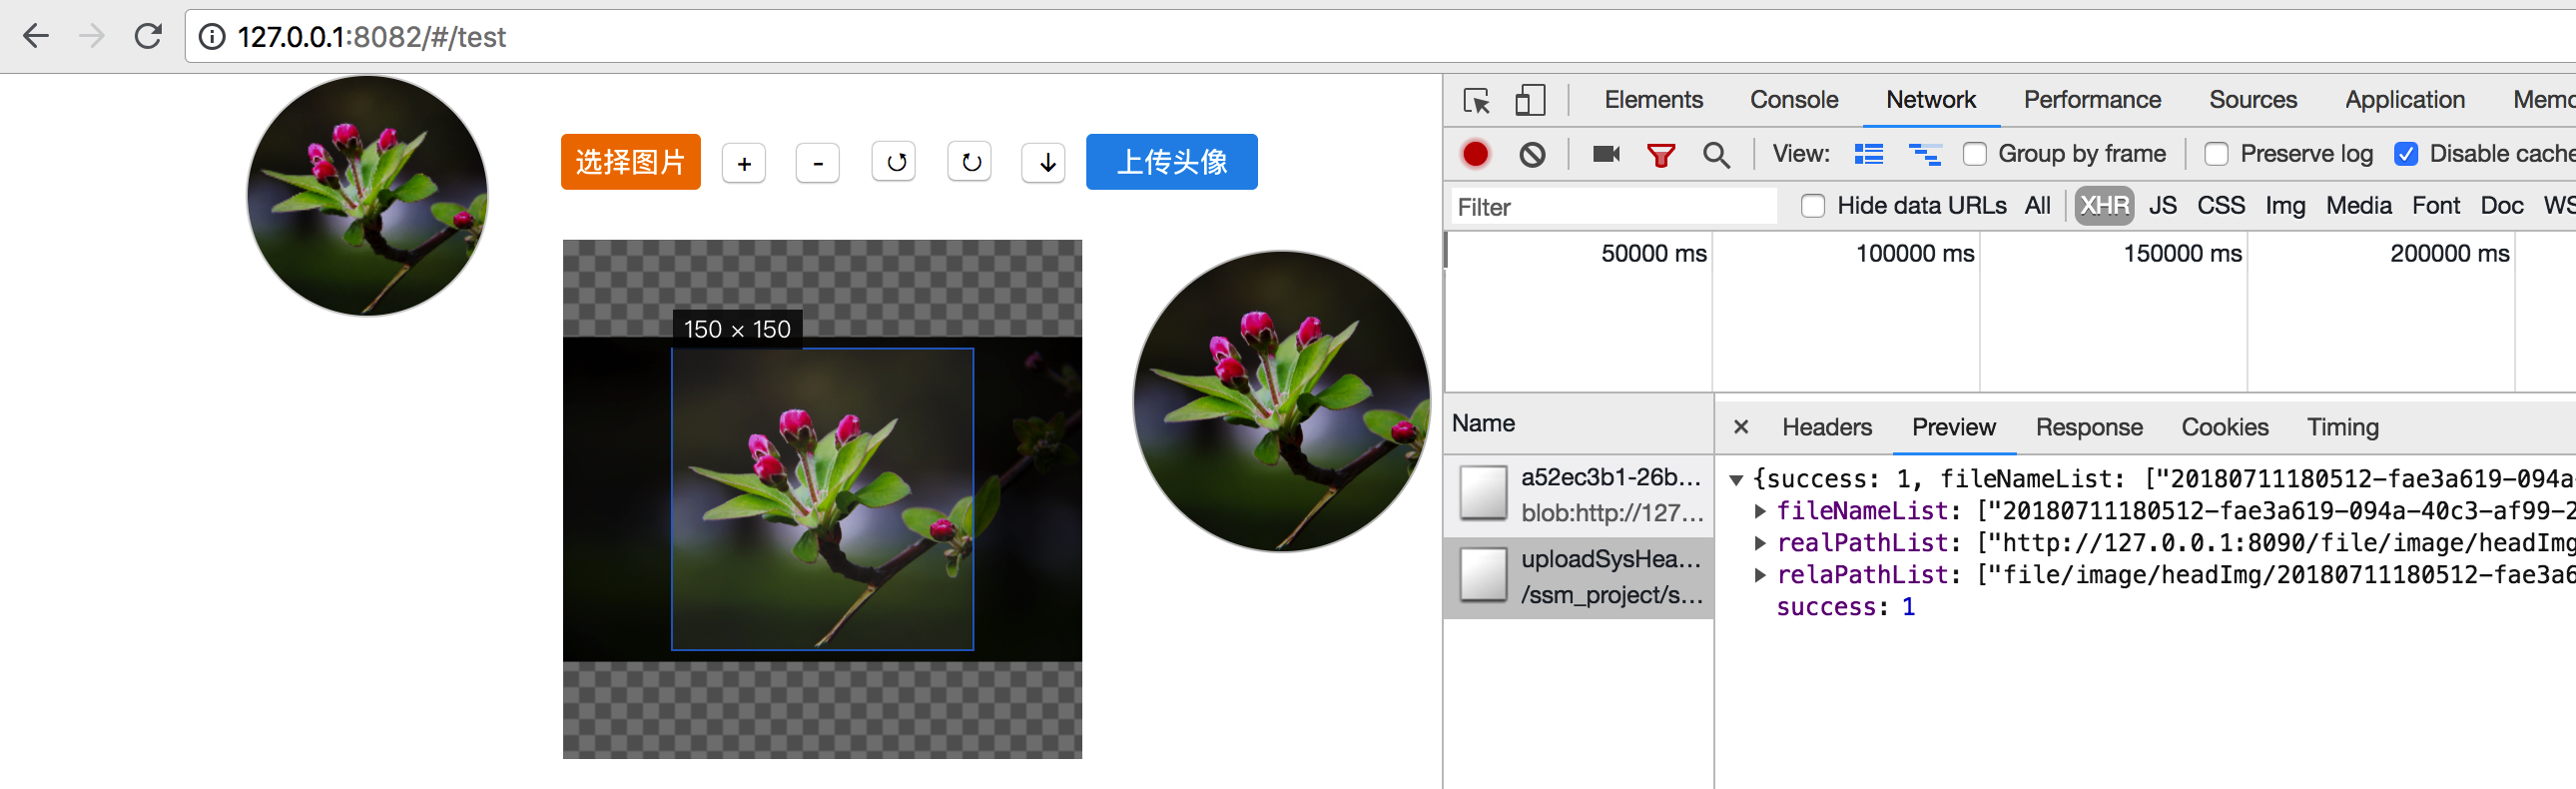
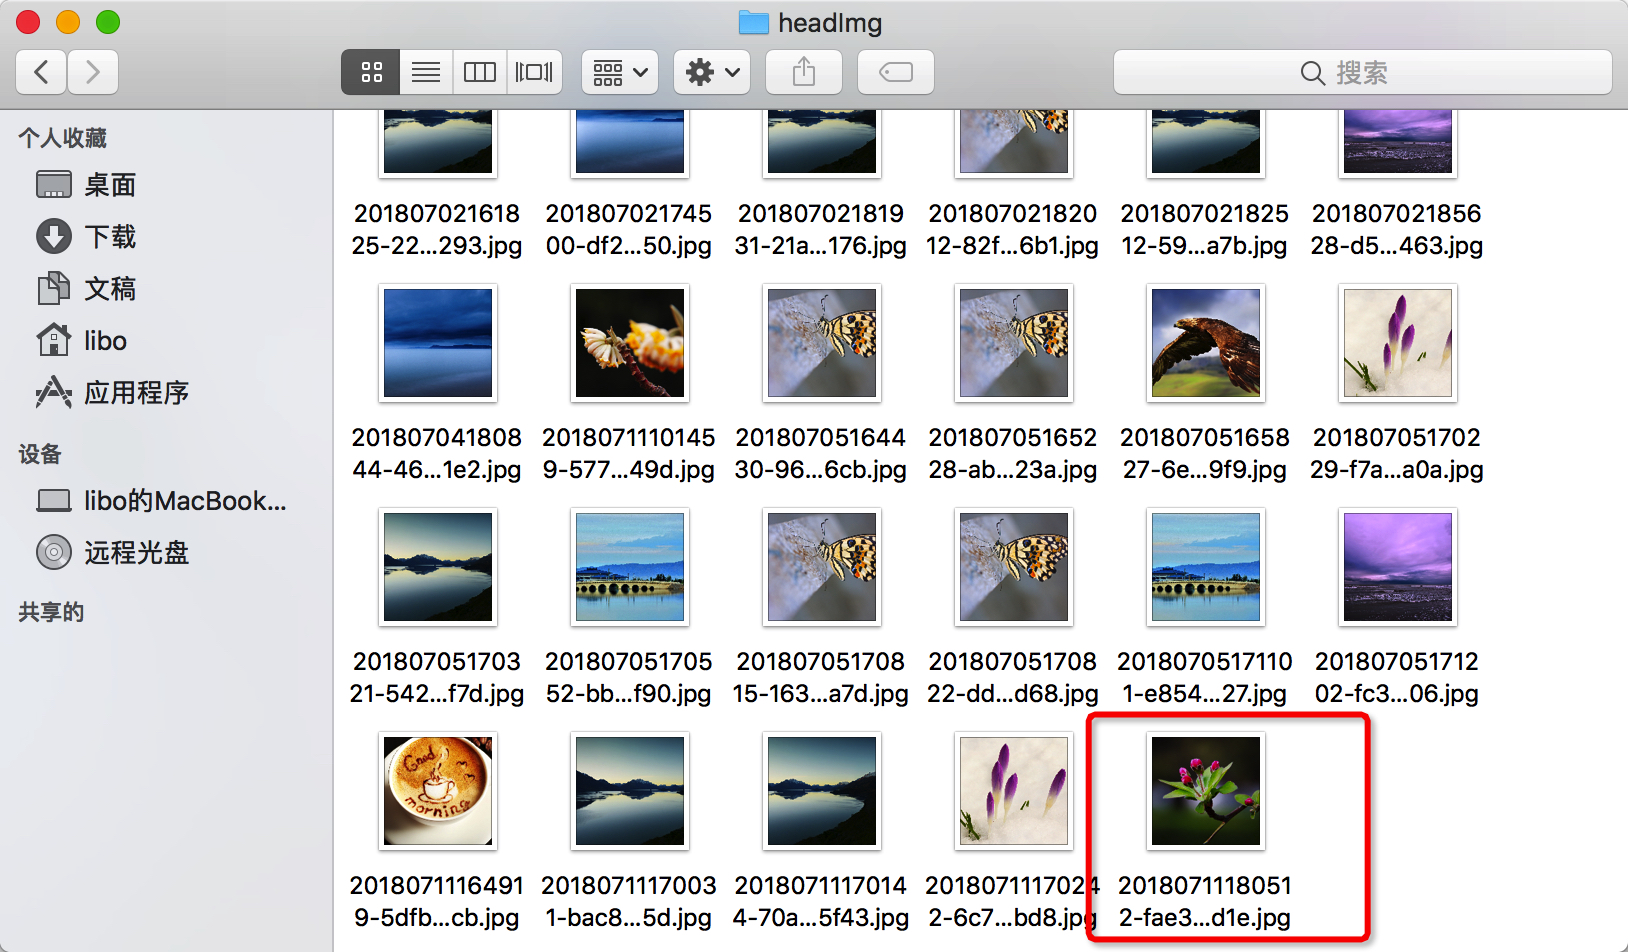
此时,图片便已上传成功了,查看图片服务器指定的目录,即可查看到图片已经在服务器上了
需要购买阿里云产品和服务的,点击此链接领取优惠券红包,优惠购买哦,领取后一个月内有效: https://promotion.aliyun.com/ntms/yunparter/invite.html?userCode=fp9ccf07
Vue项目图片剪切上传——vue-cropper的使用的更多相关文章
- 图片剪裁上传插件 - cropper
图片剪裁上传插件 - cropper <style> .photo-container{float: left;width: 300px;height: 300px;} .photo-co ...
- VUE项目中文件上传兼容IE9
项目使用VUE编写,UI是ElementUI,但是Element的Upload组件是不兼容IE9的.因为IE9中无法使用FormData. 查找资料基本有两种解决方法:1.引入JQuery和jQuer ...
- cropper实现图片剪切上传
一.引入文件 <script src="jquery.min.js"></script> <link rel="stylesheet&quo ...
- vue实现图片的上传和删除
目录 1 UI库使用ElementUI 2 后端使用Express + formidable模块 1 UI库使用ElementUI 安装ElementUI $ npm install --save-d ...
- vue Base64图片压缩上传OSS
this.compress(result, 800, 0.5).then(val => { //得到压缩图片 let data = val; that.file = that.dataURLto ...
- vue里图片压缩上传组件
//单图上传 <template> <div> <div class="uploader" v-if='!dwimg'> <van-upl ...
- vue项目 多文件上传并显示在页面上
<template> <label for="file" class=" btn btn-default" style="borde ...
- layui+croppers完成图片剪切上传
不多说直接上代码: 前台代码: <!DOCTYPE html> <html> <head> <meta charset="utf-8" / ...
- vue中使用cropperjs进行图片裁剪上传
下面代码直接就可以复制使用了,但是需要在本地下个cropperjs,下载命令:npm install cropperjs --save-dev <template> <div id= ...
随机推荐
- filter对数组和对象的过滤
1,对数组的过滤 let arr = ['1', '2', '3'] let b = arr.filter(val => val === '2') console.log(b) // ['2] ...
- LeetCode 9 Palindrome Number(回文数字判断)
Long Time No See ! 题目链接https://leetcode.com/problems/palindrome-number/?tab=Description 首先确定该数字的 ...
- Linux应急处理操作手册
基础准备--命令防篡改与命令记录 很多黑客入侵到操作系统后,会做两个常见的操作unset history和替换命令文件(或者对应的链接库文件),针对这两点要做好记录shelllog并且检查链接库类文件 ...
- linux系统下kvm虚拟机的安装
一 KVM虚拟机简介 KVM是kernel-based Virtual Machine的简称,目前已成为学术界的主流VMM之一.KVM的虚拟化需要硬件支持(如Intel VT技术或者AMD V技术) ...
- Django之数据聚合函数 annotate
在我们的博客侧边栏有分类列表,显示博客已有的全部文章分类.现在想在分类名后显示该分类下有多少篇文章,该怎么做呢?最优雅的方式就是使用 Django 模型管理器的annotate方法. 模型回顾 回顾一 ...
- 这个代码给所有带有name属性的链接加了一个背景色
jQuery起点教程之使用选择器和事件jQuery提供两种方式来选择html的elements: 第一种是用CSS和Xpath选择器联合起来形成一个字符串来传送到jQuery的构造器(如:$(&quo ...
- htop详解
一.Htop的使用简介 大家可能对top监控软件比较熟悉,今天我为大家介绍另外一个监控软件Htop,姑且称之为top的增强版,相比top其有着很多自身的优势.如下: 两者相比起来,top比较繁琐 默认 ...
- JS继承封装
<script> var extend = function (subClass, superClass) { //1.继承类的中间类 var Tmp = function() {}; / ...
- oracle行转列,列转行
多行转字符串这个比较简单,用||或concat函数可以实现 SQL Code select concat(id,username) str from app_userselect id||userna ...
- 冒泡排序快速版(C)
冒泡排序C语言版:在每轮排序中检查时候有元素位置交换,如果无交换,说明数组元素已经有序,无需继续排序 #include <stdio.h> #include <stdlib.h> ...