NFS介绍
一、NFS服务介绍
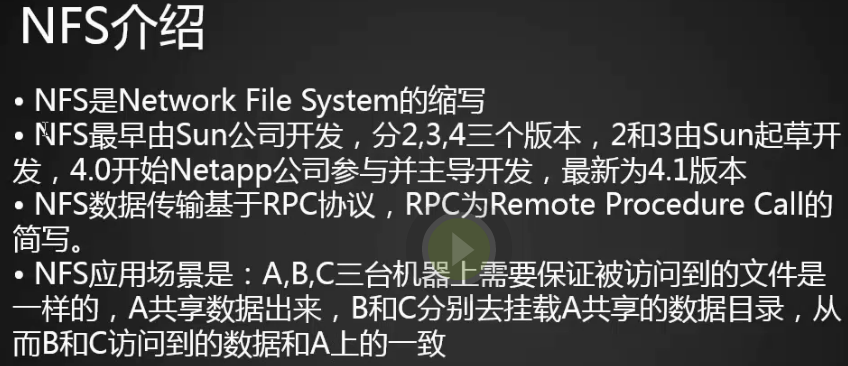
NFS是 Network File system的缩写
分为2.3.4三个版本,2和3由sun公司起草开发,4.0开始netapp公司参与并主导开发
NFS数据传输基于RPC协议:
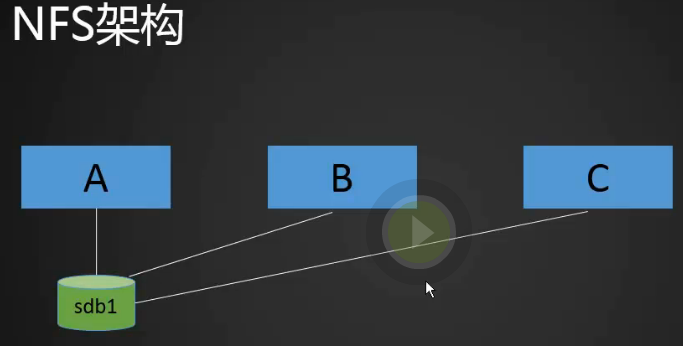
应用场景:A,B,C三台机器上需要保证被访问到的文件是一样的,A共享数据出来,B和C分别取挂载A共享的数据目录,从而B和C访问到的数据和A上的一致。
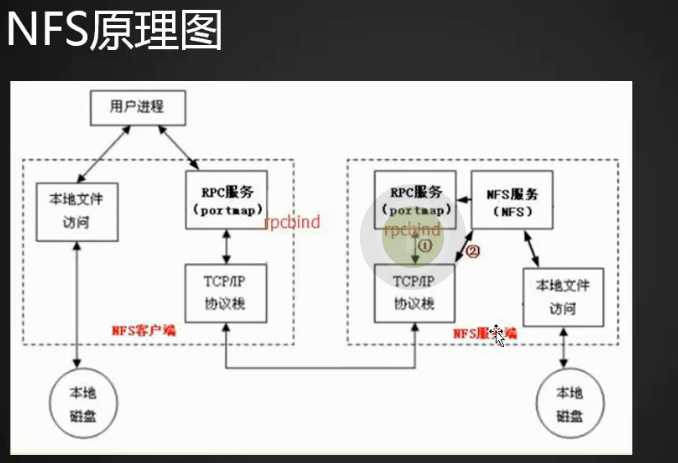
NFS原理图:(NFS服务不监听任何端口,但是RPC服务中的模块,rpcbind默认监听111端口,)
NFS服务端安装配置
1.首先需要两台机器,一个为服务端(ip10.21.95.122)一个为客户端(ip10.21.95.58)。
2.服务端安装两个包
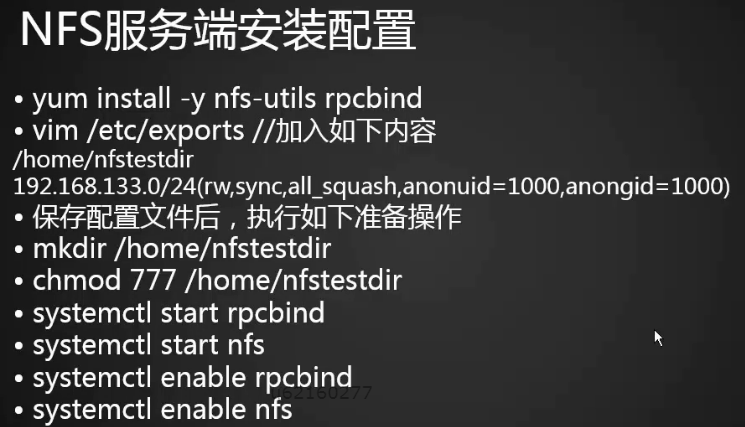
[root@bogon ~]# yum install -y nfs-utils rpcbind
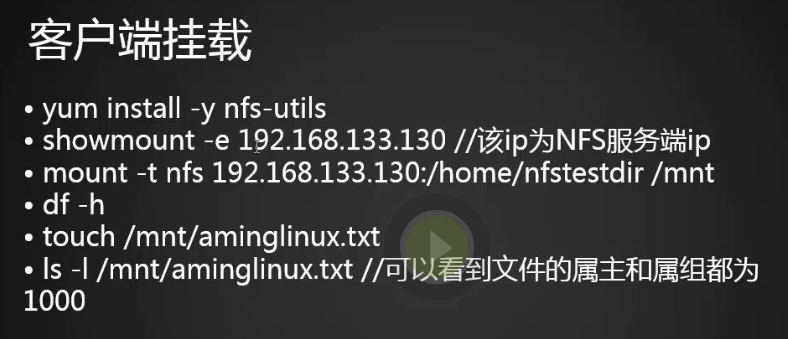
3.客户端安装包
[root@sunyujun02 ~]# yum install -y nfs-utils
4.接下来在服务端编辑:
[root@fuwuduan ~]# vim /etc/exports
[root@fuwuduan ~]#
/home/nfstestdir 10.21.95.0/24(rw,sync,all_squash,anonuid=1000,anongid=1000)
# 第一段来定义共享目录的绝对路径 第二段指定ip和一些选项
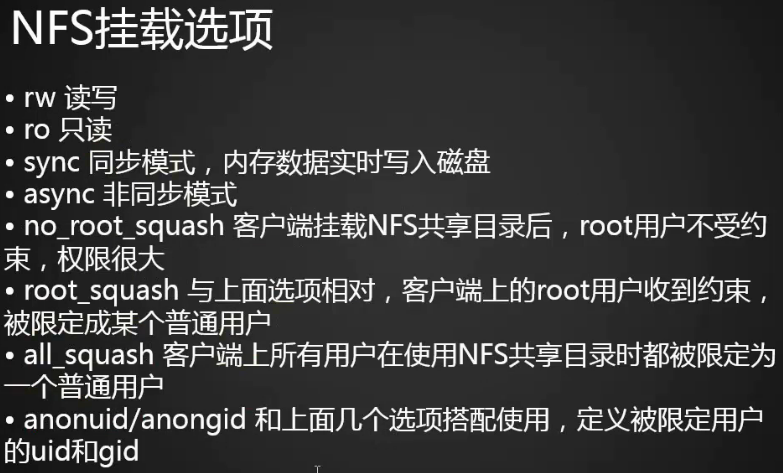
# rw 读写
# ro 只读
# sync 同步模式,内存数据实时写入磁盘
# async 非同步模式
# no_root_squash 客户端挂载NFS共享目录后,root用户不受约束,权限很大
# root_squash 与上面选项相对,客户端上的root用户收到约束,被限定成某个普通用户
# all_squash 客户端上所有用户在使用NFS共享目录时都被限定为一个普通用户
# anonuid/anongid 和上面几个选项搭配使用,定义被限定用户的uid和gid
5.保存配置文件以后,因为共享目录不存在,所以做以下操作。
[root@fuwuduan ~]# mkdir /home/nfstestdir

[root@fuwuduan ~]# chmod 777 /home/nfstestdir/
6.查看rpcbind所用的111端口已经启动
[root@fuwuduan ~]# netstat -lntp

Active Internet connections (only servers)

Proto Recv-Q Send-Q Local Address           Foreign Address         State       PID/Program name

tcp        0      0 0.0.0.0:             0.0.0.0:*               LISTEN      1/systemd

tcp        0      0 0.0.0.0:80              0.0.0.0:*               LISTEN      75879/nginx: worker

tcp        0      0 192.168.122.1:53        0.0.0.0:*               LISTEN      4161/dnsmasq

tcp        0      0 0.0.0.0:22              0.0.0.0:*               LISTEN      1475/sshd

tcp        0      0 127.0.0.1:631           0.0.0.0:*               LISTEN      1477/cupsd

tcp        0      0 127.0.0.1:25            0.0.0.0:*               LISTEN      2778/master

tcp        0      0 0.0.0.0:443             0.0.0.0:*               LISTEN      75879/nginx: worker

tcp6       0      0 :::3306                 :::*                    LISTEN      3849/mysqld

tcp6       0      0 :::111                  :::*                    LISTEN      1/systemd

tcp6       0      0 :::22                   :::*                    LISTEN      1475/sshd

tcp6       0      0 ::1:631                 :::*                    LISTEN      1477/cupsd

tcp6       0      0 ::1:25                  :::*                    LISTEN      2778/master

[root@fuwuduan ~]#
7.客户端和服务端都启动rpcbind
[root@fuwuduan ~]# systemctl start rpcbind

[root@fuwuduan ~]# ps aux|grep rpc

root        752  0.0  0.0      0     0 ?        S<   2月19   0:00 [rpciod]

rpc       37786  0.6  0.1  64952  1040 ?        Ss   17:20   0:00 /sbin/rpcbind -w

root      37788  0.0  0.0 112684   976 pts/2    S+   17:20   0:00 grep --color=auto rpc

[root@fuwuduan ~]#
[root@sunyujun02 ~]# systemctl start rpcbind

[root@sunyujun02 ~]# ps aux|grep rpc

root        818  0.0  0.0      0     0 ?        S<   2月20   0:00 [rpciod]

rpc       47335  0.2  0.1  64936  1052 ?        Ss   17:20   0:00 /sbin/rpcbind -w

root      47337  0.0  0.0 112668   976 pts/1    R+   17:20   0:00 grep --color=auto rpc

[root@sunyujun02 ~]#
8.服务端启动nfs
[root@fuwuduan ~]# systemctl start nfs

[root@fuwuduan ~]# ps aux|grep nfs

root      37863  0.0  0.0      0     0 ?        S<   17:22   0:00 [nfsd4]

root      37864  0.0  0.0      0     0 ?        S<   17:22   0:00 [nfsd4_callbacks]

root      37872  0.0  0.0      0     0 ?        S    17:22   0:00 [nfsd]

root      37873  0.0  0.0      0     0 ?        S    17:22   0:00 [nfsd]

root      37874  0.0  0.0      0     0 ?        S    17:22   0:00 [nfsd]

root      37875  0.0  0.0      0     0 ?        S    17:22   0:00 [nfsd]

root      37876  0.0  0.0      0     0 ?        S    17:22   0:00 [nfsd]

root      37877  0.0  0.0      0     0 ?        S    17:22   0:00 [nfsd]

root      37878  0.0  0.0      0     0 ?        S    17:22   0:00 [nfsd]

root      37879  0.0  0.0      0     0 ?        S    17:22   0:00 [nfsd]

root      37895  0.0  0.0 112680   972 pts/2    R+   17:22   0:00 grep --color=auto nfs

[root@fuwuduan ~]#
9.启动nfs后发现rpc.statd也自动启动了
[root@fuwuduan ~]# ps aux|grep rpc

root        752  0.0  0.0      0     0 ?        S<   2月19   0:00 [rpciod]

rpc       37786  0.0  0.1  64952  1412 ?        Ss   17:20   0:00 /sbin/rpcbind -w

rpcuser   37852  0.0  0.1  44464  1828 ?        Ss   17:22   0:00 /usr/sbin/rpc.statd

root      37853  0.0  0.0  42560   948 ?        Ss   17:22   0:00 /usr/sbin/rpc.mountd

root      37854  0.0  0.0  21384   416 ?        Ss   17:22   0:00 /usr/sbin/rpc.idmapd

root      37939  0.0  0.0 112684   972 pts/2    R+   17:23   0:00 grep --color=auto rpc

[root@fuwuduan ~]#
10.设置开机启动
[root@fuwuduan ~]# systemctl enable nfs

Created symlink from /etc/systemd/system/multi-user.target.wants/nfs-server.service to /usr/lib/systemd/system/nfs-server.service.

[root@fuwuduan ~]#
11.客户端挂载
12.客户端测试提示错误
[root@sunyujun02 ~]# showmount -e 10.21.95.122
clnt_create: RPC: Port mapper failure - Unable to receive: errno 113 (No route to host)

我们发现报错,这是由于网络不通造成,是由防火墙导致我,所以我们把客户端和服务端的防火墙和selinux关闭
13.关掉防火墙(最好把服务端和客户端防火墙都关掉)
[root@fuwuduan ~]# systemctl stop firewalld

[root@fuwuduan ~]# setenforce 0
14.再次测试成功
[root@sunyujun02 ~]# showmount -e 10.21.95.122

Export list for 10.21.95.122:

/home/nfstestdir 10.21.95.0/24

[root@sunyujun02 ~]#
15.客户端挂载远程nfs到mnt目录下
[root@sunyujun02 ~]# mount -t nfs 10.21.95.122:/home/nfstestdir /mnt/

[root@sunyujun02 ~]#
16.df 查看下
[root@sunyujun02 ~]# df -h

文件系统                       容量  已用  可用 已用% 挂载点

/dev/mapper/centos-root         18G  7.9G  9.6G   46% /

devtmpfs                       474M     0  474M    0% /dev

tmpfs                          489M  144K  489M    1% /dev/shm

tmpfs                          489M   14M  476M    3% /run

tmpfs                          489M     0  489M    0% /sys/fs/cgroup

/dev/sda1                      497M  157M  341M   32% /boot

tmpfs                           98M   24K   98M    1% /run/user/0

/dev/sr0                       4.1G  4.1G     0  100% /run/media/root/CentOS 7 x86_64

10.21.95.122:/home/nfstestdir   18G   13G  5.0G   72% /mnt

[root@sunyujun02 ~]#
17.在客户端新建一个文件试试看是否可以同步到服务端
[root@sunyujun02 ~]# cd /mnt/

[root@sunyujun02 mnt]# ls

[root@sunyujun02 mnt]# touch linux.111

[root@sunyujun02 mnt]# ls -l

总用量 0

-rw-r--r-- 1 sunyujun sunyujun 0 2月  23 11:36 linux.111

[root@sunyujun02 mnt]#
18.服务端成功同步,太神奇了
[root@fuwuduan ~]# cd /home/nfstestdir/

[root@fuwuduan nfstestdir]# ls

linux.111

[root@fuwuduan nfstestdir]#
19.因为配置文件中配置的是uid gid 1000所以文件的所属组、属主也是1000用户sunyujun
[root@fuwuduan nfstestdir]# id sunyujun

uid=1000(sunyujun) gid=1000(sunyujun) 组=1000(sunyujun)

[root@fuwuduan nfstestdir]#
[root@sunyujun02 mnt]# id sunyujun

uid=1000(sunyujun) gid=1000(sunyujun) 组=1000(sunyujun)

[root@sunyujun02 mnt]#
exportfs命令
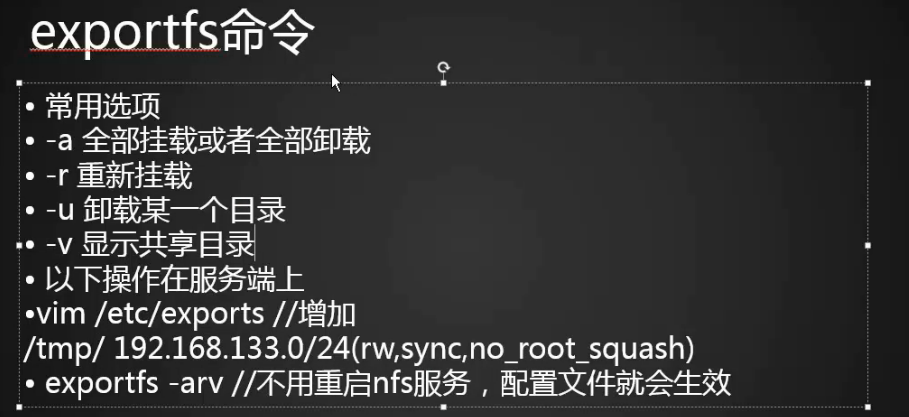
1. nfs进程不能随便从新启动,如果不得已要重启,必须把客户端的挂载目录卸载,然后在从新启动。这时候就可以用exportfs命令
[root@sunyujun02 mnt]# cd

[root@sunyujun02 ~]# umount /mnt/

[root@sunyujun02 ~]#
2.编辑配置文件,添加tmp目录
[root@fuwuduan nfstestdir]# exportfs -u

/home/nfstestdir

                10.21.95.0/24

[root@fuwuduan nfstestdir]# vim /etc/exports

[root@fuwuduan nfstestdir]#
/home/nfstestdir 10.21.95.0/24(rw,sync,all_squash,anonuid=1000,anongid=1000)

/tmp/ 10.21.95.58/24(rw,sync,no_root_squash)
3.执行命令
[root@fuwuduan nfstestdir]# exportfs -arv

exporting 10.21.95.58/24:/tmp

exporting 10.21.95.0/24:/home/nfstestdir

[root@fuwuduan nfstestdir]#
4.客户端执行showmount发现也生效了
[root@sunyujun02 ~]# !showm

showmount -e 10.21.95.122

Export list for 10.21.95.122:

/tmp             10.21.95.58/24

/home/nfstestdir 10.21.95.0/24

[root@sunyujun02 ~]#
5.客户端重新挂载/tmp/
[root@sunyujun02 ~]# mount -t nfs 10.21.95.122:/tmp/ /mnt/

[root@sunyujun02 ~]# df -h

文件系统                 容量  已用  可用 已用% 挂载点

/dev/mapper/centos-root   18G  7.9G  9.6G   46% /

devtmpfs                 474M     0  474M    0% /dev

tmpfs                    489M  144K  489M    1% /dev/shm

tmpfs                    489M   14M  476M    3% /run

tmpfs                    489M     0  489M    0% /sys/fs/cgroup

/dev/sda1                497M  157M  341M   32% /boot

tmpfs                     98M   24K   98M    1% /run/user/0

/dev/sr0                 4.1G  4.1G     0  100% /run/media/root/CentOS 7 x86_64

10.21.95.122:/tmp         18G   13G  5.0G   72% /mnt

[root@sunyujun02 ~]# ls /mnt/

linux.sock

mysql2.sql

mysql_all.sql

mysqlbak.sql

mysql.sock

php-fcgi.sock

ssh-VkkK9OKJsW89

systemd-private-b091a55929414513a9b7db2f688afef6-colord.service-B5wa5w

systemd-private-b091a55929414513a9b7db2f688afef6-cups.service-RpVATe

systemd-private-b091a55929414513a9b7db2f688afef6-rtkit-daemon.service-gDlUSL

systemd-private-b091a55929414513a9b7db2f688afef6-vmtoolsd.service-TLnArm

test.com.log

test.com.log-20180213

test.com.log-20180222

user.sql

yum_save_tx.2018-02-14.10-18.boB57M.yumtx

yum_save_tx.2018-02-14.10-33.ffqojN.yumtx

[root@sunyujun02 ~]#
6.服务端和客户端同时有了tmp目录
[root@fuwuduan nfstestdir]# ls /tmp/

linux.sock

mysql2.sql

mysql_all.sql

mysqlbak.sql

mysql.sock

php-fcgi.sock

ssh-VkkK9OKJsW89

systemd-private-b091a55929414513a9b7db2f688afef6-colord.service-B5wa5w

systemd-private-b091a55929414513a9b7db2f688afef6-cups.service-RpVATe

systemd-private-b091a55929414513a9b7db2f688afef6-rtkit-daemon.service-gDlUSL

systemd-private-b091a55929414513a9b7db2f688afef6-vmtoolsd.service-TLnArm

test.com.log

test.com.log-20180213

test.com.log-20180222

user.sql

yum_save_tx.2018-02-14.10-18.boB57M.yumtx

yum_save_tx.2018-02-14.10-33.ffqojN.yumtx

[root@fuwuduan nfstestdir]#
7.在客户端新建一个文件1111.txt
[root@sunyujun02 ~]# vim /mnt/1111.txt
[root@sunyujun02 ~]# ls /mnt/

1111.txt

linux.sock

mysql2.sql

mysql_all.sql

mysqlbak.sql

mysql.sock

php-fcgi.sock

ssh-VkkK9OKJsW89

systemd-private-b091a55929414513a9b7db2f688afef6-colord.service-B5wa5w

systemd-private-b091a55929414513a9b7db2f688afef6-cups.service-RpVATe

systemd-private-b091a55929414513a9b7db2f688afef6-rtkit-daemon.service-gDlUSL

systemd-private-b091a55929414513a9b7db2f688afef6-vmtoolsd.service-TLnArm

test.com.log

test.com.log-20180213

test.com.log-20180222

user.sql

yum_save_tx.2018-02-14.10-18.boB57M.yumtx

yum_save_tx.2018-02-14.10-33.ffqojN.yumtx

[root@sunyujun02 ~]#
8.查看服务端同样生成了1111.txt文件并且文件的属组属主都是root就是因为设置了no_root_squash
[root@fuwuduan nfstestdir]# ls /tmp/

1111.txt

linux.sock

mysql2.sql

mysql_all.sql

mysqlbak.sql

mysql.sock

php-fcgi.sock

ssh-VkkK9OKJsW89

systemd-private-b091a55929414513a9b7db2f688afef6-colord.service-B5wa5w

systemd-private-b091a55929414513a9b7db2f688afef6-cups.service-RpVATe

systemd-private-b091a55929414513a9b7db2f688afef6-rtkit-daemon.service-gDlUSL

systemd-private-b091a55929414513a9b7db2f688afef6-vmtoolsd.service-TLnArm

test.com.log

test.com.log-20180213

test.com.log-20180222

user.sql

yum_save_tx.2018-02-14.10-18.boB57M.yumtx

yum_save_tx.2018-02-14.10-33.ffqojN.yumtx

[root@fuwuduan nfstestdir]#
NFS客户端问题
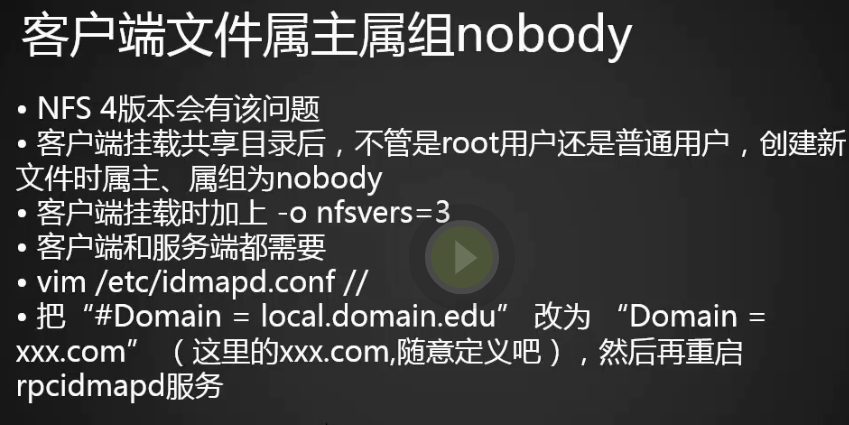
在centos6中遇到的比较多,NFS4版本可能会有该问题
客户端挂载共享目录后,不管是root还是普通用户,创建新文件时所属主,属组为nobody。
解决方法:
第一种:
客户端挂在时加上-o nfsvers=3 (指定NFS版本为3)
[root@sunyujun02 ~]# mount -t nfs -o nfsvers=3 10.21.95.122:/tmp/ /mnt/
[root@sunyujun02 ~]# mount -t nfs -oremount,nfsvers=3 10.21.95.122:/tmp/ /mnt/
[root@sunyujun02 ~]#
第二种:
客户端和服务端都要做:
vim /etc/idmapd.conf //
把“#Domain = local.domain.edu” 改为 “Domain = xxx.com” (这里的xxx.com,随意定义吧),然后再重启rpcidmapd服务
NFS介绍的更多相关文章
- NFS介绍 NFS服务端安装配置 NFS配置选项
NFS 介绍 • NFS是Network File System的缩写 • NFS最早由Sun公司开发,分2,,4三个版本,2和3由Sun起草开发,.0开始Netapp公司参与并主导开发,最新为4.1 ...
- NFS介绍、服务端安装配置、NFS配置选项
6月21日任务 14.1 NFS介绍14.2 NFS服务端安装配置14.3 NFS配置选项 14.1 NFS介绍 14.2 NFS服务端安装配置 1.首先需要2台机器,一台是服务端,一台是客户端,分别 ...
- Linux centosVMware NFS介绍、NFS服务端安装配置、NFS配置选项
一.NFS介绍 NFS是Network File System的缩写 NFS最早由Sun公司开发,分2,3,4三个版本,2和3由Sun起草开发,4.0开始Netapp公司参与并主导开发,最新为4.1版 ...
- NFS介绍和安装
NFS简单介绍 NFS 是Network File System的缩写,即网络文件系统. 一种使用于分散式文件系统的协定,由Sun公司开发,于1984年向外发布.功能是通过网络让不同的机器.不同的操作 ...
- NFS介绍与搭建
一.NFS的介绍 1.1.什么是NFS NFS 是Network File System的缩写,即网络文件系统.一种使用于分散式文件系统的协定,由Sun公司开发,于1984年向外公布. NFS在文件传 ...
- Linux NFS 介绍
由SUN开发,用于在不同的系统之间使用,所以其设计与主机系统无关,用户想使用远程文件时,只需要mount –t nfs就可以把远程的文件拿到本地,像使用本地文件一样使用,非常方便. 它采用C/S架构, ...
- NFS、FTP介绍
第二十五课 NFS.FTP介绍 目录 一. NFS介绍 二.NFS服务端安装配置 三.NFS配置选项 四.exportfs命令 五.NFS客户端问题 六.FTP介绍 七.使用vsftpd搭建ftp 八 ...
- NFS文件共享系统
1.NFS介绍 NFS是Network File System的缩写,主要功能是通过网络让不同的机器系统之间可以彼此共享文件或目录.NFS服务器可以允许NFS客户端将远端NFS服务端的共享目录挂载到本 ...
- NFS存储服务部署
第1章 NFS介绍 1.1 NFS服务内容的概述 □ RPC服务知识概念介绍说明,以及RPC服务存在价值(必须理解掌握) □ NFS服务工作原理讲解(必须理解掌握) □ NFS共享文件系统使用原理讲解 ...
随机推荐
- Problem G: 零起点学算法102——删除字符
#include<stdio.h> #include<string.h> int main() { ],a; while(gets(ch)!=NULL) { scanf(&qu ...
- bootstrap学习(全局CSS样式)(二)
标题类:.h1到.h6 页面主体 bootstrap将全局font-size设置为14px,line-height设置为1.428,这些属性 直接赋予元素和所有段落元素. 文本对齐类 text-lef ...
- ENVI裁剪
一.basic tools-->resize data进行规则裁剪 虽然是进行图像重采样工具,但也可以用于简单快速的裁剪 1. 选中要裁剪的图像: 对话框下面选择spatial subset(构 ...
- Atlassian发布JIRA项目组合管理解决方案
在其年度用户峰会上,开发和协作软件供应商Atlassian发布了JIRA Portfolio,JIRA Portfolio是JIRA的一个附加组件"可以提供简单准确的视图用于计划和管理跨团队 ...
- this和$(this)的关系
环境关键字this引用的是DOM元素 $(this)是jQuery对象 下面点击按钮分别alert一下 alert(this); alert($(this)); 获取DOM对象的属性id,可以 $(t ...
- 万里长征第二步——django个人博客(第二步 ——日志记录器)
定义日志记录器 可以在setting.py里设置日志记录器 # 自定义日志输出信息 LOGGING = { 'version': 1, 'disable_existing_loggers': True ...
- 一份不太简短的LaTeX教程 lshort – A short introduction to LATEX 2elshort – A short introduction to LATEX 2e
Lshort started as a translation and rationalisation of a ground-breaking German-language i ...
- 有关ubuntu16.04进行sudo apt-get update更新时出现:‘。。。N: 无法安全地用该源进行更新,所以默认禁用该源。。。’等问题解决方案
关于ubuntu16.04在 sudo apt-get update 时出现如下错误: 针对这种情况,本人结合网上的解决方案总结出以下方案,三条命令搞定,希望有用. 1. 进入 sources.lis ...
- 模糊搜索:concat各种函数详解、like操作符、通配符
if(StringUtils.isNotBlank(queryBean.getConditions())){ hqlBuilder.addWhereClause(" concat(this. ...
- MongoDB分片集群常用操作
下架主节点: db.adminCommand({replSetStepDown : 1, force : true}) 删除节点: rs.remove("IP:PORT") 新增节 ...