Zabbix-2.4-安装-3
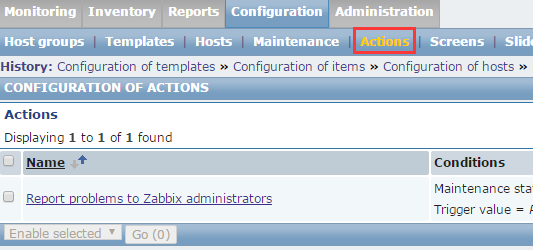
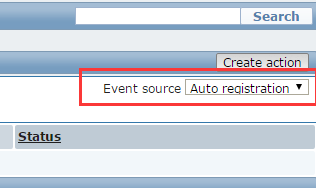
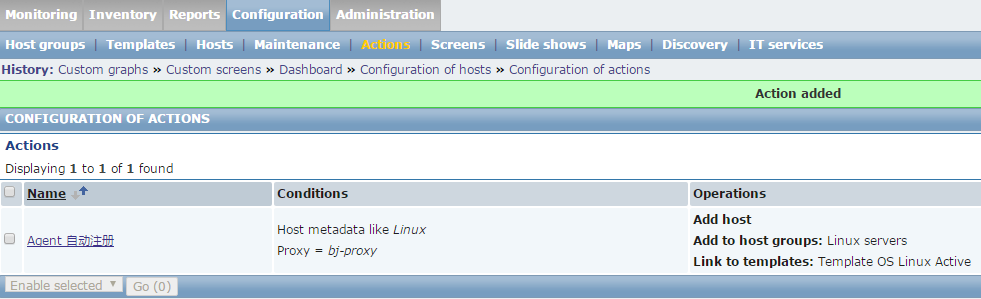
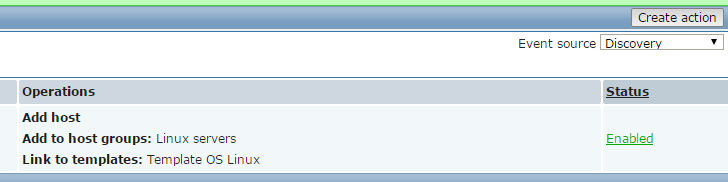
下面就是自动注册

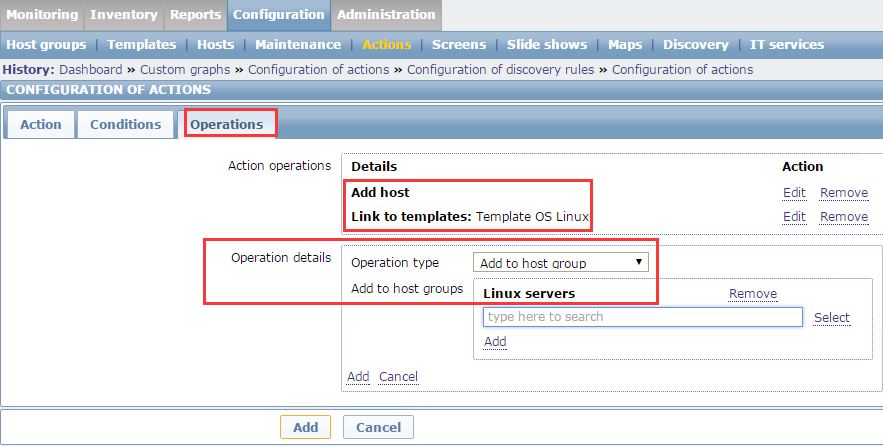
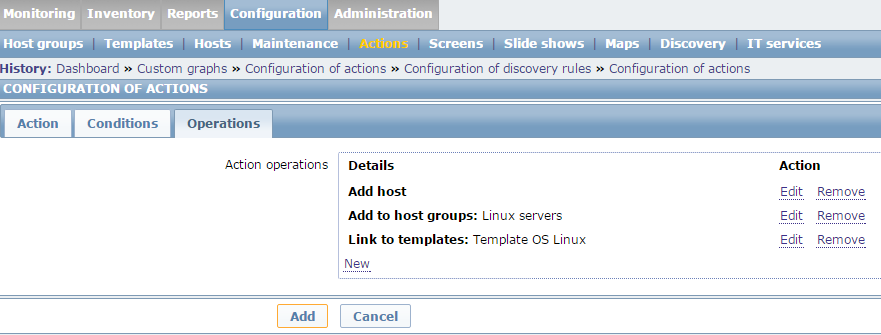
在operations这里找到Add host


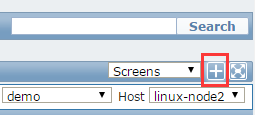
创建1个2行2列的screen。


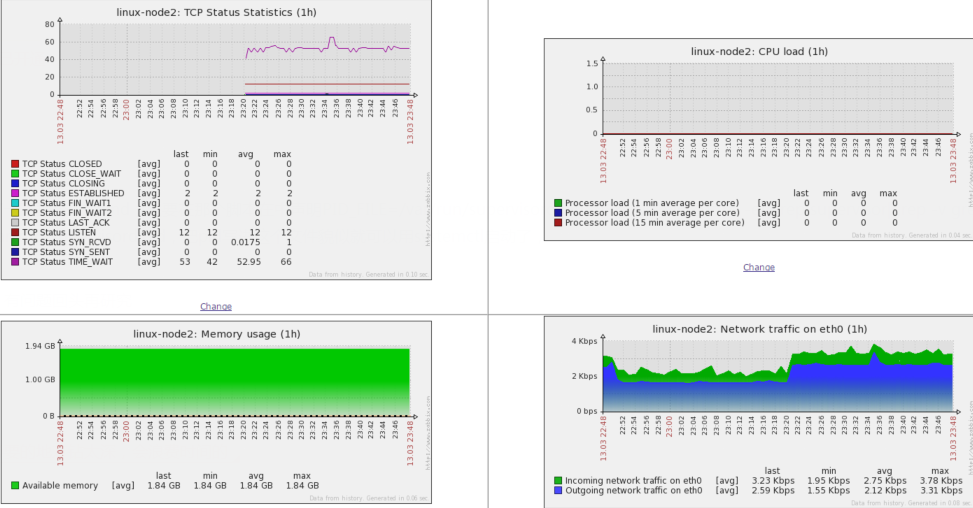
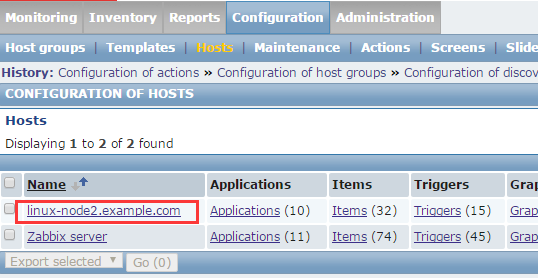
加入进来了

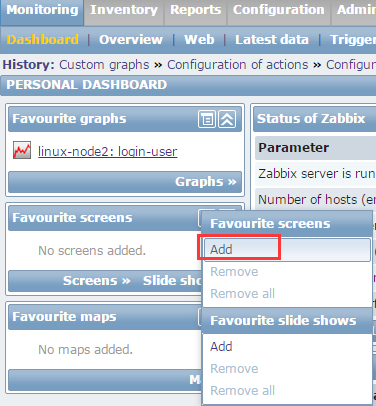
从Monitor--Screens里也可以加

zabbix监控主动模式
默认情况下zabbix是运行在被动模式,这个主动和被动是针对zabbix-agent来说的
agent默认监听一个端口,10050,server会定期主动过来要数据。server端主动的发命令,告诉agent。取哪些数据
如果1万台机器,zabbix同时要发10000个请求到agent,问他们数据。这么弄肯定有问题
zabbix agent也支持主动模式,主动给服务器发消息,这时候用于分布式比较好了

全部克隆


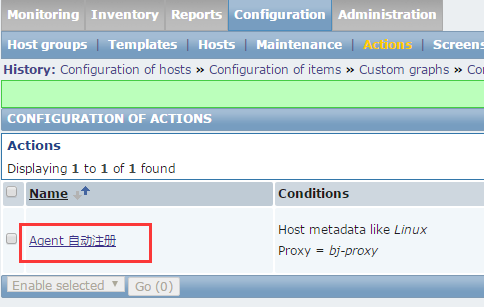
点击进去
点击Full clone

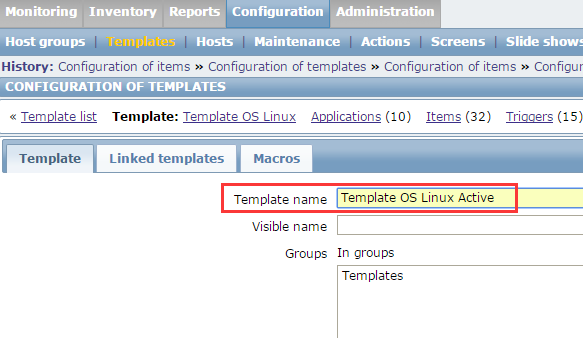
把克隆出来的改成如下名字,多了个Active用来区分,然后点击Add


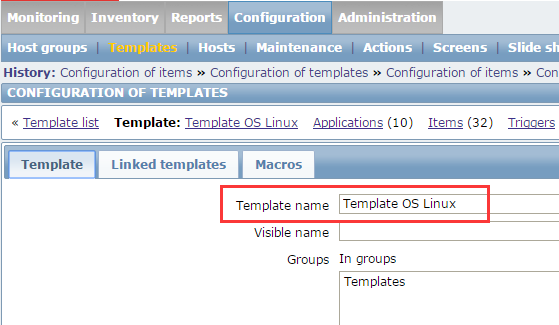
改成如下
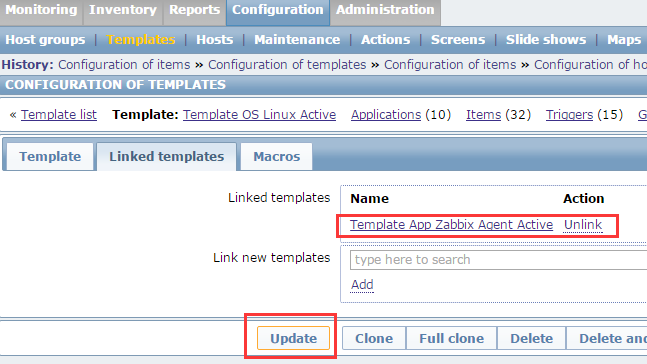
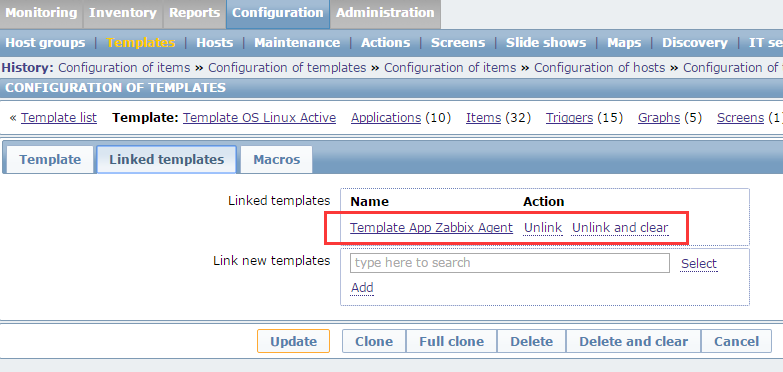
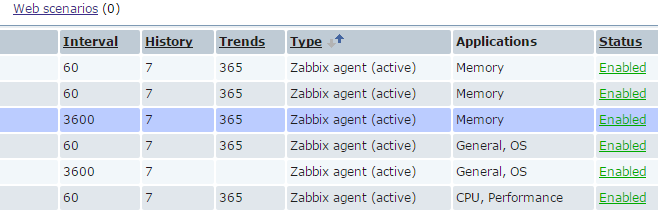
以上更改仅仅是添加了新的模板,items这里并没改掉
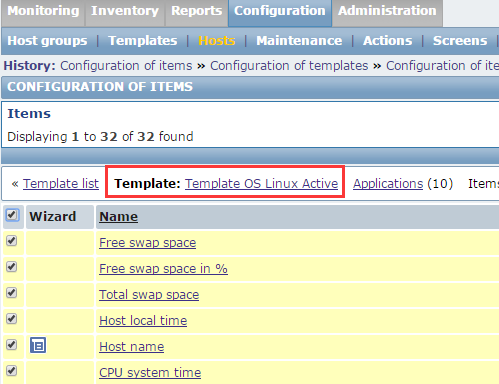
批量修改
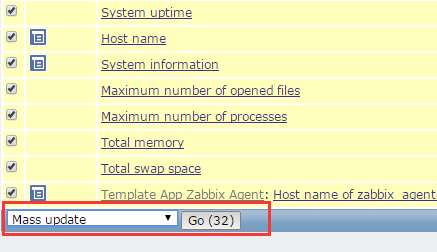
下面这里改成Active的
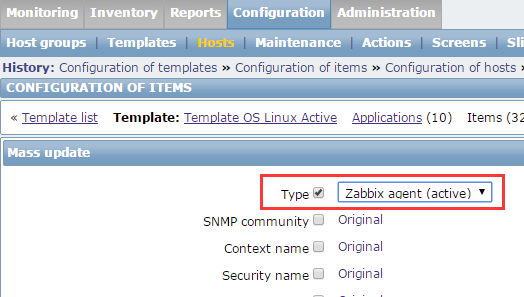
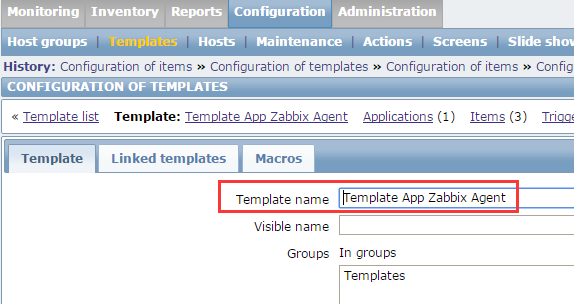
右边的items这里都变成了Active的。上面没变的是link的另一个模板的,因此link的模板也要改


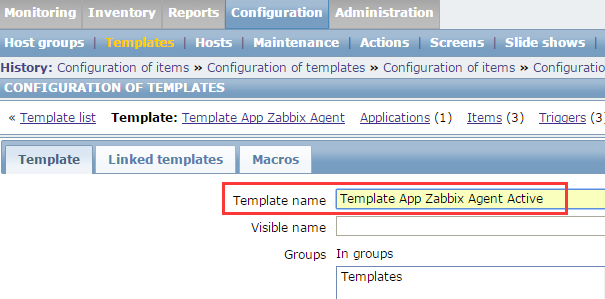
也改成active的


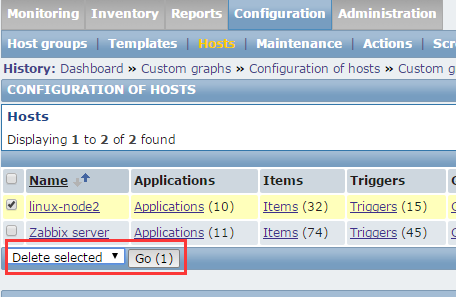
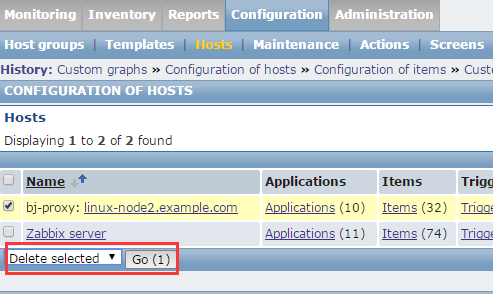
删除之前的node2主机,改成主动模式添加

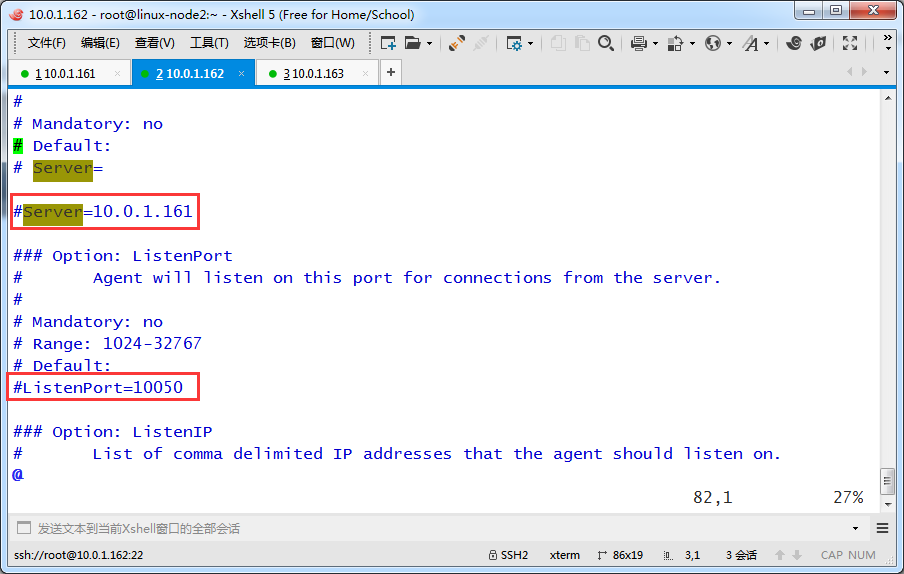
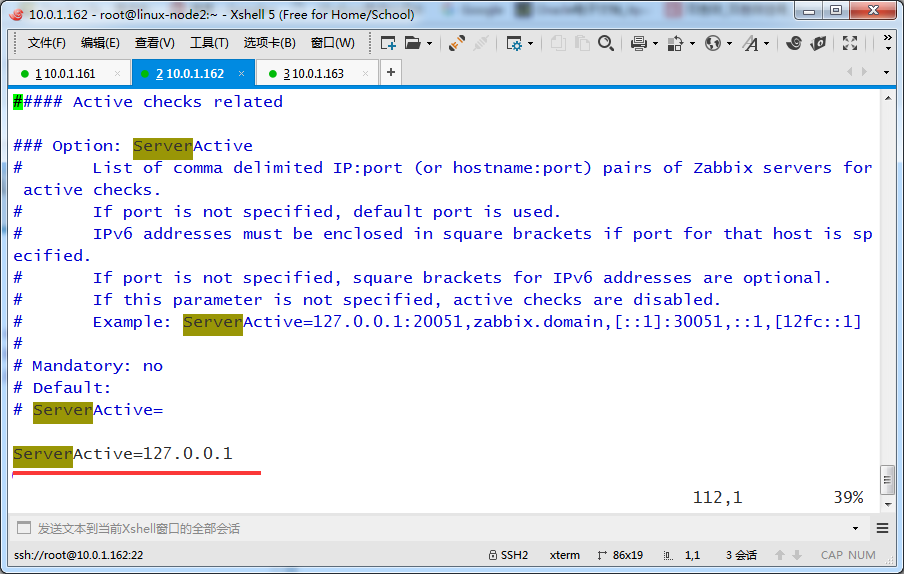
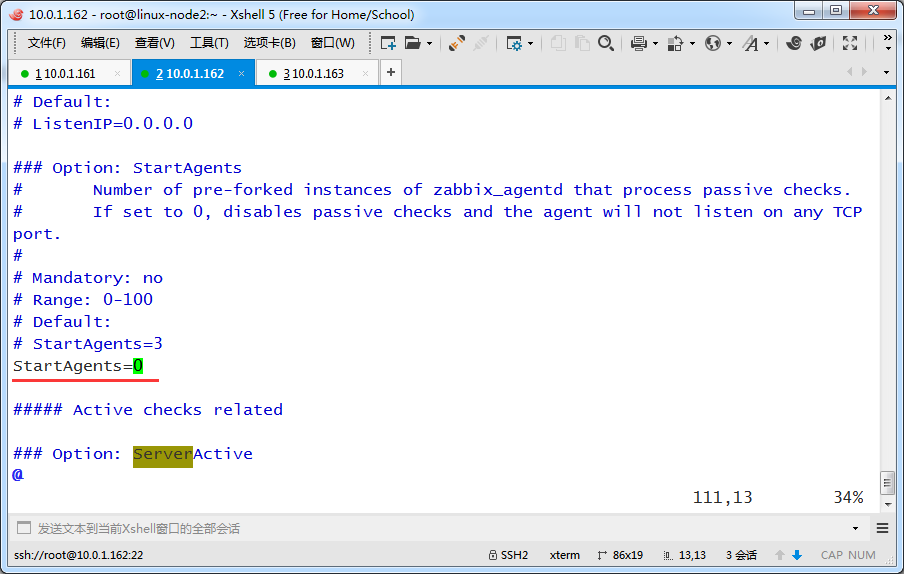
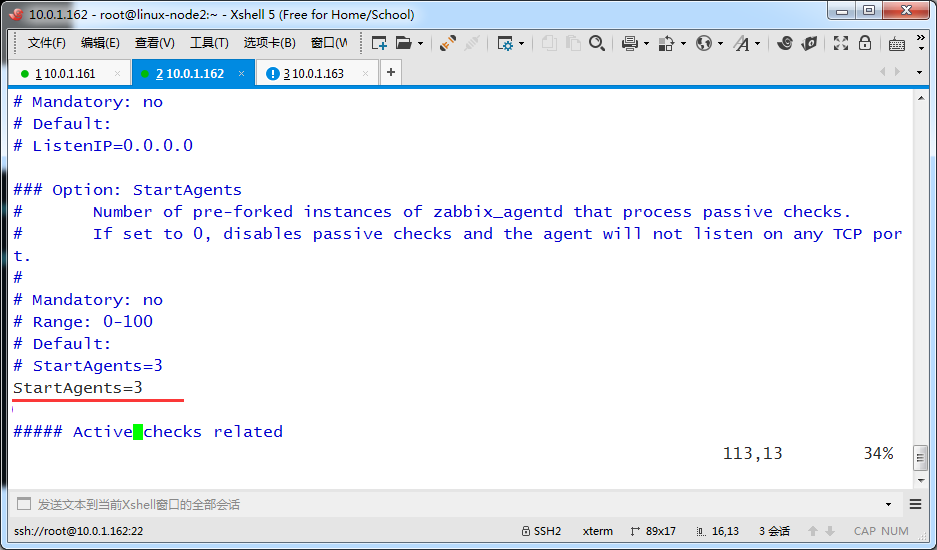
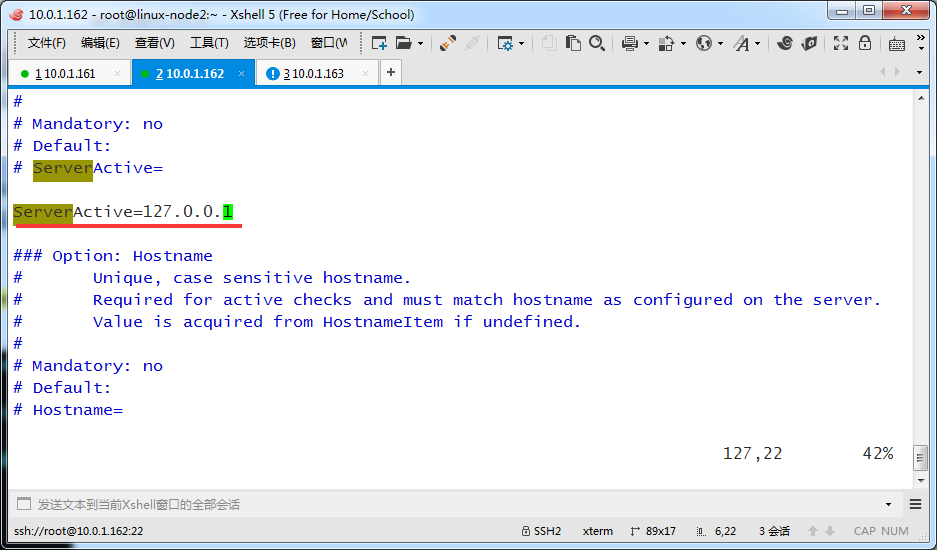
下面是设置为0才表示agent开启主动监控模式
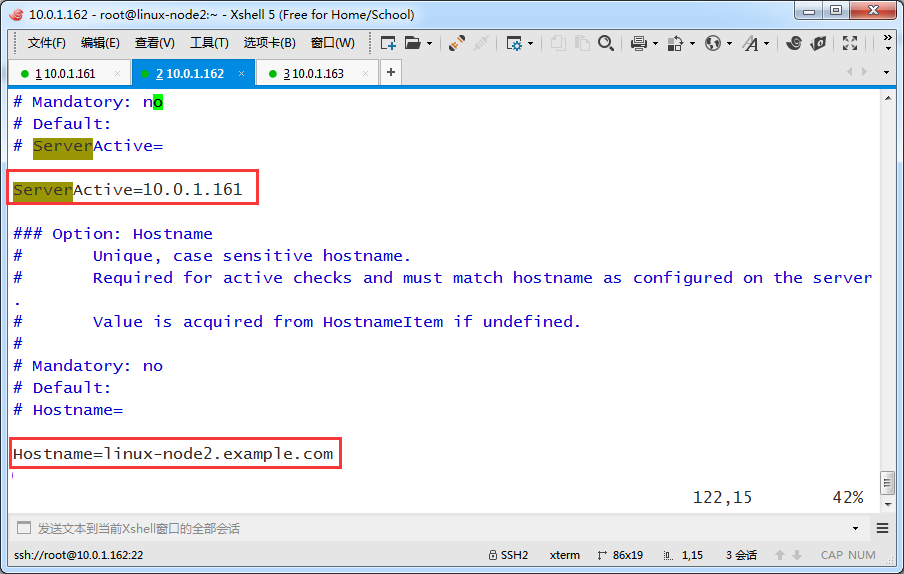
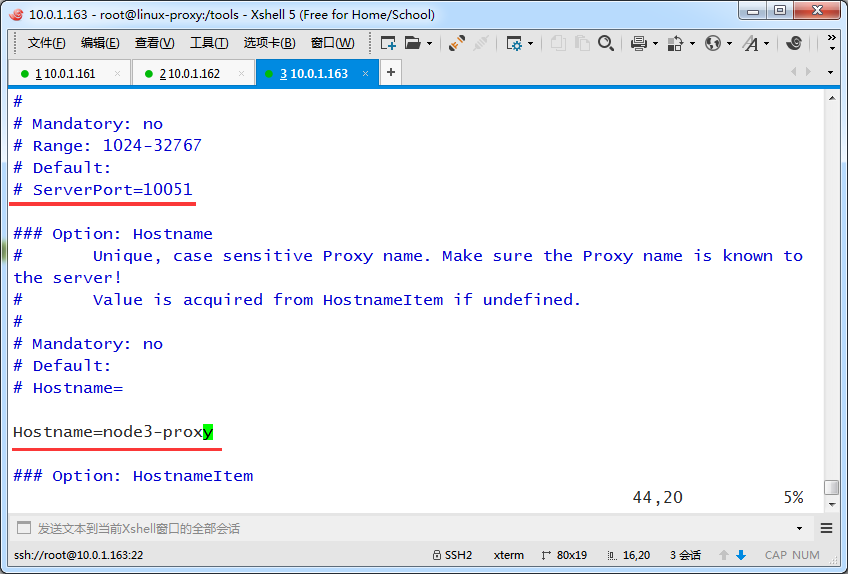
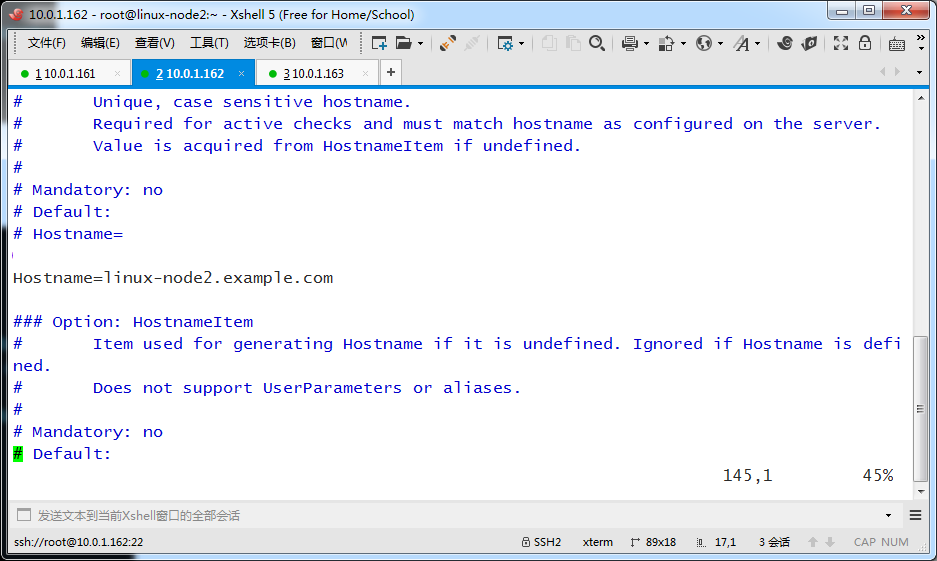
把ServerActive改成Zabbix Server的地址,把Hostname改成自己的主机名
[root@linux-node2 ~]# grep '^[a-Z]' /etc/zabbix/zabbix_agentd.conf

PidFile=/var/run/zabbix/zabbix_agentd.pid

LogFile=/var/log/zabbix/zabbix_agentd.log

LogFileSize=0

StartAgents=0

ServerActive=10.0.1.161

Hostname=linux-node2.example.com

Include=/etc/zabbix/zabbix_agentd.d/

UserParameter=login-user,uptime | awk -F ' '  '{print $4}'

[root@linux-node2 ~]#
重启agent服务
[root@linux-node2 ~]# /etc/init.d/zabbix-agent restart

Shutting down Zabbix agent:                                [  OK  ]

Starting Zabbix agent:                                     [  OK  ]

[root@linux-node2 ~]#
看到不再监听端口了
[root@linux-node2 ~]# netstat -lntp

Active Internet connections (only servers)

Proto Recv-Q Send-Q Local Address               Foreign Address             State       PID/Program name

tcp        0      0 0.0.0.0:22                  0.0.0.0:*                   LISTEN      2075/sshd

tcp        0      0 :::22                       :::*                        LISTEN      2075/sshd

[root@linux-node2 ~]# ps -ef | grep zabbix

zabbix    76194      1  0 19:38 ?        00:00:00 zabbix_agentd -c /etc/zabbix/zabbix_agentd.conf

zabbix    76195  76194  0 19:38 ?        00:00:00 zabbix_agentd: collector [idle 1 sec]

zabbix    76197  76194  0 19:38 ?        00:00:00 zabbix_agentd: active checks #1 [idle 1 sec]

root      76211  75384  0 19:42 pts/0    00:00:00 grep --colour=auto zabbix

[root@linux-node2 ~]#
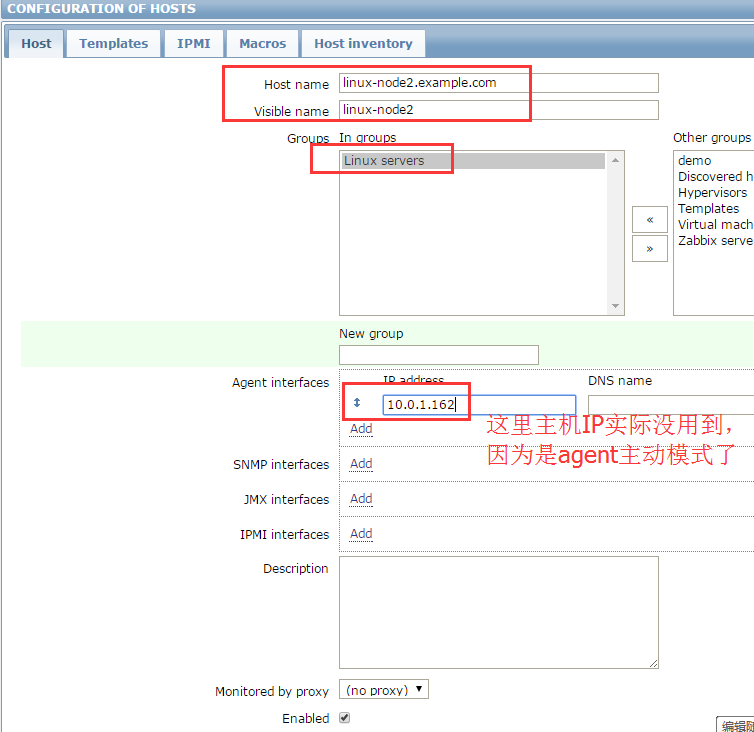
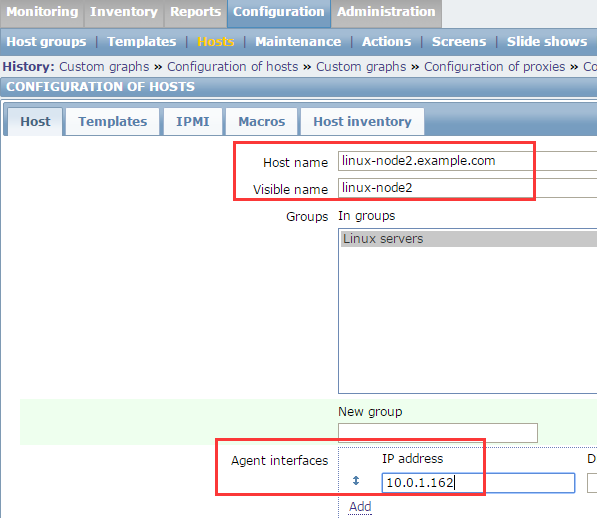
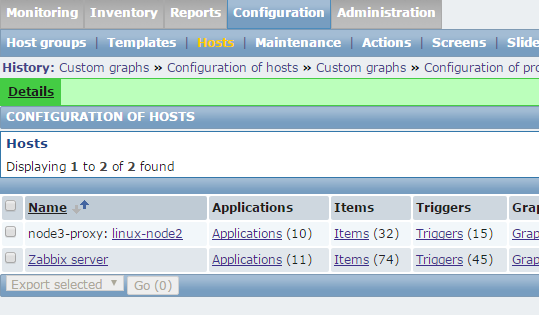
网页里添加主机


mkdir /tools -p

cd /tools/

wget   http://repo.zabbix.com/zabbix/2.4/rhel/6/x86_64/zabbix-release-2.4-1.el6.noarch.rpm

rpm -ivh zabbix-release-2.4-1.el6.noarch.rpm
yum install -y zabbix-proxy zabbix-proxy-mysql mysql-server
[root@linux-proxy tools]# yum install -y zabbix-proxy  zabbix-proxy-mysql mysql-server

Loaded plugins: fastestmirror, refresh-packagekit, security

Setting up Install Process

Loading mirror speeds from cached hostfile

 * base: mirrors.cn99.com

 * extras: mirrors.cn99.com

 * updates: mirrors.cn99.com

Package zabbix-proxy-2.4.8-1.el6.x86_64 already installed and latest version

Package zabbix-proxy-mysql-2.4.8-1.el6.x86_64 already installed and latest version

Package mysql-server-5.1.73-8.el6_8.x86_64 already installed and latest version

Nothing to do

[root@linux-proxy tools]#
启动刚装的mysql,并设置密码
[root@linux-proxy tools]# /etc/init.d/mysqld start

Initializing MySQL database:  WARNING: The host 'linux-proxy.example.com' could not be looked up with resolveip.

This probably means that your libc libraries are not 100 % compatible

with this binary MySQL version. The MySQL daemon, mysqld, should work

normally with the exception that host name resolving will not work.

This means that you should use IP addresses instead of hostnames

when specifying MySQL privileges !

Installing MySQL system tables...

OK

Filling help tables...

OK

To start mysqld at boot time you have to copy

support-files/mysql.server to the right place for your system

PLEASE REMEMBER TO SET A PASSWORD FOR THE MySQL root USER !

To do so, start the server, then issue the following commands:

/usr/bin/mysqladmin -u root password 'new-password'

/usr/bin/mysqladmin -u root -h linux-proxy.example.com password 'new-password'

Alternatively you can run:

/usr/bin/mysql_secure_installation

which will also give you the option of removing the test

databases and anonymous user created by default.  This is

strongly recommended for production servers.

See the manual for more instructions.

You can start the MySQL daemon with:

cd /usr ; /usr/bin/mysqld_safe &

You can test the MySQL daemon with mysql-test-run.pl

cd /usr/mysql-test ; perl mysql-test-run.pl

Please report any problems with the /usr/bin/mysqlbug script!

                                                           [  OK  ]

Starting mysqld:                                           [  OK  ]

[root@linux-proxy tools]# /usr/bin/mysqladmin -uroot password 'zabbix'

[root@linux-proxy tools]# mysql -uroot -pzabbix

Welcome to the MySQL monitor.  Commands end with ; or \g.

Your MySQL connection id is 3

Server version: 5.1.73 Source distribution

Copyright (c) 2000, 2013, Oracle and/or its affiliates. All rights reserved.

Oracle is a registered trademark of Oracle Corporation and/or its

affiliates. Other names may be trademarks of their respective

owners.

Type 'help;' or '\h' for help. Type '\c' to clear the current input statement.

mysql> show databases;

+--------------------+

| Database           |

+--------------------+

| information_schema |

| mysql              |

| test               |

+--------------------+

3 rows in set (0.00 sec)

mysql>
创建zabbix_proxy库,并授权zabbix用户,导入数据
[root@linux-proxy tools]# rpm -ql zabbix-proxy-mysql

/usr/sbin/zabbix_proxy_mysql

/usr/share/doc/zabbix-proxy-mysql-2.4.8

/usr/share/doc/zabbix-proxy-mysql-2.4.8/create

/usr/share/doc/zabbix-proxy-mysql-2.4.8/create/schema.sql

[root@linux-proxy tools]# /usr/bin/mysqladmin -uroot password 'zabbix'

/usr/bin/mysqladmin: connect to server at 'localhost' failed

error: 'Access denied for user 'root'@'localhost' (using password: NO)'

[root@linux-proxy tools]# mysql -uroot -pzabbix

Welcome to the MySQL monitor.  Commands end with ; or \g.

Your MySQL connection id is 5

Server version: 5.1.73 Source distribution

Copyright (c) 2000, 2013, Oracle and/or its affiliates. All rights reserved.

Oracle is a registered trademark of Oracle Corporation and/or its

affiliates. Other names may be trademarks of their respective

owners.

Type 'help;' or '\h' for help. Type '\c' to clear the current input statement.

mysql> create database zabbix_proxy character set utf8;

Query OK, 1 row affected (0.00 sec)

mysql> grant all on zabbix_proxy.* to zabbix@localhost identified by 'zabbix';

Query OK, 0 rows affected (0.00 sec)

mysql> use zabbix_proxy;

Database changed

mysql> source  /usr/share/doc/zabbix-proxy-mysql-2.4.8/create/schema.sql

Query OK, 0 rows affected (0.01 sec)

Query OK, 0 rows affected (0.02 sec)

Records: 0  Duplicates: 0  Warnings: 0
[root@linux-proxy tools]# vim /etc/zabbix/zabbix_proxy.conf
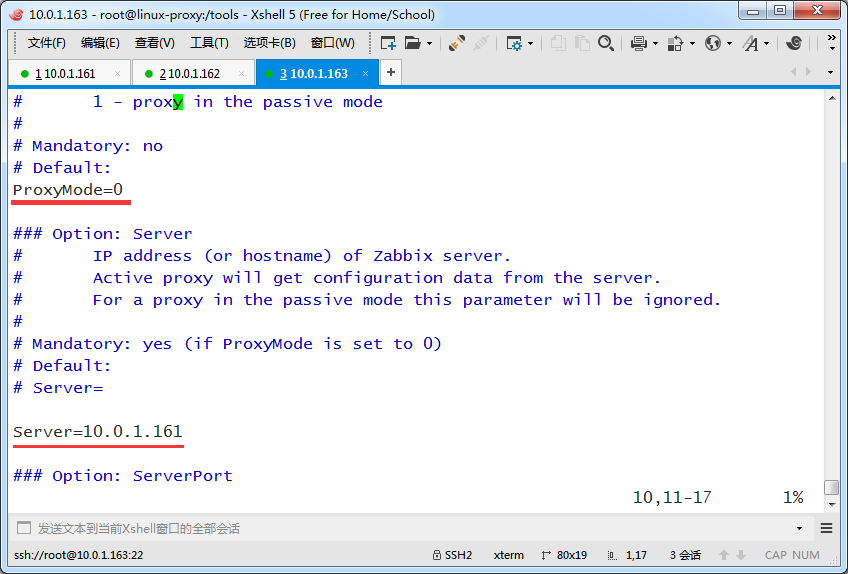
看到如下注释,proxy也可以运行在Active和Passtive模式下,工作中主要还是运行在Active模式下

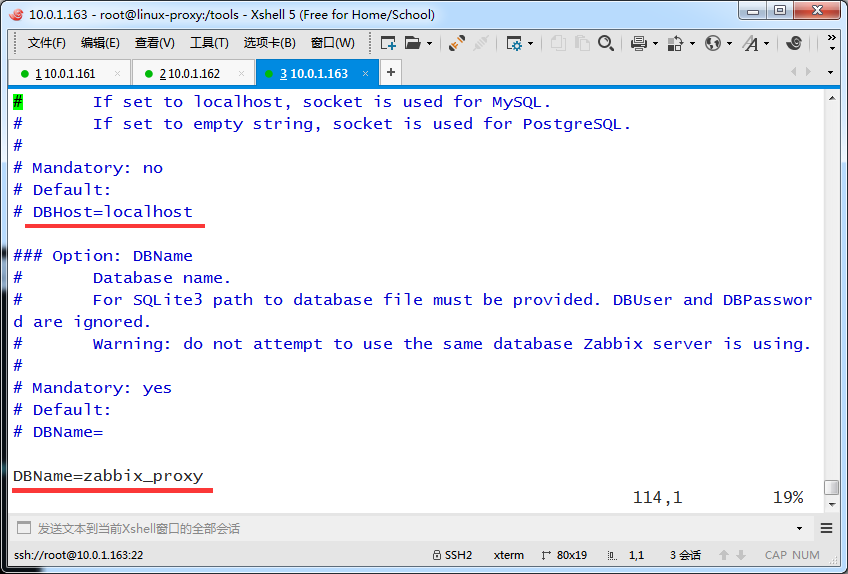
DBHost和DBName都没变,不用修改

检查配置
[root@linux-proxy tools]# vim /etc/zabbix/zabbix_proxy.conf

[root@linux-proxy tools]# grep '^[a-Z]'  /etc/zabbix/zabbix_proxy.conf

ProxyMode=0

Server=10.0.1.161

Hostname=node3-proxy

LogFile=/var/log/zabbix/zabbix_proxy.log

LogFileSize=0

PidFile=/var/run/zabbix/zabbix_proxy.pid

DBName=zabbix_proxy

DBUser=zabbix

DBPassword=zabbix

DBSocket=/var/lib/mysql/mysql.sock

ExternalScripts=/usr/lib/zabbix/externalscripts

[root@linux-proxy tools]#
[root@linux-proxy tools]# /etc/init.d/zabbix-proxy start

Starting Zabbix proxy:                                     [  OK  ]

[root@linux-proxy tools]# netstat -lntp

Active Internet connections (only servers)

Proto Recv-Q Send-Q Local Address               Foreign Address             State       PID/Program name

tcp        0      0 0.0.0.0:22                  0.0.0.0:*                   LISTEN      2076/sshd

tcp        0      0 0.0.0.0:10051               0.0.0.0:*                   LISTEN      13310/zabbix_proxy

tcp        0      0 0.0.0.0:3306                0.0.0.0:*                   LISTEN      13219/mysqld

tcp        0      0 :::22                       :::*                        LISTEN      2076/sshd

tcp        0      0 :::10051                    :::*                        LISTEN      13310/zabbix_proxy

[root@linux-proxy tools]#
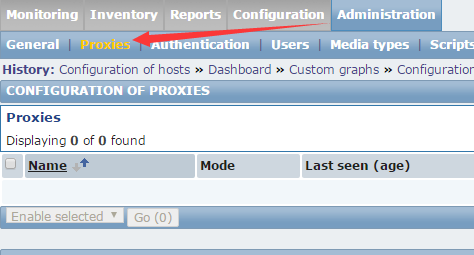

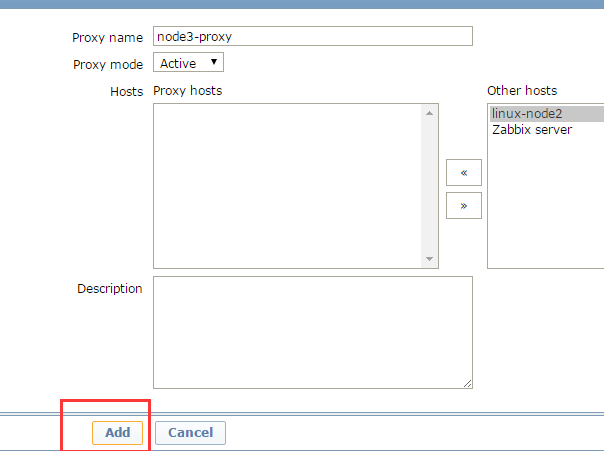
下面这里要选择proxy
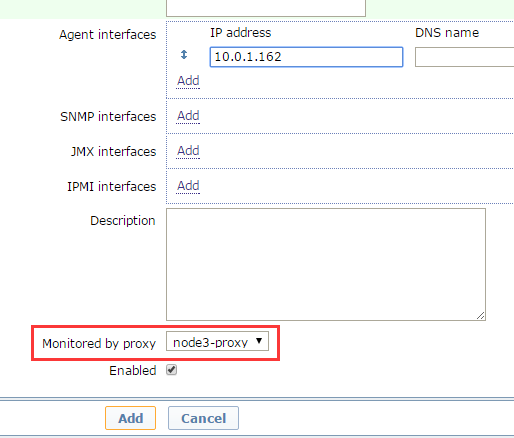

还需要把node2的指向改成proxy
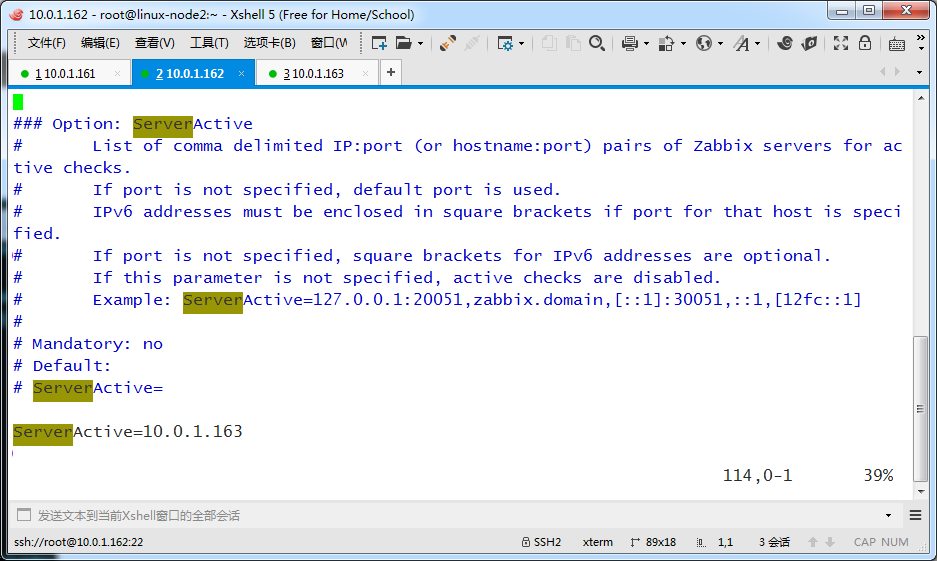
[root@linux-node2 ~]# vim /etc/zabbix/zabbix_agentd.conf
下面改成proxy地址,因为它要把数据发给proxy
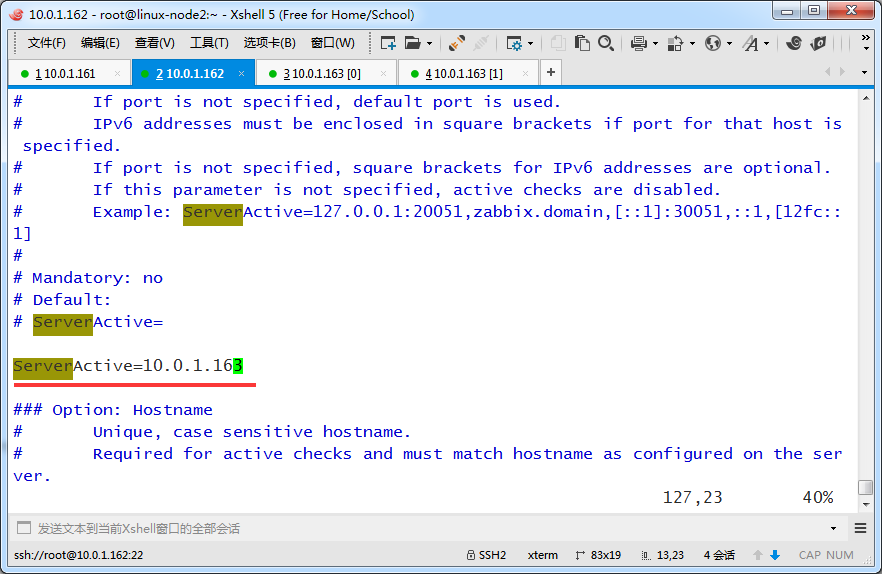
重启agent
[root@linux-node2 ~]# /etc/init.d/zabbix-agent restart

Shutting down Zabbix agent:                                [  OK  ]

Starting Zabbix agent:                                     [  OK  ]

[root@linux-node2 ~]#
[root@linux-proxy tools]# tail -f /var/log/zabbix/zabbix_proxy.log

 13537:20170315:225713.912 proxy #17 started [http poller #1]

 13542:20170315:225713.918 proxy #22 started [history syncer #4]

 13531:20170315:225713.918 proxy #11 started [trapper #2]

 13543:20170315:225713.918 proxy #23 started [self-monitoring #1]

 13532:20170315:225713.918 proxy #12 started [trapper #3]

 13528:20170315:225713.919 proxy #8 started [poller #5]

 13533:20170315:225713.922 proxy #13 started [trapper #4]

 13538:20170315:225713.941 proxy #18 started [discoverer #1]

 13520:20170315:225813.966 sending heartbeat message to server failed: error:"negative response: "failed"", info:"proxy "linux-proxy.example.com" not found"

 13534:20170315:225858.853 cannot send list of active checks to [10.0.1.162]: host [linux-node2.example.com] not found
[root@linux-proxy tools]# tail -f /var/log/zabbix/zabbix_proxy.log

 13638:20170315:230149.414 proxy #17 started [http poller #1]

 13642:20170315:230149.415 proxy #21 started [history syncer #3]

 13634:20170315:230149.415 proxy #13 started [trapper #4]

 13637:20170315:230149.420 proxy #16 started [housekeeper #1]

 13641:20170315:230149.420 proxy #20 started [history syncer #2]

 13633:20170315:230149.424 proxy #12 started [trapper #3]

 13643:20170315:230149.426 proxy #22 started [history syncer #4]

 13635:20170315:230149.431 proxy #14 started [trapper #5]

 13639:20170315:230149.448 proxy #18 started [discoverer #1]

 13620:20170315:230149.453 received configuration data from server, datalen 7423


Zabbox自动化监控---自动注册
自动化监控分为:
agent自动注册
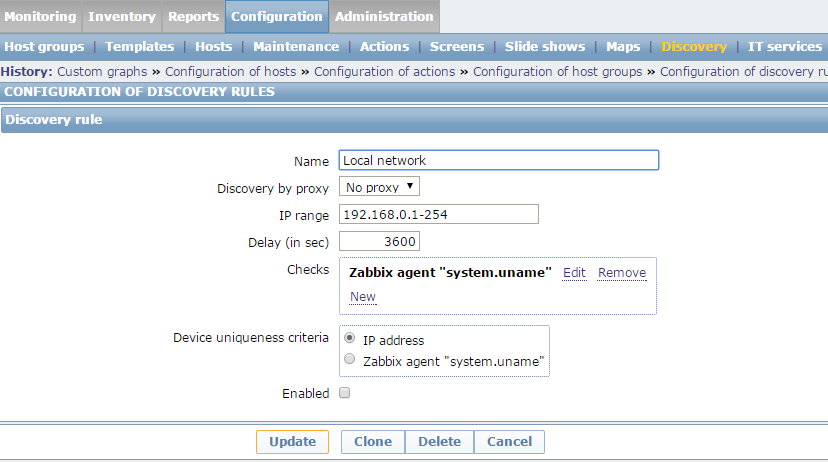
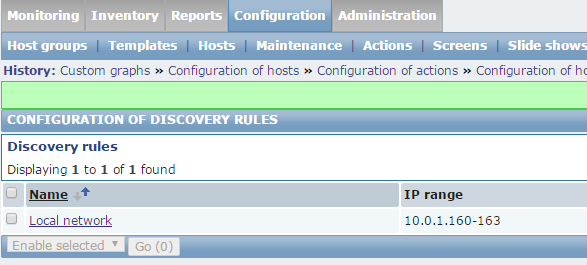
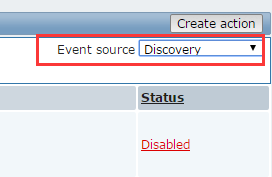
server端自动发现
通过zabbix api方式插入数据(比如从cmdb读取资产里的主机,然后通过Zabbix的api插入Zabbix数据库)
[root@linux-node1 ~]# zabbix_get -s 10.0.1.161 -k system.uname

Linux linux-node1.example.com 2.6.32-504.el6.x86_64 #1 SMP Wed Oct 15 04:27:16 UTC 2014 x86_64
[root@linux-node2 ~]# /etc/init.d/zabbix-agent restart

Shutting down Zabbix agent:                                [  OK  ]

Starting Zabbix agent:                                     [  OK  ]

[root@linux-node2 ~]#


[root@linux-node1 ~]# zabbix_get -s 10.0.1.161 -k system.uname

Linux linux-node1.example.com 2.6.32-504.el6.x86_64 #1 SMP Wed Oct 15 04:27:16 UTC 2014 x86_64
这两个条件
注意你的条件是a and b,operation 表示你想让它干什么。添加这台主机,然后添加主机组,再link一个模板


[root@linux-node2 ~]# grep '^[a-Z]' /etc/zabbix/zabbix_agentd.conf
PidFile=/var/run/zabbix/zabbix_agentd.pid
LogFile=/var/log/zabbix/zabbix_agentd.log
LogFileSize=0
Server=10.0.1.161
StartAgents=3
ServerActive=127.0.0.1
Hostname=linux-node2.example.com
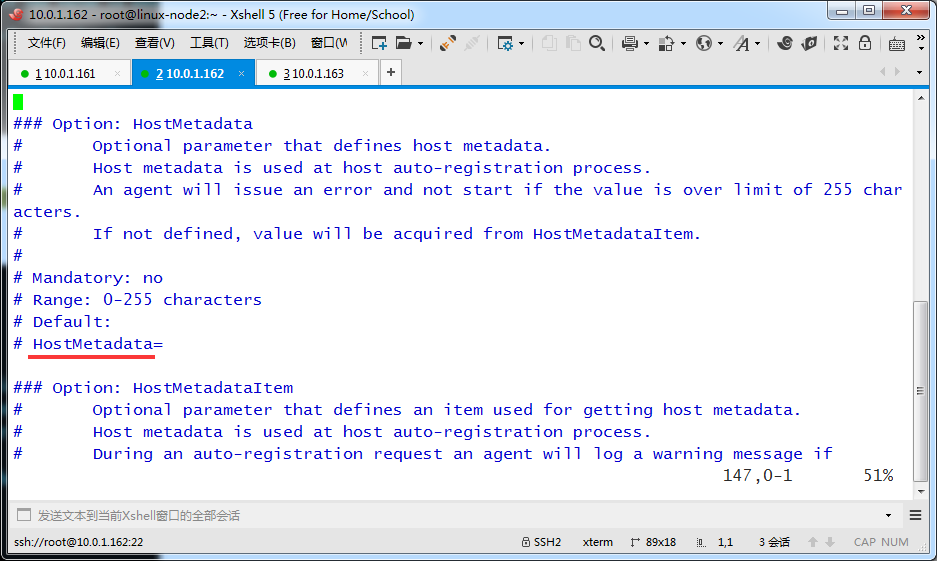
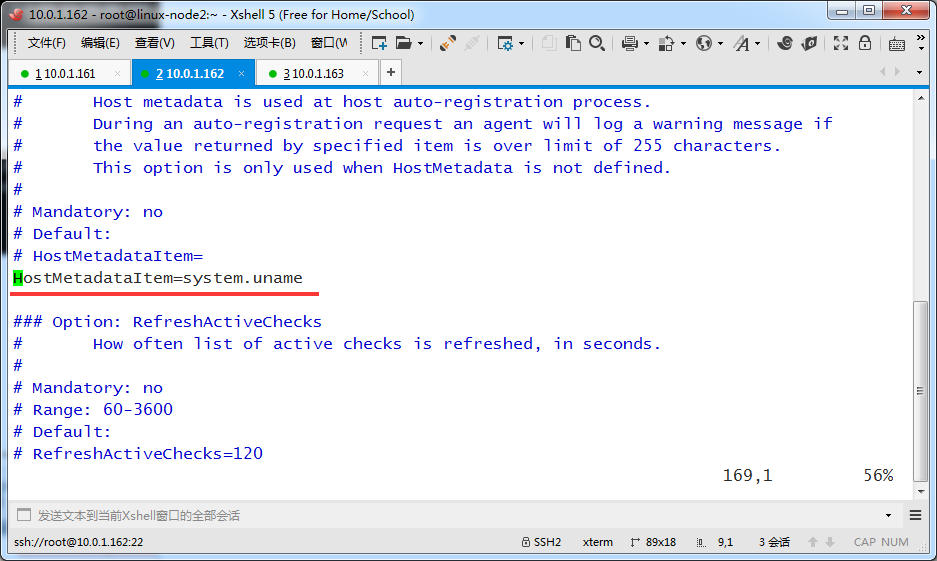
HostMetadataItem=system.uname
Include=/etc/zabbix/zabbix_agentd.d/
UserParameter=login-user,uptime | awk -F ' ' '{print $4}'
[root@linux-node2 ~]#
[root@linux-node2 ~]# /etc/init.d/zabbix-agent restart

Shutting down Zabbix agent:                                [  OK  ]

Starting Zabbix agent:                                     [  OK  ]

[root@linux-node2 ~]#


Zabbix-2.4-安装-3的更多相关文章
- zabbix 3.0 安装 ubuntu环境
zabbix 3.0 安装 标签(空格分隔): 开发 [TOC] 下载deb # wget http://repo.zabbix.com/zabbix/3.0/ubuntu/pool/main/z/z ...
- zabbix windows angent安装:
zabbix windows angent安装:1.下载zabbix agent for windows客户端,直接解压到C盘下.C:\zabbix 的目录015/04/21 11:16 <DI ...
- Zabbix概念、安装以及快速入门
Zabbix is an enterprise-class open source distributed monitoring solution.[1] Zabbix是一个企业级的.开源的.分布式的 ...
- 【zabbix系列】安装与加入host
測试环境 Ubuntu 14.04.1 LTS [服务端安装] 关于安装官方提供了非常具体的安装方法,包含各平台的源代码及包安装.关于其它版本号Linux请參考 https://www.zabbix. ...
- zabbix源码安装实例
环境 系统 Centos7 zabbix版本 Zabbix 3.4.15 (revision 86739) zabbix源码安装 .tar.gz cd zab ...
- zabbix学习笔记----安装----2019.03.26
1.zabbix官方yum源地址:repo.zabbix.com 2.安装zabbix server zabbix server使用mysql作为数据库,在zabbix 3.X版本,安装zabbix- ...
- zabbix客户端的安装、zabbix主被动模式、添加主机模板等、处理页面的中文乱码
1.zabbix客户端的安装: 如下步骤: wget repo.zabbix.com/zabbix/3.2/rhel/7/x86_64/zabbix-release-3.2-1.el7.noarch. ...
- 运用Zabbix实现内网服务器状态及局域网状况监控(3) —— Zabbix服务端安装
1. Zabbix服务端安装,基于LNMP PHP5.5+Nginx1.9安装配置:http://www.cnblogs.com/vurtne-lu/p/7707536.html MySQL5.5编译 ...
- CentOS7 zabbix服务 简单安装文档
1. 简介 zabbix是一个基于WEB界面的提供分布式系统监视以及网络监视功能的企业级的开源解决方案. zabbix能监视各种网络参数,保证服务器系统的安全运营:并提供灵活的通知机制以让系统管理员快 ...
- zabbix v3.0安装部署
这篇文章没有写明init的部分要注意 zabbix v3.0安装部署 摘要: 本文的安装过程摘自http://www.ttlsa.com/以及http://b.lifec-inc.com ,和站长凉白 ...
随机推荐
- Ubuntu16.04 安装Teamviewer
有时需要远程控制ubuntu系统的电脑,Teamviewer在linux下也可以进行安装,大致看了下向日葵在linux下配置好像比较麻烦,而且Teamviewer远程控制的流畅性一直不错,就选择安装T ...
- 扩展HtmlHelper类实现Mvc4分页
1.扩展HtmlHelper类方法Pager public static HtmlString Pager(this HtmlHelper htmlHelper, int currentPage, i ...
- python scrapy爬虫数据库去重方法
1. scrapy对request的URL去重 yield scrapy.Request(url, self.parse, dont_filter=False) 注意这个参数:dont_filter= ...
- C++ API方式连接mysql数据库实现增删改查
这里复制的 http://www.bitscn.com/pdb/mysql/201407/226252.html 一.环境配置 1,装好mysql,新建一个C++控制台工程(从最简单的弄起,这个会了, ...
- 4--Selenium环境准备---chromedriver.exe 与chrome版本匹配
0.jdk8 和eclipse 4.6 https://www.eclipse.org/downloads/packages/release/neon/3 1.selenium-server-stan ...
- CentOS7+Nginx配置Tomcat负载均衡环境
1.准备两个Tomcat 配置两个Tomcat一个端口是8080另外一个端口是8081,分别在webapps下面添加一个测试用的web项目,修改index.jsp文件,8080端口的index.jsp ...
- python base64 编解码,转换成Opencv,PIL.Image图片格式
二进制打开图片文件,base64编解码,转成Opencv格式: # coding: utf-8 import base64 import numpy as np import cv2 img_file ...
- Python学习笔记第十六周
目录: 一.CSS补充 1.页面布局 二.JavaScript补充 1.条件判断 2.函数分类 3.序列化 4.转义 5.eval 6.时间 7.作用域 三.DOM 1.间接查找 文本操作 样式操作 ...
- 20165228 预备作业3 Linux安装及学习
(一)安装虚拟机 根据娄老师给的Ubuntu版本和安装教程,我曾遇到如下问题: Q1:首先遇到的问题是没有开启虚拟化 解决方法:在重启电脑时进入BIOS>Configuratio > In ...
- 餐巾计划问题 zwk费用流解法
«问题描述:一个餐厅在相继的N 天里,每天需用的餐巾数不尽相同.假设第i天需要ri块餐巾(i=1,2,…,N).餐厅可以购买新的餐巾,每块餐巾的费用为p分:或者把旧餐巾送到快洗部,洗一块需m天,其费用 ...