
基础_模型迁移_CBIR_augmentation
在之前我们做过这样的研究:5图分类CBIR问题
import numpy as np
from keras.datasets import mnist
import gc

from keras.models import Sequential, Model
from keras.layers import Input, Dense, Dropout, Flatten
from keras.layers.convolutional import Conv2D, MaxPooling2D
from keras.applications.vgg16 import VGG16
from keras.optimizers import SGD
from keras.utils.data_utils import get_file
import cv2
import h5py as h5py
import numpy as np

import os
import math
from matplotlib import pyplot as plt

#全局变量
RATIO = 0.2
train_dir = 'D:/dl4cv/datesets/littleCBIR/'

#根据分类总数确定one-hot总类
NUM_DENSE = 5
#训练总数
epochs = 10

def tran_y(y):
    y_ohe = np.zeros(NUM_DENSE)
    y_ohe[y] = 1
    return y_ohe

#根据Ratio获得训练和测试数据集的图片地址和标签
##生成数据集,本例先验3**汽车、4**恐龙、5**大象、6**花、7**马
def get_files(file_dir, ratio):
    '''
    Args:
        file_dir: file directory
    Returns:
        list of images and labels
    '''
    image_list = []
    label_list = []
    for file in os.listdir(file_dir):
        if file[0:1]=='3':
            image_list.append(file_dir + file)
            label_list.append(0)
        elif file[0:1]=='4':
            image_list.append(file_dir + file)
            label_list.append(1)
        elif file[0:1]=='5':
            image_list.append(file_dir + file)
            label_list.append(2)
        elif file[0:1]=='6':
            image_list.append(file_dir + file)
            label_list.append(3)
        else:
            image_list.append(file_dir + file)
            label_list.append(4)
    print('数据集导入完毕')
    #图片list和标签list
    #hstack 水平(按列顺序)把数组给堆叠起来
    image_list = np.hstack(image_list)
    label_list = np.hstack(label_list)

    temp = np.array([image_list, label_list])
    temp = temp.transpose()
    np.random.shuffle(temp)

    all_image_list = temp[:, 0]
    all_label_list = temp[:, 1]

    n_sample = len(all_label_list)
    #根据比率,确定训练和测试数量
    n_val = math.ceil(n_sample*ratio) # number of validation samples
    n_train = n_sample - n_val # number of trainning samples
    tra_images = []
    val_images = []
    #按照0-n_train为tra_images,后面位val_images的方式来排序

    for index in range(n_train):
        image = cv2.imread(all_image_list[index])
        #灰度,然后缩放
        image = cv2.cvtColor(image,cv2.COLOR_RGB2GRAY)
        image = cv2.resize(image,(48,48))#到底在这个地方修改,还是在后面修改,需要做具体实验
        tra_images.append(image)

    tra_labels = all_label_list[:n_train]
    tra_labels = [int(float(i)) for i in tra_labels]

    for index in range(n_val):
        image = cv2.imread(all_image_list[n_train+index])
        #灰度,然后缩放
        image = cv2.cvtColor(image,cv2.COLOR_RGB2GRAY)
        image = cv2.resize(image,(32,32))
        val_images.append(image)

    val_labels = all_label_list[n_train:]
    val_labels = [int(float(i)) for i in val_labels]
    return np.array(tra_images),np.array(tra_labels),np.array(val_images),np.array(val_labels)

# colab+VGG要求至少48像素在现有数据集上,已经能够完成不错情况
ishape=48
#(X_train, y_train), (X_test, y_test) = mnist.load_data()
#获得数据集
#X_train, y_train, X_test, y_test = get_files(train_dir, RATIO)
#保持数据
##np.savez("D:\\dl4cv\\datesets\\littleCBIR.npz",X_train=X_train,y_train=y_train,X_test=X_test,y_test=y_test)
#读取数据

path='littleCBIR.npz'
#https://github.com/jsxyhelu/GOCW/raw/master/littleCBIR.npz
path = get_file(path,origin='https://github.com/jsxyhelu/GOCW/raw/master/littleCBIR.npz')
f = np.load(path)
X_train, y_train = f['X_train'], f['y_train']
X_test, y_test = f['X_test'], f['y_test']

X_train = [cv2.cvtColor(cv2.resize(i, (ishape, ishape)), cv2.COLOR_GRAY2BGR) for i in X_train]
X_train = np.concatenate([arr[np.newaxis] for arr in X_train]).astype('float32')
X_train /= 255.0

X_test = [cv2.cvtColor(cv2.resize(i, (ishape, ishape)), cv2.COLOR_GRAY2BGR) for i in X_test]
X_test = np.concatenate([arr[np.newaxis] for arr in X_test]).astype('float32')
X_test /= 255.0

y_train_ohe = np.array([tran_y(y_train[i]) for i in range(len(y_train))])
y_test_ohe = np.array([tran_y(y_test[i]) for i in range(len(y_test))])
y_train_ohe = y_train_ohe.astype('float32')
y_test_ohe = y_test_ohe.astype('float32')

model_vgg = VGG16(include_top = False, weights = 'imagenet', input_shape = (ishape, ishape, 3))
#for i, layer in enumerate(model_vgg.layers):
#    if i<20:
for layer in model_vgg.layers:
        layer.trainable = False
model = Flatten()(model_vgg.output)
model = Dense(4096, activation='relu', name='fc1')(model)
model = Dense(4096, activation='relu', name='fc2')(model)
model = Dropout(0.5)(model)
model = Dense(NUM_DENSE, activation = 'softmax', name='prediction')(model)
model_vgg_pretrain = Model(model_vgg.input, model, name = 'vgg16_pretrain')
#model_vgg_pretrain.summary()
print("vgg准备完毕\n")
sgd = SGD(lr = 0.05, decay = 1e-5)
model_vgg_pretrain.compile(loss = 'categorical_crossentropy', optimizer = sgd, metrics = ['accuracy'])
print("vgg开始训练\n")
log = model_vgg_pretrain.fit(X_train, y_train_ohe, validation_data = (X_test, y_test_ohe), epochs = epochs, batch_size = 64)

score = model_vgg_pretrain.evaluate(X_test, y_test_ohe, verbose=0)
print('Test loss:', score[0])
print('Test accuracy:', score[1])

plt.figure('acc')
plt.subplot(2, 1, 1)
plt.plot(log.history['acc'],'r--',label='Training Accuracy')
plt.plot(log.history['val_acc'],'r-',label='Validation Accuracy')
plt.legend(loc='best')
plt.xlabel('Epochs')
plt.axis([0, epochs, 0.5, 1])
plt.figure('loss')
plt.subplot(2, 1, 2)
plt.plot(log.history['loss'],'b--',label='Training Loss')
plt.plot(log.history['val_loss'],'b-',label='Validation Loss')
plt.legend(loc='best')
plt.xlabel('Epochs')
plt.axis([0, epochs, 0, 1])

plt.show()
os.system("pause")


log = model_vgg_pretrain.fit_generator(img_generator.flow(X_train,y_train_ohe, batch_size= 128), steps_per_epoch = 400, epochs=10,validation_data=(X_test, y_test_ohe),workers=4)
# Install the PyDrive wrapper & import libraries.
# This only needs to be done once in a notebook.
!pip install -U -q PyDrive
from pydrive.auth import GoogleAuth
from pydrive.drive import GoogleDrive
from google.colab import auth
from oauth2client.client import GoogleCredentials

# Authenticate and create the PyDrive client.
# This only needs to be done once in a notebook.
auth.authenticate_user()
gauth = GoogleAuth()
gauth.credentials = GoogleCredentials.get_application_default()
drive = GoogleDrive(gauth)

# Create & upload a text file.
uploaded = drive.CreateFile()
uploaded.SetContentFile('5type4cbirMODEL.h5')
uploaded.Upload()
print('Uploaded file with ID {}'.format(uploaded.get('id')))
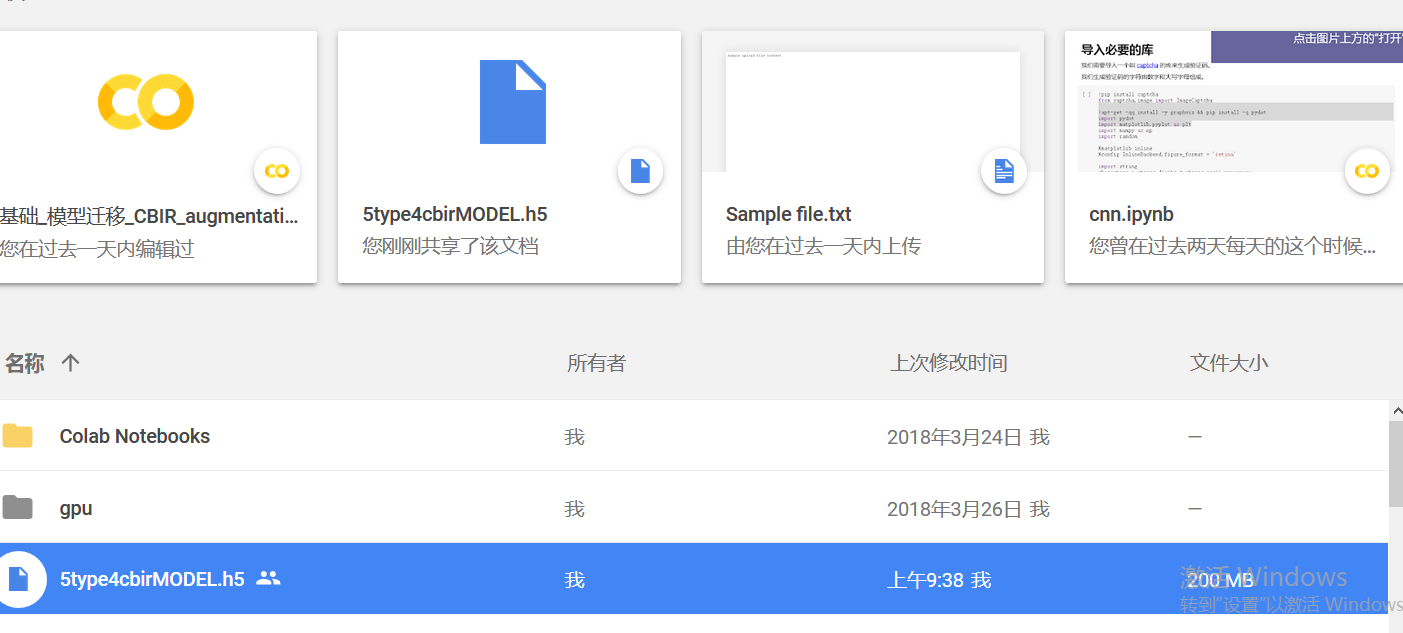
# Install the PyDrive wrapper & import libraries.
# This only needs to be done once per notebook.
!pip install -U -q PyDrive
from pydrive.auth import GoogleAuth
from pydrive.drive import GoogleDrive
from google.colab import auth
from oauth2client.client import GoogleCredentials

# Authenticate and create the PyDrive client.
# This only needs to be done once per notebook.
auth.authenticate_user()
gauth = GoogleAuth()
gauth.credentials = GoogleCredentials.get_application_default()
drive = GoogleDrive(gauth)
#根据文件名进行下载
file_id = '1qjxAm_QiXdSqBmyIoPl3bfnyLNJxwKo9'
downloaded = drive.CreateFile({'id': file_id})
print('Downloaded content "{}"'.format(downloaded.GetContentString()))
附件列表
基础_模型迁移_CBIR_augmentation的更多相关文章
- 使用 Azure PowerShell 将 IaaS 资源从经典部署模型迁移到 Azure Resource Manager
以下步骤演示了如何使用 Azure PowerShell 命令将基础结构即服务 (IaaS) 资源从经典部署模型迁移到 Azure Resource Manager 部署模型. 也可根据需要通过 Az ...
- 老李分享: 并行计算基础&编程模型与工具 1
老李分享: 并行计算基础&编程模型与工具 在当前计算机应用中,对高速并行计算的需求是广泛的,归纳起来,主要有三种类型的应用需求: 计算密集(Computer-Intensive)型应用,如 ...
- 算法基础_递归_求杨辉三角第m行第n个数字
问题描述: 算法基础_递归_求杨辉三角第m行第n个数字(m,n都从0开始) 解题源代码(这里打印出的是杨辉三角某一层的所有数字,没用大数,所以有上限,这里只写基本逻辑,要符合题意的话,把循环去掉就好) ...
- 规划将 IaaS 资源从经典部署模型迁移到 Azure Resource Manager
尽管 Azure 资源管理器提供了许多精彩功能,但请务必计划迁移,以确保一切顺利进行. 花时间进行规划可确保执行迁移活动时不会遇到问题. Note 以下指导的主要参与者为 Azure 客户顾问团队,以 ...
- 有关从经典部署模型迁移到 Azure Resource Manager 部署模型的常见问题
此迁移计划是否影响 Azure 虚拟机上运行的任何现有服务或应用程序? 不可以. VM(经典)是公开上市的完全受支持的服务. 你可以继续使用这些资源来拓展你在 Azure 上的足迹. 如果我近期不打算 ...
- 桥接模式_NAT模式_仅主机模式_模型图.ziw
2017年1月12日, 星期四 桥接模式_NAT模式_仅主机模式_模型图 null
- 使用 Azure CLI 将 IaaS 资源从经典部署模型迁移到 Azure Resource Manager 部署模型
以下步骤演示如何使用 Azure 命令行接口 (CLI) 命令将基础结构即服务 (IaaS) 资源从经典部署模型迁移到 Azure Resource Manager 部署模型. 本文中的操作需要 Az ...
- Flutter实战视频-移动电商-05.Dio基础_引入和简单的Get请求
05.Dio基础_引入和简单的Get请求 博客地址: https://jspang.com/post/FlutterShop.html#toc-4c7 第三方的http请求库叫做Dio https:/ ...
- Flutter实战视频-移动电商-08.Dio基础_伪造请求头获取数据
08.Dio基础_伪造请求头获取数据 上节课代码清楚 重新编写HomePage这个动态组件 开始写请求的方法 请求数据 .但是由于我们没加请求的头 所以没有返回数据 451就是表示请求错错误 创建请求 ...
随机推荐
- 前端基础进阶(五):全方位解读this
https://segmentfault.com/a/1190000012646488 https://yangbo5207.github.io/wutongluo/ 说明:此处只是记录阅读前端基础 ...
- python os.path模块常用方法详解
os.path模块主要用于文件的属性获取,在编程中经常用到,以下是该模块的几种常用方法.更多的方法可以去查看官方文档:http://docs.python.org/library/os.path.ht ...
- unity3d-代码控制游戏角色控制器移动
先上一个gif看看效果.因为图片大小限制.所以录制的比较小.个人认为效果比较牵强.特别是里面的逻辑代码. 不过我还是认为一切是为了先实现,因为我是刚接触的新手. 工程结构图 这次实现的效果是: 1:摄 ...
- Flex中如何利用FocusManager类的setFocus函数设置TextInput的焦点的例子
参考:https://blog.csdn.net/liruizhuang/article/details/5876455 <?xml version="1.0" encodi ...
- sourceInsight工具移除不掉项目 source Insight Add and Remove Project Files
问题描述: sourceInsight创建的项目,有时候会遇到Remove Project 报错,移除不成功的情况. 解决办法: 进入到sourceinsight的安装目录.删除掉保存的工程文件信息即 ...
- IIS转发需要的模块
1.Application Request Routing https://www.iis.net/downloads/microsoft/application-request-routing 2 ...
- 使用js Math.random()函数生成n到m间的随机数字
何使用js生成n到m间的随机数字,主要目的是为后期的js生成验证码做准备,Math.random()函数返回0和1之间的伪随机数 摘要: 本文讲解如何使用js生成n到m间的随机数字,主要目的是为后 ...
- 1.sklearn库的安装
sklearn库 sklearn是scikit-learn的简称,是一个基于Python的第三方模块.sklearn库集成了一些常用的机器学习方法,在进行机器学习任务时,并不需要实现算法,只需要简单的 ...
- Palindrome Bo (预处理 + 区间DP)
先进行离散化,然后再预处理出所有位置的下一个元素,做好这一步对时间的优化非常重要. 剩下的就是一般的DP了.区间DP #include<bits/stdc++.h> using names ...
- codeforces 979A Pizza, Pizza, Pizza!!!
题意: 对一个圆形的pizza,只能用直线来切它,求把它切为n+1份的形状和size都相同的最下次数. 思路: 形状和size都相同,那么只能是扇形,分奇偶讨论. n为0还得特判,切0刀,因为这个还被 ...