ivew Upload 上传图片组件
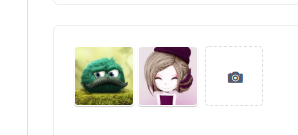
1. 先展示一个效果图
2.代码详解
<!-- 封面缩略图 -->

     <div class="pop-up-div pic">

        <div class="thumbnail"><span>发布封面</span></div>

        <div class="demo-upload-list" v-for="item in uploadList" :key="item.index">    // uploadList(重点)

        <template >

            <img :src="coverLink ? coverLink : item.path">    //图片渲染

            <div class="demo-upload-list-cover">

                <Icon type="ios-eye-outline" @click.native="handleView(item.name)"></Icon>   // 展示默认icon

                <Icon type="ios-trash-outline" @click.native="handleRemove(item)"></Icon>

            </div>

        </template>

       </div>

       <Upload

            ref="upload"     // dom节点

            :show-upload-list= true     // 默认上传显示列表

            :on-success="handleSuccess"   // 成功回调

            :format="['jpg','png']"       // 设置图片格式

            :max-size="2048"              // 设置图片大小

            :on-format-error="handleFormatError"   // 判断图片格式是否正确

            :on-exceeded-size="handleMaxSize"      // 限制图片大小

            :before-upload="handleBeforeUpload"     // 上传之前的钩子函数,可以在此限制图片的张数

            type="drag"                            // 开启拖拽上传

            name="coverImage"                      // multiple,加此属性可以多图片上传

            :headers= "header"                    // 设置请求头

            v-if="show"

            :action="uploadCoverUrl"              //上传图片接口

            style="display: inline-block;width:116px;">

            <div  style="width: 116px;height:116px;line-height: 116px;">

                <Icon type="ios-camera" size="30"></Icon>       // 默认icon

            </div>

          </Upload>

         //点击为大图

          <Modal title="View Image"  v-model="visible" :closable="false" @on-ok="$store.state.addArticle = true" @on-cancel="$store.state.addArticle = true">

            <img :src="'/' + imgName "  v-if="visible" style="width: 100%;z-index:1100;">   // closable  点击model右上角,关闭模态框,默认为true,

          </Modal>

          <div class="warnText">    // 一些格式说明

            <p>1.格式为jpg或png</p>

            <p>2.且不能大于2M</p>

            <p>3.建议尺寸336*160</p>

          </div>

        </div>

        <div slot="footer">

          <Button type="primary" size="large" @click="ok">确定</Button>  // 信息提交按钮

        </div>
data(){
uploadCoverUrl:'',
uploadList :[],
coverLink :'',
show:true,
visible: false,
header:{
'token': sessionStorage.getItem('token')
}
}
//封面缩略图 图片上传成功后的操作

          handleSuccess(res, file){

            let _this = this;

            console.log(res)

            file.path = res.data.path

            file.name = _this.getNameFromLink(file.path)

            _this.coverLink = file.path

            _this.uploadList.push(file)

            _this.show = false;

          },

          //判断图片格式对不对

          handleFormatError (file) {

              this.$Notice.warning({

                  title: '图片格式不正确',

                  desc:   file.name + ' 格式不正确,请重新选择'

              });

          },

          //限制图片大小

          handleMaxSize (file) {

              this.$Notice.warning({

                  title: '图片尺寸过大',

                  desc: file.name + ' 太大,最大为2M,请注意图片大小!'

              });

          },

          //限制图片的张数

          handleBeforeUpload (file) {

            if(this.uploadList){

              const check = this.uploadList.length < 1;

              if (!check) {

                  this.$Notice.warning({

                      title: '最多上传一张图片!'

                  });

              }

              return check;

            }

          },

          // 点击看大图

          handleView(name){

            console.log(name)

            this.imgName = name;

            this.visible = true;

            this.$store.state.addArticle = false

          },

         // 删除一张图片

          handleRemove(file){

            this.uploadList.splice(file, 1);

            this.show = true;  //这个是显示上传的那个icon

          },
//上传pdf文件

<Upload
  ref="previewPdf"
  :default-file-list="defaultList"
  multiple
  name="accessory"
  :format="['pdf', '', '',]"
  type="drag"
  :headers= "header"
  :max-size="51200"
  :before-upload="handleBeforeUploadp"
  :on-preview="lookPdf"
  :on-success="handleSuccessPdf"
  :action="uploadPdfUrl">
  <div style="padding: 20px 0">
    <Icon type="ios-cloud-upload" size="52" style="color: #999"></Icon>
    <p>将文件拖拽至此或选择文件(最多上传50M的pdf文件)</p>
    <p style="color: #07C5A3;font-weight: bold">点击上传</p>
  </div>
</Upload>
// 点击查看pdf的操作
  lookPdf(file){
    console.log(file)
    let _this = this;
    let url;
    if(file.response){
     url = file.response.data.path
    }else{
     url = file.url
    }
    window.open(url)
  },
  // pdf上传成功的操作
  handleSuccessPdf(res,file,fileList){
    let _this = this;
    console.log(fileList)
    _this.$refs.previewPdf.fileList = fileList
    _this.defaultList = fileList
    _this.contentAccessoryIds = res.data.id
  },
// pdf文件移除时候的方法
handleRemoveFile(file,fileList){
  console.log(fileList)
  console.log(this.defaultList.length)
  this.defaultList = fileList
  console.log(this.defaultList)
},
// 上传pdf文件的数量控制
handleBeforeUploadp(){
  let _this = this;
  console.log(_this.defaultList)
  const tpl = _this.defaultList.length < 1
  if(!tpl) {
    _this.$Notice.warning({
            title: '最多上传一个pdf文件!'
        });
  }
  return tpl;
},

// 通过iframe上传视频
<!--视频-->
<div v-if="shiPing" class="shi-ping">
  <!-- 视频 -->
   <iframe v-if="!videoSrc" width="800" height="200" src="" frameborder="0"></iframe>
  <div >
    <div v-if="videoSrc" class="deleteFlag"><span class="float-r" @click="deleteVideo" style="backgroundColor:#333;cursor:pointer;width:32px;text-align:center;font-size:24px;">X</span> </div>
    <video id="videoSec" v-if="videoSrc" :src="videoSrc"  width="300" height="200" controlsList="nodownload"  controls="controls"></video>
  </div>
</div>
ivew Upload 上传图片组件的更多相关文章
- 为ivew的Page组件的跳页增加跳页确定按钮
首次使用vue做后台管理项目,首次使用ivew框架,好不容易所有的功能都做完了,前几天产品经理让在每个列表的跳页后面加个‘确定’按钮,说没有确定按钮有点反人类,心想那还不分分钟的事儿嘛,立马回个‘好的 ...
- 自定义input上传图片组件
自定义input上传图片组件,美化样式 前段时间因为项目需求,做过一个上传图片组件,这里分享下大致思路,希望对有需要的童鞋有所帮助~~~ 功能需求:1.上传图片限制大小.分辨率.类型 2.上传图片支持 ...
- iview upload 上传图片 不传服务器 转 base64
开始的时候 找不到this了,后来想起来要用 ES6的箭头函数 就有this了 reader.onload = e => { // 读取到的图片base64 数据编码 将此编码字符串传给后台即可 ...
- 上传图片组件封装 element ui
// element ui 文档地址: http://element.eleme.io/#/zh-CN <template> <div> <div class=" ...
- 微信小程序 - 上传图片组件
2019-01-08 更新至1.1:修复了一些问题 2019-03-14 全面更新,推荐:https://www.cnblogs.com/cisum/p/10533559.html 使用了es8的as ...
- jQuery file upload上传图片的流程
先触发_onChange[jquery.fileupload.js] _onChange: function (e) { var that = this, data = { fileInput: $( ...
- jQuery file upload上传图片出错分析
以https://github.com/blueimp/jQuery-File-Upload/blob/master/basic-plus.html为例 注释掉load-image.all.min.j ...
- ivew Upload 上传时附带的额外参数
<Upload action="/api/device/importData" :data="uploadData" :before-upload=&qu ...
- django admin upload 上传图片到oss Django Aliyun OSS2 Storage
https://github.com/xiewenya/django-aliyun-oss2-storage Install pip install django-aliyun-oss2-storag ...
随机推荐
- input只读效果
有两种方式可以实现input的只读效果:disabled 和 readonly. 自然两种出来的效果都是只能读取不能编辑,可是两者有很大不同. Disabled说明该input无效,及其value不会 ...
- 大众点评Java开发实时应用监控平台-CAT
CAT介绍 CAT是基于Java开发的实时应用监控平台,包括实时应用监控,业务监控. CAT作为大众点评网基础监控组件,它已经在中间件框架(MVC框架,RPC框架,数据库框架,缓存框架等)中得到广泛应 ...
- 编译Linux-2.6.23内核中遇见的错误
编译linux-2.6.23 错误[1]: elf_x86_64: 没有那个文件或目录 原因是 gcc 4.6 不再支持 linker-style 架构.在 arch/x86/vdso/Makefil ...
- automapper实体中的映射和聚合根中的使用
一,如下例子: using AutoMapper; using System; using System.Collections.Generic; using System.Linq; using S ...
- LVS _keepalived 配置
#!/bin/bash HOSTNAME=$(HOSTNAME) ETHNAME=ens34 ID=-]{,}\.[-]{,}\.[-]{,}\.[-]{,}" | awk -F . 'NR ...
- 在线px转换rem工具
今天推荐一个在线工具,在线px转换rem工具 只要输入1rem = 多少px即可在线转换 和cssrem插件差不多的功能 rem在线转换工具: http://www.ofmonkey.com/fr ...
- shell unique
由于uniq命令只能对相邻行进行去重复操作,所以在进行去重前,先要对文本行进行排序,使重复行集中到一起 1.文本行去重 (1)排序由于uniq命令只能对相邻行进行去重复操作,所以在进行去重前,先要对文 ...
- hadoop HA集群的安装
1.hadoop集群规化 ip 主机名 安装软件 角色 运行进程 10.124.147.22 hadoop1 jdk.zookeeper.hadoop namenode/zookeeper/jobhi ...
- pdfminer实现pdf布局分析 python (pdfminer realize layout analysis with PDF python)
使用pdfminer实现pdf文件的布局分析 python 参考资料: https://github.com/euske/pdfminer https://stackoverflow.com/ques ...
- Halo(五)
ApplicationPreparedEvent 监听事件 Event published once the application context has been refreshed but be ...