springmvc+ajax异步上传图片
1、javaweb传统的上传图片方式就是通过form表单提交
<form action="#" method="post" enctype="multipart/form-data">

    <input type="file" name="file">

    <input type="submit" value="上传">

</form>
2、现在想要实现:点击文件表单的"浏览"按鈕后,文件异步上传,然后返回文件的路径,页面实时刷新显示刚才上传的图片。
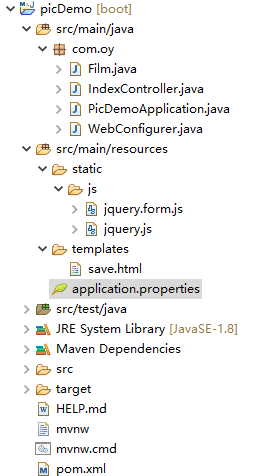
2.1、新建一个springboot项目picDemo
pom.xml
<dependencies>

    <dependency>

        <groupId>org.springframework.boot</groupId>

        <artifactId>spring-boot-starter-thymeleaf</artifactId>

    </dependency>

    <dependency>

        <groupId>org.springframework.boot</groupId>

        <artifactId>spring-boot-starter-web</artifactId>

    </dependency>

    <dependency>

        <groupId>org.springframework.boot</groupId>

        <artifactId>spring-boot-starter-test</artifactId>

        <scope>test</scope>

    </dependency>

</dependencies>
application.properties
server.port=8090

server.servlet.context-path=/
2.2、要实现图片异步上传,可以使用jquery.form.js插件。
save.html
<!DOCTYPE html>

<html xmlns:th="http://www.thymeleaf.org">

<head>

<meta charset="UTF-8">

<title>标题</title>

<script type="text/javascript" th:src="@{/js/jquery.js}"></script>

<script type="text/javascript" th:src="@{/js/jquery.form.js}"></script>

<style type="text/css">

.hidden {

    display:none;

}

</style>

</head>

<body>

<div id="film_save">

<form id="form" action="#" th:action="@{/film/save}" method="post" th:object="${film}" enctype="multipart/form-data">

    <input type="hidden" name="id" th:value="*{id}"/>

    <table class="table">

        <tr>

            <td>电影名称:</td>

            <td><input type="text" name="name" th:value="*{name}"/></td>

        </tr>

        <tr>

            <td>电影图片:</td>

            <td><input type="file" name="file" id="file" onchange="fileUpload()"/></td>

        </tr>

        <tr>

            <td><input type="hidden" id="imageUrl" name="imageUrl" value=""/></td>

            <td><img id="imgSrc" th:class="${film.imageUrl eq null or film.imageUrl eq ''}?hidden:''" th:src="'http://localhost:8080/image/' + ${film.imageUrl}" style="width:200px;"/></td>

        </tr>

        <tr>

            <td></td>

            <td><input type="submit" value="保存"/></td>

        </tr>

    </table>

</form>

<script type="text/javascript">

    function fileUpload() {

        var option = {

            type:'POST',

            url:'/film/uploadPic',

            dataType:'json',

            data:{

                fileName : 'file'

            },

            success:function(data){

                //把json串转换成json对象

                //var jsonObj = $.parseJSON(data);

                //alert(data);

                //返回服务器图片路径,把图片路径设置给img标签

                $("#imgSrc").attr("src",data.fullPath);

                // 显示图片

                $("#imgSrc").removeClass("hidden");

                //数据库保存相对路径

                $("#imageUrl").val(data.relativePath);

                //alert($("#imageUrl").val());

            }

        };

        $("#form").ajaxSubmit(option);

    }

</script>

</div>

</body>

</html>
2.3、后端代码
IndexController
package com.oy;

import java.io.File;

import java.util.HashMap;

import java.util.Map;

import java.util.UUID;

import org.springframework.stereotype.Controller;

import org.springframework.web.bind.annotation.RequestMapping;

import org.springframework.web.bind.annotation.ResponseBody;

import org.springframework.web.multipart.MultipartFile;

@Controller

public class IndexController {

    @RequestMapping("/save")

    public Object save(Film film) {

        return "save";

    }

    @RequestMapping("/film/uploadPic")

    @ResponseBody

    public Object uploadPic(MultipartFile file) throws Exception {

        String oldName = file.getOriginalFilename();

        String newName = UUID.randomUUID().toString().replace("-", "").toUpperCase()

                + "_" + oldName;

        System.out.println("上传的图片的newName: " + newName);

        File base = new File("d:/image/filmImage/");

        if (! base.exists()) {

            base.mkdirs();

        }

        // 保存文件

        file.transferTo(new File("d:/image/filmImage/" + newName));

        // 封装返回结果

        Map<String, Object> map = new HashMap<>();

        map.put("fullPath", "http://localhost:8090/image/" + newName);

        map.put("relativePath", newName);

        return map;

    }

}
Film类:
public class Film {

    private Integer id; // 编号

    private String name; // 电影名称

    private String imageUrl; // 电影图片

    // getter和setter方法省略

}
图片上传后,java返回的json数据为:
{

    "fullPath": "http://localhost:8090/image/E29C543179AD4B69B521EB542D9E735E_无标题.png",

    "relativePath": "E29C543179AD4B69B521EB542D9E735E_无标题.png"

}
其中,fullPath为图片全路径。要实现图片上传后,图片刷新显示,还要再springboot中配置图片保存目录的路径映射:
WebConfigurer类
package com.oy;

import org.springframework.context.annotation.Configuration;

import org.springframework.web.servlet.config.annotation.ResourceHandlerRegistry;

import org.springframework.web.servlet.config.annotation.WebMvcConfigurer;

@Configuration

public class WebConfigurer implements WebMvcConfigurer {

    @Override

    public void addResourceHandlers(ResourceHandlerRegistry registry) {

        registry.addResourceHandler("/image/**").addResourceLocations("file:D:/image/filmImage/");

    }

}
3、其他
3.1、上面的demo是将图片保存目录的路径进行了映射。图片url与demo是在同一个域,都是http://localhost:8090,其实图片可以配置成其他的,比如http://localhost:8091,然后用外置的tomcat(非springboot内置)或nginx配置映射。
3.2、将图片上传至图片服务器(分布式文件系统)
springmvc+ajax异步上传图片的更多相关文章
- [Ajax] 使用Ajax异步上传图片文件(非Form表单提交)
通过表单Form提交来上传文件的方式这里就不说了: 下面介绍,通过js中使用ajax异步上传图片文件: 新建一个html页面和一个一般处理程序即可: 涉及思路: //发送2次Ajax请求完成js异步上 ...
- ajax异步上传图片&SpringMVC后台代码
function uploadPic(){ var options = { url : "/upload/updatePic.action", type : "post& ...
- 使用Ajax异步上传图片的方法(html,javascript,php)
前两天项目中需要用到异步上传图片和显示上传进度的功能,于是找了很多外国的文章,翻山越岭地去遇上各种坑,这里写篇文章记录一下. HTML <form id="fileupload-for ...
- ajax异步上传图片三种方案
转自:http://www.jb51.net/article/51180.htm 注:自己尝试了前两种,都可用: 目前常用的异步文件上传功能有几种,比较多见的如使用iframe框架形式,ajax功能效 ...
- ajax异步上传图片(TP5)
直接上代码 PHP代码如下 /** * 上传 */ public function upload_photo(){ $file = $this->request->file('file') ...
- thinkPHP利用ajax异步上传图片并显示、删除
近来学习tp5的过程中,项目中有个发帖功能,选择主题图片.如下: 利用原始的文件上传处理,虽然通过原始js语句能实时显示上传图片,但是这样的话会涉及很多兼容问题.使用ajax技术,实现选择性删除所选图 ...
- thinkphp5 不使用form,用input+ajax异步上传图片
不支持$this->request->file()获取图片 后台接收文件请使用$_FILE 正文开始: HTML <div class="upload"> ...
- js 原生 ajax 异步上传图片
<script type="text/javascript"> function upload() { var file1 = document.getElementB ...
- Ajax实现异步上传图片
要求:点击页面浏览按钮后,选择需要上传的图片,页面无刷新,将上传的图片展示出来 开发流程 一:在页面编写表单代码和js代码 <!DOCTYPE html PUBLIC "-//W3C/ ...
随机推荐
- Metinfo5.1 /about/show.php SQL注入
- 理解ES6的模块导入与导出
export export后必须跟语句, 何为语句, 如声明, for, if 等都是语句, export 不能导出匿名函数, 也不能导出某个已经声明的变量, 如: export const bar ...
- 不用 Notepad++,还有更牛逼的选择!
来源:oschina.net/news/110987/no-notepad-plus-plus 这两天 Notepad++ 牛逼了,然后引发了大家的关注,具体事件内容请大家自行百度,其实作为文本编辑工 ...
- Linux mv命令(7)
mv命令,move的缩写,顾名思义是移动文件的意思.其实就相当于剪切操作,而前面说的cp命令,就是复制粘贴,这两个有什么区别想必不用多说. 基本使用 使用格式 mv 源文件 目标文件 我的根目录下有 ...
- 初识MySQL <一>
创建一个 表 create table student( id int(10) not null unique auto_increment primary key, name varchar(30) ...
- MySQL数据表操作命令
mysql语句: 1.修改表名: rename table 旧表名 to 新表名; 2.修改字段类型: alter table 表名 modify column 字段名 字段类型(长度) 3.修改字段 ...
- vue render 渲染函数
vue render 渲染函数 经常看到使用render渲染函数的示例,而且在一些特殊情况下,确实更好使用,可以更加有效地细分组件,因而借助vue-element-admin来学习一波 render函 ...
- chrom插件1
本文是稀土掘金投稿,虽然其中有倔金的私货,是篇推广文,但我看过后认为内容确实不错,有些好插件还是第一次知道,对我很有帮助,考虑过后还是决定推荐给大家,最近我比较关注各种提高开发效率的工具与技巧,今后看 ...
- javaScript运动框架之匀速运动
运动框架 1.在开始运动时,关闭已有定时器 2.把运动和停止隔开(if/else) 匀速运动的停止条件 运动终止条件:距离足够近 Demo代码 <!DOCTYPE html> <ht ...
- 几个常用I/O函数用法(printf,fprintf等)
一 格式化输出 1.printf 定义:int printf(const char *format,[argument]); 功能:产生格式化输出的函数(定义在 stdio.h 中) 参数说明:for ...