Keras入门(五)搭建ResNet对CIFAR-10进行图像分类
本文将会介绍如何利用Keras来搭建著名的ResNet神经网络模型,在CIFAR-10数据集进行图像分类。
数据集介绍
CIFAR-10数据集是已经标注好的图像数据集,由Alex Krizhevsky, Vinod Nair, and Geoffrey Hinton三人收集,其访问网址为:https://www.cs.toronto.edu/~kriz/cifar.html 。
CIFAR-10数据集包含60000张尺寸为32x32的彩色图片,共分成10个分类(类别之间互相独立),每个类别一共6000张图片。该数据集划分为训练集和测试集,其中训练集5000张图片,测试集10000张图片。
该数据集分为5个训练批次和1个测试批次,每个批次一共10000张图片。测试批次包含从每个分类中随机选取的1000张图片。训练批次包含剩下的图片,但是每个训练批次的某些类别的图片会比其他类别多。
下图为从每个类别中选取的10张示例图片:

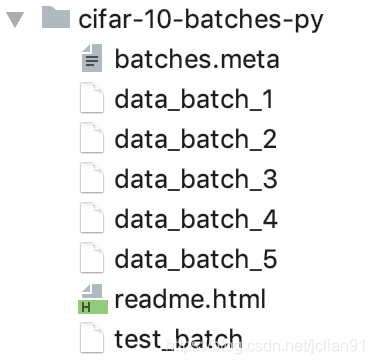
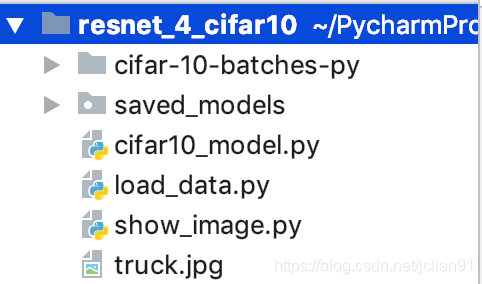
本文中选用的CIFAR-10数据集下载网址为:https://www.cs.toronto.edu/~kriz/cifar-10-python.tar.gz,文件夹内容如下:
我们尝试着用Python程序读取里面的图片(图片可视化),Python程序代码如下:
# -*- coding: utf-8 -*-

import cv2

import pickle

# 读取文件

fpath = 'cifar-10-batches-py/data_batch_1'

with open(fpath, 'rb') as f:

    d = pickle.load(f, encoding='bytes')

data = d[b'data']

labels = d[b'labels']

data = data.reshape(data.shape[0], 3, 32, 32).transpose(0, 2, 3, 1)

# 保存第image_no张图片

strings=['airplane', 'automobile', 'bird', 'cat', 'deer',

         'dog', 'frog', 'horse', 'ship', 'truck']

image_no = 1000

label = strings[labels[image_no]]

image = data[image_no,:,:,:]

cv2.imwrite('%s.jpg' % label, image)
运行结果如下:
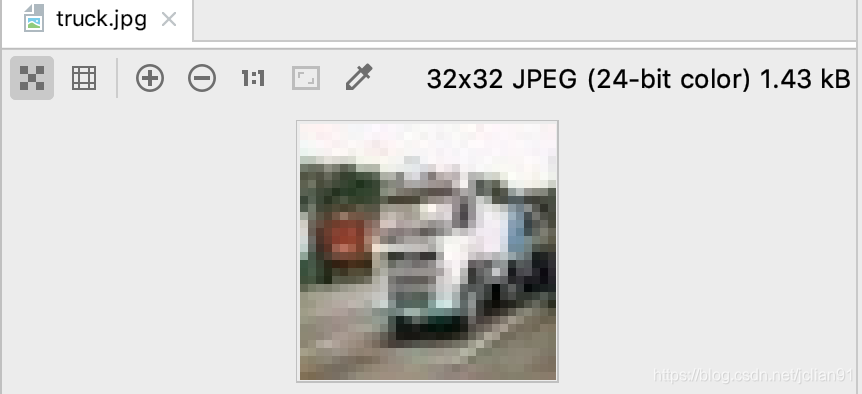
图片虽然比较模糊,但还是可以看出这是一辆车,属于truck类别。
ResNet模型
图像分类中的经典模型为CNN,但CNN随着层数的增加,显示出退化问题,即深层次的网络反而不如稍浅层次的网络性能;这并非是过拟合导致的,因为在训练集上就显示出退化差距。而ResNet能较好地解决这个问题。
ResNet全名Residual Network,中文名为残差神经网络,曾获得2015年ImageNet的冠军。ResNet的主要思想在于残差块,Kaiming He等设计了一种skip connection(或者shortcut connections)结构,使得网络具有更强的identity mapping(恒等映射)的能力,从而拓展了网络的深度,同时也提升了网络的性能。残差块的结构如下:
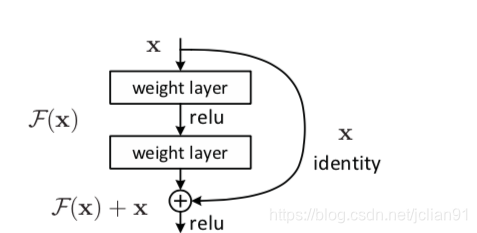
F(x)=H(x)−x,x为浅层的输出,H(x)为深层的输出,F(x)为夹在二者中间的的两层代表的变换,当浅层的x代表的特征已经足够成熟,如果任何对于特征x的改变都会让loss变大的话,F(x)会自动趋向于学习成为0,x则从恒等映射的路径继续传递。这样就在不增加计算成本的情况下实现了一开始的目的:在前向过程中,当浅层的输出已经足够成熟(optimal),让深层网络后面的层能够实现恒等映射的作用。
示例的残差块如下图:
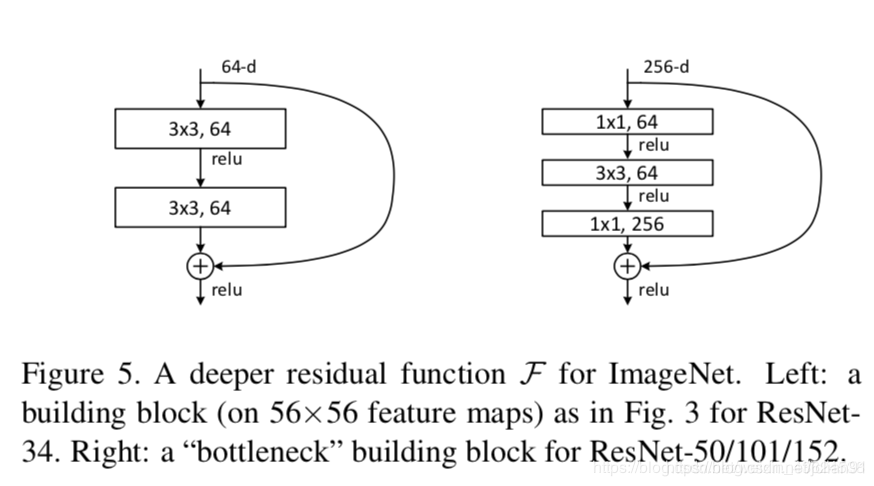
左边针对的是ResNet34浅层网络,右边针对的是ResNet50/101/152深层网络,右边这个又被叫做 bottleneck。bottleneck 很好地减少了参数数量。
以上是关于ResNet的一些简单介绍,更多细节有待于研究。
模型训练
我们利用Keras官方网站给出的ResNet模型对CIFAR-10进行图片分类。
项目结构如下图:
其中load_data.py脚本将数据集导入进来,分为训练集和测试集,完整代码如下:
# -*- coding: utf-8 -*-

import keras

from keras.layers import Dense, Conv2D, BatchNormalization, Activation

from keras.layers import AveragePooling2D, Input, Flatten

from keras.optimizers import Adam

from keras.callbacks import ModelCheckpoint, LearningRateScheduler

from keras.callbacks import ReduceLROnPlateau

from keras.preprocessing.image import ImageDataGenerator

from keras.regularizers import l2

from keras.models import Model

import numpy as np

import os

# 使用GPU,自己根据机器配置调整,默认不开启

# os.environ["CUDA_VISIBLE_DEVICES"] = "4,5,6,7,8"

from load_data import load_data

# Training parameters

batch_size = 32

epochs = 100

num_classes = 10

# Subtracting pixel mean improves accuracy

subtract_pixel_mean = True

n = 3

# Model version

# Orig paper: version = 1 (ResNet v1), Improved ResNet: version = 2 (ResNet v2)

version = 1

# Computed depth from supplied model parameter n

depth = n * 6 + 2

# Model name, depth and version

model_type = 'ResNet%dv%d' % (depth, version)

# Load the CIFAR10 data.

(x_train, y_train), (x_test, y_test) = load_data()

print('load data successfully!')

# Input image dimensions.

input_shape = x_train.shape[1:]

# Normalize data.

x_train = x_train.astype('float32') / 255

x_test = x_test.astype('float32') / 255

# If subtract pixel mean is enabled

if subtract_pixel_mean:

    x_train_mean = np.mean(x_train, axis=0)

    x_train -= x_train_mean

    x_test -= x_train_mean

print('x_train shape:', x_train.shape)

print(x_train.shape[0], 'train samples')

print(x_test.shape[0], 'test samples')

print('y_train shape:', y_train.shape)

# Convert class vectors to binary class matrices.

y_train = keras.utils.to_categorical(y_train, num_classes)

y_test = keras.utils.to_categorical(y_test, num_classes)

print('Begin model training...')

# Learning Rate Schedule

def lr_schedule(epoch):

    lr = 1e-3

    if epoch > 180:

        lr *= 0.5e-3

    elif epoch > 160:

        lr *= 1e-3

    elif epoch > 120:

        lr *= 1e-2

    elif epoch > 80:

        lr *= 1e-1

    print('Learning rate: ', lr)

    return lr

# resnet layer

def resnet_layer(inputs,

                 num_filters=16,

                 kernel_size=3,

                 strides=1,

                 activation='relu',

                 batch_normalization=True,

                 conv_first=True):

    conv = Conv2D(num_filters,

                  kernel_size=kernel_size,

                  strides=strides,

                  padding='same',

                  kernel_initializer='he_normal',

                  kernel_regularizer=l2(1e-4))

    x = inputs

    if conv_first:

        x = conv(x)

        if batch_normalization:

            x = BatchNormalization()(x)

        if activation is not None:

            x = Activation(activation)(x)

    else:

        if batch_normalization:

            x = BatchNormalization()(x)

        if activation is not None:

            x = Activation(activation)(x)

        x = conv(x)

    return x

def resnet_v1(input_shape, depth, num_classes=10):

    # ResNet Version 1 Model builder [a]

    if (depth - 2) % 6 != 0:

        raise ValueError('depth should be 6n+2 (eg 20, 32, 44 in [a])')

    # Start model definition.

    num_filters = 16

    num_res_blocks = int((depth - 2) / 6)

    inputs = Input(shape=input_shape)

    x = resnet_layer(inputs=inputs)

    # Instantiate the stack of residual units

    for stack in range(3):

        for res_block in range(num_res_blocks):

            strides = 1

            if stack > 0 and res_block == 0:  # first layer but not first stack

                strides = 2  # downsample

            y = resnet_layer(inputs=x,

                             num_filters=num_filters,

                             strides=strides)

            y = resnet_layer(inputs=y,

                             num_filters=num_filters,

                             activation=None)

            if stack > 0 and res_block == 0:  # first layer but not first stack

                # linear projection residual shortcut connection to match

                # changed dims

                x = resnet_layer(inputs=x,

                                 num_filters=num_filters,

                                 kernel_size=1,

                                 strides=strides,

                                 activation=None,

                                 batch_normalization=False)

            x = keras.layers.add([x, y])

            x = Activation('relu')(x)

        num_filters *= 2

    # Add classifier on top.

    # v1 does not use BN after last shortcut connection-ReLU

    x = AveragePooling2D(pool_size=8)(x)

    y = Flatten()(x)

    outputs = Dense(num_classes,

                    activation='softmax',

                    kernel_initializer='he_normal')(y)

    # Instantiate model.

    model = Model(inputs=inputs, outputs=outputs)

    return model

model = resnet_v1(input_shape=input_shape, depth=depth, num_classes=num_classes)

model.compile(loss='categorical_crossentropy',

              optimizer=Adam(lr=lr_schedule(0)),

              metrics=['accuracy'])

model.summary()

print(model_type)

# Prepare model model saving directory.

save_dir = os.path.join(os.getcwd(), 'saved_models')

model_name = 'garbage_%s_model.{epoch:03d}.h5' % model_type

if not os.path.isdir(save_dir):

    os.makedirs(save_dir)

filepath = os.path.join(save_dir, model_name)

# Prepare callbacks for model saving and for learning rate adjustment.

checkpoint = ModelCheckpoint(filepath=filepath,

                             monitor='val_acc',

                             verbose=1,

                             save_best_only=True)

lr_scheduler = LearningRateScheduler(lr_schedule)

lr_reducer = ReduceLROnPlateau(factor=np.sqrt(0.1),

                               cooldown=0,

                               patience=5,

                               min_lr=0.5e-6)

callbacks = [checkpoint, lr_reducer, lr_scheduler]

# Run training, with data augmentation.

print('Using real-time data augmentation.')

# This will do preprocessing and realtime data augmentation:

datagen = ImageDataGenerator(

        # set input mean to 0 over the dataset

        featurewise_center=False,

        # set each sample mean to 0

        samplewise_center=False,

        # divide inputs by std of dataset

        featurewise_std_normalization=False,

        # divide each input by its std

        samplewise_std_normalization=False,

        # apply ZCA whitening

        zca_whitening=False,

        # epsilon for ZCA whitening

        zca_epsilon=1e-06,

        # randomly rotate images in the range (deg 0 to 180)

        rotation_range=0,

        # randomly shift images horizontally

        width_shift_range=0.1,

        # randomly shift images vertically

        height_shift_range=0.1,

        # set range for random shear

        shear_range=0.,

        # set range for random zoom

        zoom_range=0.,

        # set range for random channel shifts

        channel_shift_range=0.,

        # set mode for filling points outside the input boundaries

        fill_mode='nearest',

        # value used for fill_mode = "constant"

        cval=0.,

        # randomly flip images

        horizontal_flip=True,

        # randomly flip images

        vertical_flip=False,

        # set rescaling factor (applied before any other transformation)

        rescale=None,

        # set function that will be applied on each input

        preprocessing_function=None,

        # image data format, either "channels_first" or "channels_last"

        data_format=None,

        # fraction of images reserved for validation (strictly between 0 and 1)

        validation_split=0.0)

# Compute quantities required for featurewise normalization

# (std, mean, and principal components if ZCA whitening is applied).

datagen.fit(x_train)

# Fit the model on the batches generated by datagen.flow().

model.fit_generator(datagen.flow(x_train, y_train, batch_size=batch_size),

                    steps_per_epoch=len(x_train) // batch_size,

                    validation_data=(x_test, y_test),

                    epochs=epochs, verbose=1, workers=4,

                    callbacks=callbacks)

# Score trained model.

scores = model.evaluate(x_test, y_test, verbose=1)

print('Test loss:', scores[0])

print('Test accuracy:', scores[1])
输出的模型结构如下:

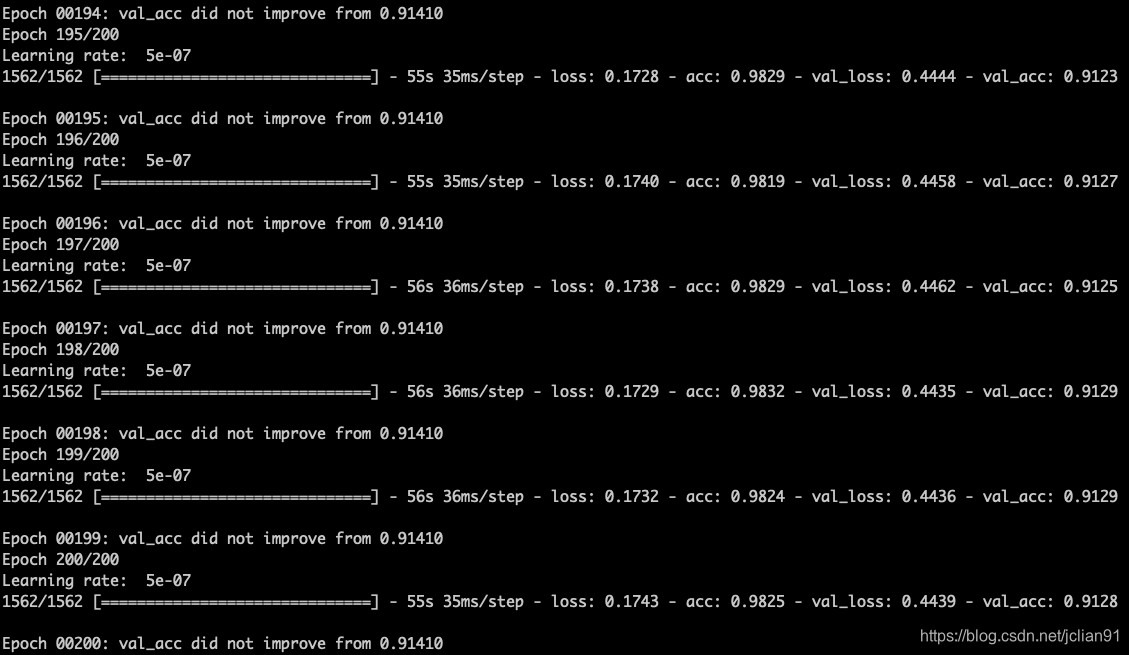
在GPU上进行模型训练,训练结果如下:
Test loss: 0.4439272038936615

Test accuracy: 0.9128
总结
本项目已经开源,Github地址为:https://github.com/percent4/resnet_4_cifar10 。
感谢大家阅读,有问题请批评指正~
Keras入门(五)搭建ResNet对CIFAR-10进行图像分类的更多相关文章
- Keras入门(一)搭建深度神经网络(DNN)解决多分类问题
Keras介绍 Keras是一个开源的高层神经网络API,由纯Python编写而成,其后端可以基于Tensorflow.Theano.MXNet以及CNTK.Keras 为支持快速实验而生,能够把 ...
- Keras入门(四)之利用CNN模型轻松破解网站验证码
项目简介 在之前的文章keras入门(三)搭建CNN模型破解网站验证码中,笔者介绍介绍了如何用Keras来搭建CNN模型来破解网站的验证码,其中验证码含有字母和数字. 让我们一起回顾一下那篇文 ...
- Keras入门(二)模型的保存、读取及加载
本文将会介绍如何利用Keras来实现模型的保存.读取以及加载. 本文使用的模型为解决IRIS数据集的多分类问题而设计的深度神经网络(DNN)模型,模型的结构示意图如下: 具体的模型参数可以参考文章 ...
- 转:ubuntu 下GPU版的 tensorflow / keras的环境搭建
http://blog.csdn.net/jerr__y/article/details/53695567 前言:本文主要介绍如何在 ubuntu 系统中配置 GPU 版本的 tensorflow 环 ...
- MySql概述及入门(五)
MySql概述及入门(五) MySQL集群搭建之读写分离 读写分离的理解 为解决单数据库节点在高并发.高压力情况下出现的性能瓶颈问题,读写分离的特性包括会话不开启事务,读语句直接发送到 salve 执 ...
- Thinkphp入门 五 —模型 (49)
原文:Thinkphp入门 五 -模型 (49) [数据库操作model模型] model 模型 数据库操作 tp框架主要设计模式:MVC C:controller 控制器 shop/Li ...
- DevExpress XtraReports 入门五 创建交叉表报表
原文:DevExpress XtraReports 入门五 创建交叉表报表 本文只是为了帮助初次接触或是需要DevExpress XtraReports报表的人群使用的,为了帮助更多的人不会像我这样浪 ...
- 架构师入门:搭建双注册中心的高可用Eureka架构(基于项目实战)
本文的案例是基于 架构师入门:搭建基本的Eureka架构(从项目里抽取) 改写的. 在上文里,我们演示Eureka客户端调用服务的整个流程,在这部分里我们将在架构上有所改进.大家可以想象下,在上文里案 ...
- keras 入门整理 如何shuffle,如何使用fit_generator 整理合集
keras入门参考网址: 中文文档教你快速建立model keras不同的模块-基本结构的简介-类似xmind整理 Keras的基本使用(1)--创建,编译,训练模型 Keras学习笔记(完结) ke ...
- 脑残式网络编程入门(五):每天都在用的Ping命令,它到底是什么?
本文引用了公众号纯洁的微笑作者奎哥的技术文章,感谢原作者的分享. 1.前言 老于网络编程熟手来说,在测试和部署网络通信应用(比如IM聊天.实时音视频等)时,如果发现网络连接超时,第一时间想到的就是 ...
随机推荐
- $bzoj2067\ szn$ 二分+贪心
正解:二分+贪心 解题报告: 传送门$QwQ$ 题目大意就说有一棵树,然后要用若干条线覆盖所有边且不能重叠.问最少要用几条线,在用线最少的前提下最长的线最短是多长. 昂首先最少用多少条线这个还是蛮$e ...
- 博帝飚速盘 16G
设备制造商: Patriot Memory当前协议 : USB2.0输入电流 : 300mA 芯片制造商: 群联(Phison)芯片型号 : PS2251-38闪存颗粒 : 美光( ...
- Jenkins+ant+jmeter环境搭建
下载的工具版本: apache-jmeter-3.0 apache-ant-1.8.4 jenkins-2.46.3 之前用jmeter写了测试接口的脚本,运行及返回结果都正常,所以需要做的就是工具的 ...
- 「SP25784」BUBBLESORT - Bubble Sort 解题报告
SP25784 BUBBLESORT - Bubble Sort 题目描述 One of the simplest sorting algorithms, the Bubble Sort, can b ...
- cannot open git-upload-pack,cannot open git-receive-pack,Can't connect to any URI错误解决方法eclipse
cannot open git-upload-pack,cannot open git-receive-pack,Can't connect to any URI错误解决方法eclipse 解决ecl ...
- 为云而生,腾讯云服务器操作系统TencentOS内核正式开源
1月9日,腾讯云宣布将开源其服务器操作系统TencentOS内核.相比业内其它版本Linux 内核,腾讯云 TencentOS 内核在资源调度弹性.容器支持.系统性能及安全等层面极具竞争力,特别适合 ...
- K8s 实践 | 如何解决多租户集群的安全隔离问题?
作者 | 匡大虎 阿里巴巴技术专家 导读:如何解决多租户集群的安全隔离问题是企业上云的一个关键问题,本文主要介绍 Kubernetes 多租户集群的基本概念和常见应用形态,以及在企业内部共享集群的业 ...
- 小白学Java:老师!泛型我懂了!
目录 小白学Java:老师!泛型我懂了! 泛型概述 定义泛型 泛型类的定义 泛型方法的定义 类型变量的限定 原生类型与向后兼容 通配泛型 非受限通配 受限通配 下限通配 泛型的擦除和限制 类型擦除 类 ...
- python打印图形
i = 0 while i < 5: # print('*****') 效果与下行相同 print('*'*5) i+=1 print('\n\n') i = 1 while i < 6: ...
- Spring Boot自动装配
前言 一些朋友问我怎么读源码,这篇文章结合我看源码时候一些思路给大家聊聊,我主要从这三个方向出发: 确定目标,这个目标要是一个具体,不要一上来我要看懂Spring,这是不可能的,目标要这么来定,比如看 ...