centos7安装lnmp
一、配置CentOS 第三方yum源(CentOS默认的标准源里没有nginx软件包)
[root@localhost ~]# yum install wget  #安装下载工具wget

[root@localhost ~]#wget http://www.atomicorp.com/installers/atomic  #下载atomic yum源

[root@localhost ~]#sh ./atomic   #安装

[root@localhost ~]# yum check-update #更新yum软件包
二、安装开发包和库文件
[root@localhost ~]# yum -y install ntp make openssl openssl-devel pcre pcre-devel libpng libpng-devel libjpeg-6b libjpeg-devel-6b freetype freetype-devel gd gd-devel zlib zlib-devel gcc gcc-c++ libXpm libXpm-devel ncurses ncurses-devel libmcrypt libmcrypt-devel libxml2 libxml2-devel imake autoconf automake screen sysstat compat-libstdc++-33 curl curl-devel
三、卸载已安装的apache、mysql、php
[root@localhost ~]# yum remove httpd
[root@localhost ~]# yum remove mysql
[root@localhost ~]# yum remove php
四、安装nginx
[root@localhost ~]# yum install nginx -y
[root@localhost ~]# systemctl start nginx.service
[root@localhost ~]# systemctl status nginx.service
[root@localhost ~]# systemctl enable nginx.service
Created symlink from /etc/systemd/system/multi-user.target.wants/nginx.service to /usr/lib/systemd/system/nginx.service.
[root@localhost ~]#
五、安装mariadb
[root@localhost ~]# yum install mariadb-devel mariadb mariadb-server
[root@localhost ~]# systemctl start mariadb.service
[root@localhost ~]# systemctl status mariadb.service
● mariadb.service - MariaDB database server
   Loaded: loaded (/usr/lib/systemd/system/mariadb.service; disabled; vendor preset: disabled)
   Active: active (running) since Sat 2017-12-23 10:37:58 HKT; 4s ago
  Process: 18474 ExecStartPost=/usr/libexec/mariadb-wait-ready $MAINPID (code=exited, status=0/SUCCESS)
  Process: 18395 ExecStartPre=/usr/libexec/mariadb-prepare-db-dir %n (code=exited, status=0/SUCCESS)
 Main PID: 18473 (mysqld_safe)
   CGroup: /system.slice/mariadb.service
           ├─18473 /bin/sh /usr/bin/mysqld_safe --basedir=/usr
           └─18635 /usr/libexec/mysqld --basedir=/usr --datadir=/var/lib/mysql --plugin-dir=/usr/lib64/mysql/plugin --log-error=/var/log/...

Dec 23 10:37:56 localhost.localdomain mariadb-prepare-db-dir[18395]: MySQL manual for more instructions.
Dec 23 10:37:56 localhost.localdomain mariadb-prepare-db-dir[18395]: Please report any problems at http://mariadb.org/jira
Dec 23 10:37:56 localhost.localdomain mariadb-prepare-db-dir[18395]: The latest information about MariaDB is available at http://mar...org/.
Dec 23 10:37:56 localhost.localdomain mariadb-prepare-db-dir[18395]: You can find additional information about the MySQL part at:
Dec 23 10:37:56 localhost.localdomain mariadb-prepare-db-dir[18395]: http://dev.mysql.com
Dec 23 10:37:56 localhost.localdomain mariadb-prepare-db-dir[18395]: Consider joining MariaDB's strong and vibrant community:
Dec 23 10:37:56 localhost.localdomain mariadb-prepare-db-dir[18395]: https://mariadb.org/get-involved/
Dec 23 10:37:56 localhost.localdomain mysqld_safe[18473]: 171223 10:37:56 mysqld_safe Logging to '/var/log/mariadb/mariadb.log'.
Dec 23 10:37:56 localhost.localdomain mysqld_safe[18473]: 171223 10:37:56 mysqld_safe Starting mysqld daemon with databases from /v.../mysql
Dec 23 10:37:58 localhost.localdomain systemd[1]: Started MariaDB database server.
Hint: Some lines were ellipsized, use -l to show in full.
[root@localhost ~]# systemctl enable mariadb.service
Created symlink from /etc/systemd/system/multi-user.target.wants/mariadb.service to /usr/lib/systemd/system/mariadb.service
#为root账户设置密码
[root@localhost ~]#mysql_secure_installation  #初始化MySQL
Enter current password for root (enter for none):   <---输入现在的root密码,因为我们还没设置,直接回车
Set root password? [Y/n] Y                                    <---是否设定root密码,当然设置了,输入Y回车
New password:                                                      <---输入root密码,并回车,输入的过程中不会有任何显示
Re-enter new password:                                        <---再次输入root密码,并回车,输入的过程中不会有任何显示
Remove anonymous users? [Y/n] Y                      <---是否删除匿名用户,删除,输入Y回车
Disallow root login remotely? [Y/n] Y                     <---是否删禁止root用户远程登录,当然禁止,输入Y回车
Remove test database and access to it? [Y/n]      <---是否删除测试数据库test,看个人喜好
Reload privilege tables now? [Y/n] Y                    <---刷新权限,输入Y回车
最后出现:Thanks for using MySQL!
MySql密码设置完成,重新启动 MySQL:
六、安装php
[root@localhost ~]# yum -y install php php-cli php-mysql php-gd php-imap php-ldap php-odbc php-pear php-xml php-xmlrpc php-mbstring php-mcrypt php-mssql php-snmp php-soap
安装php和所需组件使PHP支持MySQL、FastCGI模式
[root@localhost ~]# yum install  php-tidy php-common php-devel php-fpm php-mysql -y
[root@localhost ~]# systemctl start php-fpm.service
[root@localhost ~]# systemctl status php-fpm.service
● php-fpm.service - The PHP FastCGI Process Manager
   Loaded: loaded (/usr/lib/systemd/system/php-fpm.service; disabled; vendor preset: disabled)
   Active: active (running) since Sat 2017-12-23 10:53:59 HKT; 4s ago
 Main PID: 18953 (php-fpm)
   Status: "Ready to handle connections"
   CGroup: /system.slice/php-fpm.service
           ├─18953 php-fpm: master process (/etc/php-fpm.conf)
           ├─18955 php-fpm: pool www
           ├─18956 php-fpm: pool www
           ├─18957 php-fpm: pool www
           ├─18958 php-fpm: pool www
           └─18959 php-fpm: pool www

Dec 23 10:53:59 localhost.localdomain systemd[1]: Starting The PHP FastCGI Process Manager...
Dec 23 10:53:59 localhost.localdomain systemd[1]: Started The PHP FastCGI Process Manager.
[root@localhost ~]#
[root@localhost ~]# systemctl enable php-fpm.service
Created symlink from /etc/systemd/system/multi-user.target.wants/php-fpm.service to /usr/lib/systemd/system/php-fpm.service.
[root@localhost ~]#
七、配置nginx支持php
[root@localhost ~]# cp /etc/nginx/nginx.conf{,.bak} #将配置文件改为备份文件

#修改nginx配置文件,添加fastcgi支持
[root@localhost ~]# vim /etc/nginx/nginx.conf
vim /etc/nginx/nginx.conf  #编辑
user  nginx  nginx;  #修改nginx运行账号为:nginx组的nginx用户
:wq!    #保存退出

[root@localhost nginx]# vim /etc/nginx/conf.d/default.conf

    location / {
        root   /usr/share/nginx/html;
        index  index.php index.html index.htm;   #增加index.php
    }
      location ~ \.php$ {
        root           /usr/share/nginx/html;
        fastcgi_pass   127.0.0.1:9000;
        fastcgi_index  index.php;
        fastcgi_param  SCRIPT_FILENAME  /usr/share/nginx/html$fastcgi_script_name;
        include        fastcgi_params;
    }
八、配置php
[root@localhost nginx]# cp /etc/php.ini{,.bak}
[root@localhost nginx]#vim /etc/php.ini

expose_php = Off #禁止显示php版本的信息
九、重启nginx php-fpm
[root@localhost ~]# systemctl restart nginx.service

[root@localhost ~]# systemctl restart php-fpm.service
十、测试
[root@localhost ~]# cd /usr/share/nginx/html/

[root@localhost html]# vim  index.php

<?php

     phpinfo();

?>

[root@localhost html]# chown nginx.nginx /usr/share/nginx/html/ -R  #设置目录所有者
#配置防火墙,开启80端口、3306端口
[root@localhost html]# firewall-cmd --zone=public --add-port=/tcp --permanent

success

[root@localhost html]# firewall-cmd --zone=public --add-port=/tcp --permanent

success

[root@localhost html]# systemctl restart firewalld.service

[root@localhost html]# systemctl enable firewalld.service
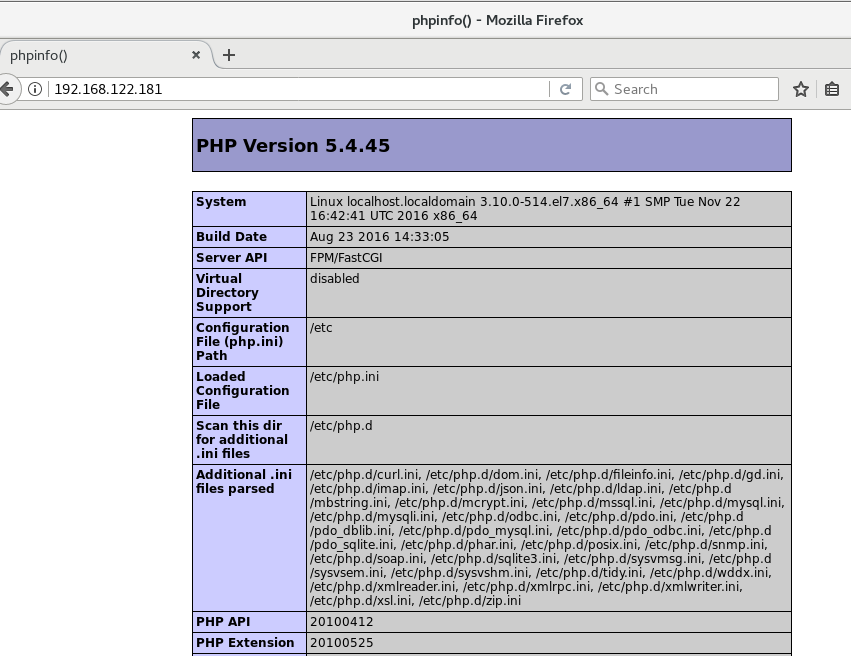
在客户端浏览器输入服务器IP地址,可以看到相关的配置信息!
#############################################################################
备注
nginx默认站点目录是:/usr/share/nginx/html/

权限设置:chown nginx.nginx/usr/share/nginx/html/ -R

MySQL数据库目录是:/var/lib/mysql

权限设置:chown mysql.mysql -R /var/lib/mysql
参考:
https://www.cnblogs.com/xiaoit/p/3991037.html
http://www.kuitao8.com/20150305/3571.shtml
centos7安装lnmp的更多相关文章
- 腾讯云CentOS7安装LNMP+wordpress
许多云主机都有学生优惠,于是我趁着现在大一买了个腾讯1元云主机+免费cn域名(高中生的话就别想了).鉴于我只知道用服务器安装博客,别的用途不了解,所以我就去安装wordpress. 而由于我看的教程有 ...
- centos7安装Lnmp(Linux+Nginx+MySql+Php+phpMyAdmin+Apache)
centos7安装Lnmp(Linux+Nginx+MySql+Php)及Apache Nginx是俄罗斯人编写的十分轻量级的HTTP服务器,Nginx是一个高性能的HTTP和反向代理服务器,Ng ...
- Centos7 安装lnmp
Centos7 安装lnmp 1.下载 wget http://soft.vpser.net/lnmp/lnmp1.5-full.tar.gz 2.解压 tar -zvxf lnmp1.5-full. ...
- centos7安装LNMP与Laravel遇到的一些小问题
安装LNMP 第一次安装 yum update CentOS7下 Nginx1.13.5 + PHP7.1.10 + MySQL5.7.19 源码编译安装 安装mySQL时,mysqld: error ...
- CentOS7 安装LNMP(Linux+Nginx+MySQL+PHP)
由于工作须要,须要学习php,本来想安装lamp的可是考虑到如今nginxserver有良好的性能且应用广泛. 这里我决定搭建Linux(CentOS7+Nginx+MySQL+PHP)下的webse ...
- Centos7安装lnmp环境
系统版本:centos7 64位 PHP版本:PHP 7.0.21 Nginx版本:1.8.1 MySQL版本:5.5.17 注:1.所有安装都必须放在 /usr/local/src文件夹下 2.添加 ...
- centos7 安装lnmp环境
准备工作 一.配置防火墙 vim /etc/sysconfig/iptables 开启80端口.3306.22端口 -A INPUT -m state --state NEW -m tcp -p tc ...
- CentOS 7 安装phpredis和redis(接上一篇centos7安装lnmp)
一.安装扩展phpredis 1.PHP7 安装redis 扩展phpredis cd /root/software wget https://github.com/edtechd/phpredis/ ...
- centos7 安装LNMP(php7)之php7.0 yum安装
http://www.jianshu.com/p/35f21210668a 安装过程参考上面的网址
- centos7 安装LNMP(php7)之mysql安装,更改密码,远程授权
1.执行命令 yum install mysql mysql-server mysql-devel -y 知道出现complete!则安装mysql完成 当执行 service mysqld rest ...
随机推荐
- 初识python——知其名而去其意
---背景 b2b,房地产,人工智能是今年最火的词汇,那么配套的软件技术究竟是怎样的呢,通过百度,园子里的信息分析,自我感觉需要用python来进行数据采集. ---环境 在百度,qq群的大神指导下, ...
- 09_$.ajax()参数详解及标准写法
1.url: 要求为String类型的参数,(默认为当前页地址)发送请求的地址. 2.type: 要求为String类型的参数,请求方式(post或get)默认为get.注意其他http请求方法,例如 ...
- Spring Data JPA使用findAllOrderBy时踩的坑
Spring Data JPA使用findAllOrderBy时踩的坑 按照以往的编程经验,我的写法是这样的: List<ActivityEntity> findAllOrderByWis ...
- zTree 节点勾选取消勾选 选中取消选中
zTreeObj.cancelSelectedNode function 举例 取消当前所有被选中节点的选中状态 var treeObj = $.fn.zTree.getZTreeObj(" ...
- 【转】Java实现折半查找(二分查找)的递归和非递归算法
原创作品,允许转载,转载时请务必以超链接形式标明文章 原始出处 .作者信息和本声明.否则将追究法律责任.http://wintys.blog.51cto.com/425414/94051 Java二分 ...
- 【Java并发基础】并发编程bug源头:可见性、原子性和有序性
前言 CPU .内存.I/O设备之间的速度差距十分大,为了提高CPU的利用率并且平衡它们的速度差异.计算机体系结构.操作系统和编译程序都做出了改进: CPU增加了缓存,用于平衡和内存之间的速度差异. ...
- Redis 通配符批量删除key
问题: 线上有部分的redis key需要清理. 一. 由于Keys模糊匹配,请大家在实际运用的时候忽略掉.因为Keys会引发Redis锁,并且增加Redis的CPU占用,情况是很恶劣的, 官网说明如 ...
- FFT 入门
推荐博客 :https://oi.men.ci/fft-notes/ 卷积的理解 : https://www.zhihu.com/question/22298352?rf=21686447 题目链接 ...
- 继承Exception⭐⭐
public class ECOrderException : Exception { //第一种类型: throw new ECOrderException { ErrorCode = " ...
- 测试工具Fiddler(二)—— 入门使用
Fiddler设置与安装证书 一.Fiddler常见设置 Options位置:Tools->Options 二.移动端连上Fiddler作为代理 注意:因为Charles也是默认8888端口,小 ...