React Router基础教程
React是个技术栈,单单使用React很难构建复杂的Web应用程序,很多情况下我们需要引入其他相关的技术
React Router是React的路由库,保持相关页面部件与URL间的同步
下面就来简单介绍其基础使用,更全面的可参考 指南
1. 它看起来像是这样
在页面文件中
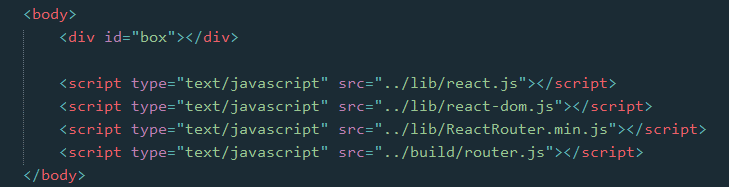
在外部脚本文件中

2. 库的引入
React Router库的引入,有两种方式
2.1 浏览器直接引入
可以引用 这里 的浏览器版本,或者下载之后引入
然后就可以直接使用 ReactRouter 这个对象了,我们可能会使用到其中的几个属性
let {Router, Route, IndexRoute, Redirect, IndexRedirect, Link, IndexLink, hashHistory, browserHistory} = ReactRouter;
2.2 npm 安装,通过构建工具编译引入
npm install --save react-router
安装好路由库之后,在脚本文件中引入相关属性
import {Router, Route, IndexRoute, Redirect, IndexRedirect, Link, IndexLink, hashHistory, browserHistory} from 'react-router';
因浏览器目前还不能支持import与export命令,且babel工具不会将require命令编译,所以我们还得需要如Webpack等构建工具编译引入
库引入之后,在ReactDOM的render方法中,就可以使用相关的组件了
3. 路由简单使用
最基本的,通过URL判断进入哪个页面(组件部件)

class First extends Component {

    constructor(props) {

        super(props);

    }

    render() {

        return <p>First</p>

    }

}

class Second extends Component {

    constructor(props) {

        super(props);

    }

    render() {

        return <p>Second</p>

    }

}

class App extends Component {

    constructor(props) {

        super(props);

    }

    render() {

        return <div></div>

    }

}
render((

    <Router history={hashHistory}>

        <Route path="/" component={App} />

        <Route path="first" component={First} />

        <Route path="second" component={Second} />

    </Router>

    ),

    document.getElementById('box')

);
首先,Router是一个容器,history属性定义了是用何种方式处理页面的URL
有三种:
- browserHistory:通过URL的变化改变路由,是推荐的一种方式,但是需要在服务器端需要做一些配置(窝目前还不知怎么配)
- hashHistory:通过#/ ,其实就像是单页面应用中常见的hashbang方式,example.com/#/path/path.. (使用简单,这里暂且就用这种方式)
- createMemoryHistory:Memory history 并不会从地址栏中操作或是读取,它能够帮助我们完成服务器端的渲染,我们得手动创建history对象
然后,在容器中使用Route组件定义各个路由,通过path指定路径(可以看到,是不区分大小写的),通过component指定该路径使用的组件
也可以直接在Router容器上直接用routes属性定义各个路由,如
let routes =

    <div>

        <Route path="/" component={App} />

        <Route path="first" component={First} />

        <Route path="second" component={Second} />

    </div>;

render(<Router routes={routes} history={hashHistory}></Router>, document.getElementById('box'));
需要注意的是{routes}中只能有一个父级,所以这里加了<div>标签
另外,路由Route也可以嵌套,在上面的例子中,嵌套起来可能更符合实际情况
需要注意的是,这里的App在父级,为了获取子级的First与Second组件,需要在App组件中添加 this.props.children 获取
class App extends Component {

    constructor(props) {

        super(props);

    }

    render() {

        return <div>{this.props.children}</div>

    }

}

render((

    <Router history={hashHistory}>

        <Route path="/" component={App}>

            <Route path="first" component={First} />

            <Route path="second" component={Second} />

        </Route>

    </Router>

    ),

    document.getElementById('box')

);
同样的,可以直接在Router中用routes属性定义路由
let routes =

        <Route path="/" component={App}>

            <Route path="first" component={First} />

            <Route path="second" component={Second} />

        </Route>;

render(<Router routes={routes} history={hashHistory}></Router>, document.getElementById('box'));
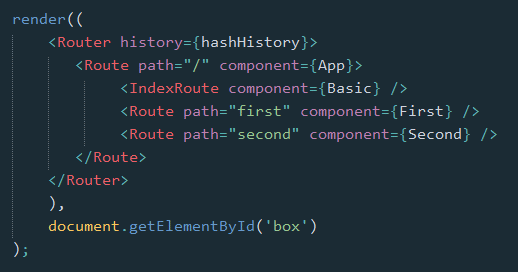
4. 路由的其他组件
除了基本的Route之外,IndexRoute、Redirect、IndexRedirect、Link、IndexLink等,顾名思义
- IndexRoute: 在主页面会用到,如上个例子中,在路径"/"下我们看到的是空白页面,可以添加默认的页面组件用于导航
- Link: 可以认为它是<a>标签在React中的实现,使用to属性定义路径,还可以通过activeClass或activeStyle定义active的样式
- IndexLink: 类似Link,推荐用来定义指向主页面的链接,当然也可以随意定义

class First extends Component {

    constructor(props) {

        super(props);

    }

    render() {

        return (

            <p>First

                <IndexLink to="/" activeStyle={{color: 'red'}}>Basic</IndexLink>

            </p>

        )

    }

}

class Second extends Component {

    constructor(props) {

        super(props);

    }

    render() {

        return <p>Second</p>

    }

}

class Basic extends Component {

    constructor(props) {

        super(props);

    }

    render() {

        return (

            <ul role="nav">

                <li><IndexLink to="/" activeStyle={{color: 'red'}}>Basic</IndexLink></li>

                <li><Link to="/first" activeStyle={{color: 'red'}}>First</Link></li>

                <li><Link to="/Second" activeClass="active">Second</Link></li>

            </ul>

        )

    }

}

class App extends Component {

    constructor(props) {

        super(props);

    }

    render() {

        return <div>

            {this.props.children}

        </div>

    }

}

render((

    <Router history={hashHistory}>

        <Route path="/" component={App}>

            <IndexRoute component={Basic} />

            <Route path="first" component={First} />

            <Route path="second" component={Second} />

        </Route>

    </Router>

    ),

    document.getElementById('box')

);
- Redirect: 从from路径重定向到to路径
- IndexRedirect: 在主页面,直接重定向到to路径

render((

    <Router history={hashHistory}>

        <Route path="/" component={App}>

            <IndexRoute component={Basic} />

            <IndexRedirect to="first" />

            <Redirect from="second" to="first" />

            <Route path="first" component={First} />

            <Route path="second" component={Second} />

        </Route>

    </Router>

    ),

    document.getElementById('box')

);
5. 路由的path规则
path定义的路由的路径,在hashHistory中,它的主页路径是#/
自定义Route路由通过与父Route的path进行合并,在与主页路径合并,得到最终的路径
- :paramName 匹配 URL 的一个部分,直到遇到下一个/、?、#
- () 表示URL的这个部分是可选的
- * 匹配任意字符(非贪婪模式),直到模式里面的下一个字符为止
- ** 匹配任意字符(贪婪模式),直到下一个/、?、#为止
<Route path="/hello/:name">         // 匹配 /hello/michael 和 /hello/ryan

<Route path="/hello(/:name)">       // 匹配 /hello, /hello/michael, 和 /hello/ryan

<Route path="/files/*.*">           // 匹配 /files/hello.jpg 和 /files/hello.html

<Route path="/**/*.jpg">            // 匹配 /files/hello.jpg 和 /files/path/to/file.jpg
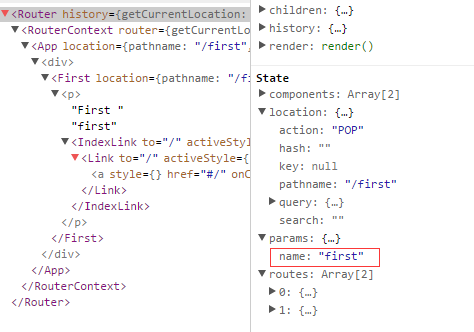
而:name可以通过 this.props.params 中取到
class First extends Component {

    constructor(props) {

        super(props);

    }

    render() {

        return (

            <p>First {this.props.params.name}

                <IndexLink to="/" activeStyle={{color: 'red'}}>Basic</IndexLink>

            </p>

        )

    }

}

.

.

<Route path="/:name" component={First} />

通过React Dev Tool也可以看到组件的相关数据
6. 路由的onEnter、onLeave钩子
在路由的跳转中,我们可能需要在进入页面或离开页面的时候做一些特殊操作,Route 通过 onEnter 与 onLeave 定义了这两个行为

      <Route path="first" component={First} onEnter={(nextState, replace) => {

                console.log(nextState);

                alert('onEnter');

                // replace('second');

            }} onLeave={() => {

                alert('onLeave');

            }}/>
如上,带两个参数,通过 replace 可以更新路径,把注释去掉后,进入"/first"时立马跳转值"/second",这在检测登录时应该比较有用
更多的使用参见 指南
React Router基础教程的更多相关文章
- [转] React Router 使用教程
PS:react-route就是一个决定生成什么父子关系的组件,一般和layout结合起来,保证layout不行,内部的子html进行跳转 你会发现,它不是一个库,也不是一个框架,而是一个庞大的体系. ...
- React Router基础使用
React是个技术栈,单单使用React很难构建复杂的Web应用程序,很多情况下我们需要引入其他相关的技术 React Router是React的路由库,保持相关页面部件与URL间的同步 下面就来简单 ...
- React Router 使用教程
一.基本用法 React Router 安装命令如下. $ npm install -S react-router 使用时,路由器Router就是React的一个组件. import { Router ...
- React-Native基础教程
React-Native牛刀小试仿京东砍啊砍砍到你手软 React-Native基础教程 *React-Native基础篇作者git *React-Native官方文档 *Demo 几个月前faceb ...
- React Router教程
React Router教程 React项目的可用的路由库是React-Router,当然这也是官方支持的.它也分为: react-router 核心组件 react-router-dom 应用于浏览 ...
- React Native基础&入门教程:初步使用Flexbox布局
在上篇中,笔者分享了部分安装并调试React Native应用过程里的一点经验,如果还没有看过的同学请点击<React Native基础&入门教程:调试React Native应用的一小 ...
- React实例入门教程(1)基础API,JSX语法--hello world
前 言 毫无疑问,react是目前最最热门的框架(没有之一),了解并学习使用React,可以说是现在每个前端工程师都需要的. 在前端领域,一个框架为何会如此之火爆,无外乎两个原因:性能优秀,开发 ...
- 【原创】React实例入门教程(1)基础API,JSX语法--hello world
前 言 毫无疑问,react是目前最最热门的框架(没有之一),了解并学习使用React,可以说是现在每个前端工程师都需要的. 在前端领域,一个框架为何会如此之火爆,无外乎两个原因:性能优秀,开发效率 ...
- React Router学习
React Router教程 本教程引用马伦老师的的教程 React项目的可用的路由库是React-Router,当然这也是官方支持的.它也分为: react-router 核心组件 react-ro ...
随机推荐
- hdu 5051 找规律?+大trick
http://acm.hdu.edu.cn/showproblem.php?pid=5051 打表找规律 据说是http://zh.wikipedia.org/wiki/%E6%9C%AC%E7%A6 ...
- ES基本操作
倒排索引 ElasticSearch使用一种称为倒排索引的结构,它适用于快速的全文搜索.一个倒排索引由文档中所有不重复词的列表构成,对于其中每个词,有一个包含它的文档列表. 查询 # 查看索引配置GE ...
- Ubuntu12.04搭建自有源
其实,这个工作比较简单,主要两步:apt-mirror和apache.(这里的系统是ubuntu12.04) 1.apt-mirror 1.1 安装 一如既往地简单,直接sudo apt-get in ...
- 将一个浮点数转换成人民币读法字符串(java)
public class Num2Rmb { private String[] hanArr = {"零" , "壹" , "贰&qu ...
- 集成算法(chapter 7 - Hands on machine learning with scikit learn and tensorflow)
Voting classifier 多种分类器分别训练,然后分别对输入(新数据)预测/分类,各个分类器的结果视为投票,投出最终结果: 训练: 投票: 为什么三个臭皮匠顶一个诸葛亮.通过大数定律直观地解 ...
- .net core Area独立成单独的dll文件
以前做MES项目遇到过这个情况,一个项目有7到8个大模块,生产.质量.物耗.电子看板.设备等,每个模块都有大量业务,这样使用mvc结构如果所有模块放在一个目录中,那么势必会产生很多问题,各模块代码不好 ...
- [C++基础]队列<queue>中的常用函数
在C++中只要#include<queue>即可使用队列类,其中在面试或笔试中常用的成员函数如下(按照最常用到不常用的顺序) 1. push 2. pop 3. size 4. empty ...
- Python2 指定文件编码格式需要注意的地方
python2 中默认的编码格式是unicode, 开发人员经常需要根据需要,将python文件的编码格式设置为utf-8,我们可以在python文件的第一行进行设置,加入如下代码: # encodi ...
- hadoop集群搭建(hdfs)
(搭建hadoop集群的前提是服务器已成功安装jdk以及服务器之间已设置免密码登录,服务器之间的免密码登录可参考<linux服务器间ssh免密码登录>) 1.下载hadoop安装包 wge ...
- [工具]渗透神器CobaltStrike 3.1.2 K8去后门破解版 & Windows版TeamServer
CS简介 Cobalt Strike(简称CS)是全球黑客公认一款非常优秀的渗透测试神器,以metasploit为基础的GUI的框架式渗透工具,集成了传统远控功能(远程桌面VNC.键盘记录.CmdSh ...