cas server
Tomcat: V8.5.x
Java: 1.8 x64
MySQL: 5.5.x
OS: Win10 x64
I. war
0. clone
git clone https://github.com/apereo/cas-gradle-overlay-template.git
1. set gradle
https://gradle.org/releases/
1) extract
2) set system variable
$PATH=$PATH;%GRADLE_HOME%\bin
2. build war
File location: cas\build\libs\cas.war
1) config file
gradle.properties
cas.version=
->
cas.version=

gradle.version=4.8
->
gradle.version=

springboot.version=.RELEASE
->
springboot.version=.RELEASE
change version:
2) build
cd cas-gradle-overlay-template
$gradle build
II. Run
0. key/certificate
1) genkey
keytool -genkey -keyalg RSA -alias thekeystore -keypass changeit -storepass changeit -keysize 2048 -keystore d:/etc/cas/thekeystore
info:
-dname "CN=localhost,OU=test.com,O=test,L=WH,ST=HB,C=CN"
2) export
keytool -export -alias thekeystore -file d:/etc/cas/cas538.crt -keystore d:/etc/cas/thekeystore -storepass changeit
3) import
keytool -import -alias thekeystore -storepass changeit -file d:/etc/cas/cas538.crt -keystore "%JAVA_HOME%\jre\lib\security\cacerts"
1. set tomcat
1)thekeystore
copy thekeystore file to $TOMCAT_HOME/conf
2)add https
server.xml
    <Connector port=" protocol="org.apache.coyote.http11.Http11NioProtocol"
               maxThreads=" SSLEnabled="true">
        <SSLHostConfig>
            <Certificate certificateKeystoreFile="conf/thekeystore"
                        keystorePass="changeit"
                         type="RSA" />
        </SSLHostConfig>
    </Connector>
2. let's it
(1) tomcat startup
startup.bat
(2) login
Enter username and password
casuser/Mellon
If you want to change the user/password, stop Tomcat and change it in Application.properties(webapps\cas\WEB-INF\classes).
##
# CAS Authentication Credentials
#
cas.authn.accept.users=casuser::Mellon

----Beautiful Split Line----
III. Database Authentication
0. config files folder
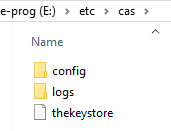
copy cas-gradle-overlay-template/etc to The drive letter where Tomcat is located.
For example:
e:\
1. service register
0) ON Services
cas.properties
Append the following Key-Value:
cas.serviceRegistry.initFromJson=truecas.serviceRegistry.json.location=classpath:/services
1) services file
webapps\cas\WEB-INF\classes\services
- cas spring secured app
- casSecuredApp-19991.json
- cas client for java
- loginInfo-10000004.json
2. JDBC Support
1) down jar
MySQL Connector/J is 5.x;
cas-server-support-jdbc for matching ' cas.server '.
If the cas.authn.jdbc.query[0].passwordEncoder.type is not NONE, add the cas-server-support-jdbc-authentication package.
https://mvnrepository.com/artifact/mysql/mysql-connector-java

https://mvnrepository.com/artifact/org.apereo.cas/cas-server-support-jdbc

https://mvnrepository.com/artifact/org.apereo.cas/cas-server-support-jdbc-authentication
2) properties
application.properties(..\webapps\cas\WEB-INF\classes)
##
# CAS Authentication Credentials
#
#cas.authn.accept.users=casuser::Mellon
# server.port =
cas.server.name: https://localhost:8443
cas.server.prefix: https://localhost:8443/cas

cas.adminPagesSecurity.ip=\.\.\.

logging.config: file:/etc/cas/config/log4j2.xml
cas.serviceRegistry.initFromJson=true
cas.serviceRegistry.json.location=classpath:/services

# SSL
# server.ssl.enabled=false

cas.authn.accept.users=
cas.authn.accept.name=
#CAS Database Authentication Property
#cas.authn.jdbc.query[].sql=SELECT * FROM users WHERE email = ?
cas.authn.jdbc.query[].sql=SELECT * FROM app_user WHERE email = ?
cas.authn.jdbc.query[].url=jdbc:mysql://127.0.0.1:3306/test
cas.authn.jdbc.query[].dialect=org.hibernate.dialect.MySQLDialect
cas.authn.jdbc.query[].user=DBAdmin
cas.authn.jdbc.query[].password=xbfirst
cas.authn.jdbc.query[].ddlAuto=none
cas.authn.jdbc.query[].driverClass=com.mysql.jdbc.Driver
## mysql8+
#cas.authn.jdbc.query[].driverClass=com.mysql.cj.jdbc.Driver
cas.authn.jdbc.query[].fieldPassword=password
#cas.authn.jdbc.query[].passwordEncoder.type=NONE
cas.authn.jdbc.query[].passwordEncoder.type=BCRYPT
# cas.authn.jdbc.query[].passwordEncoder.characterEncoding=
# cas.authn.jdbc.query[].passwordEncoder.encodingAlgorithm=
# cas.authn.jdbc.query[].passwordEncoder.secret=
cas.authn.jdbc.query[].passwordEncoder.strength=
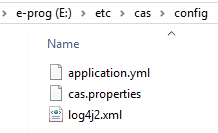
cas.properties(e:\etc\cas\config)
3) table
create table APP_USER (
   id BIGINT NOT NULL AUTO_INCREMENT,
   sso_id VARCHAR() NOT NULL,
   password VARCHAR() NOT NULL,
   first_name VARCHAR() NOT NULL,
   last_name  VARCHAR() NOT NULL,
   email VARCHAR() NOT NULL,
   state VARCHAR() NOT NULL,
   PRIMARY KEY (id),
   UNIQUE (sso_id)
);
APP_USER
INSERT INTO APP_USER(sso_id, password, first_name, last_name, email, state)
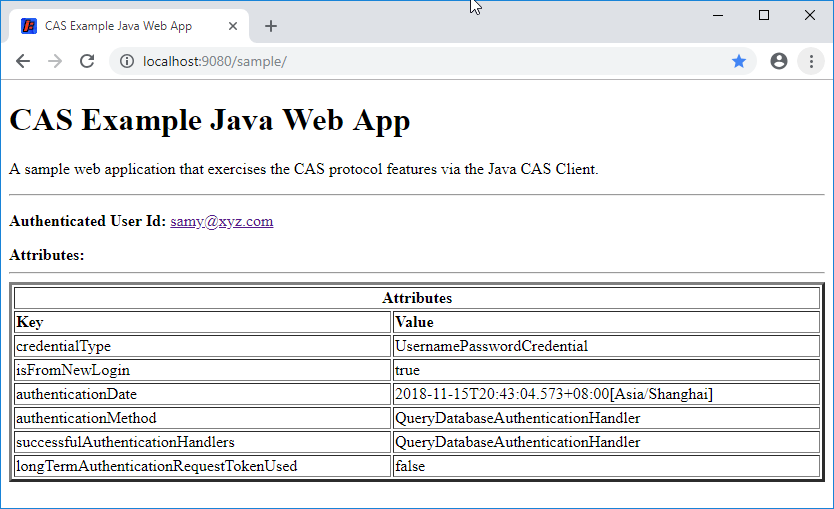
VALUES ('sam','$2a$10$4eqIF5s/ewJwHK1p8lqlFOEm2QIA0S8g6./Lok.pQxqcxaBZYChRm', 'Sam','Smith','samy@xyz.com', 'Active');
insert data
3. test
Source:
{
    "@class" : "org.apereo.cas.services.RegexRegisteredService",
    "serviceId" : "^http://localhost:9000/login/cas",
    "name" : "CAS Spring Secured App",
    "description": "This is a Spring App that usses the CAS Server for it's authentication",
    ,

}
casSecuredApp-19991.json
{
  "@class" : "org.apereo.cas.services.RegexRegisteredService",
  "serviceId" : "^http://localhost:9080/loginInfo/",
  "name" : "Login Information",
  ,
  "description" : "Sample service for Cas client",

}
loginInfo-10000004.json
Reference:
1) configure
2. keytool - del
keytool -delete -alias thekeystore -keystore "%JAVA_HOME%\jre\lib\security\cacerts" -storepass changeit
3. bcrypt tool
End
cas server的更多相关文章
- Eclipse配置CAS server
1.下载cas server的源码包(我使用的是cas-server-3.5.2.1-release.zip) 2.解压压缩包到某个目录下,找到cas-server-3.5.2.1-release.z ...
- Cas Server中各配置文件介绍
Cas Server中所有的配置文件都是放在WEB-INF目录及其子目录下的. 在WEB-INF/classes下的配置文件有: l cas-theme-default.properties:该文件 ...
- 设置cas server使用http非安全协议
目录 1.tomcat添加https安全协议 2.下载cas server端部署到tomcat上 3.CAS服务器深入配置(连接MYSQL) 4.Apache Shiro 集成Cas作为cas cli ...
- cas+tomcat+shiro实现单点登录-2-部署cas server到tomcat
目录 1.tomcat添加https安全协议 2.下载cas server端部署到tomcat上 3.CAS服务器深入配置(连接MYSQL) 4.Apache Shiro 集成Cas作为cas cli ...
- nginx反向代理cas server之1:多个cas server负载均衡配置以及ssl配置
系统环境采用centOS7 由于cas server不支持session持久化方式的共享,所以请用其他方式代替,例如:组播复制. 为什么不支持session持久化:http://blog.csdn.n ...
- 关于cas server无法通过session持久化方式实现集群的问题
最近在搭建cas单点登录系统 ,在建立集群时发生一个问题. 搭建的环境是tomcat+tomcat-redis-session-manager+redis+cas 在对tomcat的session进行 ...
- CAS server打包小白教程
如题,cas是耶鲁大学的一个开源的登录系统,功能齐全,受到很多企业的青睐. 耶鲁大学都不知道那你太out了,我告诉你吧!耶鲁大学就是山东一个椰子树长的很多的地方的大学,很牛逼. 很多新手程序员简历都喜 ...
- No principal was found in the response from the CAS server
按网上的配置了 public String casServerUrlPrefix = "http://cas-server.com:8080/cas"; public String ...
- 单点登录(七)-----实战-----cas server去掉https验证
我们在搭建cas中已经说过如果不搭建https证书体系的需要去掉https的验证: 单点登录(二)----实战------简单搭建CAS---测试认证方式搭建CAS 因为cas4.2以上的代码做了一些 ...
随机推荐
- super and this
super 指向父类的一个指针, 引用父类中的属性,方法或者构造函数 public class Father { String name ; Father(String myName){ name = ...
- YUICompressor的安装及使用(一)
step1:下载ant和YUICompressor 1) Ant: http://ant.apache.org/bindownload.cgi 打开页面后,下拉滚动条,找到如下图所示,单 ...
- webpack 入口:entry
定义一个入口点就生成一个chunk.如果你只是用字符串的方式定义了一个入口点,其就被命名为main.如果你用对象的方式定义多个入口点,其就被命名为入口对象中的键值.下面两个例子是等价的: entry: ...
- css3中的BFC,IFC,GFC和FFC
出处:https://www.jianshu.com/p/e75f351e11f8 表格比较: 名称 英文全称 含义 BFC Block Formatting Contexts 块级格式化上下文 IF ...
- Python Scrapy环境搭建(一)
本来是以学习的目的添加了几个QQ群,但是发现群内有着很多的小白都在咨询如何搭建环境的问题,所以我这里把自己搭建的方法分享下 1.首先我们需要查看下自己安装的python的版本; 最简单的版本就是在命令 ...
- Git-git rebase详解
git合并代码方式主要有两种方式,分别为:1.merge处理,这是大家比较能理解的方式.2.rebase处理,中文此处翻译为衍合过程. git rebase操作讲解例子: cd /usr/local/ ...
- 【java】类的初识
面向过程思想:强调的是功能行为 面向对象思想:不自己亲自做,将功能封装为对象,强调具备功能的对象,指挥对象实现各种功能.以后开发实际就是找对象使用对象,要是对象没有就创建对象并维护对象. 面向对象的三 ...
- Vivado约束文件(XDC)的探究(2)
Vivado约束文件(XDC)的探究(2)
- oracle中delete、truncate、drop的区别
oracle中delete.truncate.drop的区别 标签: deleteoracletable存储 2012-05-23 15:12 7674人阅读 评论(0) 收藏 举报 分类: ora ...
- Python 进制转换与位运算
十进制转二进制.八进制.十六进制: dec = int(input("输入数字:")) print("十进制数为:", dec) print("转换为 ...