高并发压力测试工具Locust(蝗虫)
What is Locust?
Locust is an easy-to-use, distributed, user load testing tool. It is intended for load-testing web sites (or other systems) and figuring out how many concurrent users a system can handle.
The idea is that during a test, a swarm of locusts will attack your website. The behavior of each locust (or test user if you will) is defined by you and the swarming process is monitored from a web UI in real-time. This will help you battle test and identify bottlenecks in your code before letting real users in.
Locust is completely event-based, and therefore it’s possible to support thousands of concurrent users on a single machine. In contrast to many other event-based apps it doesn’t use callbacks. Instead it uses light-weight processes, through gevent. Each locust swarming your site is actually running inside its own process (or greenlet, to be correct). This allows you to write very expressive scenarios in Python without complicating your code with callbacks.
蝗虫是什么?
蝗虫是一个易于使用、分发、用户负载测试工具。它是用于负载测试的网站(或其他系统),弄清楚有多少并发用户系统可以处理。
我们的想法是,在测试期间,一群蝗虫会攻击你的网站。每个蝗虫的行为(或测试用户如果你愿意)被定义为你和聚集过程实时监控从web UI。这将帮助你战斗测试和代码中识别瓶颈之前让真正的用户。
蝗虫是完全基于事件,因此可以支持在单个机器上成千上万的并发用户。与许多其他的基于事件的应用程序不使用回调。相反,它使用轻量级进程,通过gevent。每个蝗虫爬你的网站实际上是运行在它自己的进程(或一种绿色小鸟,是正确的)。这允许您编写非常富有表现力的场景在Python中没有复杂的代码和回调。
Installation
Locust is available on PyPI and can be installed through pip or easy_install
pip install locustio
or:
easy_install locustio
When Locust is installed, a locust command should be available in your shell (if you’re not using virtualenv—which you should—make sure your python script directory is on your path).
To see available options, run:
locust --help
Options:

  -h, --help            show this help message and exit

  -H HOST, --host=HOST  Host to load test in the following format:

                        http://10.21.32.33

  --web-host=WEB_HOST   Host to bind the web interface to. Defaults to '' (all

                        interfaces)

  -P PORT, --port=PORT, --web-port=PORT

                        Port on which to run web host

  -f LOCUSTFILE, --locustfile=LOCUSTFILE

                        Python module file to import, e.g. '../other.py'.

                        Default: locustfile

  --master              Set locust to run in distributed mode with this

                        process as master

  --slave               Set locust to run in distributed mode with this

                        process as slave

  --master-host=MASTER_HOST

                        Host or IP address of locust master for distributed

                        load testing. Only used when running with --slave.

                        Defaults to 127.0.0.1.

  --master-port=MASTER_PORT

                        The port to connect to that is used by the locust

                        master for distributed load testing. Only used when

                        running with --slave. Defaults to 5557. Note that

                        slaves will also connect to the master node on this

                        port + 1.

  --master-bind-host=MASTER_BIND_HOST

                        Interfaces (hostname, ip) that locust master should

                        bind to. Only used when running with --master.

                        Defaults to * (all available interfaces).

  --master-bind-port=MASTER_BIND_PORT

                        Port that locust master should bind to. Only used when

                        running with --master. Defaults to 5557. Note that

                        Locust will also use this port + 1, so by default the

                        master node will bind to 5557 and 5558.

  --no-web              Disable the web interface, and instead start running

                        the test immediately. Requires -c and -r to be

                        specified.

  -c NUM_CLIENTS, --clients=NUM_CLIENTS

                        Number of concurrent clients. Only used together with

                        --no-web

  -r HATCH_RATE, --hatch-rate=HATCH_RATE

                        The rate per second in which clients are spawned. Only

                        used together with --no-web

  -n NUM_REQUESTS, --num-request=NUM_REQUESTS

                        Number of requests to perform. Only used together with

                        --no-web

  -L LOGLEVEL, --loglevel=LOGLEVEL

                        Choose between DEBUG/INFO/WARNING/ERROR/CRITICAL.

                        Default is INFO.

  --logfile=LOGFILE     Path to log file. If not set, log will go to

                        stdout/stderr

  --print-stats         Print stats in the console

  --only-summary        Only print the summary stats

  -l, --list            Show list of possible locust classes and exit

  --show-task-ratio     print table of the locust classes' task execution

                        ratio

  --show-task-ratio-json

                        print json data of the locust classes' task execution

                        ratio

  -V, --version         show program's version number and exit
Quick start
Example locustfile.py
Below is a quick little example of a simple locustfile.py:
from locust import HttpLocust, TaskSet

def login(l):

    l.client.post("/login", {"username":"ellen_key", "password":"education"})

def index(l):

    l.client.get("/")

def profile(l):

    l.client.get("/profile")

class UserBehavior(TaskSet):

    tasks = {index:2, profile:1}

    def on_start(self):

        login(self)

class WebsiteUser(HttpLocust):

    task_set = UserBehavior

    min_wait = 5000

    max_wait = 9000
The HttpLocust class inherits from the Locust class, and it adds a client attribute which is an instance of HttpSession, that can be used to make HTTP requests.
Another way we could declare tasks, which is usually more convenient, is to use the @task decorator. The following code is equivalent to the above:
from locust import HttpLocust, TaskSet, task

class UserBehavior(TaskSet):

    def on_start(self):

        """ on_start is called when a Locust start before any task is scheduled """

        self.login()

    def login(self):

        self.client.post("/login", {"username":"ellen_key", "password":"education"})

    @task(2)

    def index(self):

        self.client.get("/")

    @task(1)

    def profile(self):

        self.client.get("/profile")

class WebsiteUser(HttpLocust):

    task_set = UserBehavior

    min_wait = 5000

    max_wait = 9000
Start Locust
To run Locust with the above locust file, if it was named locustfile.py and located in the current working directory, we could run:
locust --host=http://example.com
If the locust file is located under a subdirectory and/or named different than locustfile.py, specify it using -f:
locust -f locust_files/my_locust_file.py --host=http://example.com
To run Locust distributed across multiple processes we would start a master process by specifying--master:
locust -f locust_files/my_locust_file.py --master --host=http://example.com
and then we would start an arbitrary number of slave processes:
locust -f locust_files/my_locust_file.py --slave --host=http://example.com
If we want to run locust distributed on multiple machines we would also have to specify the master host when starting the slaves (this is not needed when running locust distributed on a single machine, since the master host defaults to 127.0.0.1):
locust -f locust_files/my_locust_file.py --slave --master-host=192.168.0.100 --host=http://example.com
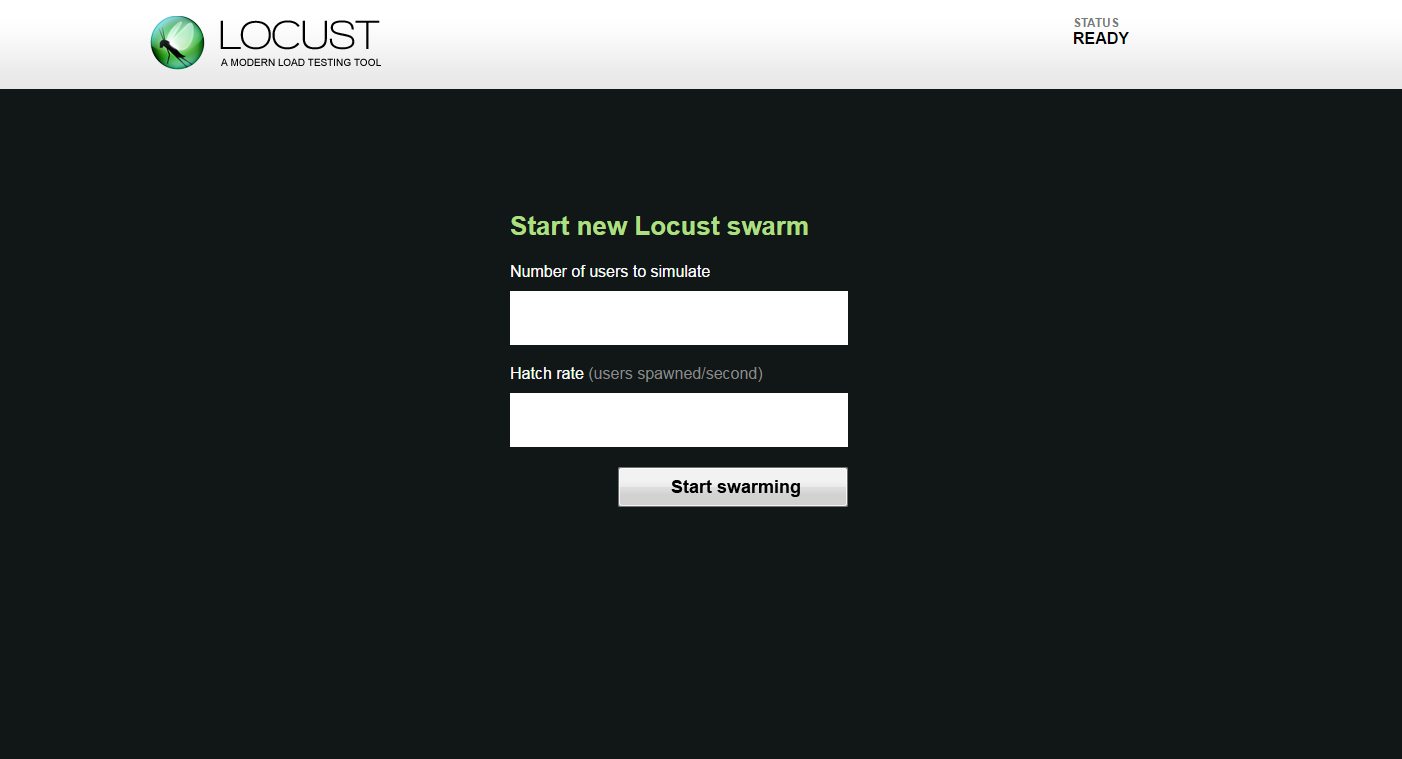
Open up Locust’s web interface
Once you’ve started Locust using one of the above command lines, you should open up a browser and point it to http://127.0.0.1:8089 (if you are running Locust locally). Then you should be greeted with something like this:
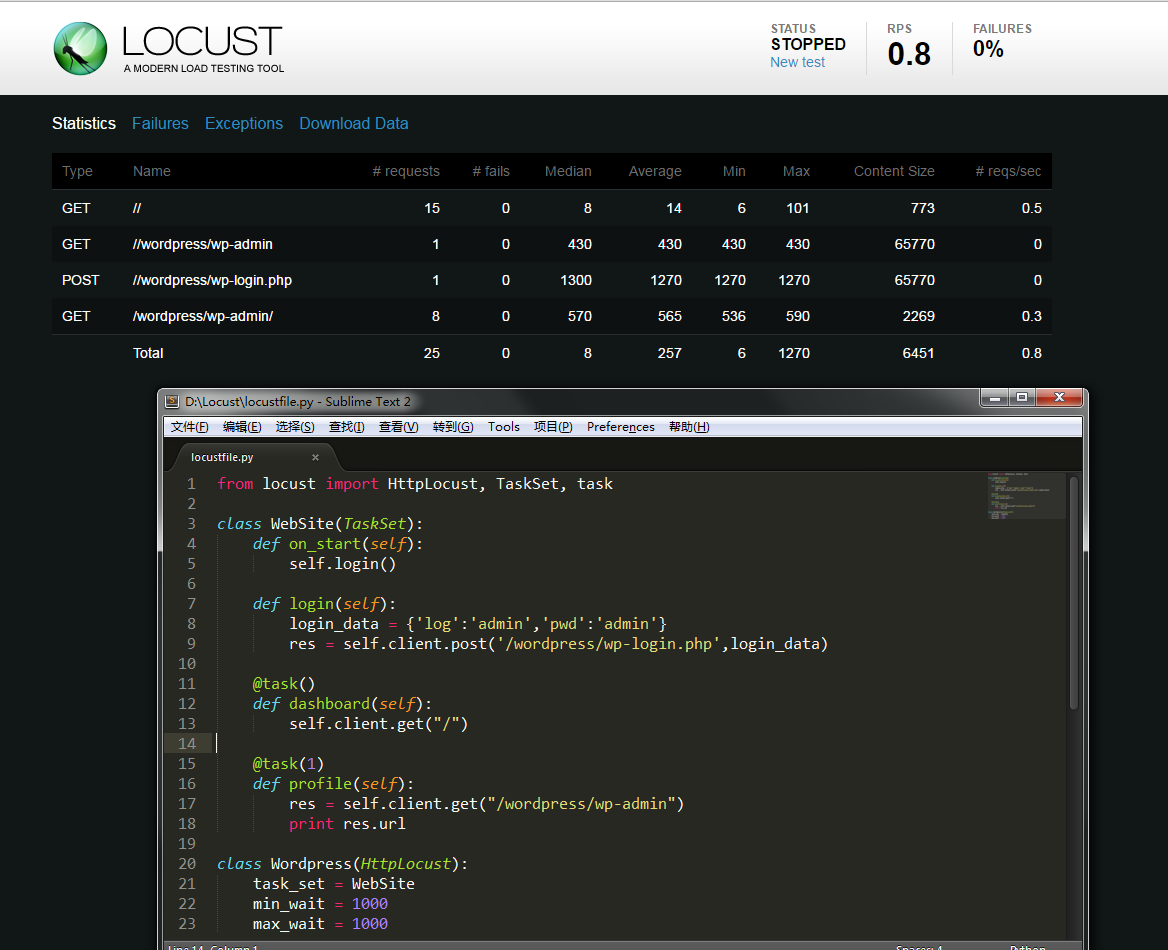
from locust import HttpLocust, TaskSet, task class WebSite(TaskSet):
def on_start(self):
self.login() def login(self):
login_data = {'log':'admin','pwd':'admin'}
res = self.client.post('/wordpress/wp-login.php',login_data) @task()
def create_task(self):
self.client.get("/") @task(1)
def profile(self):
res = self.client.get("/wordpress/wp-admin")
print res.urlclass Wordpress(HttpLocust):
task_set = WebSite
min_wait = 1000
max_wait = 1000
蝗虫比Jmeter好的一点就是 高并发,但是相对的不好的地方也有,就是需要另外的工具去监控服务器,而且需要去编写代码,
locust还需要再去深入研究琢磨,Locust使用好了 是一款非常强大的性能测试工具
http://docs.locust.io/en/latest/
高并发压力测试工具Locust(蝗虫)的更多相关文章
- 面向Web应用的并发压力测试工具——Locust实用攻略
1. 概述 该方案写作目的在于描述一个基于Locust实现的压力测试,文中详细地描述了如何利用locustfile.py文件定义期望达成的测试用例,并利用Locust对目标站点进行并发压力测试. 特别 ...
- 6步完成压力测试工具Locust部署和使用
1,准备安装python,安装过程略 已安装的,查看安装目录: cmd输入where Python 2,pip安装locust 1.进入python所在目录,如果没有配置环境变量,需要进入到C:\Us ...
- HTTP压力测试工具
HttpTest4Net是一款基于C#实现的和HTTP压力测试工具,通过工具可以简单地对HTTP服务进行一个压力测试.虽然VS.NET也集成了压力测试项目,但由于VS自身占用的资源导致了在配置不高的P ...
- Http压力测试工具HttpTest4Net
HttpTest4Net是一款基于C#实现的和HTTP压力测试工具,通过工具可以简单地对HTTP服务进行一个压力测试.虽然VS.NET也集成了压力测试项目,但由于VS自身占用的资源导致了在配置不高的P ...
- Linux下进行Web服务器压力(并发)测试工具http_load、webbench、ab、Siege、autobench简单使用教程(转)
一.http_load 程序非常小,解压后也不到100K http_load以并行复用的方式运行,用以测试web服务器的吞吐量与负载.但是它不同于大多数压力测试工 具,它可以以一个单一的进程运行,一般 ...
- 压力测试工具ab,wrk,locust简介
ab 无疑是目前最常见的压力测试工具.其典型用法如下: shell> ab -k -c 100 -t 10 http://domain/path 其中,参数「c」表示的是并发, 参数「t」表示的 ...
- Apache压力(并发)测试工具ab的使用教程收集
说明:用ab的好处,在处理多并发的情况下不用自己写线程模拟.其实这个世界除了LoadRunner之外还是有很多方案可以选择的. 官网: http://httpd.apache.org/(Apache服 ...
- 九款Web服务器性能压力测试工具
一.http_load 程序非常小,解压后也不到100Khttp_load以并行复用的方式运行,用以测试web服务器的吞吐量与负载.但是它不同于大多数压力测试工具,它可以以一个单一的进程运行,一般不会 ...
- Linux下四款Web服务器压力测试工具(http_load、webbench、ab、siege)介绍
一.http_load程序非常小,解压后也不到100Khttp_load以并行复用的方式运行,用以测试web服务器的吞吐量与负载.但是它不同于大多数压力测试工具,它可以以一个单一的进程运行,一般不会把 ...
随机推荐
- poj2112 最大流+floyd+二分
题意:给一堆点,一部分是牛,一部分是机器,每头牛必须要走到一个机器,每个点之间有距离,要求每头牛都能找得到一台机器(机器有最大容量)的情况下,走的最远的牛距离最小 题解:二分答案,小于该距离的边才能加 ...
- 【WCF】利用WCF实现上传下载文件服务
引言 前段时间,用WCF做了一个小项目,其中涉及到文件的上传下载.出于复习巩固的目的,今天简单梳理了一下,整理出来,下面展示如何一步步实现一个上传下载的WCF服务. 服务端 1.首先新建一个名 ...
- MySQL 约束和数据库设计
1.MySQL 约束: 1.约束的概念: 约束是一种限制,它通过对表的行或列的数据做出限制,来确保表的数据的完整性.唯一性. MySQL中,常用的几种约束: 约束类型: 非空 主键 唯一 外键 默认值 ...
- 分析 PHP升级导致系统负载过高问题(转载)
原文:http://chuansongme.com/n/797172 背景 据XX部门兄弟反应, 其在将PHP从5.3.8 升级到5.5.13 时, 开始运行正常, 运行一段时间后, 系统负载变高,达 ...
- PHP Smarty无法解析模板文件
/****************************************************************************** * PHP Smarty无法解析模板文件 ...
- 1150 Travelling Salesman Problem(25 分)
The "travelling salesman problem" asks the following question: "Given a list of citie ...
- hashmap&linkedlist
import java.util.HashMap; import java.util.Iterator; public class hashmap1 { public static void main ...
- ASP.NET MVC 缓存Outputcache (局部动态)
首先说一下需求: 比如我需要对网站首页做缓存,于是在首页对于的Action上贴上了Outputcache,接着问题就来了,首页上的有部分数据是不能做缓存的,比如个人信息,不然,每个人登陆都是看到第一个 ...
- ubuntu tftp server config
1.安装tftp-server sudo apt-get install tftpd-hpa sudo apt-get install tftp-hpa(如果不需要客户端可以不安装) tftp-hpa ...
- 洛谷【P1140】相似基因
浅谈\(DP\):https://www.cnblogs.com/AKMer/p/10437525.html 题目传送门:https://www.luogu.org/problemnew/show/P ...