Java方式配置Spring
概述
本文主要讲的是如何使用Java Bean来配置Spring,而不是用xml来配置Spring。
本文主要是代码,需要注意的都在注释里面。
Java配置Spring
 package com.wisely.highlight_spring4.ch1.javaconfig;

 /**

  * 最终被调用的类

  */

 public class FunctionService {

     public String sayHello(String word){

         return "Hello " + word +" !";

     }

 }
 package com.wisely.highlight_spring4.ch1.javaconfig;

 /**

  * 调用类

  */

 public class UseFunctionService {

     //这里也可以使用@Autowired将FunctionService的实体bean注入到UseFunctionService中,

     //让UseFunctionService具备将FunctionService的实体bean注入到UseFunctionService中的功能

     //@Autowired

     FunctionService functionService;

     public void setFunctionService(FunctionService functionService) {

         this.functionService = functionService;

     }

     public String SayHello(String word){

         return functionService.sayHello(word);

     }

 }
 package com.wisely.highlight_spring4.ch1.javaconfig;

 import org.springframework.context.annotation.Bean;

 import org.springframework.context.annotation.Configuration;

 /**

  * 配置类,代替xml配置

  */

 //声明当前类是一个配置类

 @Configuration

 //自动扫描包名下所有使用@Service/@Component/@Repository和@Controller的类,并注册为Bean

 //@ComponentScan("com.wisely.highlight_spring4.ch1")

 public class JavaConfig {

     /**

      * 声明当前方法的返回值是一个bean,bean的名称是方法名

      * @return bean

      */

     @Bean

     public FunctionService functionService(){

         return new FunctionService();

     }

     @Bean

     public UseFunctionService useFunctionService(){

         UseFunctionService useFunctionService = new UseFunctionService();

         //注入FunctionService的时候直接调用functionService

         useFunctionService.setFunctionService(functionService()); //

         return useFunctionService;

     }

     /**

      * 也可以将bean作为方法参数传入,spring会自动注入

      */

 //    @Bean

 //    public UseFunctionService useFunctionService(FunctionService functionService){//4

 //        UseFunctionService useFunctionService = new UseFunctionService();

 //        useFunctionService.setFunctionService(functionService);

 //        return useFunctionService;

 //    }

 }
 package com.wisely.highlight_spring4.ch1.javaconfig;

 import org.springframework.context.annotation.AnnotationConfigApplicationContext;

 /**

  * 程序入口

  */

 public class Main {

     public static void main(String[] args) {

         //使用AnnotationConfigApplicationContext作为容器,

         //接受输入一个配置类作为参数

         AnnotationConfigApplicationContext context =

                 new AnnotationConfigApplicationContext(JavaConfig.class);

         //获得声明配置的UseFunctionService的Bean

         UseFunctionService useFunctionService = context.getBean(UseFunctionService.class);

         //调用输出方法

         System.out.println(useFunctionService.SayHello("java config"));

         context.close();

     }

 }
最终效果如下所示

Java配置AOP
 package com.wisely.highlight_spring4.ch1.aop;

 import java.lang.annotation.Documented;

 import java.lang.annotation.ElementType;

 import java.lang.annotation.Retention;

 import java.lang.annotation.RetentionPolicy;

 import java.lang.annotation.Target;

 /**

  * 拦截规则的注解

  */

 @Target(ElementType.METHOD)

 @Retention(RetentionPolicy.RUNTIME)

 @Documented

 public @interface Action {

     //注解参数

     String name();

 }
 package com.wisely.highlight_spring4.ch1.aop;

 import org.springframework.stereotype.Service;

 /**

  * 使用注解的被拦截类

  */

 @Service

 public class DemoAnnotationService {

     @Action(name="注解式拦截的add操作")

     public void add(){}

 }
 package com.wisely.highlight_spring4.ch1.aop;

 import org.springframework.stereotype.Service;

 /**

  * 使用方法规则被拦截类

  */

 @Service

 public class DemoMethodService {

     public void add(){}

 }
package com.wisely.highlight_spring4.ch1.aop; import org.aspectj.lang.JoinPoint;
import org.aspectj.lang.annotation.After;
import org.aspectj.lang.annotation.Aspect;
import org.aspectj.lang.annotation.Before;
import org.aspectj.lang.annotation.Pointcut;
import org.aspectj.lang.reflect.MethodSignature;
import org.springframework.stereotype.Component; import java.lang.reflect.Method; /**
* 配置切面
*/
@Aspect //声明切面
@Component //让切面成为spring容器管理的bean
public class LogAspect {
//声明切点,拦截Action
@Pointcut("@annotation(com.wisely.highlight_spring4.ch1.aop.Action)")
public void annotationPointCut() {
} //声明建言,并使用@Pointcut定义的切点annotationPointCut()
@After("annotationPointCut()")
public void after(JoinPoint joinPoint) {
MethodSignature signature = (MethodSignature) joinPoint.getSignature();
Method method = signature.getMethod();
Action action = method.getAnnotation(Action.class);
//通过反射获可得注解上的name属性,然后做日志记录相关的操作
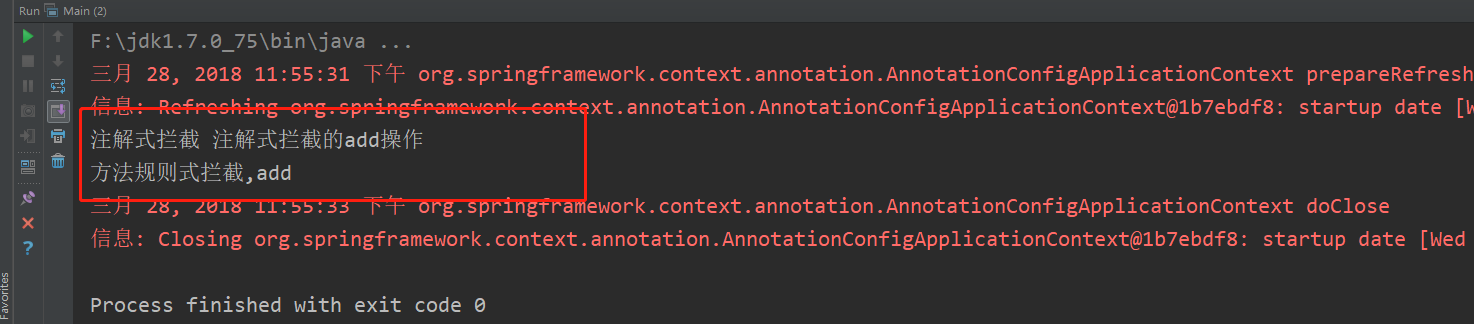
System.out.println("注解式拦截 " + action.name());
} //声明建言,直接使用拦截规则作为参数
@Before("execution(* com.wisely.highlight_spring4.ch1.aop.DemoMethodService.*(..))")
public void before(JoinPoint joinPoint) {
MethodSignature signature = (MethodSignature) joinPoint.getSignature();
Method method = signature.getMethod();
System.out.println("方法规则式拦截," + method.getName());
}
}
 package com.wisely.highlight_spring4.ch1.aop;

 import org.springframework.context.annotation.ComponentScan;

 import org.springframework.context.annotation.Configuration;

 import org.springframework.context.annotation.EnableAspectJAutoProxy;

 /**

  * Spring配置类,因为程序中使用了诸如@Service之类的配置,所以这里不用写其他配置

  * 只需要使用@ComponentScan扫描一下就可以了

  */

 @Configuration

 //扫描注解,注册bean

 @ComponentScan("com.wisely.highlight_spring4.ch1.aop")

 //开启spring对AspectJ的支持

 @EnableAspectJAutoProxy //

 public class AopConfig {

 }
 package com.wisely.highlight_spring4.ch1.aop;

 import org.springframework.context.annotation.AnnotationConfigApplicationContext;

 /**

  * 程序入口

  */

 public class Main {

     public static void main(String[] args) {

          AnnotationConfigApplicationContext context =

                     new AnnotationConfigApplicationContext(AopConfig.class);

          DemoAnnotationService demoAnnotationService = context.getBean(DemoAnnotationService.class);

          DemoMethodService demoMethodService = context.getBean(DemoMethodService.class);

          demoAnnotationService.add();

          demoMethodService.add();

          context.close();

     }

 }
最终效果如下所示
Java方式配置Spring的更多相关文章
- Java方式配置Spring MVC
概述 使用Java方式配置Spring MVC,以及回顾一下Spring MVC的各种用法. Spring MVC简述 关于Spring MVC的介绍网上有很多,这里就不再赘述了,只是要说一下,Spr ...
- 如何用Java类配置Spring MVC(不通过web.xml和XML方式)
DispatcherServlet是Spring MVC的核心,按照传统方式, 需要把它配置到web.xml中. 我个人比较不喜欢XML配置方式, XML看起来太累, 冗长繁琐. 还好借助于Servl ...
- bean的自动装配,使用注解开发,使用java的方式配置Spring
bean的自动装配 自动装配是Spring满足bean依赖一种方式! Spring会在上下文中自动寻找,并自动给bean装配属性! 在Spring中有三种装配的方式 在xml中显示的配置 在java中 ...
- SSH深度历险(十) AOP原理及相关概念学习+AspectJ注解方式配置spring AOP
AOP(Aspect Oriented Programming),是面向切面编程的技术.AOP基于IoC基础,是对OOP的有益补充. AOP之所以能得到广泛应用,主要是因为它将应用系统拆分分了2个部分 ...
- 纯java config配置Spring MVC实例
1.首先创建一个Maven工程,项目结构如下: pom.xml添加Spring和servlet依赖,配置如下 <project xmlns="http://maven.apache.o ...
- 使用java类的方式配置spring 需要什么注解?
1.@Configuration 修饰类,声明当前类是一个配置类,相当于applicationContext.xml文件 2.@ComponentScan 用于指定spring在初始化容器时要扫描的包 ...
- spring java 方式配置JedisPool Bean
来自一个开源项目https://git.oschina.net/geek_qi/ace-cache package com.ace.cache.config; import com.ace.cache ...
- MyBatis 及 MyBatis Plus 纯注解方式配置(Spring Boot + Postgresql)
说明 当前的版本为 MyBatis 3.5.9 MyBatis Plus 3.5.1 Spring Boot 2.6.4 Postgresql 42.3.3 与 Spring Boot 结合使用 My ...
- 纯注解方式配置spring+springMVC
1.新建类initConfig,继承AbstractAnnotationConfigDispatcherServletInitializer,并重写getRootConfigClasses().get ...
随机推荐
- Springboot框架中request.getInputStream()获取不到上传的文件流
Springboot框架中用下面的代码,使用request.getInputStream()获取不到上传的文件流 @PostMapping("/upload_img") publi ...
- 【C/C++】获取当前系统时间
#include<iostream> #include<Ctime> using namespace std; int main() { time_t t; time(& ...
- 【旧文章搬运】Win7 OBJECT_HEADER之TypeIndex解析
原文发表于百度空间,2010-08-09========================================================================== 在Wind ...
- Kefa and Watch
题意: 维护一个长度为n的字符串,两种操作: 1.将 [l,r] 的字符变为 c 2.询问 d 是否为 $S(l,r)$ 的周期 解法: 首先分析如何令 [l,r] 的周期为d,利用循环串的性质得: ...
- 极客时间_Vue开发实战_07.Vue组件的核心概念(3):插槽
07.Vue组件的核心概念(3):插槽 严格来的说在2.0之后已经不分区这两种插槽的概念了. 因为它底层的实现已经趋向于相同了. 2.6为了兼容2.5的版本,现在依然可以用这两种写法 作用域插槽就是多 ...
- HDU - 1272 小希的迷宫 并查集判断无向环及连通问题 树的性质
小希的迷宫 上次Gardon的迷宫城堡小希玩了很久(见Problem B),现在她也想设计一个迷宫让Gardon来走.但是她设计迷宫的思路不一样,首先她认为所有的通道都应该是双向连通的,就是说如果有一 ...
- ZOJ3352【记忆化搜索】
先膜拜watashi! 前言: 比赛的时候,确定的是这是一个博弈,然后就是各种瞎猜,后面想到DP[ x ][ y ]代表x表白色的状态,y表黑色的状态,无果.挂机开始.GG.巨菜. 思路: 这一发记忆 ...
- 3DMAX 4角色蒙皮
1 角色建模 略,以后补充 2 骨骼绑定 一般不用骨骼直接拉,Biped足够,以后适当补充骨骼直接拉的操作 1 将Biped骨骼和模型对齐 1 创建biped之后,第一步一要先选择,然后再对位骨骼到模 ...
- 如何使Label有修改功能
如何使Label有修改功能 之前制作一个项目时需要这样一个功能: 双击Label, 随后Label变为TextBox,用户修改后回车,TextBox变回Label 之前使用WPF做了一个,代码如下: ...
- PHP实现用户登录页面
PHP学习日常,放在上面记录一下咯 我用了bootstrap框架,这样的界面要好看一点 登录页面: 必须用户名.密码.验证码都输入正确才能登录成功喔,否则出现下面提示 登陆成功之后,登录和注册选项切换 ...