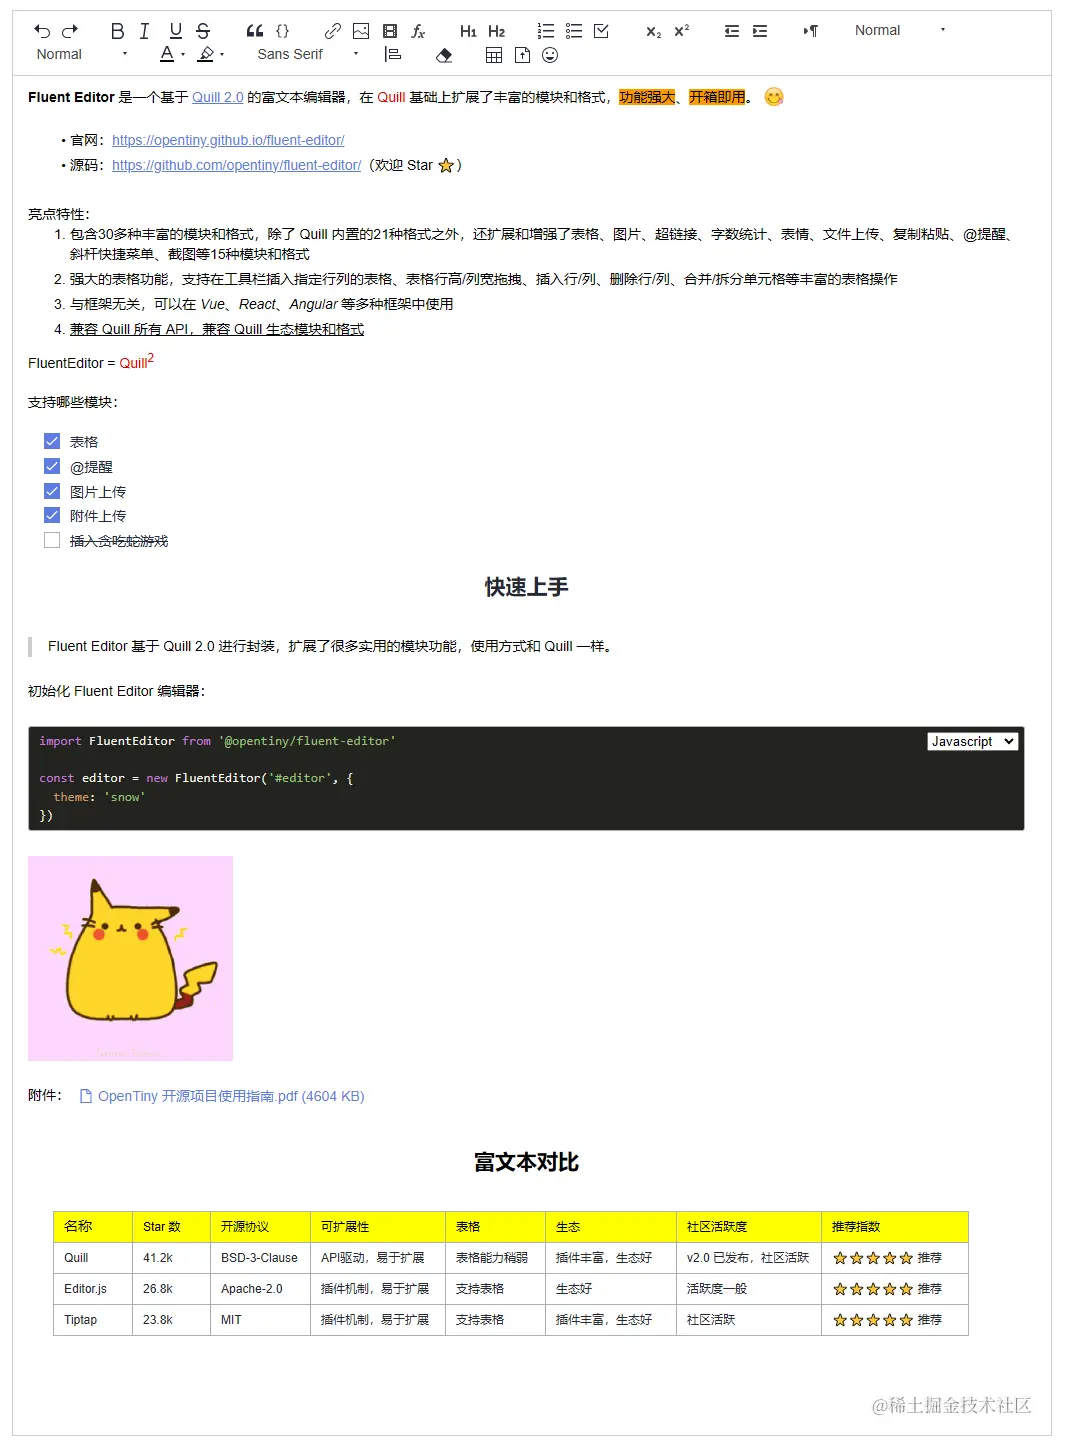
Fluent Editor:一个基于 Quill 2.0 的富文本编辑器,功能强大、开箱即用!
你好,我是 Kagol,个人公众号:前端开源星球。
今年4月份,听到 Quill 2.0 正式发布的消息,我心情非常激动,立马体验了下,并写了一篇文章。
由于越来越多用户声音希望提供富文本组件,于是我们基于 Quill 2.0 封装了一个功能更全面的 Fluent Editor 富文本。
- 官网:https://opentiny.github.io/fluent-editor/
- 源码:https://github.com/opentiny/fluent-editor/(欢迎 Star )
接下来我就带大家一起使用下 Fluent Editor,使用起来基本上和 Quill 没什么区别,只需要重点关注下增强的部分,比如表格、附件、@提醒、表情等模块。
1 快速上手
Fluent Editor 基于 Quill 2.0 进行封装,扩展了很多实用的模块功能,使用方式和 Quill 一样。
安装依赖:
npm i @opentiny/fluent-editor
编写 HTML:
<div id="editor">

  <p><strong>Fluent Editor</strong> 是一个基于 <a class="ql-normal-link" href="https://quilljs.com/" target="_blank">Quill 2.0</a> 的富文本编辑器,在 Quill 基础上扩展了丰富的模块和格式,功能强大、开箱即用。</p>

  <p><br></p>

  <p>官网:<a class="ql-normal-link" href="https://opentiny.github.io/fluent-editor/" target="_blank">https://opentiny.github.io/fluent-editor/</a></p>

  <p>源码:<a class="ql-normal-link" href="https://github.com/opentiny/fluent-editor/" target="_blank">https://github.com/opentiny/fluent-editor/</a>(欢迎 Star )</p>

</div>
引入样式:
@import '@opentiny/fluent-editor/style.css';
初始化 Fluent Editor 编辑器:
import FluentEditor from '@opentiny/fluent-editor'

const editor = new FluentEditor('#editor', {

  theme: 'snow'

})

2 配置工具栏
配置工具栏是最常见的需求。
Fluent Editor 支持 27 种内置工具栏按钮,当然也可以扩展。
除了支持 Quill 内置的 22 种工具栏之外,还支持以下工具栏:
undo撤销redo重做better-table表格file文件上传,需要启用file模块emoji插入表情,需要启用emoji-toolbar模块
Quill 支持的工具栏: https://quilljs.com/docs/modules/toolbar
可以通过 toolbar 模块配置工具栏按钮:
import FluentEditor from '@opentiny/fluent-editor'

const toolbarOptions = [

  ['undo', 'redo'],                                 // Fluent Editor added

  ['bold', 'italic', 'underline', 'strike'],        // toggled buttons

  ['blockquote', 'code-block'],

  ['link', 'image', 'video', 'formula'],

  [{ 'header': 1 }, { 'header': 2 }],               // custom button values

  [{ 'list': 'ordered'}, { 'list': 'bullet' }, { 'list': 'check' }],

  [{ 'script': 'sub'}, { 'script': 'super' }],      // superscript/subscript

  [{ 'indent': '-1'}, { 'indent': '+1' }],          // outdent/indent

  [{ 'direction': 'rtl' }],                         // text direction

  [{ 'size': ['small', false, 'large', 'huge'] }],  // custom dropdown

  [{ 'header': [1, 2, 3, 4, 5, 6, false] }],

  [{ 'color': [] }, { 'background': [] }],          // dropdown with defaults from theme

  [{ 'font': [] }],

  [{ 'align': [] }],

  ['clean'],                                         // remove formatting button

  ['better-table', 'file', 'emoji']                  // Fluent Editor added

]

const editor = new FluentEditor('#editor', {

  theme: 'snow',

  modules: {

    toolbar: toolbarOptions,

    syntax: true,          // 代码块高亮

    file: true,            // 文件上传

    'emoji-toolbar': true, // 插入表情

  }

})
除了配置内置的工具栏,也支持扩展工具栏按钮,具体扩展方式可以参考我之前写的文章:
深入浅出 Quill 系列之实践篇2:整个贪吃蛇游戏到编辑器里玩儿吧
或者参考 Quill 官方文档:https://quilljs.com/docs/modules/toolbar#handlers
3 配置内置模块
Fluent Editor 支持 11 种内置模块:
- clipboard 粘贴版
- history 操作历史
- keyboard 键盘事件
- syntax 语法高亮
- toolbar 工具栏
- uploader 文件上传
- formula 公式,依赖 katex 公式库
- better-table 表格
- mention @提醒
- emoji-toolbar 插入表情
- file 附件上传,配合 file format 一起使用,可以插入附件
通过 modules 配置模块,比如要启用一个模块,可以设置该模块为 true。
const editor = new FluentEditor('#editor', {

  theme: 'snow',

  modules: {

    toolbar: toolbarOptions,

    syntax: true,          // 启用代码块高亮模块

    file: true,            // 启用文件上传模块

    'emoji-toolbar': true, // 启用插入表情模块

  }

})
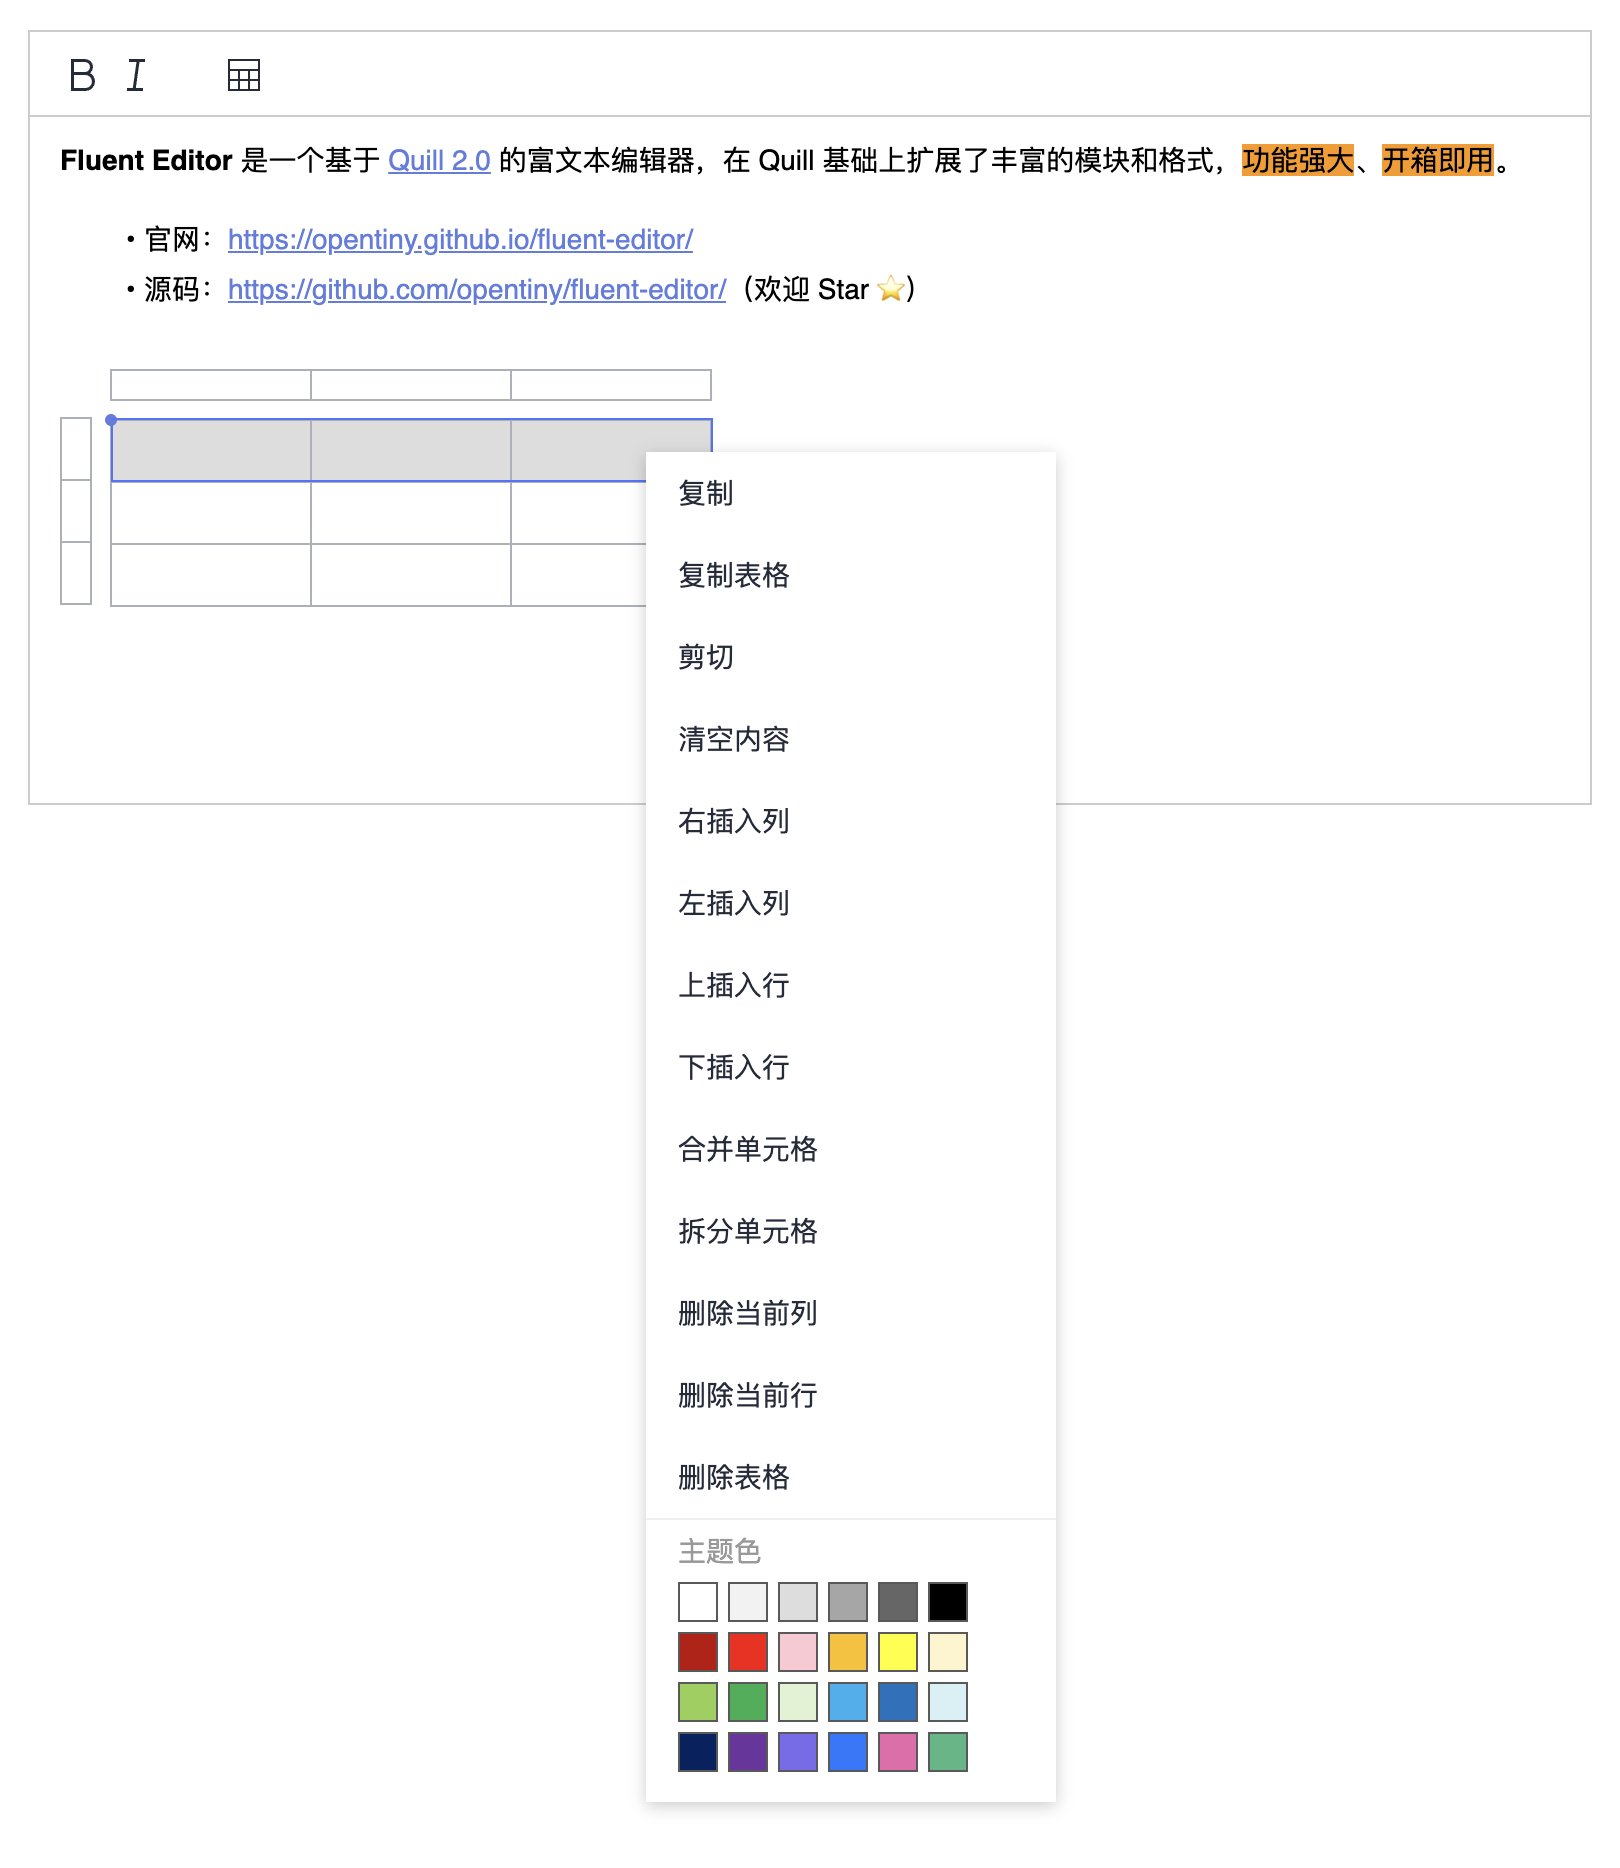
还可以传入一些配置项,定制模块的功能,比如:配置表格右键操作菜单。
const editor = new FluentEditor('#editor', {

  theme: 'snow',

  modules: {

    toolbar: toolbarOptions,

    'better-table': {

      operationMenu: {

        color: {

          text: '主题色',

          colors: [

            '#ffffff', '#f2f2f2', '#dddddd', '#a6a6a6', '#666666', '#000000',

            '#c00000', '#ff0000', '#ffc8d3', '#ffc000', '#ffff00', '#fff4cb',

            '#92d050', '#00b050', '#dff3d2', '#00b0f0', '#0070c0', '#d4f1f5',

            '#002060', '#7030a0', '#7b69ee', '#1476ff', '#ec66ab', '#42b883',

          ]

        }

      }

    }

  }

})
更多使用方式可参考 Fluent Editor 和 Quill 文档:
- Fluent Editor:https://opentiny.github.io/fluent-editor/docs/custom-toolbar
- Quill:https://quilljs.com/docs/modules
4 配置 Quill 生态模块
Quill 是一个模块化的富文本,拥有很多外部生态模块,Fluent Editor 基于 Quill,和 Quill 拥有一样的模块化能力,我们从以下 Quill 模块列表中选择一个 Markdown 快捷键的模块:quill-markdown-shortcuts,配置到我们的 Fluent Editor 富文本中。
https://github.com/quilljs/awesome-quill
首先需要安装 quill-markdown-shortcuts。
npm i quill-markdown-shortcuts
然后注册这个模块:
import FluentEditor from '@opentiny/fluent-editor'

// 引入和注册

import MarkdownShortcuts from 'quill-markdown-shortcuts'

FluentEditor.register('modules/markdownShortcuts', MarkdownShortcuts)
配置到 modules 中即可:
new FluentEditor('#editor', {

  theme: 'snow',

  modules: {

    markdownShortcuts: {} // 启动 Markdown 快捷键模块

  }

})
这时我们在富文本编辑器中输入 Markdown 语法的快捷键,比如:#,按空格键,会自动变成一级标题的格式。
效果如下:
除了配置现有模块之外,还支持扩展新模块,具体可以参考我之前写的文章:
深入浅出 Quill 系列之原理篇1:现代富文本编辑器 Quill 的模块化机制
5 在多种前端框架中使用
Fluent Editor 是一个框架无关的富文本编辑器,可以在任意前端框架中使用。
比如在 Vue 中使用:
App.vue
<script setup lang="ts">

import { onMounted } from 'vue'

import FluentEditor from '@opentiny/fluent-editor'

onMounted(() => {

  new FluentEditor('#editor', {

    theme: 'snow'

  })

})

</script>

<template>

  <div id="editor"></div>

</template>
在 React 中使用:
App.tsx
import { useEffect } from 'react'

import FluentEditor from '@opentiny/fluent-editor'

import '@opentiny/fluent-editor/style.css'

function App() {

  useEffect(() => {

    new FluentEditor('#editor', {

      theme: 'snow'

    })

  })

  return (

    <div id="editor"></div>

  )

}

export default App
6 总结
本文主要从以下几个部分给大家进行分享。
- 先是带大家快速上手使用 Fluent Editor 富文本
- 然后是介绍开发中最常见的配置工具栏,共内置 27 种实用的工具栏按钮
- 再介绍 Fluent Editor 的 11 个内置模块,并重点介绍表格模块的配置
- 由于 Fluent Editor 是兼容 Quill 生态的,以 Markdown 快捷键的模块:
quill-markdown-shortcuts为例,介绍如何配置 Quill 生态模块 - 最后介绍了如何在 Vue / React 框架中使用 Fluent Editor
更多用法请参考 Fluent Editor 官网:https://opentiny.github.io/fluent-editor/
由于 Fluent Editor 就是基于 Quill 进行封装的,其实掌握 Quill 基本上就掌握了 Fluent Editor,欢迎大家关注我之前写的《深入浅出 Quill》系列文章:
https://juejin.cn/column/7325707131678769152
联系我们
GitHub:https://github.com/opentiny/tiny-vue(欢迎 Star )
官网:https://opentiny.design/tiny-vue
B站:https://space.bilibili.com/15284299
个人博客:https://kagol.github.io/blogs
小助手微信:opentiny-official
公众号:OpenTiny
Fluent Editor:一个基于 Quill 2.0 的富文本编辑器,功能强大、开箱即用!的更多相关文章
- vue2.0 实现富文本编辑器功能
前端富文本编译器使用总结: UEditor:百度前端的开源项目,功能强大,基于 jQuery,但已经没有再维护,而且限定了后端代码,修改起来比较费劲 bootstrap-wysiwyg:微型,易用,小 ...
- 基于 React-draft-wysiwyg 实现的 react 富文本编辑器组件 开箱即用
工作中遇到了一个需要做图文详情 的富文本编辑的需求, 于是基于 React-draft-wysiwyg 实现了一个 纯组件, 目前支持 常规文本输入 外部链接图片 以及本地上传图片, 由于是纯组件, ...
- 现代富文本编辑器Quill的模块化机制
DevUI是一支兼具设计视角和工程视角的团队,服务于华为云DevCloud平台和华为内部数个中后台系统,服务于设计师和前端工程师.官方网站:devui.designNg组件库:ng-devui(欢迎S ...
- 富文本编辑器Quill(一)简单介绍
Quill是一个很流行的富文本编辑器,github上star大约21k: github:https://github.com/quilljs/quill/ 官网: https://quilljs.co ...
- Asp.Net Core 2.0 项目实战(2)NCMVC一个基于Net Core2.0搭建的角色权限管理开发框架
Asp.Net Core 2.0 项目实战(1) NCMVC开源下载了 Asp.Net Core 2.0 项目实战(2)NCMVC一个基于Net Core2.0搭建的角色权限管理开发框架 Asp.Ne ...
- 一个基于Net Core3.0的WPF框架Hello World实例
目录 一个基于Net Core3.0的WPF框架Hello World实例 1.创建WPF解决方案 1.1 创建Net Core版本的WPF工程 1.2 指定项目名称,路径,解决方案名称 2. 依赖库 ...
- 基于ABP做一个简单的系统——实战篇:4.基于富文本编辑器,Razor模板引擎生成内容并导出Word 填坑记录
起因 需求是这样的,有一种协议需要生成,协议的模板是可配置的,在生成过程中,模板中的内容可以根据约定的标记进行替换(就像mvc的razor模板一样).生成后的内容还需要导出成word或pdf. 常见的 ...
- 现代富文本编辑器Quill的内容渲染机制
DevUI是一支兼具设计视角和工程视角的团队,服务于华为云DevCloud平台和华为内部数个中后台系统,服务于设计师和前端工程师.官方网站:devui.designNg组件库:ng-devui(欢迎S ...
- Quill – 可以灵活自定义的开源的富文本编辑器
Quill 的建立是为了解决现有的所见即所得(WYSIWYG)的编辑器本身就是所见即所得(指不能再扩张)的问题.如果编辑器不正是你想要的方式,这是很难或不可能对其进行自定义以满足您的需求. Quill ...
- [译] 通过 contentEditable 属性创建一个所见即所得的编辑器(富文本编辑器)
译者注 这只是一篇入门教程,介绍了一些基础知识,仅供参考,切不可因此觉得富文本编辑器很简单. 创建富文本编辑器是一个非常复杂的工程,需要考虑到方方面面,也有很多坑(请参考原文第一条评论). 为免误导大 ...
随机推荐
- 多Github账号指定ssh-key提交代码
问题 目前github中代码提交只能通过ssh方式. 每个github账号只能添加一个专用的ssh-key. 如果同时有多个Github账号在用的话就必须给每个账号绑定不同的ssh-key. 方法一: ...
- Linux gpio子系统:gpio_direction_output 与 gpio_set_value的区别
Linux gpio子系统:gpio_direction_output 与 gpio_set_value的区别 背景 最近改驱动程序,看到驱动代码中既有gpio_direction_output也有g ...
- 在win10上安装MTK驱动(附驱动下载链接)
参考:https://www.cnblogs.com/keepgoing707/p/4926171.html 背景 在调试MTK平台MT67XX的时候,发现安装preloader驱动装不上. 第三方i ...
- 3568F-Linux系统启动卡制作及系统固化
- 嵌入式测试手册——基于NXP iMX6ULL开发板(2)
基于测试板卡:创龙科技TLIMX6U-EVM是一款基于NXP i.MX 6ULL的ARM Cortex-A7高性能低功耗处理器设计的评估板,由核心板和评估底板组成.核心板经过专业的PCB Layout ...
- 自己写一个 NODE/ATTR 的结构
## python 3.8 以上 from typing import Dict, List, TypeVar, Tuple, Generic, get_args import json T = Ty ...
- 【ClickHouse】0:clickhouse学习3之时间日期函数
官方文档: https://clickhouse.tech/docs/zh/sql-reference/functions/date-time-functions/ 常用的clickhouse时间函数 ...
- 说说你对 SPA 单页面的理解,它的优缺点分别是什么?
SPA( single-page application )仅在 Web 页面初始化时加载相应的 HTML.JavaScript 和 CSS. 一旦页> 面加载完成,SPA 不会因为用户的操作而 ...
- Linux 鉴定故障
导读 进入linux,输入root账户,密码输入是正确的,提示"鉴定故障",刚开始以为是系统挂了,后来百度说,需要重置root密码,具体步骤如下. 重置root密码 重启Linux ...
- 面试题-python 什么是闭包(closure)?
前言 前面学了装饰器,那么闭包和装饰器有什么区别呢?闭包传递的是变量,而装饰器传递的是函数对象,只是传的参数内容不一样,闭包的概念包含了装饰器,可以说装饰器是闭包的一种,它只是传递函数对象的闭包. 先 ...