Tkinter 之Button标签
一、参数说明
| 语法 | 作用 |
|---|---|
| Button(root,text='xxxx') | 按钮图标显示内容 |
| Button(root,text='xxxx',height=2) | 组件的高度(所占行数) |
| Button(root,text='xxxx',width=20) | 组件的宽度(所占字符个数) |
| Button(text='xxxx',fg='blue') | 按钮字体颜色 |
| Button(root,text='xxxx',activebackground='grey') | 按钮按下时的前景字体颜色 |
| Button(root,text=‘xxxxx’,justify=tk.LEFT) | 多行文本的对齐方式 |
| Button(root,text='xxxx',pady=10) | 文本上下两侧的空格数 |
| Button(root,text='xxxx',padx=10) | 文本左右两侧的空格数(默认为1) |
| Button(root,text='xxxx',command=函数) | 按钮触发执行的命令(函数) |
| Button(root,text='xxxx',state=tk.DISABLED) | 按钮禁止点击 |
| Button(root,text='xxxx',underline=1) | 文字下划线(默认为-1) |
| Button(root,text='xxxx',author=tk.CENTER) | 文字位置 |
| Button(root,text='xxxx',textvariable=var) | 动态设置文本 |
二、代码示例
import tkinter as tk

window = tk.Tk()

def main():

    global window

    # 设置主窗体大小

    winWidth = 600

    winHeight = 400

    # 获取屏幕分辨率

    screenWidth = window.winfo_screenwidth()

    screenHeight = window.winfo_screenheight()

    # 计算主窗口在屏幕上的坐标

    x = int((screenWidth - winWidth)/ 2)

    y = int((screenHeight - winHeight) / 2)

    # 设置主窗口标题

    window.title("Button参数说明")

    # 设置主窗口大小

    window.geometry("%sx%s+%s+%s" % (winWidth, winHeight, x, y))

    # 设置窗口宽高固定

    window.resizable(0,0)

    # 设置窗口图标

    window.iconbitmap("./image/icon.ico")

    """ button参数列表

        STANDARD OPTIONS

            activebackground, activeforeground, anchor,

            background, bitmap, borderwidth, cursor,

            disabledforeground, font, foreground

            highlightbackground, highlightcolor,

            highlightthickness, image, justify,

            padx, pady, relief, repeatdelay,

            repeatinterval, takefocus, text,

            textvariable, underline, wraplength

        WIDGET-SPECIFIC OPTIONS

            command, compound, default, height,

            overrelief, state, width

        """

    var = tk.StringVar()

    var.set("提交")

    tk.Button(window, text="提交", width=30, pady=5,fg="#f00", bg="#bbb",

              borderwidth=0, activeforeground="yellow", activebackground="#666"

              ,underline=-1, command=click, textvariable=var).pack()

    window.mainloop()

def click():

    print("click")

if __name__ == '__main__':

    main()
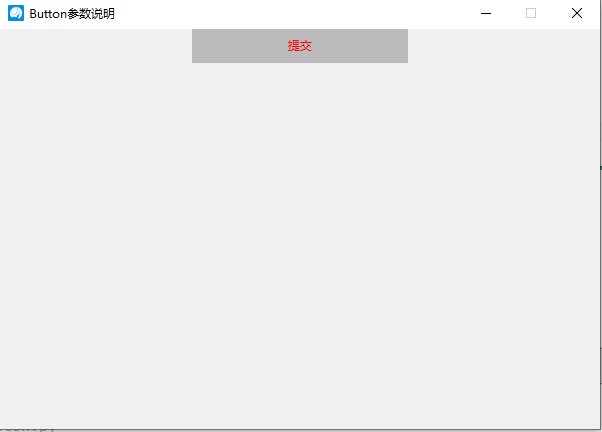
三、效果图
Tkinter 之Button标签的更多相关文章
- class1and2_tkinter之 Label & Button 标签和按钮
''' # ------------------------------------------------------------ # # 1. 使用tkinter设置一个标签 # # # 设计tk ...
- button标签和input button
一.定义和用法 <button> 标签定义的是一个按钮. 在 button 元素内部,可以放置文本或图像.这是<button>与使用 input 元素创建的按钮的不同之处. 二 ...
- <button> 标签 id 与 function 重复时发生的问题
今天遇到一种情况,在调用js自定义方法的时候,总是提示“import:660 Uncaught TypeError: ... is not a function”. 仔细检查了代码,并没有问题.甚至把 ...
- 理解button标签的默认行为
button标签的作用和它的名字一样,在绝大多数场合当做按钮来使用. 很多人在使用button按钮的时候出现过这样或者那样的问题,比如:自动提交表单.一次提交表单多次submit行为,有的浏览器下点击 ...
- HTML <button>标签
如果<button>标签在<form>中不加type="button",那么默认含义是"submit". <button>标 ...
- Button标签自动刷新问题
在form表单中,button标签在IE浏览器 type类型默认是button ,而在其他浏览器默认是submit. 解决方法1: 设置类型type="button" <bu ...
- CSS消除button标签的默认样式
button{ /*消除button的默认样式*/ /*这种写法是对所有的button标签同时生效*/ margin: 0px; padding: 0px; /*自定义边框*/ border: 0px ...
- 前端 html button标签
就是一个按钮标签 <!DOCTYPE html> <html> <head> <meta charset="utf-8"> < ...
- 使用<button></button>标签
使用<button></button>标签一定要记住给它设置type,因为它默认的type=“submit”,会提交表单,设置如下 <button type=" ...
随机推荐
- 测试人员必须掌握的linu常用命令
有些公司需要测试人员部署程序包,通过工具xshell. 现在我将总结下工作需要用到的最多的命令 ls 显示文件或目录 pwd ...
- centos7上使用git clone出现问题
centos 7 git clone时出现不支持协议版本的问题 unable to access 'https://github.com/baloonwj/TeamTalk.git/': Peer ...
- bootstrap环境搭建
Bootstrap 是stwitter公司的两名前端设计师设计的基于html css javascript的超强的前端框架. Bootstrap 是一移动设备为优先,pc机,平板,手机皆适用的框架. ...
- 虹软人脸识别 - Android Camera实时人脸追踪画框适配
在使用虹软人脸识别Android SDK的过程中 ,预览时一般都需要绘制人脸框,但是和PC平台相机应用不同,在Android平台相机进行应用开发还需要考虑前后置相机切换.设备横竖屏切换等情况,因此在人 ...
- Vue指令之`v-for`和`key`属性
2.2.0+ 的版本里,**当在组件中使用** v-for 时,key 现在是必须的. 当 Vue.js 用 v-for 正在更新已渲染过的元素列表时,它默认用 “**就地复用**” 策略.如果数据项 ...
- Django的安装和使用
一.安装 ① 命令行安装 # 命令提示符下 # 方式一 pip install django==1.11.16 -i https://pypi.tuna.tsinghua.edu.cn/simple ...
- 创建yum私有库
简述 在Linux系统中安装软件的方法有三种,分别是rpm软件包安装.yum源安装与源代码编译安装,在用rpm软件包安装软件时会经常出现依赖性问题,导致安装繁琐,用源代码编译安装就更不用说了,相信 ...
- 【深度学习】Precision 和 Recall 评价指标理解
1. 四种情况 Precision精确率, Recall召回率,是二分类问题常用的评价指标.混淆矩阵如下: 预测结果为阳性 Positive 预测结果为假阳性 Negative 预测结果是真实的 Tr ...
- Java关键字—final
final—不可变的,用来说明最终属性,表明一个类不能派生出子类,或者成员方法不能被覆盖,或者成员域的值不能被改变. 修饰范围: 1.修饰类,被final关键字修饰的类无法被继承: 2.修饰方法,被f ...
- java项目中注解使用——整理
文章:@Mapper注解的使用 地址:https://blog.csdn.net/weixin_39666581/article/details/81057385 @Mapper注解的的作用 1:为了 ...