nginx 配置 https 并强制跳转(lnmp一键安装包)
一、安装包
安装大家按照官方说的安装即可。
./install.sh lnmpa
二、配置
为域名 bbs.wzlinux.com 配置虚拟主机
[root@test ~]# lnmp vhost add

+-------------------------------------------+

|    Manager for LNMP, Written by Licess    |

+-------------------------------------------+

|              https://lnmp.org             |

+-------------------------------------------+

Please enter domain(example: www.lnmp.org): bbs.wzlinux.com

 Your domain: bbs.wzlinux.com

Enter more domain name(example: lnmp.org *.lnmp.org):

Please enter the directory for the domain: bbs.wzlinux.com

Default directory: /home/wwwroot/bbs.wzlinux.com:

Virtual Host Directory: /home/wwwroot/bbs.wzlinux.com

Allow access log? (y/n) y

Enter access log filename(Default:bbs.wzlinux.com.log):

You access log filename: bbs.wzlinux.com.log

Please enter Administrator Email Address: wangzan18@126.com

Server Administrator Email:wangzan18@126.com

Create database and MySQL user with same name (y/n) n

Add SSL Certificate (y/n) y

1: Use your own SSL Certificate and Key

2: Use Let's Encrypt to create SSL Certificate and Key

Enter 1 or 2: 2

It will be processed automatically.

Press any key to start create virtul host...

Create Virtul Host directory......

set permissions of Virtual Host directory......

Test Nginx configure file......

nginx: the configuration file /usr/local/nginx/conf/nginx.conf syntax is ok

nginx: configuration file /usr/local/nginx/conf/nginx.conf test is successful

Reload Nginx......

Test Apache configure file...

test apache configure... Syntax OK

 done

Restart Apache...

graceful apache...  done

--2019-05-08 16:15:37--  https://soft.vpser.net/lib/acme.sh/latest.tar.gz

Resolving soft.vpser.net (soft.vpser.net)... 50.93.201.152, 2600:3c01::f03c:91ff:fe92:1a06

Connecting to soft.vpser.net (soft.vpser.net)|50.93.201.152|:443... connected.

HTTP request sent, awaiting response... 200 OK

Length: 128963 (126K) [application/octet-stream]

Saving to: ‘latest.tar.gz’

100%[==========================================================================================================================================================================================>] 128,963      296KB/s   in 0.4s

2019-05-08 16:15:39 (296 KB/s) - ‘latest.tar.gz’ saved [128963/128963]

[Wed May  8 16:15:39 CST 2019] It is recommended to install socat first.

[Wed May  8 16:15:39 CST 2019] We use socat for standalone server if you use standalone mode.

[Wed May  8 16:15:39 CST 2019] If you don't use standalone mode, just ignore this warning.

[Wed May  8 16:15:39 CST 2019] Installing to /usr/local/acme.sh

[Wed May  8 16:15:39 CST 2019] Installed to /usr/local/acme.sh/acme.sh

[Wed May  8 16:15:39 CST 2019] Installing alias to '/root/.bashrc'

[Wed May  8 16:15:39 CST 2019] OK, Close and reopen your terminal to start using acme.sh

[Wed May  8 16:15:39 CST 2019] Installing alias to '/root/.cshrc'

[Wed May  8 16:15:39 CST 2019] Installing alias to '/root/.tcshrc'

[Wed May  8 16:15:39 CST 2019] Installing cron job

no crontab for root

no crontab for root

[Wed May  8 16:15:39 CST 2019] Good, bash is found, so change the shebang to use bash as preferred.

[Wed May  8 16:15:39 CST 2019] OK

Redirecting to /bin/systemctl restart crond.service

Note: Forwarding request to 'systemctl enable crond.service'.

Starting create SSL Certificate use Let's Encrypt...

[Wed May  8 16:15:41 CST 2019] Registering account

[Wed May  8 16:15:43 CST 2019] Registered

[Wed May  8 16:15:43 CST 2019] ACCOUNT_THUMBPRINT='-cKHSTDQhjSIjWvO8OFcqx4cURrIDG88TaHlE_OkRDM'

[Wed May  8 16:15:43 CST 2019] Creating domain key

[Wed May  8 16:15:43 CST 2019] The domain key is here: /usr/local/nginx/conf/ssl/bbs.wzlinux.com/bbs.wzlinux.com.key

[Wed May  8 16:15:43 CST 2019] Single domain='bbs.wzlinux.com'

[Wed May  8 16:15:43 CST 2019] Getting domain auth token for each domain

[Wed May  8 16:15:44 CST 2019] Getting webroot for domain='bbs.wzlinux.com'

[Wed May  8 16:15:45 CST 2019] Verifying: bbs.wzlinux.com

[Wed May  8 16:15:48 CST 2019] Success

[Wed May  8 16:15:48 CST 2019] Verify finished, start to sign.

[Wed May  8 16:15:48 CST 2019] Lets finalize the order, Le_OrderFinalize: https://acme-v02.api.letsencrypt.org/acme/finalize/56638729/438522172

[Wed May  8 16:15:50 CST 2019] Download cert, Le_LinkCert: https://acme-v02.api.letsencrypt.org/acme/cert/046b73070d79dd7f8275ef2ce8235ddab879

[Wed May  8 16:15:50 CST 2019] Cert success.

[Wed May  8 16:15:50 CST 2019] Your cert is in  /usr/local/nginx/conf/ssl/bbs.wzlinux.com/bbs.wzlinux.com.cer

[Wed May  8 16:15:50 CST 2019] Your cert key is in  /usr/local/nginx/conf/ssl/bbs.wzlinux.com/bbs.wzlinux.com.key

[Wed May  8 16:15:50 CST 2019] The intermediate CA cert is in  /usr/local/nginx/conf/ssl/bbs.wzlinux.com/ca.cer

[Wed May  8 16:15:50 CST 2019] And the full chain certs is there:  /usr/local/nginx/conf/ssl/bbs.wzlinux.com/fullchain.cer

[Wed May  8 16:15:51 CST 2019] Run reload cmd: /etc/init.d/nginx reload

Reload service nginx...  done

[Wed May  8 16:15:51 CST 2019] Reload success

Let's Encrypt SSL Certificate create successfully.

Create dhparam.pem...

Generating DH parameters, 2048 bit long safe prime, generator 2

This is going to take a long time

.........................................................................................................................................................................................................................................+....................................................................................+..............................................................................+..............................................................................+...............................................................................................................................+.....+.............................+...............................................................................................................................+......+.......................................+...........................................................................................................+.....................................................................................................................................................................................................................................................+.................................................................+.........................................................................+...................................................+....................................................................+......................................................................................+......................+.........+...................................................................+...................................+................................................................................................+...............................................................+......................................................................+...............................................................................................................................................................................................................................................................................................................................................................................................................................................................................................................+.........+.....................+....................++*++*

Test Nginx configure file......

nginx: the configuration file /usr/local/nginx/conf/nginx.conf syntax is ok

nginx: configuration file /usr/local/nginx/conf/nginx.conf test is successful

Reload Nginx......

================================================

Virtualhost infomation:

Your domain: bbs.wzlinux.com

Home Directory: /home/wwwroot/bbs.wzlinux.com

Enable log: yes

Create database: no

Create ftp account: no

Enable SSL: yes

  =>Let's Encrypt

================================================
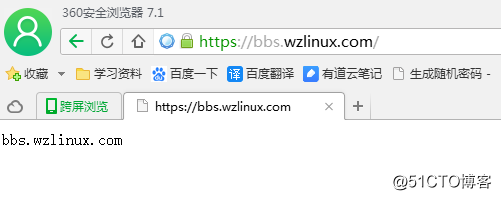
添加好测试页面,就可以了,我们发现也是正常的。
三、查看配置文件
首先查看 Nginx 配置文件 /usr/local/nginx/conf/vhost/bbs.wzlinux.com.conf,我们看到 http 和 https 都是可以访问的。
server

    {

        listen 80;

        #listen [::]:80;

        server_name bbs.wzlinux.com ;

        index index.html index.htm index.php default.html default.htm default.php;

        root  /home/wwwroot/bbs.wzlinux.com;

        #error_page   404   /404.html;

        # Deny access to PHP files in specific directory

        #location ~ /(wp-content|uploads|wp-includes|images)/.*\.php$ { deny all; }

        include proxy-pass-php.conf;

        location ~ .*\.(gif|jpg|jpeg|png|bmp|swf)$

        {

            expires      30d;

        }

        location ~ .*\.(js|css)?$

        {

            expires      12h;

        }

        location ~ /.well-known {

            allow all;

        }

        location ~ /\.

        {

            deny all;

        }

        access_log  /home/wwwlogs/bbs.wzlinux.com.log;

    }

server

    {

        listen 443 ssl http2;

        #listen [::]:443 ssl http2;

        server_name bbs.wzlinux.com ;

        index index.html index.htm index.php default.html default.htm default.php;

        root  /home/wwwroot/bbs.wzlinux.com;

        ssl on;

        ssl_certificate /usr/local/nginx/conf/ssl/bbs.wzlinux.com/fullchain.cer;

        ssl_certificate_key /usr/local/nginx/conf/ssl/bbs.wzlinux.com/bbs.wzlinux.com.key;

        ssl_session_timeout 5m;

        ssl_protocols TLSv1 TLSv1.1 TLSv1.2;

        ssl_prefer_server_ciphers on;

        ssl_ciphers "EECDH+CHACHA20:EECDH+CHACHA20-draft:EECDH+AES128:RSA+AES128:EECDH+AES256:RSA+AES256:EECDH+3DES:RSA+3DES:!MD5";

        ssl_session_cache builtin:1000 shared:SSL:10m;

        # openssl dhparam -out /usr/local/nginx/conf/ssl/dhparam.pem 2048

        ssl_dhparam /usr/local/nginx/conf/ssl/dhparam.pem;

        #error_page   404   /404.html;

        # Deny access to PHP files in specific directory

        #location ~ /(wp-content|uploads|wp-includes|images)/.*\.php$ { deny all; }

        include proxy-pass-php.conf;

        location ~ .*\.(gif|jpg|jpeg|png|bmp|swf)$

        {

            expires      30d;

        }

        location ~ .*\.(js|css)?$

        {

            expires      12h;

        }

        location ~ /.well-known {

            allow all;

        }

        location ~ /\.

        {

            deny all;

        }

        access_log  /home/wwwlogs/bbs.wzlinux.com.log;

    }
3.1、设定强制跳转 https
方法1:可以在server 80 里面添加一个一个重定向。
rewrite ^(.*)$ https://$host$1 permanent;
或者
server_name bbs.wzlinux.com;

rewrite ^(.*)$  https://$server_name$1 permanent;
或者
listen 80;

server_name bbs.wzlinux.com bbs1.wzlinux.com bbs2.wzlinux.com;

if ($host != 'bbs.wzlinux.com') {

      rewrite ^/(.*)$ https://bbs.wzlinux.com/$1 permanent;

	}
或者
if ($http_x_forwarded_proto != "https")

        {

            rewrite  ^/(.*)$  https://$host/$1 permanent;

        }
或者
if ($server_port !~ 443){

        rewrite ^(/.*)$ https://$host$1 permanent;

    }
或者使用 return
if ($server_port = 80 ) {

                return 301 https://$host$request_uri;

        }
或者
return 301 https://$host$request_uri;
3.2 Rewrite 常用全局变量举例
变量	说明

$args	存放了请求url中的请求指令。比如http://www.myweb.name/server/source?arg1=value1&arg2=value2中的arg1=value1&arg2=value2

$content_length	存放请求头中的Content-length字段

$content_type	存放了请求头中的Content-type字段

$document_root	存放了针对当前请求的根路径

$document_uri	请求中的uri,不包含请求指令 ,比如比如http://www.myweb.name/server/source?arg1=value1&arg2=value2中的/server/source

$host	存放了请求url中的主机字段,比如比如http://www.myweb.name/server/source?arg1=value1&arg2=value2中的www.myweb.name。如果请求中的主机部分字段不可用或者为空,则存放nginx配置中该server块中server_name指令的配置值

$http_user_agent	存放客户端的代理

$http_cookie	cookie

$limit_rate	nginx配置中limit_rate指令的配置值

$remote_addr	客户端的地址

$remote_port	客户端与服务器端建立连接的端口号

$remote_user	变量中存放了客户端的用户名

$request_body_file	存放了发给后端服务器的本地文件资源的名称

$request_method	存放了客户端的请求方式,如get,post等

$request_filename	存放当前请求的资源文件的路径名

$requset_uri	当前请求的uri,并且带有指令

$query_string	$args含义相同

$scheme	客户端请求使用的协议,如http,https,ftp等

$server_protocol	客户端请求协议的版本,如”HTTP/1.0”,”HTTP/1.1”

$server_addr	服务器的地址

$server_name	客户端请求到达的服务器的名称

$server_port	客户端请求到达的服务器的端口号

$uri	同 $document_uri
nginx 配置 https 并强制跳转(lnmp一键安装包)的更多相关文章
- lnmp一键安装包配置laravel项目
laravel一键安装包:https://lnmp.org/install.html 在server中加入 location / { try_files $uri $uri/ /index.php?$ ...
- LNMP一键安装包如何重装Nginx
LNMP一键安装包安装好后,相应的Mysql,Nginx及PHP都会安装配置完成. 由于某些特殊情况的需要,如何更换Nginx的版本呢? nginx升级脚本可以完成. 1. 手动编译方法:/usr/l ...
- lnmp 一键安装包
系统需求: CentOS/RHEL/Fedora/Debian/Ubuntu/Raspbian Linux系统 需要5GB以上硬盘剩余空间 需要128MB以上内存(如果为128MB的小内存VPS,Xe ...
- 安装 - LNMP一键安装包
https://lnmp.org/ 系统需求: CentOS/RHEL/Fedora/Debian/Ubuntu/Raspbian Linux系统 需要5GB以上硬盘剩余空间 需要128MB以上内存( ...
- LNMP一键安装包+Thinkphp搭建基于pathinfo模式的路由
LNMP一键安装包是一个用Linux Shell编写的可以为CentOS/RadHat/Fedora.Debian/Ubuntu/Raspbian/Deepin VPS或独立主机安装LNMP(Ngin ...
- 安装lnmp一键安装包(转)
系统需求: CentOS/RHEL/Fedora/Debian/Ubuntu/Raspbian Linux系统 需要3GB以上硬盘剩余空间 128M以上内存,Xen的需要有SWAP,OpenVZ的另外 ...
- CentOS下Web服务器环境搭建LNMP一键安装包
CentOS下Web服务器环境搭建LNMP一键安装包 时间:2014-09-04 00:50来源:osyunwei.com 作者:osyunwei.com 举报 点击:3797次 最新版本:lnmp- ...
- LNMP一键安装包 V1.1
通告
LNMP一键安装包 是一个用Linux Shell编写的能够为CentOS/RadHat.Debian/Ubuntu VPS(VDS)或独立主机安装LNMP(Nginx.MySQL/MariaDB.P ...
- Linode和DigitalOcean lnmp一键安装包哪个好?
Linode和DigitalOcean都是非常棒的VPS厂商,512MB内存的VPS每月低到5美元,搭建wordpress网站,非常方便,甚至可以多人共用,服务器足够强悍,跑几个wordpress博客 ...
随机推荐
- Linux系统进程的知识总结,进程与线程之间的纠葛...
来源:嵌入式ARM 当一个程序开始执行后,在开始执行到执行完毕退出这段时间内,它在内存中的部分就叫称作一个进程. Linux 是一个多任务的操作系统,也就是说,在同一时间内,可以有多个进程同时执行.我 ...
- 使用Struts2+Hibernate开发学生信息管理功能1
第一章:Struts2与Hibernate整合 1.课程简介 2.界面原型演示 3.Struts2与Hibernate整合 4.创建实体类 5.生成实体映射文件 6.生成表结构 1.课程简介 Stru ...
- easyui-filebox上传文件或图片时选择相同文件无法触发change事件的问题
其实很简单,当选择完一个文件之后,会将文件名存放在input中的value值中,当下一次onChange之后,比对玩发现,value值没有发生变化,所以不能触发. 所以,只需要下次将value值清空就 ...
- 尤娜博客系统 Una
站长资讯平台:Una [‘尤娜’] 只是一个项目代号,没有特殊含义.尤娜是站在巨人的肩膀上开发完成的博客系统,旨在为程序员提供一个极简的内容创作管理平台,尤娜100%开放源代码,如果您对她感兴趣,Fo ...
- GO111MODULE的设置(及GOPROXY)
环境:win7 go1.13.1 早听说GO111MODULE大名,今天才测试成功,步骤如下: 因为我的Go version >= 1.13,直接用go env -w 设置(注意大小写) go ...
- OSI七层协议模型
OSI七层模型详解 TCP/IP协议 链接:https://www.nowcoder.com/questionTerminal/b2ccf60bbb13483b94b4bffe200b4f3c 来源: ...
- Codeforces 1175E Minimal Segment Cover
题意: 有\(n\)条线段,区间为\([l_i, r_i]\),每次询问\([x_i, y_i]\),问要被覆盖最少要用多少条线段. 思路: \(f[i][j]\)表示以\(i\)为左端点,用了\(2 ...
- UOJ269. 【清华集训2016】如何优雅地求和 [生成函数]
传送门 思路 神仙题.jpg 脑子一抽,想把\(f(x)\)表示成下降幂的形式,也就是 \[ f(x)=\sum_{i=0}^m f_ix_{(i)}\\ x_{(i)}=\prod_{k=0}^{i ...
- wqy的C题
wqy的C题 毒瘤! 题意: 你有一张 $ n $ 个点 $ m $ 条边的无向图. 你想在这张图上添加 $ n $ 条有向边,每一条有向边连接两个点 $ u,v $ ,你需要保证 $ u,v $ 在 ...
- DQL:查询表中数据
1. 基础查询 (1) 查询整表 SELECT * FROM 表名; -- 不推荐使用"*",不方便阅读 (2) 选择性查询 SELECT 列名,列名,列名 FROM 表名; (3 ...