04 DRF内容回顾、用户登录 (含跨域) (vuex vue-cookie)、用户认证 (Auth认证)(拦截器)
1、内容回顾


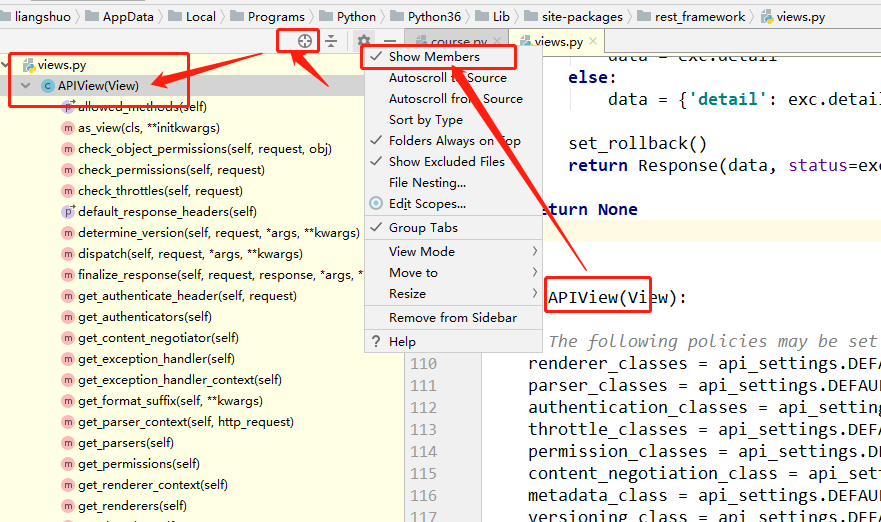
1、视图中常见的继承

2、频率访问控制源码

3、序列化,反序列化
2、初始化代码
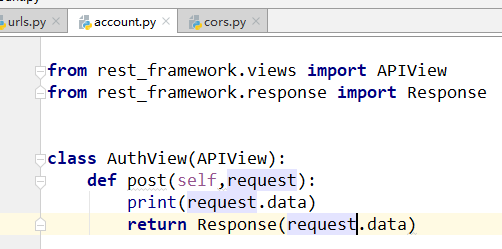
1、后端代码:AuthView
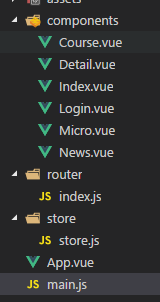
(1)目录结构
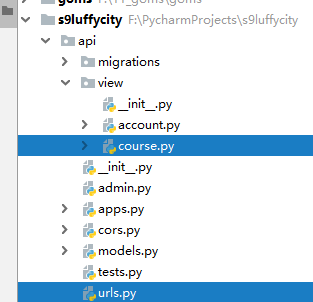
(2)urls

(3)view
(4)注释掉cors

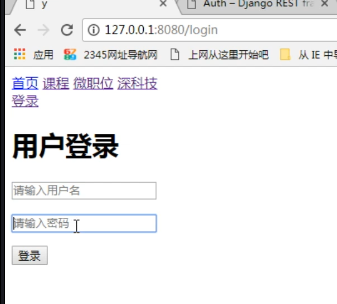
(5)效果

2、前端代码:Login组件
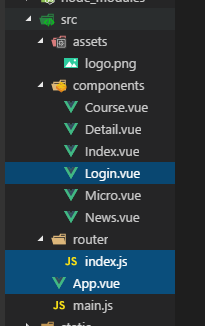
(1)App.vue 主组件

(2)router/index.js 路由

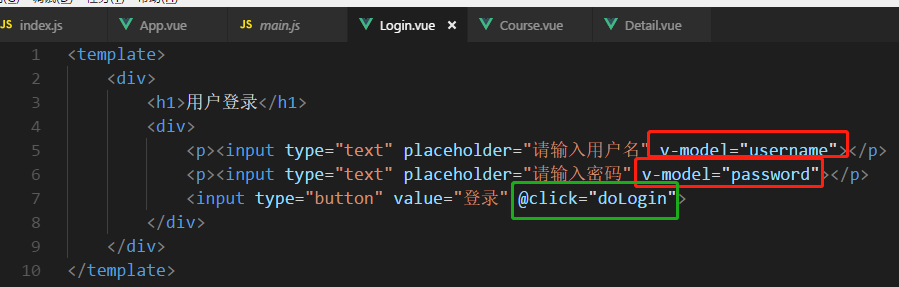
(3)Login.vue组件
v-model监听数据
@click 方法
ajax请求

<template>

    <div>

        <h1>用户登录</h1>

        <div>

            <p><input type="text" placeholder="请输入用户名" v-model="username"></p>

            <p><input type="text" placeholder="请输入密码" v-model="password"></p>

            <input type="button" value="登录" @click="doLogin">

        </div>

    </div>

</template>

<script>

export default {

    name:"login",

    data(){

        return {

            username:'',

            password:'',

        }

    },

    methods:{

        doLogin(){

            // alert(123);

            // alert(this.username);

            // alert(this.password);

            this.$axios.request({

                url:'http://127.0.0.1:8001/api/v1/auth/',

                method:'POST',

                data:{

                    user:this.username,

                    pwd:this.password,

                },

                headers:{

                    'Content-Type':'application/json'

                }

            }).then(function(arg){

                console.log(arg)

            }).catch(function(arg){

                console.log('发生了错误')

            })

        }

    }

}

</script>

<style  scoped>

</style>
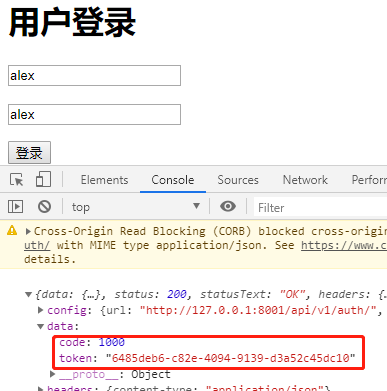
3、用户登录(含跨域处理)
wupeiqi : https://www.cnblogs.com/wupeiqi/article/5703697.html
1、复杂请求
浏览器帮助发送option请求,跨域了


添加headers变成 复杂请求 了
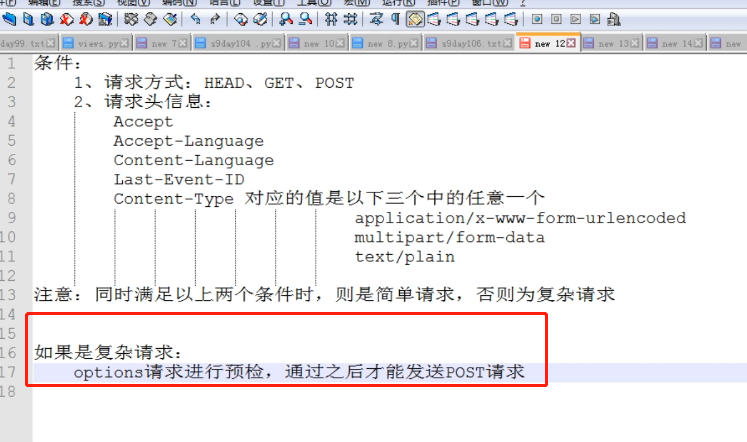
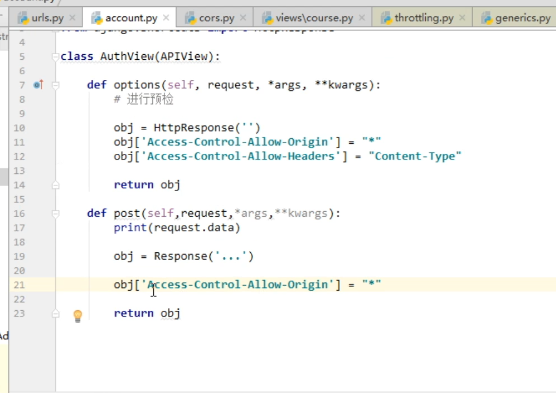
2、局部,预检option
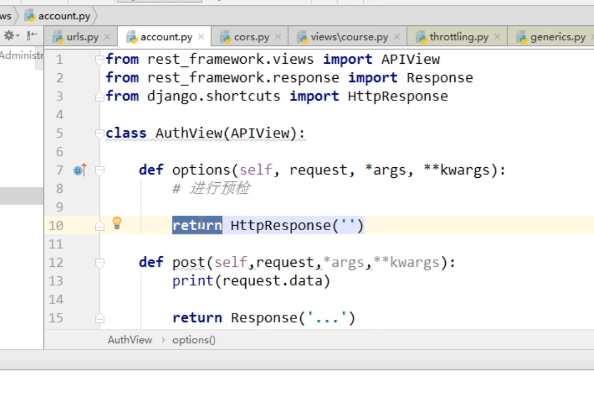

预检通过了


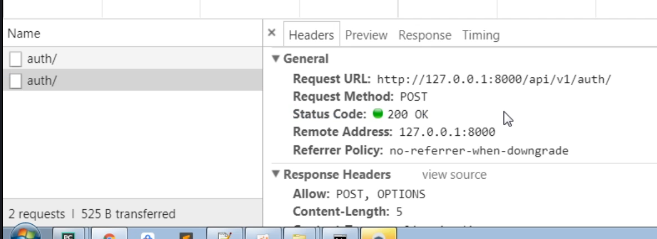

post请求,允许给哪个host返回data


3、全局配置 :中间件
全局cors中间件,详见01章节的跨域

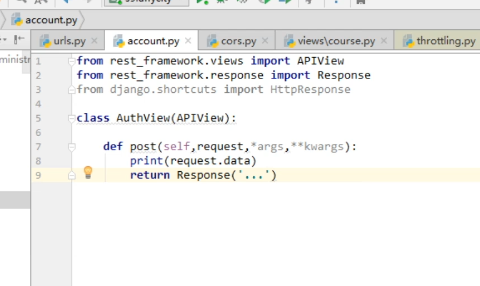
View中只写业务逻辑
4、自定义请求头


5、put方法
用most


6、cors代码
settings导入中间件
MIDDLEWARE = [

    'django.middleware.security.SecurityMiddleware',

    'django.contrib.sessions.middleware.SessionMiddleware',

    'django.middleware.common.CommonMiddleware',

    'django.middleware.csrf.CsrfViewMiddleware',

    'django.contrib.auth.middleware.AuthenticationMiddleware',

    'django.contrib.messages.middleware.MessageMiddleware',

    'django.middleware.clickjacking.XFrameOptionsMiddleware',

    'api.cors.CORSMiddleware',

]
cors代码
from django.middleware.clickjacking import XFrameOptionsMiddleware class MiddlewareMixin:
def __init__(self, get_response=None):
self.get_response = get_response
super().__init__() def __call__(self, request):
response = None
if hasattr(self, 'process_request'):
response = self.process_request(request)
response = response or self.get_response(request)
if hasattr(self, 'process_response'):
response = self.process_response(request, response)
return response class CORSMiddleware(MiddlewareMixin): def process_response(self,request,response):
# 添加响应头
'''
# response['XXXXX'] = 8888 # 1.允许你的域名来获取我的数据
# response['Access-Control-Allow-Origin'] = "http://localhost:8080"
# response['Access-Control-Allow-Origin'] = "*" # 2.允许你携带Content-Type请求头
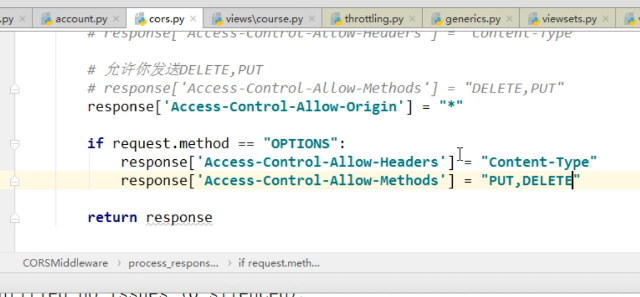
# response['Access-Control-Allow-Headers'] = "Content-Type,Host,XXX" # 3.允许你发送DELETE,PUT
# response['Access-Control-Allow-Methods'] = "DELETE,PUT"
''' response['Access-Control-Allow-Origin'] = "*"
if request.method == "OPTIONS":
response['Access-Control-Allow-Headers'] = "Content-Type,k1"
response['Access-Control-Allow-Methods'] = "DELETE,PUT,POST" return response
4、vuex和vue-cookie的应用
1、用户登录表

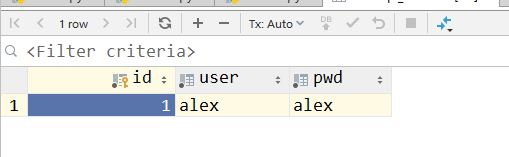
2、uuid生成token
用户名密码,数据库校验
uuid 根据当前的网卡,时间,随机生成字符串


3、vuex保存token
登录页面获取的token,每个组件都要用
需要 vuex (中央空调,发数据)
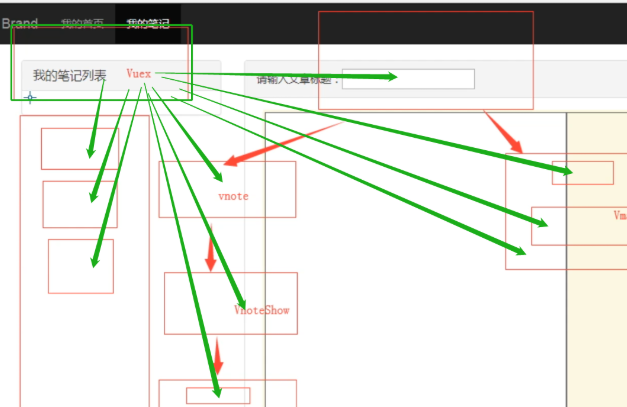
vuex


(1)vuex的使用
方法1
main中引入,router中设置
https://www.cnblogs.com/venicid/p/11572473.html#_label0_2
方法2
创建store目录保存vuex的相关东西

(2)ajax请求
(3)全局变量有了,前端 if 显示


4、刷新失败,引入cookie
(1)下载cookie


(2)引入cookie
组件中通过 this.$store.commit(saveToken,参数) 调用
(3)ajax

(4)操作


(5)刷新,消失
cookie不会丢失,全局变量丢失

(6)注销


5、代码
(1)知识点
vuex , vue-cookie 跨域 复杂请求
option是,复杂的跨域请求的,预检
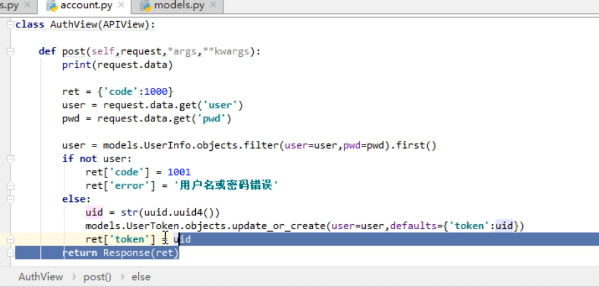
(2)后端代码
account.py
import uuid

from rest_framework.views import APIView

from rest_framework.response import Response

from django.http import HttpResponse

from api.models import UserInfo, UserToken

class AuthView(APIView):

    def post(self, request):

        print(request.data)

        ret = {'code': 1000}

        user = request.data.get('user')

        pwd = request.data.get('pwd')

        user = UserInfo.objects.filter(user=user, pwd=pwd).first()

        if not user:

            ret['code'] = 1001

            ret['error'] = 'user or pwd error'

        else:

            uid = str(uuid.uuid4())

            UserToken.objects.update_or_create(user=user, defaults={'token': uid})

            ret['token'] = uid

        return Response(ret)
(3)前端
main.js
// The Vue build version to load with the `import` command

// (runtime-only or standalone) has been set in webpack.base.conf with an alias.

import Vue from 'vue'

import App from './App'

import router from './router'

import axios from "axios"

// 在vue的全局变量中设置 $axios=axios

// 以后每个组件使用时: this.$axios

Vue.prototype.$axios = axios

// 4.引入store

import store from './store/store'

Vue.prototype.$store = store

Vue.config.productionTip = false

/* eslint-disable no-new */

new Vue({

  el: '#app',

  router,

  components: { App },

  template: '<App/>'

})
router/index.js
import Vue from 'vue'

import Router from 'vue-router'

// import HelloWorld from '@/components/HelloWorld'

import Index from "@/components/Index"

import Course from "@/components/Course"

import Micro from "@/components/Micro"

import News from "@/components/News"

import Detail from "@/components/Detail"

import Login from "@/components/Login"

Vue.use(Router)

export default new Router({

  routes: [

    {

      path: '/index',

      name: 'index',

      component: Index

    },

    {

      path: '/course',

      name: 'course',

      component: Course

    },

    {

      path: '/micro',

      name: 'micro',

      component: Micro

    },

    {

      path: '/news',

      name: 'news',

      component: News

    },

    {

      path: '/detail/:id',

      name: 'detail',

      component: Detail

    },

    {

      path: '/login',

      name: 'login',

      component: Login

    },

  ],

  'mode':'history'

})
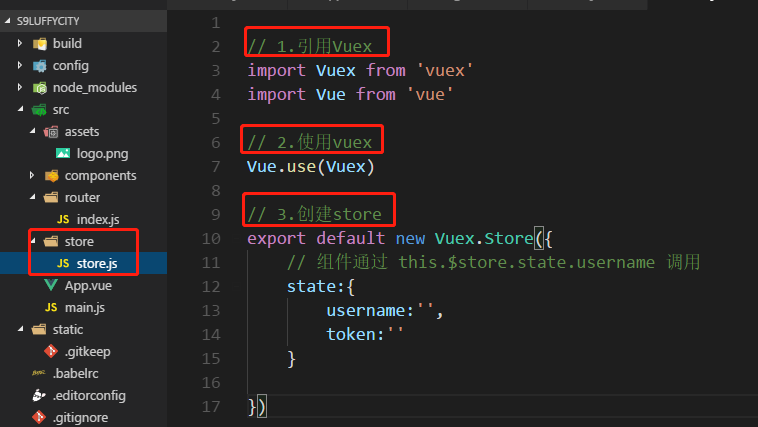
sotre.js
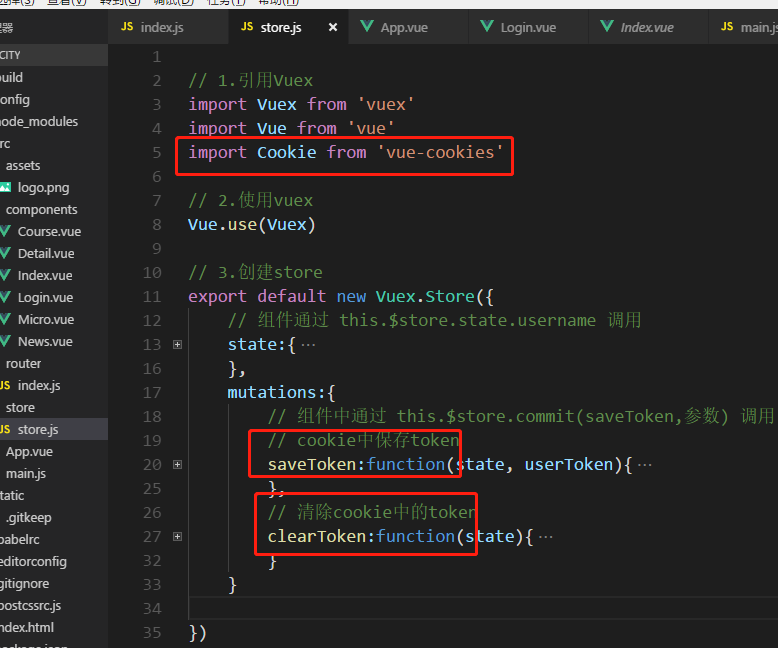
// 1.引用Vuex
import Vuex from 'vuex'
import Vue from 'vue'
import Cookie from 'vue-cookies' // 2.使用vuex
Vue.use(Vuex) // 3.创建store
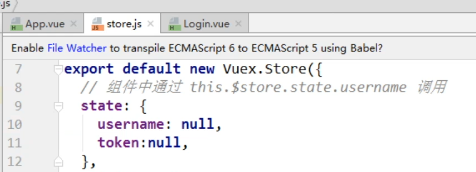
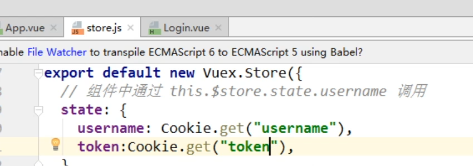
export default new Vuex.Store({
// 组件通过 this.$store.state.username 调用
state:{
username:Cookie.get('username'),
token:Cookie.get('token')
},
mutations:{
// 组件中通过 this.$store.commit(saveToken,参数) 调用
// cookie中保存token
saveToken:function(state, userToken){
state.username = userToken.username
state.token = userToken.token
Cookie.set('username',userToken.username,'20min')
Cookie.set('token',userToken.token,'20min')
},
// 清除cookie中的token
clearToken:function(state){
state.username = null
state.token = null
Cookie.remove('username')
Cookie.remove('token')
}
} })
App.vue
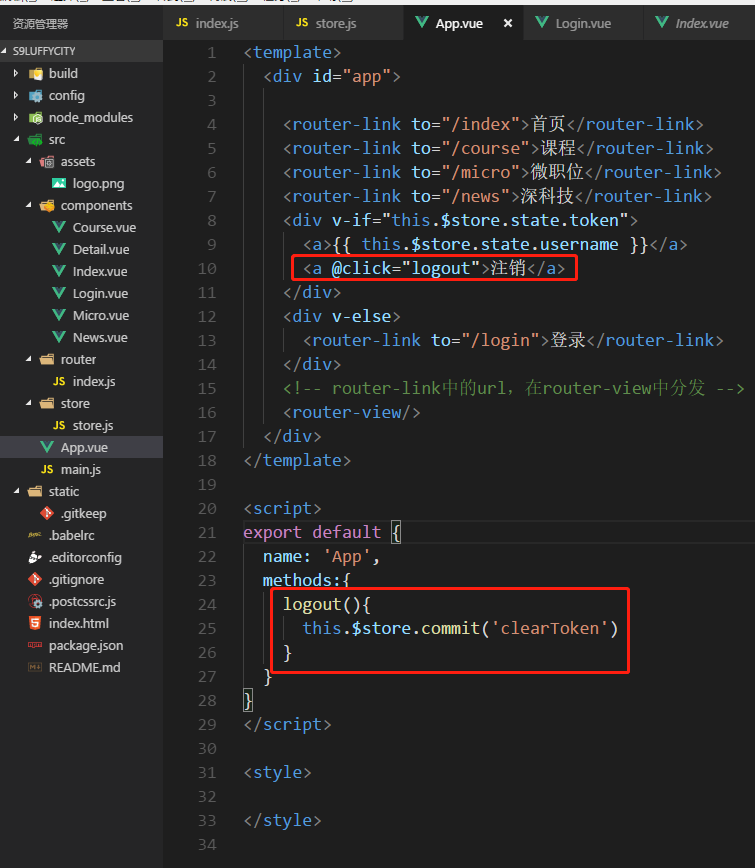
<template>

  <div id="app">

    <router-link to="/index">首页</router-link>

    <router-link to="/course">课程</router-link>

    <router-link to="/micro">微职位</router-link>

    <router-link to="/news">深科技</router-link>

    <div v-if="this.$store.state.token">

      <a>{{ this.$store.state.username }}</a>

      <a @click="logout">注销</a>

    </div>

    <div v-else>

      <router-link to="/login">登录</router-link>

    </div>

    <!-- router-link中的url,在router-view中分发 -->

    <router-view/>

  </div>

</template>

<script>

export default {

  name: 'App',

  methods:{

    logout(){

      this.$store.commit('clearToken')

    }

  }

}

</script>

<style>

</style>
Login.vue
<template>
<div>
<h1>用户登录</h1>
<div>
<p><input type="text" placeholder="请输入用户名" v-model="username"></p>
<p><input type="text" placeholder="请输入密码" v-model="password"></p>
<input type="button" value="登录" @click="doLogin">
</div>
</div>
</template> <script>
export default {
name:"login",
data(){
return {
username:'',
password:'',
}
},
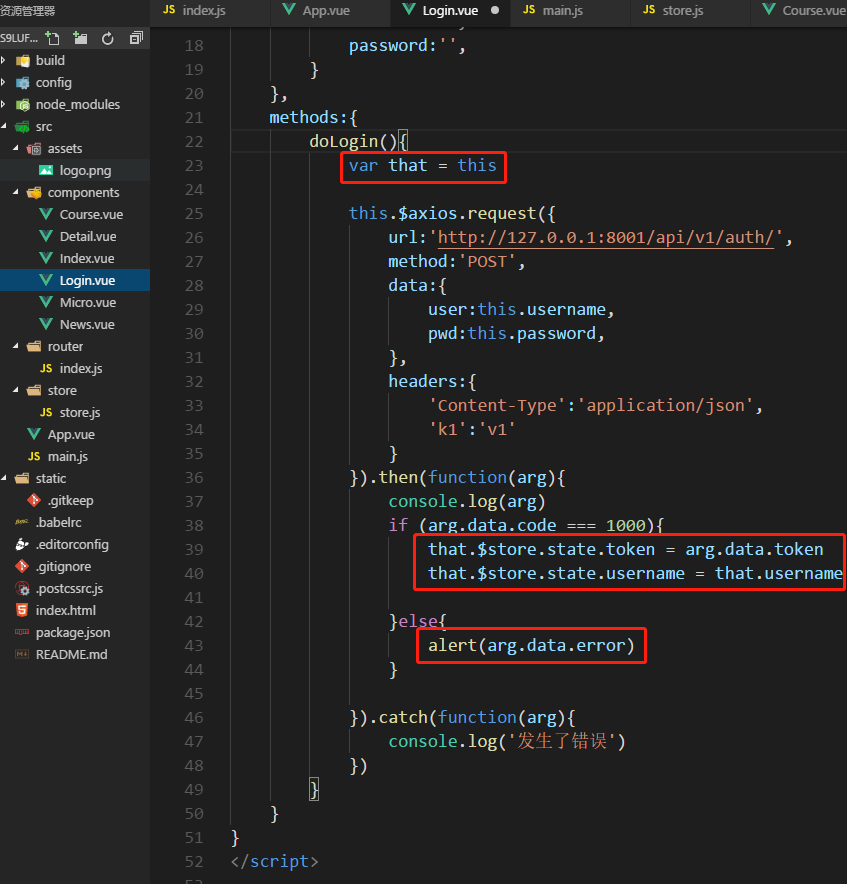
methods:{
doLogin(){
var that = this this.$axios.request({
url:'http://127.0.0.1:8001/api/v1/auth/',
method:'POST',
data:{
user:this.username,
pwd:this.password,
},
headers:{
'Content-Type':'application/json',
'k1':'v1'
}
}).then(function(arg){
console.log(arg)
if (arg.data.code === 1000){ // 方法1:暂存token
// that.$store.state.token = arg.data.token
// that.$store.state.username = that.username // 方法2: cookie保存token
console.log({token:arg.data.token,username:that.username})
that.$store.commit('saveToken',{token:arg.data.token,username:that.username}) }else{
alert(arg.data.error)
} }).catch(function(arg){
console.log('发生了错误')
})
}
}
}
</script> <style scoped> </style>
5、用户认证(含认证组件)
1、Vue 拦截器
未登录,跳回到login

路由自带的拦截器
(1)router 添加标识

import Vue from 'vue'

import Router from 'vue-router'

// import HelloWorld from '@/components/HelloWorld'

import Index from "@/components/Index"

import Course from "@/components/Course"

import Micro from "@/components/Micro"

import News from "@/components/News"

import Detail from "@/components/Detail"

import Login from "@/components/Login"

Vue.use(Router)

export default new Router({

  routes: [

    {

      path: '/index',

      name: 'index',

      component: Index

    },

    {

      path: '/course',

      name: 'course',

      component: Course

    },

    {

      path: '/micro',

      name: 'micro',

      component: Micro,

      meta:{

        requireAuth:true

      }

    },

    {

      path: '/news',

      name: 'news',

      component: News,

      meta:{

        requireAuth:true

      }

    },

    {

      path: '/detail/:id',

      name: 'detail',

      component: Detail

    },

    {

      path: '/login',

      name: 'login',

      component: Login

    },

  ],

  'mode':'history'

})
(2)拦截器:beforEach
多个页面的话如何做呢?
main.js
// The Vue build version to load with the `import` command

// (runtime-only or standalone) has been set in webpack.base.conf with an alias.

import Vue from 'vue'

import App from './App'

import router from './router'

import axios from "axios"

// 在vue的全局变量中设置 $axios=axios

// 以后每个组件使用时: this.$axios

Vue.prototype.$axios = axios

// 4.引入store

import store from './store/store'

Vue.prototype.$store = store

Vue.config.productionTip = false

/* eslint-disable no-new */

new Vue({

  el: '#app',

  router,

  components: { App },

  template: '<App/>'

})

router.beforeEach(function(to,from,next){

  if(to.meta.requireAuth){

    // 要去的url,只有登录成功后,才能访问

    if (store.state.token){

      next()

    }else{

      next({name:'login',query:{backUrl:to.fullPath}})

    }

  }else{

    next()

  }

})


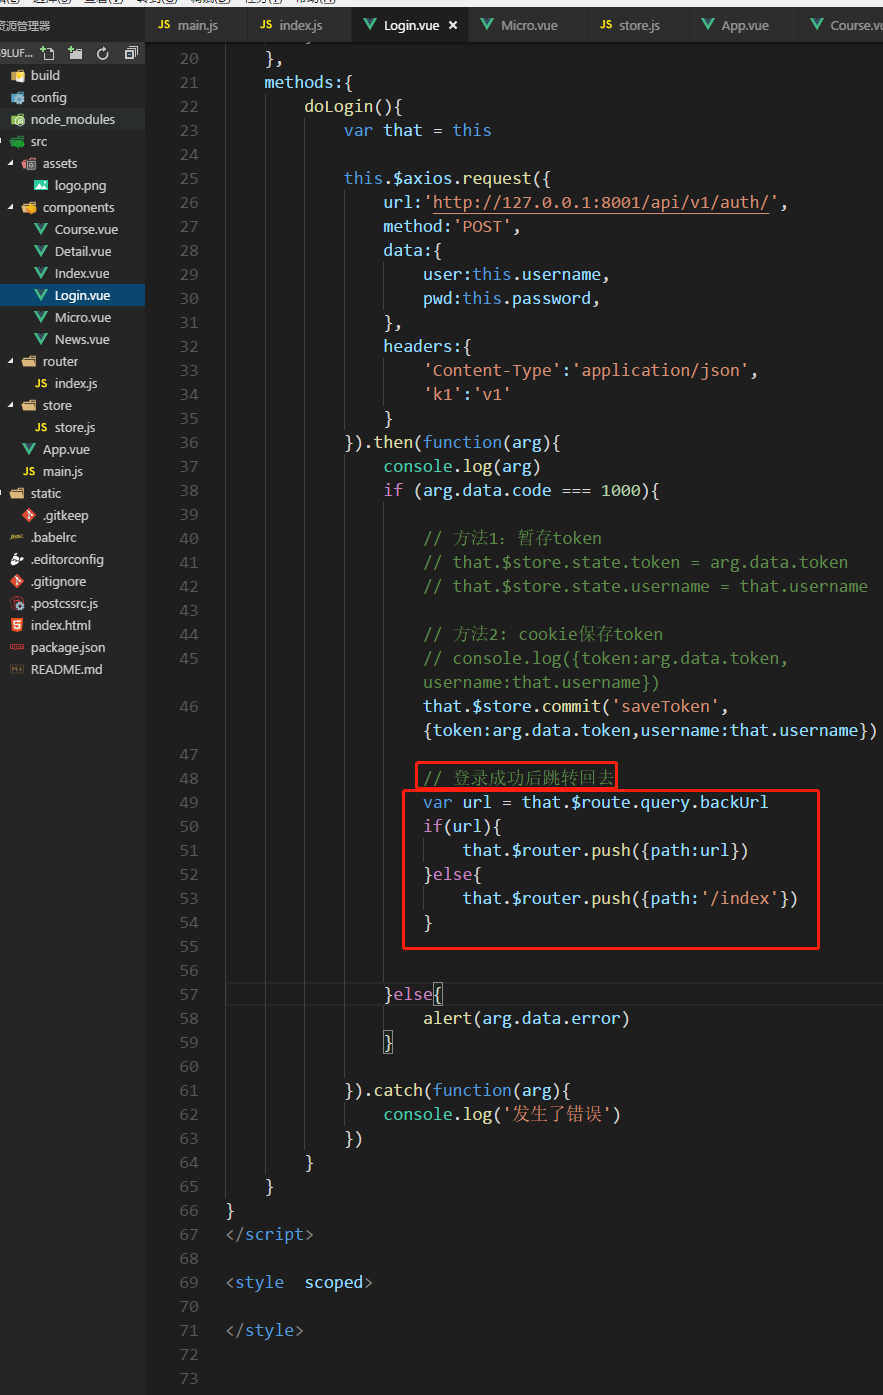
(3)login登录成功跳转回去
login.vue
<template>

    <div>

        <h1>用户登录</h1>

        <div>

            <p><input type="text" placeholder="请输入用户名" v-model="username"></p>

            <p><input type="text" placeholder="请输入密码" v-model="password"></p>

            <input type="button" value="登录" @click="doLogin">

        </div>

    </div>

</template>

<script>

export default {

    name:"login",

    data(){

        return {

            username:'',

            password:'',

        }

    },

    methods:{

        doLogin(){

            var that = this

            this.$axios.request({

                url:this.$store.state.apiList.auth,

                method:'POST',

                data:{

                    user:this.username,

                    pwd:this.password,

                },

                headers:{

                    'Content-Type':'application/json',

                    'k1':'v1'

                }

            }).then(function(arg){

                console.log(arg)

                if (arg.data.code === 1000){

                    // 方法1:暂存token

                    // that.$store.state.token = arg.data.token

                    // that.$store.state.username = that.username

                    // 方法2: cookie保存token

                    // console.log({token:arg.data.token,username:that.username})

                    that.$store.commit('saveToken',{token:arg.data.token,username:that.username})

                    // 登录成功后跳转回去

                    var url = that.$route.query.backUrl

                    if(url){

                        that.$router.push({path:url})

                    }else{

                        that.$router.push({path:'/index'})

                    }

                }else{

                    alert(arg.data.error)

                }

            }).catch(function(arg){

                console.log('发生了错误')

            })

        }

    }

}

</script>

<style  scoped>

</style>


2、局部认证:后端MicroView


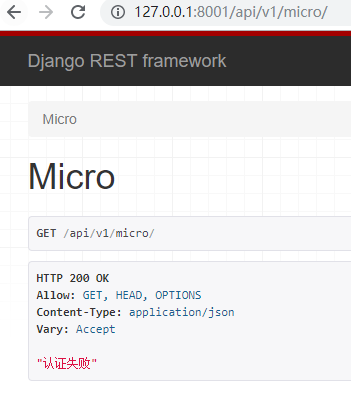
没有token也可以取数据

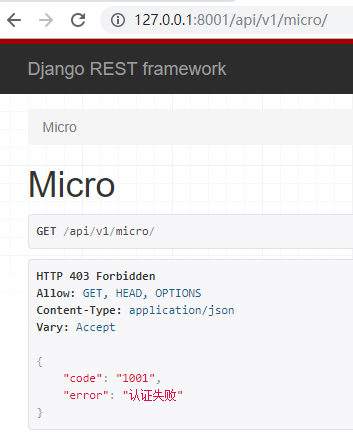
3、全局认证:Auth组件

(1)auth.py代码

from rest_framework.authentication import BaseAuthentication

from rest_framework.exceptions import AuthenticationFailed

from api import models

class LuffyAuth(BaseAuthentication):

    def authenticate(self, request):

        token = request.query_params.get('token')

        obj = models.UserToken.objects.filter(token=token).first()

        if not obj:

            raise AuthenticationFailed({'code': 1001, 'error': '认证失败'})

        return (obj.user.user, obj)
(2)micro.py代码

from rest_framework.views import APIView

from rest_framework.response import Response

from api import models

from api.auth.auth import LuffyAuth

class MicroView(APIView):

    # 全局token认证

    authentication_classes = [LuffyAuth, ]

    def get(self, request, *args, **kwargs):

        ret = {'code': 1000, 'title': '微职位'}

        return Response(ret)

    # 局部token认证

    '''

    def get(self, request, *args, **kwargs):

        token = request.query_params.get('token')

        obj = models.UserToken.objects.filter(token=token).first()

        if not obj:

            return Response('认证失败')

        return Response('微职位')

    '''

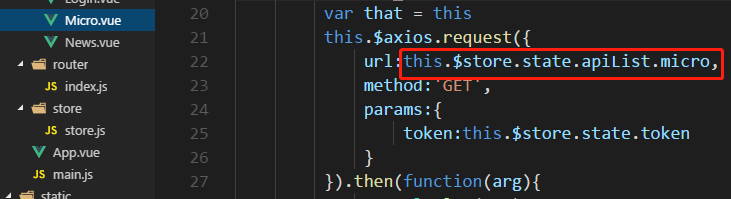
4、前端Micro的ajax请求
携带token


ajax
Micro.vue代码
<template>

    <div>

        <h1>LuffyX学位:{{ title }}</h1>

    </div>

</template>

<script>

export default {

    name:"micro",

    data(){

        return {

            title:null,

        }

    },

    mounted(){

        this.initMicro()

    },

    methods:{

     initMicro(){

         var that = this

         this.$axios.request({

             url:this.$store.state.apiList.micro,

             method:'GET',

             params:{

                 token:this.$store.state.token

             }

         }).then(function(arg){

             console.log(arg)

             if(arg.data.code === 1000){

                 that.title = arg.data.title

             }

         })

     }

    }

}

</script>

<style  scoped>

</style>


5、统一:api接口List
公共的方法,与字段放在一起

子vue中从store中引用 url


6、总结
1、今日内容
2、Vue

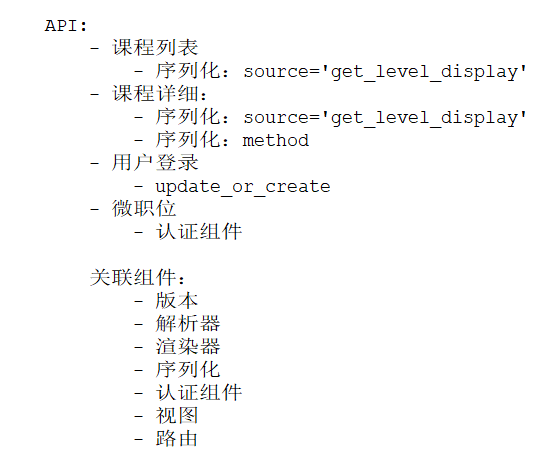
3、API
04 DRF内容回顾、用户登录 (含跨域) (vuex vue-cookie)、用户认证 (Auth认证)(拦截器)的更多相关文章
- SSO单点登录、跨域重定向、跨域设置Cookie、京东单点登录实例分析
最近在研究SSO单点登录技术,其中有一种就是通过js的跨域设置cookie来达到单点登录目的的,下面就已京东商城为例来解释下跨域设置cookie的过程 涉及的关键知识点: 1.jquery ajax跨 ...
- 跨域(cross-domain)访问 cookie (读取和设置)
Passport 一方面意味着用一个帐号可以在不同服务里登录,另一方面就是在一个服务里面登录后可以无障碍的漫游到其他服务里面去.坦白说,目前 sohu passport 在这一点实现的很烂(不过俺的工 ...
- 搞懂:前端跨域问题JS解决跨域问题VUE代理解决跨域问题原理
什么是跨域 跨域:一个域下的文档或脚本试图去请求另一个域下的资源 广义的跨域包含一下内容: 1.资源跳转(链接跳转,重定向跳转,表单提交) 2.资源请求(内部的引用,脚本script,图片img,fr ...
- 聊一下,前后分离后带来的跨域访问和cookie问题
在谈前后分离前,我们先看看什么是前后一体的.当我们用javaweb开发网站时,最终我们渲染的jsp或者springthymeleaf.我们的页面其实是WEB-INFO或者templates下.当用户请 ...
- node(koa2)跨域与获取cookie
欲做一个node 的网关服务,通过 cookie 做信息传递,选择框架 koa2,这里简单记录跨域处理以及 cookie 获取. 首先:解决跨域问题,使用 koa2-cros 来处理,跨域问题后端处理 ...
- jsonp跨域实现单点登录,跨域传递用户信息以及保存cookie注意事项
网站A:代码:网站a的login.html页面刷新,使用jsonp方式将信息传递给b.com的login.php中去,只需要在b.com中设置一下跨域以及接收参数,然后存到cookei即可, 注意:网 ...
- 模拟用户登录含注册——python第8天
print('欢迎登录尚雅梦想python学习系统'.center(30)) print('******' * 8) flag = True while flag: order = input(''' ...
- cookie单点登录(跨域访问)
新近一家公司上来就让做oa,要求嵌入公司现有系统模块,自然而然想到模拟post单点登录对方系统新建单点登陆页面保存session,然现有系统都有用cookie保存用户信息,故保存本地cookie……测 ...
- gitlab用户登录与AD域用户集成
---恢复内容开始--- 编辑gitlab.rb文件 sudo vi /etc/gitlab/gitlab.rb 下图是我编辑的内容示例(仅供参考): 编辑以下内容: gitlab_rails['ld ...
随机推荐
- oracle——学习之路(select检索)
select语法: select [distinct|all] 列名 from 表名 [where] [group by] [having] [order ...
- Centos7 添加开机启动服务
1.在/usr/lib/systemd/system/下创建服务脚本xxx.service,格式如下: [Unit] Description=Scrapyd After=syslog.target n ...
- IPv4
1.IPv4分类地址 PC0(192.168.0.1) 和PC1(172.168.0.1)如果要ping通的话需要设置各自网关 PC0 设置IP 和 默认网关=路由器设置IP 2.Gigabit ...
- (十六)JDBC 处理大数据
目录 前言: 基本概念 对于Mysql的Text类型 流地址的写法 blob类型数据 备注 前言: 在实际开发中,程序需要把 大文本或二进制 数据保存到数据库中: 实际上,我们并不存储大的数据到数据库 ...
- PID程序实现
传统PID(位置式PID控制)调节: 这种算法的缺点是,由于全量输出,每次输出均与过去的状态有关,计算时要对 e(k) 进行累加,计算机运算工作量大.而且,因为计算机输出的 u(k) 对应的是执行机构 ...
- c++ vector容器
https://www.runoob.com/w3cnote/cpp-vector-container-analysis.html
- 【Python基础】08_Python中的列表
1.列表的定义 List(列表)是Python中使用的 最频繁 的数据类型,其他语言通常叫数组 专门用于存储 一串信息 列表用 [] 定义,数据 之间用 , 分割 列表的 索引(位置) 从 0 开始 ...
- 第九章 MIZ702 ZYNQ片上ADC的使用
9.0难度系数★☆☆☆☆☆☆ 9.1实验概述 这次借助zynq的内嵌的XADC来采集zynq内部的一些参数: •VCCINT:内部PL核心电压 •VCCAUX:辅助PL电压 •VREFP:XADC ...
- antd做form表单的组件共用,利用mapPropsToFields填写默认值
做单页应用,不管是用Vue还是React,或者其他,有一个重要的原则,就是:组件重用. 既然组件可以重用,那么当添加一个信息,和修改该信息的布局必然是一致的,这时候,最好的方法自然是利用同一个组件,在 ...
- Attribute预定义特性
转载自:http://blog.csdn.net/wangyy130/article/details/44241173 一.什么是Attribute Attribute 类将预定义的系统信息或用户定义 ...