python_tensorflow_Django实现逻辑回归
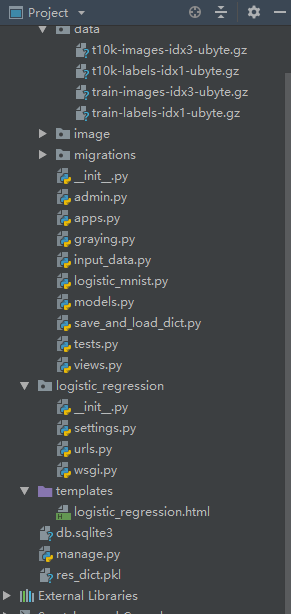
1.工程概要
2.data文件以及input_data文件准备
链接:https://pan.baidu.com/s/1EBNyNurBXWeJVyhNeVnmnA
提取码:4nnl
3.logisstic_mnist.py
def logistic_regression():

    import tensorflow as tf

    import matplotlib.pyplot as plt

    from app01 import input_data

    import numpy as np

    from PIL import Image

    print('Download and Extract MNIST dataset')

    mnist = input_data.read_data_sets('app01/data/',  one_hot=True)

    print("type of 'mnist' is %s" % (type(mnist)))

    print("number of train data is %d" % (mnist.train.num_examples))

    print("number of test data is %d" % (mnist.test.num_examples))

    trainimg = mnist.train.images

    for img in trainimg:

        for i in range(0, 748):

            if img[i] < 0.6:

                img[i] = 0

            else:

                img[i] = 1

    trainlabel = mnist.train.labels

    testimg = mnist.test.images

    for img in testimg:

        for i in range(0, 748):

            if img[i] < 0.6:

                img[i] = 0

            else:

                img[i] = 1

    testlabel = mnist.test.labels

    print("type of the 'trainimg' is %s" % (type(trainimg)))

    print("type of the 'trainlabel' is %s" % (type(trainlabel)))

    print("type of the 'testimg' is %s" % (type(testimg)))

    print("type of the 'testlabel' is %s" % (type(testlabel)))

    print("shape of the 'trainimg' is %s" % (trainimg.shape,))

    print("shape of the 'trainlabel' is %s" % (trainlabel.shape,))

    print("shape of the 'testimg' is %s" % (testimg.shape,))

    print("shape of the 'testlabel' is %s" % (testlabel.shape,))

    print('how dose the training data look like?')

    nsample = 5

    randidx = np.random.randint(trainimg.shape[0], size=nsample)

    for i in randidx:

        curr_img = np.reshape(trainimg[i, :], (28, 28))

        curr_label = np.argmax(trainlabel[i, :])

        plt.matshow(curr_img, cmap=plt.get_cmap('gray'))

        plt.title(""+str(i)+"th Training Data"+"Label is"+str(curr_label))

        print(""+str(i)+"th Training Data"+"Label is"+str(curr_label))

        plt.show()

    print('Batch Learning?')

    batch_size = 100

    batch_xs, batch_ys = mnist.train.next_batch(batch_size)

    print("type of 'batch_xs' is %s" % (type(batch_xs)))

    print("type of 'batch_ys' is %s" % (type(batch_ys)))

    print("shape of 'batch_xs' is %s" % (batch_xs.shape, ))

    print("shape of 'batch_ys' is %s" % (batch_ys.shape, ))

    # print(trainlabel[0])

    x = tf.placeholder('float', [None, 784])

    y = tf.placeholder('float', [None, 10])

    W = tf.Variable(tf.zeros([784, 10]))

    b = tf.Variable(tf.zeros([10]))

    actv = tf.nn.softmax(tf.matmul(x, W) + b)

    cost = tf.reduce_mean(-tf.reduce_sum(y*tf.log(actv), reduction_indices=1))

    learning_rate = 0.01

    optm = tf.train.GradientDescentOptimizer(learning_rate).minimize(cost)

    pred = tf.equal(tf.argmax(actv, 1), tf.argmax(y, 1))

    accr = tf.reduce_mean(tf.cast(pred, 'float'))

    init = tf.global_variables_initializer()

    sess = tf.InteractiveSession()

    training_epochs = 50

    batch_size = 100

    display_step = 5

    sess = tf.Session()

    sess.run(init)

    for epoch in range(training_epochs):

        avg_cost = 0.

        num_batch = int(mnist.train.num_examples/batch_size)

        for i in range(num_batch):

            batch_xs, batch_ys = mnist.train.next_batch(batch_size)

            feeds = {x: batch_xs, y: batch_ys}

            sess.run(optm, feed_dict=feeds)

            avg_cost += sess.run(cost, feed_dict=feeds)/num_batch

        if epoch % display_step == 0:

            feeds_train = {x: batch_xs, y: batch_ys}

            feeds_test = {x: mnist.test.images, y: mnist.test.labels}

            train_acc = sess.run(accr, feed_dict=feeds_train)

            test_acc = sess.run(accr, feed_dict=feeds_test)

            print("Epoch: %03d/%03d cost: %.9f train_acc: %.3f test_acc: %.3f" % (epoch, training_epochs, avg_cost, train_acc, test_acc))

        W_out = W.eval(session=sess)

        b_out = b.eval(session=sess)

    res_dict = {'W': W_out, 'b': b_out}

    print('DONE')

    return res_dict
4.views.py
from django.shortcuts import render

from app01 import logistic_mnist as lomni

from app01 import save_and_load_dict as save_load

# Create your views here.

def index(request):

    if request.method == 'GET':

        return render(request, 'logistic_regression.html', {'range': range(0, 28)})

    if request.method == 'POST':

        choice = request.GET.get('n')

        print('choice:', choice)

        if choice == '1':

            res_dict = lomni.logistic_regression()

            save_load.save_obj(res_dict, 'res_dict')

            return render(request, 'logistic_regression.html', {'resdict': res_dict})

        if choice == '2':

            import numpy as np

            my_test = []

            for row in range(0, 28):

                for line in range(0, 28):

                    if request.POST.get('('+str(row)+','+str(line)+')') == None:

                        my_test.append(0)

                    else:

                        my_test.append(1)

            my_test = np.array(my_test)

            print('my_test:', my_test)

            res_dict = save_load.load_obj('res_dict')

            W = np.array(res_dict['W'])

            b = np.array(res_dict['b'])

            # print(W, b)

            pred = np.argmax(np.matmul(my_test, W)+b)

            return render(request, 'logistic_regression.html', {'resdict': res_dict, 'pred':pred})

        if choice == '3':

            import numpy as np

            from PIL import Image

            img = Image.open('app01/image/sharped5.png')

            img_array = np.array(img)

            img_array = np.zeros(784).reshape(28, 28)

            print(img_array + 0)

            return render(request, 'logistic_regression.html', {'img_array': img_array+0, 'range': range(0, 28)})
5.urls.py
"""logistic_regression URL Configuration

The `urlpatterns` list routes URLs to views. For more information please see:

    https://docs.djangoproject.com/en/2.1/topics/http/urls/

Examples:

Function views

    1. Add an import:  from my_app import views

    2. Add a URL to urlpatterns:  path('', views.home, name='home')

Class-based views

    1. Add an import:  from other_app.views import Home

    2. Add a URL to urlpatterns:  path('', Home.as_view(), name='home')

Including another URLconf

    1. Import the include() function: from django.urls import include, path

    2. Add a URL to urlpatterns:  path('blog/', include('blog.urls'))

"""

from django.contrib import admin

from django.urls import path

from app01 import views

urlpatterns = [

    path('admin/', admin.site.urls),

    path('index/', views.index),

]
6.logistic_regression.html
<!DOCTYPE html>

<html lang="en">

<head>

    <meta charset="UTF-8">

    <title>Title</title>

    <style>

    </style>

</head>

<body>

<form action="/index/?n=1" method="post">

    {% csrf_token %}

    <input type="submit" value="逻辑回归训练">

</form>

{% if resdict != none %}

<div>

    <p>训练结果:</p>

    <p>W:{{ resdict.W }}</p>

    <p>b:{{ resdict.b }}</p>

</div>

{% endif %}

<form action="/index/?n=2" method="post">

 {% csrf_token %}

    <table border="1">

        <thead></thead>

        <tbody >

            {% for row in range %}

                <tr>

                    {% for line in range %}

                    <td>

                        <input type="checkbox"  name="({{ row }},{{ line }})" class="paint">

                    </td>

                    {% endfor %}

                </tr>

            {% endfor %}

        </tbody>

    </table>

<input type="submit" value="进行手写识别">

</form>

{% if pred != none %}

    <div>

        <p>

            检测结果是{{ pred }}

        </p>

    </div>

{% endif %}

<form action="/index/?n=3" method="post">

 {% csrf_token %}

    <input type="submit" value="开始检测目标文件夹中的手写字体!">

    <p>{{ img }}</p>

</form>

</body>

</html>
7.save_and_load_dict.py
<!DOCTYPE html>

<html lang="en">

<head>

    <meta charset="UTF-8">

    <title>Title</title>

    <style>

    </style>

</head>

<body>

<form action="/index/?n=1" method="post">

    {% csrf_token %}

    <input type="submit" value="逻辑回归训练">

</form>

{% if resdict != none %}

<div>

    <p>训练结果:</p>

    <p>W:{{ resdict.W }}</p>

    <p>b:{{ resdict.b }}</p>

</div>

{% endif %}

<form action="/index/?n=2" method="post">

 {% csrf_token %}

    <table border="1">

        <thead></thead>

        <tbody >

            {% for row in range %}

                <tr>

                    {% for line in range %}

                    <td>

                        <input type="checkbox"  name="({{ row }},{{ line }})" class="paint">

                    </td>

                    {% endfor %}

                </tr>

            {% endfor %}

        </tbody>

    </table>

<input type="submit" value="进行手写识别">

</form>

{% if pred != none %}

    <div>

        <p>

            检测结果是{{ pred }}

        </p>

    </div>

{% endif %}

<form action="/index/?n=3" method="post">

 {% csrf_token %}

    <input type="submit" value="开始检测目标文件夹中的手写字体!">

    <p>{{ img }}</p>

</form>

</body>

</html>
8.graying.py
import sys

print(sys.argv[0])

import os

path_curr = os.path.abspath('.')

path_up = os.path.abspath('..')

print(path_up)

threshold = 140

table = []

for a in range(256):

    if a > threshold:

        table.append(1)

    else:

        table.append(0)

from PIL import Image

for i in range(0, 10):

    img = Image.open('image/'+str(i)+'.png')

    Img = img.convert('L')

    Img.save('image/grey'+str(i)+'.png')

    photo = Img.point(table, '1')

    photo.save('image/sharped'+str(i)+'.png')
python_tensorflow_Django实现逻辑回归的更多相关文章
- 逻辑回归 Logistic Regression
逻辑回归(Logistic Regression)是广义线性回归的一种.逻辑回归是用来做分类任务的常用算法.分类任务的目标是找一个函数,把观测值匹配到相关的类和标签上.比如一个人有没有病,又因为噪声的 ...
- 用R做逻辑回归之汽车贷款违约模型
数据说明 本数据是一份汽车贷款违约数据 application_id 申请者ID account_number 账户号 bad_ind 是否违约 vehicle_year ...
- 逻辑回归(LR)总结复习
摘要: 1.算法概述 2.算法推导 3.算法特性及优缺点 4.注意事项 5.实现和具体例子 6.适用场合 内容: 1.算法概述 最基本的LR分类器适合于对两分类(类0,类1)目标进行分类:这个模型以样 ...
- scikit-learn 逻辑回归类库使用小结
之前在逻辑回归原理小结这篇文章中,对逻辑回归的原理做了小结.这里接着对scikit-learn中逻辑回归类库的我的使用经验做一个总结.重点讲述调参中要注意的事项. 1. 概述 在scikit-lear ...
- 逻辑回归LR
逻辑回归算法相信很多人都很熟悉,也算是我比较熟悉的算法之一了,毕业论文当时的项目就是用的这个算法.这个算法可能不想随机森林.SVM.神经网络.GBDT等分类算法那么复杂那么高深的样子,可是绝对不能小看 ...
- 逻辑回归(Logistic Regression)
转载请注明出自BYRans博客:http://www.cnblogs.com/BYRans/ 本文主要讲解分类问题中的逻辑回归.逻辑回归是一个二分类问题. 二分类问题 二分类问题是指预测的y值只有两个 ...
- 逻辑回归算法的原理及实现(LR)
Logistic回归虽然名字叫"回归" ,但却是一种分类学习方法.使用场景大概有两个:第一用来预测,第二寻找因变量的影响因素.逻辑回归(Logistic Regression, L ...
- 感知器、逻辑回归和SVM的求解
这篇文章将介绍感知器.逻辑回归的求解和SVM的部分求解,包含部分的证明.本文章涉及的一些基础知识,已经在<梯度下降.牛顿法和拉格朗日对偶性>中指出,而这里要解决的问题,来自<从感知器 ...
- stanford coursera 机器学习编程作业 exercise 3(逻辑回归实现多分类问题)
本作业使用逻辑回归(logistic regression)和神经网络(neural networks)识别手写的阿拉伯数字(0-9) 关于逻辑回归的一个编程练习,可参考:http://www.cnb ...
随机推荐
- 注解中用于@target的方法annotation/--ElementType.METHOD,ElementType.TYPE对应方法,类接
@Target: @Target说明了Annotation所修饰的对象范围:Annotation可被用于 packages.types(类.接口.枚举.Annotation类型).类型成员(方法.构造 ...
- python3.6使用scrapy报错
用python做爬虫的,肯定熟悉scrapy,不过新手安装总是会遇到各种奇葩错误. 错误一:building 'twisted.test.raiser' extensionerror: Microso ...
- 【Alpha】Phylab 测试报告
PhyLab Alpha 测试报告 测试中发现的bug Bug 可能原因 实验区域发布评论,如果需要验证码,无法填写 评论频率过快,实验区未接入验证码系统 忘记密码,但无邮件发送 忘记密码部分暂未修复 ...
- 'qt_sql_default_connection' is still in use
出现这个告警是因为打开了多个db而没有及时关闭,网上搜了答案是使用完了执行 QSqlDatabase::removeDatabase(m_connectionName); 泄漏的问题有所改善,但点快了 ...
- java基本编译
1.java语言严格区分大小写:1个源文件其中最多只能有一个public类:源文件必须和public类同名:每个类对应一个class字节码,且同名. 2.编译. javac -d dir Hell ...
- Error: Another program is already listening on a port that one of our HTTP servers is configured to use. Shut this program down first before starting
解决方法: find / -name supervisor.sock unlink /name/supervisor.sock 2. www-data 用户是干什么用的 3.如何通过superviso ...
- (转)总结之:CentOS 6.5 MySQL数据库的基础以及深入详解
总结之:CentOS 6.5 MySQL数据库的基础以及深入详解 原文:http://tanxw.blog.51cto.com/4309543/1395539 前言 早期MySQL AB公司在2009 ...
- java.util.Collections.synchronizedSet()方法的使用
下面的例子显示java.util.Collections.synchronizedSet()方法的使用 package com.; import java.util.*; public class C ...
- linux 将一个服务器上的文件或者文件夹复制到另一台服务器上
使用scp将一个Linux系统中的文件或文件夹复制到另一台Linux服务器上 复制文件或文件夹(目录)命令: 一.复制文件: (1)将本地文件拷贝到远程 scp 文件名 用户名@计算机IP或者计 ...
- C++11 并发(一道笔试题目)
题目:编写一个程序,开启3个线程,这3个线程的ID分别为A.B.C,每个线程将自己的ID在屏幕上打印10遍,要求输出结果必须按ABC的顺序显示:如:ABCABC….依次递推. #include < ...