
Anaconda3(2)Anaconda3中安装TensorFlow
https://zhuanlan.zhihu.com/p/34730661
1. 安装anaconda3:自行下载、安装【注意版本】
(可参考引用链接)
2. 搭建TensorFlow环境
cuda10.1
cudnn10.1
opencv4.11
显卡1050ti
win10
2.1 输入清华库,更新快一点:
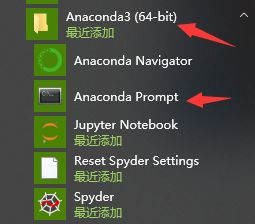
conda config --add channels https://mirrors.tuna.tsinghua.edu.cn/anaconda/pkgs/free/

conda config --set show_channel_urls yes
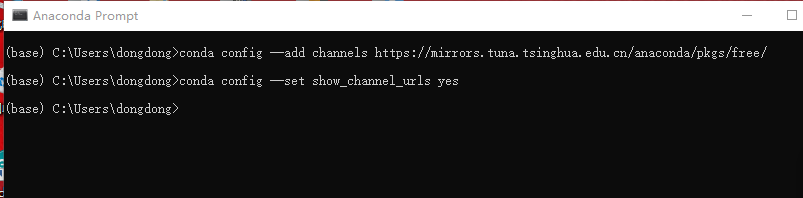
2.2 在anaconda中创建TensorFlow环境
同样在Anaconda Prompt中利用Anaconda创建一个python3.5的环境,环境名称为tensorflow ,输入下面命令:
3 开始安装
pip install --ignore-installed --upgrade tensorflow-gpu
cuda关系对应表
https://blog.csdn.net/omodao1/article/details/83241074
安装tf2.0- python3.6-cuda10.0 不是10.1
pip install tensorflow-gpu==2.0
安装tf1.4- python3.6-cuda8.0-cudnn6-numpy1.16
pip install tensorflow-gpu==1.4
测试程序
#!/usr/bin/python

# -*- coding: UTF-8 -*-

import sys

sys.path.append("F:/dongdong/0tool/python/anaconda3/envs/work_cuda8_py36_tf14/Lib/site-packages")

import numpy

import tensorflow as tf

a = tf.constant([1.0, 2.0, 3.0, 4.0, 5.0, 6.0], shape=[2, 3], name='a')

b = tf.constant([1.0, 2.0, 3.0, 4.0, 5.0, 6.0], shape=[3, 2], name='b')

c = tf.matmul(a, b)

sess = tf.Session(config=tf.ConfigProto(log_device_placement=True))

print(sess.run(c))

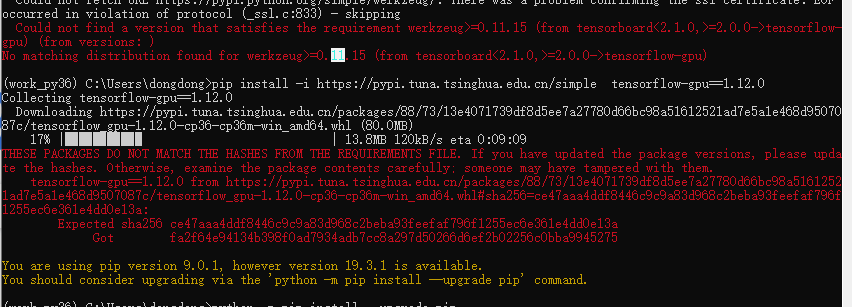
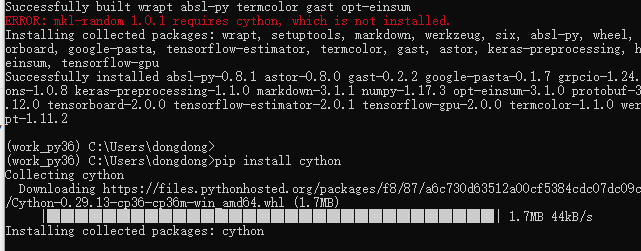
报错两个
1 安装werkzeug
2 安装cypthon库
3问题 里可以发现你可能安装了两个numpy,所以会报错
我通过从numpy卸载当前版本并通过重新安装最新版本来解决。pip uninstall numpy
和
pip install numpy
python -m pip install --upgrade numpy
4问题 cuda不对。 10.0和10.1都不行???

您应该安装Cuda 10.0。如果您安装了Cuda 10.1,将没有文件cudart64_100.dll。我重命名cudart64_101.dll为cudart64_100.dll,可以正常工作。
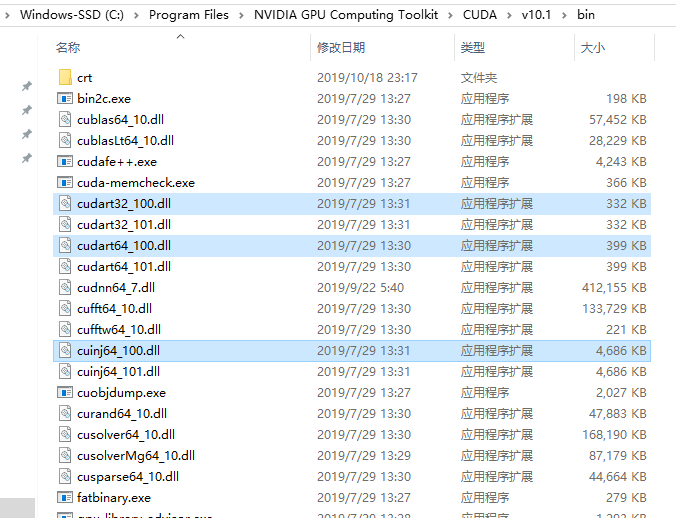
5 Tensorflow 2.0 - AttributeError: module 'tensorflow' has no attribute 'Session'
pip install --upgrade pip

pip install tensorflow==2.0.0-alpha0

pip install keras

pip install numpy==1.16.2
#!/usr/bin/python

# -*- coding: UTF-8 -*-

import sys

sys.path.append("F:/dongdong/0tool/python/anaconda3/envs/work_py36/Lib/site-packages")

import tensorflow as tf

hello = tf.constant('Hello, TensorFlow!')

sess = tf.Session()

sess.run(hello)

a = tf.constant(10)

b = tf.constant(32)

sess.run(a+b)
成功了

Anaconda3(2)Anaconda3中安装TensorFlow的更多相关文章
- ubantu中安装TensorFlow遇到的问题
因为Ubuntu中装有python3.python2两种python环境,在装TensorFlow时需要根据版本进行适配 1.安装pip3 #在python2下安装pip sudo apt-get i ...
- 在anaconda中安装tensorflow
打开Anaconda Prompt, step1: 输入清华仓库镜像 conda config --add channels https://mirrors.tuna.tsinghua.edu.cn/ ...
- Mac中安装tensorflow(转)
当我们开始学习编程的时候,第一件事往往是学习打印"Hello World".就好比编程入门有Hello World,机器学习入门有MNIST.MNIST是一个识别手写数字的程序 M ...
- (原)ubuntu中安装tensorflow
转载请注明出处: http://www.cnblogs.com/darkknightzh/p/6592052.html 参考网址: https://www.tensorflow.org/install ...
- Ubuntu在Anaconda中安装TensorFlow GPU,Keras,Pytorch
安装TensorFlow GPU pip install --ignore-installed --upgrade tensorflow-gpu 安装测试: $ source activate tf ...
- 在Win10 Anaconda中安装Tensorflow
有需要的朋友可以参考一下 1.安装Anaconda 下载:https://www.continuum.io/downloads,我用的是Python 3.5 下载完以后,安装. 安装完以后,打开A ...
- Win10下Anaconda中安装Tensorflow
1.安装Anaconda 下载:https://repo.continuum.io/archive/,我用的是Python 3.5 ,64位系统,所以选择的版本是Anaconda2-4.2.0-Win ...
- anaconda中安装TensorFlow的方法
作为一个新手党加手残党真的折腾了好久才搞定,记录一下. step1:在anaconda prompt终端中输入 pip3 install -i https://pypi.tuna.tsinghua.e ...
- linux中安装tensorflow
liunxsudo apt-get install python-pip python-dev python2.X -> pippython3.X -> pip3 pip --versio ...
随机推荐
- String.format方法使用-浅析(转)
转自 https://blog.csdn.net/u010137760/article/details/82869637 1.代码中简单使用2.源码调用的方法3.相关类-Formatter3.1可选 ...
- [BAT脚本] 1、BAT脚本FOR循环操作文件和命令返回实例
Wednesday, 31. October 2018 08:18PM - beautifulzzzz 一.需求 需要在windows上实现一个bat脚本解析json,将json转换为自己想要的key ...
- k8s-jenkins x CI/CD 动态创建slave---01
jenkins CI/CD(动态创建slave)简述: 由于之前管理kubernetes集群应用发布,用的是Gitlab-CI,用作开发环境管理还可以,生产环境管理发布,缺点太多,打包速度很慢.研究新 ...
- python之函数filter、reduce
---恢复内容开始--- 一.filter函数 filter() 函数用于过滤序列,过滤掉不符合条件的元素,返回由符合条件元素组成的新列表. 该接收两个参数,第一个为函数,第二个为序列,对序列中每个元 ...
- 怎么写自己的CMakeLists.txt--二
之前写过一篇及其简单的关于CMakeLists.txt的写法,现在重点剖析find_package的用法. 如果程序中使用了外部库,事先并不知道它的头文件和链接库的位置,就要给出头文件和链接库的查找方 ...
- PHP中直接使用sql语句
SELECT * FROM `tf_user` WHERE (`company_id` = '117' OR `other_company_ids` LIKE '%117,%' OR `other_c ...
- PyCharm创建Django项目并连接mysql数据库
0. 安装Django pip install django 1. 新建项目 注:我的Pycharm为社区版,创建项目时,File->New Project- 显示为: 注意勾选内容. 如果 ...
- golang学习笔记----源码文件
GO源码文件
- Spring Boot AOP之对请求的参数入参与返回结果进行拦截处理
Spring Boot AOP之对请求的参数入参与返回结果进行拦截处理 本文链接:https://blog.csdn.net/puhaiyang/article/details/78146620 ...
- 浅谈Semaphore类-示例
Semaphore类有两个重要方法 1.semaphore.acquire(); 请求一个信号量,这时候信号量个数-1,当减少到0的时候,下一次acquire不会再执行,只有当执行一个release( ...