CentOS6.5 Nginx优化编译配置
说到Nginx,它真的算是我在运维工作中的好朋友,它优异的性能和极高的工作效率实在是让人大爱,来自internet的报告称其epoll模型能够支持高达50000个并发连接数。
Epoll[维基百科]:
epoll是Linux下 多路复用IO接口select/poll的增强版本,它能显著提高程序在大量并发连接中只有少量活跃的情况下的系统CPU利用率,因为它会复用文件描述符 集合来传递结果而不用迫使开发者每次等待事件之前都必须重新准备要被侦听的文件描述符集合,另一点原因就是获取事件的时候,它无须遍历整个被侦听的描述符 集,只要遍历那些被内核IO事件异步唤醒而加入Ready队列的描述符集合就行了。epoll除了提供select/poll那种IO事件的电平触发 (Level Triggered)外,还提供了边沿触发(Edge Triggered),这就使得用户空间程序有可能缓存IO状态,减少epoll_wait/epoll_pwait的调用,提高应用程序效率。
Linux运维交流群 : 344177552
安装Nginx,这里我略过使用包管理器而使用编译的方式让Nginx运行起来:
1、安装Zlib函数库
####Gcc编译环境是必须条件#####[root@i-it ~]# yum install gcc-c++ make autoconf aotomake

[root@i-it ~]# tar zxf zlib-1.2.8.tar.gz

[root@i-it ~]# cd zlib-1.2.8[root@i-it zlib-1.2.8]#./configure --prefix=/software/zlib

[root@i-it zlib-1.2.8]# make && make install
2、添加对rewrite的支持,编译参数中启用了对utf8字符的支持,以便nginx支持中文的正则表达式
[root@i-it ~]# tar zxf pcre-8.35.tar.gz

[root@i-it ~]# cd pcre-8.35[root@i-it pcre-8.35]#./configure --prefix=/software/pcre --enable-utf8 --enable-unicode-properties

[root@i-it pcre-8.35]# make && make install
3、添加对https 的支持
[root@i-it ~]# tar zxf openssl-1.0.1h.tar.gz

[root@i-it ~]# cd openssl-1.0.1h[root@i-it openssl-1.0.1h]#./config --prefix=/software/openssl

[root@i-it openssl-1.0.1h]# make && make install
编 译TCMalloc,它是由Google公司发开的一款开源工具,goole-perftools中的一成员,TCMalloc在内存的分配效率和速度要 比标准的glibc库好得多,它不但可以用来优化高并发下的Mysql,从而降低系统的负载,还可以用于Nginx实现同样的功能,因此,对于高并发的 Nginx来说无疑是如虎添翼。
4、安装libunwind库
[root@i-it ~]# tar zxf libunwind-1.1.tar.gz

[root@i-it ~]# cd libunwind-1.1[root@i-it libunwind-1.1]# CFLAGS=-fPIC ./configure --prefix=/software/google-libunwind

[root@i-it libunwind-1.1]# make CFLAGS=-fPIC && make CFLAGS=-fPIC install
5、安装google-perftools
[root@i-it ~]# tar zxf gperftools-2.2.tar.gz

[root@i-it ~]# cd gperftools-2.2[root@i-it gperftools-2.2]# LDFLAGS="-L/software/google-libunwind/lib" CPPFLAGS="-I/software/google-libunwind/include"./configure --prefix=/software/google-perftools

[root@i-it gperftools-2.2]# make && make install
6、添加共享库路径
[root@i-it ~]# echo "/software/google-libunwind/lib/">>/etc/ld.so.conf

[root@i-it ~]# echo "/software/google-perftools/lib/">>/etc/ld.so.conf

[root@i-it ~]# echo "/software/zlib/lib/">>/etc/ld.so.conf

[root@i-it ~]# echo "/software/pcre/lib/">>/etc/ld.so.conf

[root@i-it ~]# ldconfig -v
7、编译Nginx
[root@i-it ~]# groupadd -g 1500 nginx

[root@i-it ~]# useradd -M -u 1500-g nginx -s /sbin/nologin nginx

[root@i-it ~]# mkdir /var/tmp/nginx

[root@i-it ~]# chown nginx:nginx /var/tmp/nginx/[root@i-it ~]# tar zxf nginx-1.7.1.tar.gz

[root@i-it ~]# cd nginx-1.7.1

#############注释该文件的174行取消debug模式##############

[root@i-it nginx-1.7.1]# vi auto/cc/gcc

    173# debug174# CFLAGS="$CFLAGS -g"

######因为google-perftools库的安装路径并非默认,所以这里又要修改一次源码####

[root@i-it nginx-1.7.1]# sed -i "s#/usr/local#/software/google-perftools#"auto/lib/google-perftools/conf

[root@i-it nginx-1.7.1]#./configure --prefix=/software/nginx --user=nginx --group=nginx --with-http_stub_status_module --with-http_ssl_module --with-http_realip_module --with-http_gzip_static_module --with-debug --http-client-body-temp-path=/var/tmp/nginx/client --http-proxy-temp-path=/var/tmp/nginx/proxy --http-fastcgi-temp-path=/var/tmp/nginx/fastcgi --http-uwsgi-temp-path=/var/tmp/nginx/uwsgi --http-scgi-temp-path=/var/tmp/nginx/scgi --with-pcre=/root/pcre-8.35--with-openssl=/root/openssl-1.0.1h--with-zlib=/root/zlib-1.2.8[root@i-it nginx-1.7.1]# make && make install
8、先添加一个启动脚本,让Nginx run起来
[root@i-it ~]# vi /etc/init.d/nginx

#!/bin/bash# nginx Startup script for the Nginx HTTP Server
# it is v.0.0.2 version.# chkconfig: - 85 15
# description: Nginx is a high-performance web and proxy server.
# It has a lot of features, but it's not for everyone.
# processname: nginx# pidfile: /software/nginx/logs/nginx.pid
# config: /software/nginx/conf/nginx.conf

nginxd=/software/nginx/sbin/nginx

nginx_config=/software/nginx/conf/nginx.conf

nginx_pid=/software/nginx/logs/nginx.pid

RETVAL=0

prog="nginx"# Source function library../etc/rc.d/init.d/functions

# Source networking configuration../etc/sysconfig/network

# Check that networking is up.[ ${NETWORKING}="no"]&&exit0[-x $nginxd ]||exit0
# Start nginx daemons functions.

start(){if[-e $nginx_pid ];then

echo "nginx already running...."exit1fi

echo -n $"Starting $prog: "

daemon $nginxd -c ${nginx_config}

RETVAL=$?

echo

[ $RETVAL =0]&& touch /var/lock/subsys/nginx

return $RETVAL

}
# Stop nginx daemons functions.

stop(){

echo -n $"Stopping $prog: "

killproc $nginxd

RETVAL=$?

echo

[ $RETVAL =0]&& rm -f /var/lock/subsys/nginx /usr/local/nginx/logs/nginx.pid

}

reload(){

echo -n $"Reloading $prog: "
#kill -HUP `cat ${nginx_pid}`

killproc $nginxd -HUP

RETVAL=$?

echo

}
# See how we were called.case"$1"in

start)

start

;;

stop)

stop

;;

reload)

reload

;;

restart)

stop

start

;;

status)

status $prog

RETVAL=$?;;*)

echo $"Usage: $prog {start|stop|restart|reload|status|help}"
exit1esacexit $RETVAL

#########赋权让其run起来#########[root@i-it ~]# chmod 755/etc/init.d/nginx && chkconfig nginx on

[root@i-it ~]# service nginx start

Starting nginx:[  OK  ][root@i-it ~]# netstat -pant | grep 80

tcp        000.0.0.0:800.0.0.0:*                   LISTEN      37831/nginx
9、Nginx run起来了,配置前面的google-perftools库
#####创建线程目录#####

[root@i-it ~]# mkdir /tmp/tcmalloc

[root@i-it ~]# chmod 0777/tmp/tcmalloc/

####修改Nginx配置文件#####

[root@i-it ~]# vi /software/nginx/conf/nginx.conf

pid        logs/nginx.pid;

google_perftools_profiles /tmp/tcmalloc;

###查看google-perftools是否加载###

[root@i-it ~]# service nginx restart

Stopping nginx:[  OK  ]Starting nginx:[  OK  ][root@i-it ~]#  lsof -n | grep tcmalloc

nginx     37882   nginx    9w      REG              253,001179654/tmp/tcmalloc.37882

nginx     37883   nginx   11w      REG              253,001179655/tmp/tcmalloc.37883

####每一行输出的数据表示Nginx主配置文件中worker_processes的值,其每个线程文件后面的数值为Nginx启动的PID####

[root@i-it ~]# ps aux | grep nginx

root     378800.00.230200892?Ss00:270:00 nginx: master process /software/nginx/sbin/nginx -c /software/nginx/conf/nginx.conf

nginx    378820.01.1348043844?        S    00:270:00 nginx: worker process

nginx    378830.01.1348043772?        S    00:270:00 nginx: worker process

####iptables 开80端口####[root@i-it ~]# iptables -I INPUT -p tcp --dport 80-j ACCEPT
访问Nginx,还有些细节处理本来想一并写在本文中,但是不想一篇文章太长篇了,所以决定分成上下….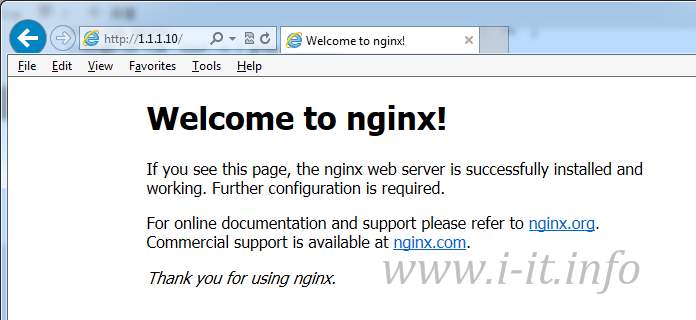
CentOS6.5 Nginx优化编译配置的更多相关文章
- CentOS6.5 Nginx优化编译配置[续]
继续上文CentOS6.5 Nginx优化编译配置本文记录有关Nginx系统环境的一些细节设置,有关Nginx性能调整除了配置文件吻合服务器硬件之前就是关闭不必要的服务.磁盘操作.文件描述符.内核调整 ...
- Linux(Centos6.5)+Nginx+PHP-fpm+Mysql配置
第一步:准备安装包 1.从[](http://nginx.org/en/download.html).下载nginx 源码包 //NOTE! 下载稳定版本 2.从[](http://php.net/d ...
- CentOS6.5_x64上简单编译配置Heartbeat3.0.4
Heartbeat 3与 2.x的最大差别在于,3 按模块把的原来2.x 拆分为多个子项目,并且提供了一个cluster-glue的组件,专用于Local ResourceManager 的管理.即h ...
- VS优化编译配置
在使用VS2010编译C++程序的时候,每次修改工程中的某一个文件,点击“生成-仅用于项目-仅生成**”时,往往都是整个工程都需要重新编译一遍.由于这个工程代码量太大,每次编译完成都需要将近10分钟左 ...
- Nginx 安装编译配置
./configure --prefix=/usr/local/nginx-1.8.0 --with-http_ssl_module --with-http_spdy_module --with-ht ...
- centos6.8服务器配置之编译安装PHP、配置nginx
php version 5.6.31.nginx version: nginx/1.10.2 1.下载: wget http://cn2.php.net/distributions/php-5.6.3 ...
- 高流量站点NGINX与PHP-fpm配置优化(译)
使用Nginx搭配PHP已有7年的这份经历让我们学会如何为高流量站点优化NGINX和PHP-fpm配置. 以下正是这方面的一些提示和建议: 1. 将TCP切换为UNIX域套接字 UNIX域套接字相比T ...
- nginx反向代理配置及优化
nginx反向代理配置及优化前言: 由于服务器apache抗不住目前的并发.加上前端squid配置后,问题依然无法解决.而页面程序大部分是动态.无法使用fastcgi来处理.因此想使用nginx做为反 ...
- 高流量站点NGINX与PHP-fpm配置优化
导读 使用Nginx搭配PHP已有7年的经历,这份经历让我们学会如何为高流量站点优化NGINX和PHP-fpm配置. 以下正是这方面的一些提示和建议: 1. 将TCP切换为UNIX域套接字 1. 将T ...
随机推荐
- expect实现ssh自动登录
expect实现ssh自动登录 #!/usr/local/bin/expect set PASSWD [lindex $argv 1] set IP [lindex $argv 0] set CM ...
- Java回调理解 (step by step)
在网上搜索了很多篇关于java回调函数的文章,自己也来试了一下写了这篇博客,可能有些地方理解不到位,烦请各位大大指正. 在计算机程序设计中.回调函数.或简称回调.是指通过函数參数传递到其他代码的,某一 ...
- javascript --- 事件托付
javascript 之 事件托付 长处:1.提高性能(仅仅须要对父级进行操作,子节点相同会拥有其相关属性和方法) 2.对于新加入的事件.也让其拥有父级事件的属性 <!doctype html& ...
- Android中使用SurfaceView和Canvas来绘制动画
事实上每一个View中都有Canvas能够用来绘制动画.仅仅须要在这个View中重载onDraw()方法就能够,可是SurfaceView类是一个专门用来制动动画的类. Canvas(中文叫做&quo ...
- 开玩笑Web它servlet(五岁以下儿童)---- 如何解决servlet线程安全问题
servlet默认值是安全线的存在,但说白,servlet安全线实际上是一个多线程线程安全问题.因为servlet它正好是一个多线程的安全问题出现. 每次通过浏览器http同意提交请求,将一个实例se ...
- windows 2003 自动安全设置
@echo offecho.echo.echo.echo 〓〓〓〓〓〓〓〓〓〓〓〓〓〓〓〓〓〓〓〓〓〓〓〓〓〓echo.echo.echo windows 2003 自动安全设置程序 echo. ec ...
- 怎样使用 iOS 7 的 AVSpeechSynthesizer 制作有声书(1)
原文: http://www.raywenderlich.com/64623/make-narrated-book-using-avspeechsynthesizer-ios-7 随着 PageVie ...
- 如何解决This system is not registered with RHN.
今天我必须写下这篇文章,由于在我刚刚接触到Linux下安装oracle时碰到了Linux中少xscreensaver.rpm包自己弄了非常久.最后还是被一个大哥帮我攻克了:仅仅能说非常的感谢你! 我试 ...
- "ScrollView can host only one direct child"问题解决了
1. 问题叙述性说明: (请注意以下几点大胆). ScrollView作为顶层view时报错,直接导致apk崩溃.具体错误信息例如以下: 12-21 09:12:15.150: D/AndroidRu ...
- 委托、Lambda和事件
委托 委托相当于C语言当中的函数指针,不过委托是类型安全的类,它定义了返回类型和参数的类型. 声明委托 在C#中使用一个类,分为两个阶段.首先,需要定义这个类,告诉编译器这个类由什么字段和方法组成,然 ...