(1/2) 为了理解 UWP 的启动流程,我从零开始创建了一个 UWP 程序
每次使用 Visual Studio 的模板创建一个 UWP 程序,我们会在项目中发现大量的项目文件、配置、应用启动流程代码和界面代码。然而这些文件在 UWP 程序中到底是如何工作起来的?
我从零开始创建了一个 UWP 程序,用于探索这些文件的用途,了解 UWP 程序的启动流程。
本文分为两个部分:
本文将一个普通项目改造成 UWP 项目,重点在了解 UWP 的项目文件组成。
从最简单的项目模板开始
虽然可以从零开始写一个 csproj 文件,不过这并没有什么技术含量,因为新的 csproj 文件实在是非常简单。参见:
于是,我创建一个 .NET Core 控制台应用。当然,其它简单的如 .NET Standard 库都是一样的,反正最后都会被我改得面目全非。
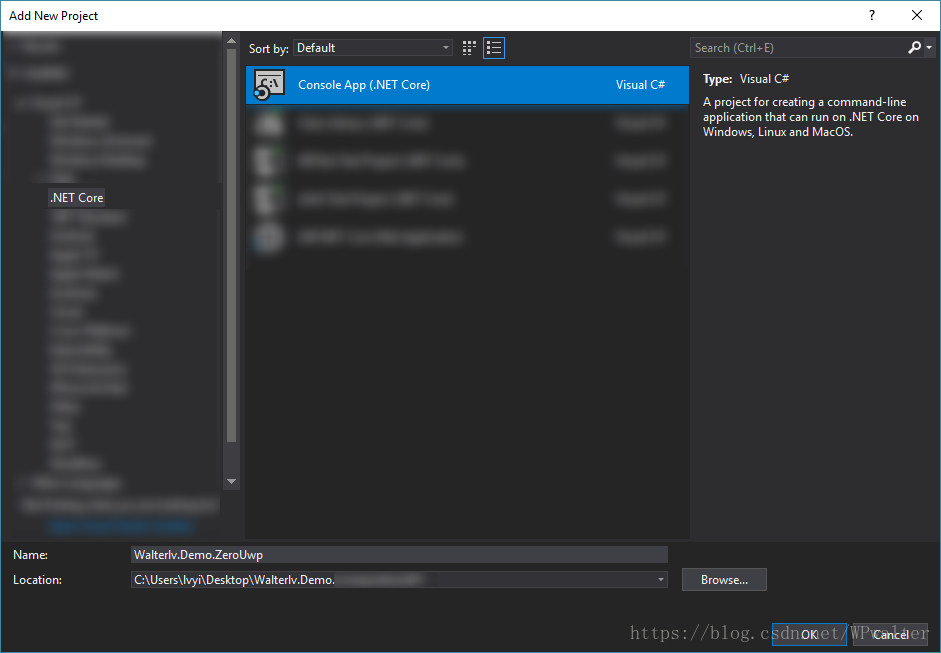
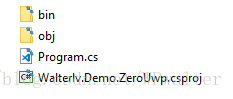
于是我得到了一个 csproj 项目文件和包含有应用程序入口的 Program.cs 文件。
其中 csproj 文件内容非常简单:
<Project Sdk="Microsoft.NET.Sdk">

  <PropertyGroup>

    <OutputType>Exe</OutputType>

    <TargetFramework>netcoreapp2.1</TargetFramework>

  </PropertyGroup>

</Project>
Program.cs 文件也是:
// using System;

namespace Walterlv.Demo.ZeroUwp

{

    class Program

    {

        static void Main(string[] args)

        {

            // 这一句需要删除,因为 UWP 程序中不能使用控制台。

            // Console.WriteLine("Hello World!");

        }

    }

}
不过,这两个文件都会被改掉的,已经无所谓里面是什么内容了。
将项目改造成 UWP 项目
UWP 程序的输出类型是 AppContainerExe,而不是一般的 Library 或者 Exe。
另外,基于 Microsoft.NET.Sdk 的新 csproj 格式不支持 UWP 应用程序。所以我希望借助第三方的 MSBuild.Sdk.Extras 来编译 UWP 的项目。参见 新 csproj 对 WPF/UWP 支持不太好?有第三方 SDK 可以用!MSBuild.Sdk.Extras。
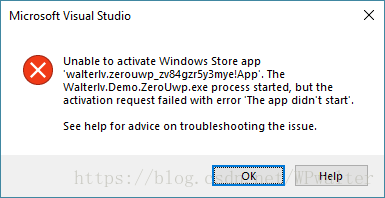
然而实际情况也不容乐观,因为此第三方 Sdk 只支持 UWP 的库程序,而不支持应用程序容器。所以即便修改为以下方式,最终也因为缺少 Visual Studio RunCommand 的支持,而导致无法启动。
<Project Sdk="MSBuild.Sdk.Extras/1.6.41">
<PropertyGroup>
<OutputType>AppContainerExe</OutputType>
<TargetFrameworks>uap10.0.17134</TargetFrameworks>
</PropertyGroup>
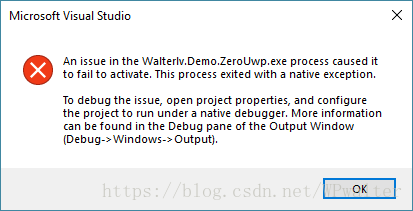
</Project>使用以上新 Sdk 的 csproj 格式,我完整地写完了整个 csproj 文件和后续步骤,依然无法解决下面这个错误提示框:
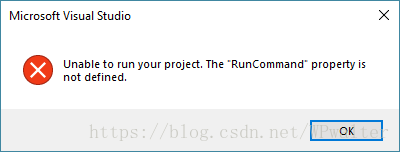
▲ 无法启动
所以我们依然只能使用传统的 csproj 文件格式。里面大部分的内容从模板中复制而来。事实上,我寻找了很多资料,都没有找到让支持 Sdk 的新 csproj 格式支持 UWP 的主程序。
<?xml version="1.0" encoding="utf-8"?>
<Project ToolsVersion="15.0" DefaultTargets="Build" xmlns="http://schemas.microsoft.com/developer/msbuild/2003">
<Import Project="$(MSBuildExtensionsPath)\$(MSBuildToolsVersion)\Microsoft.Common.props" Condition="Exists('$(MSBuildExtensionsPath)\$(MSBuildToolsVersion)\Microsoft.Common.props')" />
<PropertyGroup>
<Configuration Condition=" '$(Configuration)' == '' ">Debug</Configuration>
<Platform Condition=" '$(Platform)' == '' ">x86</Platform>
<ProjectGuid>{09A58639-DC50-41C1-8BCE-A2217A1D3327}</ProjectGuid>
<OutputType>AppContainerExe</OutputType>
<AppDesignerFolder>Properties</AppDesignerFolder>
<RootNamespace>Walterlv.Demo.ZeroUwp</RootNamespace>
<AssemblyName>Walterlv.Demo.ZeroUwp</AssemblyName>
<DefaultLanguage>en-US</DefaultLanguage>
<TargetPlatformIdentifier>UAP</TargetPlatformIdentifier>
<TargetPlatformVersion Condition=" '$(TargetPlatformVersion)' == '' ">10.0.17134.0</TargetPlatformVersion>
<TargetPlatformMinVersion>10.0.15063.0</TargetPlatformMinVersion>
<MinimumVisualStudioVersion>14</MinimumVisualStudioVersion>
<FileAlignment>512</FileAlignment>
<ProjectTypeGuids>{A5A43C5B-DE2A-4C0C-9213-0A381AF9435A};{FAE04EC0-301F-11D3-BF4B-00C04F79EFBC}</ProjectTypeGuids>
<WindowsXamlEnableOverview>true</WindowsXamlEnableOverview>
<DebugSymbols>true</DebugSymbols>
<OutputPath>bin\x86\Debug\</OutputPath>
<DefineConstants>DEBUG;TRACE;NETFX_CORE;WINDOWS_UWP</DefineConstants>
<DebugType>full</DebugType>
<PlatformTarget>x86</PlatformTarget>
<UseVSHostingProcess>false</UseVSHostingProcess>
<ErrorReport>prompt</ErrorReport>
<Prefer32Bit>true</Prefer32Bit>
</PropertyGroup>
<PropertyGroup>
<RestoreProjectStyle>PackageReference</RestoreProjectStyle>
</PropertyGroup>
<ItemGroup>
<Compile Include="Program.cs" />
<Compile Include="Properties\AssemblyInfo.cs" />
</ItemGroup>
<ItemGroup>
<AppxManifest Include="Package.appxmanifest">
<SubType>Designer</SubType>
</AppxManifest>
</ItemGroup>
<ItemGroup>
<PackageReference Include="Microsoft.NETCore.UniversalWindowsPlatform">
<Version>6.1.5</Version>
</PackageReference>
</ItemGroup>
<PropertyGroup Condition=" '$(VisualStudioVersion)' == '' or '$(VisualStudioVersion)' < '14.0' ">
<VisualStudioVersion>14.0</VisualStudioVersion>
</PropertyGroup>
<Import Project="$(MSBuildExtensionsPath)\Microsoft\WindowsXaml\v$(VisualStudioVersion)\Microsoft.Windows.UI.Xaml.CSharp.targets" />
</Project>编写 AppxManifest
项目改造成 UWP 项目后,似乎已经完成了大部分了,但此时直接运行会有编译错误,因为我缺少 UWP 程序必要的 AppxManifest.xml 文件。
事实上,AppxManifest.xml 的创建是非常繁琐的;通常是编译过程帮我们根据 Package.appxmanifest 文件自动生成的。然而创建一个 Package.appxmanifest 也是很麻烦的。至少,要让 Visual Studio 能够直接打开这个文件所需的最小代码量是下面这些(不能编译通过):
<?xml version="1.0" encoding="utf-8"?>

<Package xmlns="http://schemas.microsoft.com/appx/manifest/foundation/windows10"

         xmlns:mp="http://schemas.microsoft.com/appx/2014/phone/manifest"

         xmlns:uap="http://schemas.microsoft.com/appx/manifest/uap/windows10"

         xmlns:uap2="http://schemas.microsoft.com/appx/manifest/uap/windows10/2"

         xmlns:uap3="http://schemas.microsoft.com/appx/manifest/uap/windows10/3"

         xmlns:iot="http://schemas.microsoft.com/appx/manifest/iot/windows10"

         xmlns:mobile="http://schemas.microsoft.com/appx/manifest/mobile/windows10"

         IgnorableNamespaces="uap mp uap3 iot uap2 mobile">

  <Identity Name="walterlv.zerouwp" Publisher="CN=walterlv" Version="0.1.0.0" />

  <mp:PhoneIdentity PhoneProductId="97f5137d-c6be-4395-9af0-bbfdcea40fa7" PhonePublisherId="00000000-0000-0000-0000-000000000000" />

  <Properties>

    <DisplayName>Walterlv.ZeroUwp</DisplayName>

    <PublisherDisplayName>walterlv</PublisherDisplayName>

    <Logo>Assets\StoreLogo.png</Logo>

  </Properties>

  <Dependencies>

    <TargetDeviceFamily Name="Windows.Universal" MinVersion="10.0.0.0" MaxVersionTested="10.0.0.0" />

  </Dependencies>

  <Resources>

    <Resource Language="x-generate" />

  </Resources>

  <Applications>

    <Application Id="App" Executable="$targetnametoken$.exe" EntryPoint="Walterlv.ZeroUwp.Program">

      <uap:VisualElements DisplayName="Walterlv.ZeroUwp">

      </uap:VisualElements>

    </Application>

  </Applications>

</Package>
可以阅读这些文档了解如何完成这份文件的编写:
- Identity (Windows 10) - UWP app developer - Microsoft Docs
- pm:PhoneIdentity (Windows 10) - UWP app developer - Microsoft Docs
具体来说,<Identity /> 是此程序包的标识符,需要在整个应用商店范围内唯一(如果将此包与应用商店关联,这个值会自动更新,所以不用在意填成什么)。<mp:PhoneIdentity /> 是此程序包在移动设备上的标识符,应用的更新会依据此标识符的 GUID 来唯一确定,格式必须是 GUID。
事实上,虽然依然无法完成编译,但此时可以通过在 Visual Studio 中打开这份文件来观察还缺少哪些必要的信息需要填写。

事实上,我们缺少的信息并不多,只有四个,都从 Package/Applications/Application 开始:
- uap:VisualElements@Description
- uap:VisualElements@BackgroundColor
- uap:VisualElements@Square150x150Logo
- uap:VisualElements@Square44x44Logo
- uap:VisualElements/uap:DefaultTile@Wide310x150Logo
这是 XPath 语法,详见:XML 的 XPath 语法
同时,我们还真的需要相应的图片:
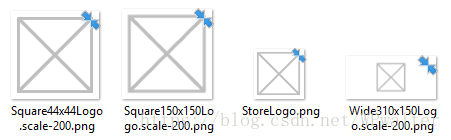
建议从 UWP 程序模板中复制,也可以去这里下载:UWP 程序所需的最少 Logo 资源-CSDN下载。
补充完毕之后,完整的文件如下:
<?xml version="1.0" encoding="utf-8"?>

<Package xmlns="http://schemas.microsoft.com/appx/manifest/foundation/windows10"

         xmlns:mp="http://schemas.microsoft.com/appx/2014/phone/manifest"

         xmlns:uap="http://schemas.microsoft.com/appx/manifest/uap/windows10"

         xmlns:uap2="http://schemas.microsoft.com/appx/manifest/uap/windows10/2"

         xmlns:uap3="http://schemas.microsoft.com/appx/manifest/uap/windows10/3"

         xmlns:iot="http://schemas.microsoft.com/appx/manifest/iot/windows10"

         xmlns:mobile="http://schemas.microsoft.com/appx/manifest/mobile/windows10"

         IgnorableNamespaces="uap mp uap3 iot uap2 mobile">

  <Identity Name="walterlv.zerouwp" Publisher="CN=walterlv" Version="0.1.0.0" />

  <Properties>

    <DisplayName>Walterlv.ZeroUwp</DisplayName>

    <PublisherDisplayName>walterlv</PublisherDisplayName>

    <Logo>Assets\StoreLogo.png</Logo>

  </Properties>

  <Dependencies>

    <TargetDeviceFamily Name="Windows.Universal" MinVersion="10.0.0.0" MaxVersionTested="10.0.0.0" />

  </Dependencies>

  <Resources>

    <Resource Language="x-generate" />

  </Resources>

  <Applications>

    <Application Id="App" Executable="$targetnametoken$.exe" EntryPoint="Walterlv.ZeroUwp.Program">

      <uap:VisualElements DisplayName="Walterlv.ZeroUwp" Description="Walterlv.ZeroUwp is a demo application to learn how uwp application runs." BackgroundColor="transparent" Square150x150Logo="Assets\Square150x150Logo.png" Square44x44Logo="Assets\Square44x44Logo.png">

        <uap:DefaultTile Wide310x150Logo="Assets\Wide310x150Logo.png">

        </uap:DefaultTile>

      </uap:VisualElements>

    </Application>

  </Applications>

</Package>
不能忘掉,这份文件还需要添加到 csproj 项目文件中:
<!-- 新增了此节点,即 AppxManifest 和相关资源。 -->

  <ItemGroup>

    <AppxManifest Include="Package.appxmanifest">

      <SubType>Designer</SubType>

    </AppxManifest>

    <Content Include="Assets\Square150x150Logo.scale-200.png" />

    <Content Include="Assets\Square44x44Logo.scale-200.png" />

    <Content Include="Assets\StoreLogo.png" />

    <Content Include="Assets\Wide310x150Logo.scale-200.png" />

  </ItemGroup>
编写 AssemblyInfo.cs
由于没有新的基于 Sdk 的 csproj 文件支持,所以我们需要自己编写 AssemblyInfo.cs 文件,并放入到 Properties 文件夹中。
using System.Reflection;

using System.Runtime.InteropServices;

[assembly: AssemblyTitle("Walterlv.Demo.ZeroUwp")]

[assembly: AssemblyProduct("Walterlv.Demo.ZeroUwp")]

[assembly: AssemblyCopyright("Copyright © walterlv 2018")]

[assembly: AssemblyVersion("0.1.0.0")]

[assembly: AssemblyFileVersion("0.1.0.0")]

[assembly: ComVisible(false)]
最后,csproj 文件会如下面这样。
<?xml version="1.0" encoding="utf-8"?>
<Project ToolsVersion="15.0" DefaultTargets="Build" xmlns="http://schemas.microsoft.com/developer/msbuild/2003">
<Import Project="$(MSBuildExtensionsPath)\$(MSBuildToolsVersion)\Microsoft.Common.props" Condition="Exists('$(MSBuildExtensionsPath)\$(MSBuildToolsVersion)\Microsoft.Common.props')" />
<PropertyGroup>
<Configuration Condition=" '$(Configuration)' == '' ">Debug</Configuration>
<Platform Condition=" '$(Platform)' == '' ">x86</Platform>
<ProjectGuid>{7B81D14B-6094-44E1-9B2F-F577995A3CAF}</ProjectGuid>
<OutputType>AppContainerExe</OutputType>
<AppDesignerFolder>Properties</AppDesignerFolder>
<RootNamespace>Walterlv.Demo.ZeroUwp</RootNamespace>
<AssemblyName>Walterlv.Demo.ZeroUwp</AssemblyName>
<DefaultLanguage>en-US</DefaultLanguage>
<TargetPlatformIdentifier>UAP</TargetPlatformIdentifier>
<TargetPlatformVersion Condition=" '$(TargetPlatformVersion)' == '' ">10.0.17134.0</TargetPlatformVersion>
<TargetPlatformMinVersion>10.0.17134.0</TargetPlatformMinVersion>
<MinimumVisualStudioVersion>14</MinimumVisualStudioVersion>
<FileAlignment>512</FileAlignment>
<ProjectTypeGuids>{A5A43C5B-DE2A-4C0C-9213-0A381AF9435A};{FAE04EC0-301F-11D3-BF4B-00C04F79EFBC}</ProjectTypeGuids>
<WindowsXamlEnableOverview>true</WindowsXamlEnableOverview>
</PropertyGroup>
<PropertyGroup Condition="'$(Configuration)|$(Platform)' == 'Debug|x86'">
<DebugSymbols>true</DebugSymbols>
<OutputPath>bin\x86\Debug\</OutputPath>
<DefineConstants>DEBUG;TRACE;NETFX_CORE;WINDOWS_UWP</DefineConstants>
<NoWarn>;2008</NoWarn>
<DebugType>full</DebugType>
<PlatformTarget>x86</PlatformTarget>
<UseVSHostingProcess>false</UseVSHostingProcess>
<ErrorReport>prompt</ErrorReport>
<Prefer32Bit>true</Prefer32Bit>
</PropertyGroup>
<PropertyGroup Condition="'$(Configuration)|$(Platform)' == 'Release|x86'">
<OutputPath>bin\x86\Release\</OutputPath>
<DefineConstants>TRACE;NETFX_CORE;WINDOWS_UWP</DefineConstants>
<Optimize>true</Optimize>
<NoWarn>;2008</NoWarn>
<DebugType>pdbonly</DebugType>
<PlatformTarget>x86</PlatformTarget>
<UseVSHostingProcess>false</UseVSHostingProcess>
<ErrorReport>prompt</ErrorReport>
<Prefer32Bit>true</Prefer32Bit>
<UseDotNetNativeToolchain>true</UseDotNetNativeToolchain>
</PropertyGroup>
<PropertyGroup Condition="'$(Configuration)|$(Platform)' == 'Debug|ARM'">
<DebugSymbols>true</DebugSymbols>
<OutputPath>bin\ARM\Debug\</OutputPath>
<DefineConstants>DEBUG;TRACE;NETFX_CORE;WINDOWS_UWP</DefineConstants>
<NoWarn>;2008</NoWarn>
<DebugType>full</DebugType>
<PlatformTarget>ARM</PlatformTarget>
<UseVSHostingProcess>false</UseVSHostingProcess>
<ErrorReport>prompt</ErrorReport>
<Prefer32Bit>true</Prefer32Bit>
</PropertyGroup>
<PropertyGroup Condition="'$(Configuration)|$(Platform)' == 'Release|ARM'">
<OutputPath>bin\ARM\Release\</OutputPath>
<DefineConstants>TRACE;NETFX_CORE;WINDOWS_UWP</DefineConstants>
<Optimize>true</Optimize>
<NoWarn>;2008</NoWarn>
<DebugType>pdbonly</DebugType>
<PlatformTarget>ARM</PlatformTarget>
<UseVSHostingProcess>false</UseVSHostingProcess>
<ErrorReport>prompt</ErrorReport>
<Prefer32Bit>true</Prefer32Bit>
<UseDotNetNativeToolchain>true</UseDotNetNativeToolchain>
</PropertyGroup>
<PropertyGroup Condition="'$(Configuration)|$(Platform)' == 'Debug|x64'">
<DebugSymbols>true</DebugSymbols>
<OutputPath>bin\x64\Debug\</OutputPath>
<DefineConstants>DEBUG;TRACE;NETFX_CORE;WINDOWS_UWP</DefineConstants>
<NoWarn>;2008</NoWarn>
<DebugType>full</DebugType>
<PlatformTarget>x64</PlatformTarget>
<UseVSHostingProcess>false</UseVSHostingProcess>
<ErrorReport>prompt</ErrorReport>
<Prefer32Bit>true</Prefer32Bit>
</PropertyGroup>
<PropertyGroup Condition="'$(Configuration)|$(Platform)' == 'Release|x64'">
<OutputPath>bin\x64\Release\</OutputPath>
<DefineConstants>TRACE;NETFX_CORE;WINDOWS_UWP</DefineConstants>
<Optimize>true</Optimize>
<NoWarn>;2008</NoWarn>
<DebugType>pdbonly</DebugType>
<PlatformTarget>x64</PlatformTarget>
<UseVSHostingProcess>false</UseVSHostingProcess>
<ErrorReport>prompt</ErrorReport>
<Prefer32Bit>true</Prefer32Bit>
<UseDotNetNativeToolchain>true</UseDotNetNativeToolchain>
</PropertyGroup>
<PropertyGroup>
<RestoreProjectStyle>PackageReference</RestoreProjectStyle>
</PropertyGroup>
<ItemGroup>
<Compile Include="Properties\AssemblyInfo.cs" />
<Compile Include="Program.cs" />
<Compile Include="VisualProperties.cs" />
</ItemGroup>
<ItemGroup>
<AppxManifest Include="Package.appxmanifest">
<SubType>Designer</SubType>
</AppxManifest>
<Content Include="Assets\Square150x150Logo.scale-200.png" />
<Content Include="Assets\Square44x44Logo.scale-200.png" />
<Content Include="Assets\StoreLogo.png" />
<Content Include="Assets\Wide310x150Logo.scale-200.png" />
</ItemGroup>
<ItemGroup>
<PackageReference Include="Microsoft.NETCore.UniversalWindowsPlatform">
<Version>6.1.5</Version>
</PackageReference>
</ItemGroup>
<PropertyGroup Condition=" '$(VisualStudioVersion)' == '' or '$(VisualStudioVersion)' < '14.0' ">
<VisualStudioVersion>14.0</VisualStudioVersion>
</PropertyGroup>
<Import Project="$(MSBuildExtensionsPath)\Microsoft\WindowsXaml\v$(VisualStudioVersion)\Microsoft.Windows.UI.Xaml.CSharp.targets" />
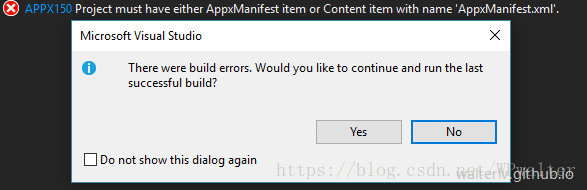
</Project>一个说明:如果运行时出现本机错误,那么可能是上面的 csproj 文件没有配置正确。如果出现下图所示的错误,建议先考虑将以上 csproj 文件中的所有内容复制到你的项目文件中再试。
完成部署和运行
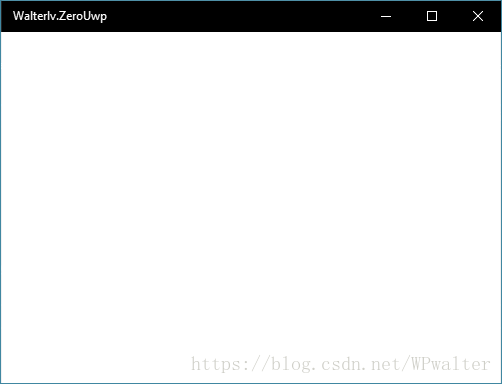
以上所有内容是一个 UWP 程序完成编译并运行所需的最少信息了。
此时运行,我们只会看到一个空的窗口,就像这样:
Main 函数中的断点是可以进入的:
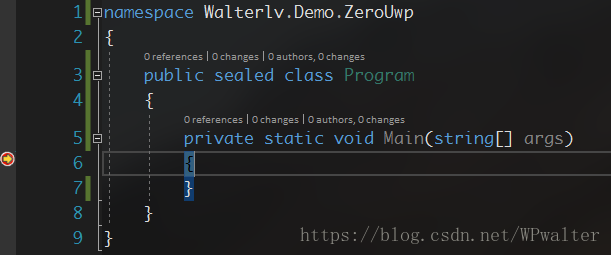
不过,如果继续运行,会提示错误。因为我们的程序并没有显示任何 UWP 的界面。
总结与后续
在本文中,我们了解到 UWP 项目所需的最少文件有:
- *.csproj 项目文件
- 这是整个从零开始的 UWP 程序中最复杂的一个文件,因为目前没有找到任何一个 Sdk 支持 UWP 的主程序工程。
- Package.appxmanifest 文件
- 这是 UWP 应用程序的清单文件。事实上,这不是最终的清单文件,而是用于在项目中填写信息的文件;从前面的错误信息中我们了解到,最终的清单文件是 AppxManifest.xml。
- Assets 文件夹中的四张图片
- StoreLogo、Square44x44Logo、Square150x150Logo 和 Wide310x150Logo 是清单文件能够正常生成所需的最少 Logo 资源
- AssemblyInfo.cs
- 由于缺少 Project@Sdk 的支持,所以我们必须编写 AssemblyInfo.cs 文件来指定版本信息。
- Program.cs
- 这是一开始我们就添加好的文件,就是放 Main 函数的地方。虽然我们什么都没写,但已经能够进入断点了。
接下来我们将从 Main 函数开始,完成一个 UWP 程序的启动:(2/2) 为了理解 UWP 的启动流程,我从零开始创建了一个 UWP 程序。
(1/2) 为了理解 UWP 的启动流程,我从零开始创建了一个 UWP 程序的更多相关文章
- (2/2) 为了理解 UWP 的启动流程,我从零开始创建了一个 UWP 程序
每次使用 Visual Studio 的模板创建一个 UWP 程序,我们会在项目中发现大量的项目文件.配置.应用启动流程代码和界面代码.然而这些文件在 UWP 程序中到底是如何工作起来的? 我从零开始 ...
- Flink on Yarn模式启动流程源代码分析
此文已由作者岳猛授权网易云社区发布. 欢迎访问网易云社区,了解更多网易技术产品运营经验. Flink on yarn的启动流程可以参见前面的文章 Flink on Yarn启动流程,下面主要是从源码角 ...
- 浅析Linux启动流程
Linux系统启动流程 Linux 系统的启动,从计算机开机通电自检开始,一直到登陆系统,需要经历多个过程.了解 Linux 的启动过程,有助于了解 Linux 系统的结构,也对系统的排错有很大的帮助 ...
- React Native 启动流程简析
导读:本文以 react-native-cli 创建的示例工程(安卓部分)为例,分析 React Native 的启动流程. 工程创建步骤可以参考官网.本文所分析 React Native 版本为 v ...
- Chromium的GPU进程启动流程
转载请注明出处:http://www.cnblogs.com/fangkm/p/3960327.html 硬件渲染依赖计算机的GPU,GPU种类繁多,兼容这么多种类的硬件,稳定性是个大问题,虽然Chr ...
- 《转》深入理解Activity启动流程(四)–Activity Task的调度算法
本文原创作者:Cloud Chou. 出处:本文链接 本系列博客将详细阐述Activity的启动流程,这些博客基于Cm 10.1源码研究. 深入理解Activity启动流程(一)--Activity启 ...
- 《转》深入理解Activity启动流程(三)–Activity启动的详细流程2
本文原创作者:Cloud Chou. 出处:本文链接 本系列博客将详细阐述Activity的启动流程,这些博客基于Cm 10.1源码研究. 深入理解Activity启动流程(一)--Activity启 ...
- 《转》深入理解Activity启动流程(三)–Activity启动的详细流程1
本文原创作者:Cloud Chou. 出处:本文链接 本系列博客将详细阐述Activity的启动流程,这些博客基于Cm 10.1源码研究. 深入理解Activity启动流程(一)--Activity启 ...
- 《转》深入理解Activity启动流程(二)–Activity启动相关类的类图
本文原创作者:Cloud Chou. 出处:本文链接 本系列博客将详细阐述Activity的启动流程,这些博客基于Cm 10.1源码研究. 在介绍Activity的详细启动流程之前,先为大家介绍Act ...
随机推荐
- 在ajax请求下的缓存机制
1.在服务端加 header(“Cache-Control: no-cache, must-revalidate”);2.在ajax发送请求前加上 anyAjaxObj.setRequestHeade ...
- python调用虹软2.0第二版
第一版踩了无数的坑,终于第二版把坑全添了,这次更新可以正常获取人脸数,角度,代码可读性更高,继续更新中 第三版已发出 https://www.cnblogs.com/wxt51/p/10125460. ...
- js三种对话框
<html> <head> <script> function tip1(){ //这个基本没有什么说的,就是弹出一个提醒的对话框 alert("这个第一 ...
- pahlcon:循环调度(Dispatch Loop)或跳转
循环调度将会在分发器执行,直到没有action需要执行为止.在上面的例子中,只有一个action 被执行到.现在让我们来看下“forward”(转发)怎样才能在循环调度里提供一个更加复杂的操作流,从而 ...
- Python 输出百分比的两种方式
Python 输出百分比的两种方式 注: 在python3环境下测试. 方式1:直接使用参数格式化:{:.2%} {:.2%}: 显示小数点后2位 显示小数点后2位: >>> pri ...
- 常用的SpringMVC注解
1.@RequestMapping() 访问链接编写: 例如: (1).请求方法: 访问链接: (2).请求参数和请求头: 访问链接: 2.@PathVariable 例如: 访问链接: 结果显示: ...
- Centos6安装MariaDB-yum方式
1.创建安装目录: mkdir /data/mysql/ mkdir /data/mysql/datafile mkdir /data/mysql/logfile 2.创建用户: useradd -r ...
- 【css】响应式布局入门【转】
最近研究响应式设计框架的时候,发现网上很多相关的属性介绍,却很少有系统的入门级使用的文章,我自己整理了一篇入门知识,并没有什么高深的理论,也不牵扯到框架. 目前已经越来越多的站点以及wap站点使用响应 ...
- 《Effective C++》第3章 资源管理(2)-读书笔记
章节回顾: <Effective C++>第1章 让自己习惯C++-读书笔记 <Effective C++>第2章 构造/析构/赋值运算(1)-读书笔记 <Effecti ...
- elasticsearch关于索引切分的实现
[背景信息] ES一直以来对于已经创建好的索引的分片是不可以进行分割的,简单的说,当你创建了一个索引,并指定了number_of_shards为2,当随着数据量的不断增大,是无法将索引的shard扩充 ...