QT串口通信编程
QT串口编程
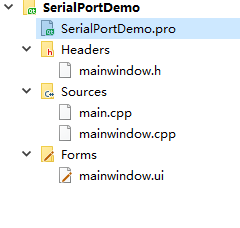
文件夹目录结构如下图所示
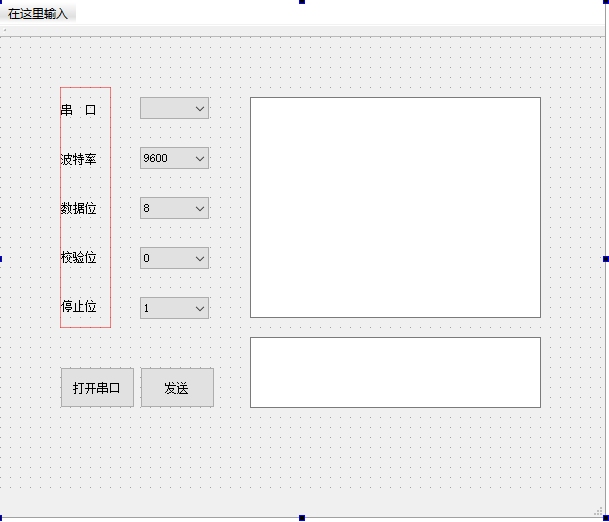
设计的示例界面如下图所示
首先在项目文件里面添加一句
QT += serialport
SerialPortDemo.pro文件如下:
#-------------------------------------------------

#

# Project created by QtCreator 2019-02-21T13:23:59

#

#-------------------------------------------------

QT   += core gui

QT   += serialport

greaterThan(QT_MAJOR_VERSION, 4): QT += widgets

TARGET = SerialPortDemo

TEMPLATE = app

# The following define makes your compiler emit warnings if you use

# any feature of Qt which has been marked as deprecated (the exact warnings

# depend on your compiler). Please consult the documentation of the

# deprecated API in order to know how to port your code away from it.

DEFINES += QT_DEPRECATED_WARNINGS

# You can also make your code fail to compile if you use deprecated APIs.

# In order to do so, uncomment the following line.

# You can also select to disable deprecated APIs only up to a certain version of Qt.

#DEFINES += QT_DISABLE_DEPRECATED_BEFORE=0x060000# disables all the APIs deprecated before Qt 6.0.0

CONFIG += c++11

SOURCES += \

main.cpp \

mainwindow.cpp

HEADERS += \

mainwindow.h

FORMS += \

mainwindow.ui

# Default rules for deployment.

qnx: target.path = /tmp/$${TARGET}/bin

else: unix:!android: target.path = /opt/$${TARGET}/bin

!isEmpty(target.path): INSTALLS += target
在头文件mainwindow.h中引入qt串口通信所需要的头文件,mainwindow.h文件代码如下:
    #ifndef MAINWINDOW_H

#define MAINWINDOW_H

#include <QMainWindow>

#include <QDebug>

//引入qt中串口通信需要的头文件

#include <QtSerialPort/QSerialPort>

#include <QtSerialPort/QSerialPortInfo>

namespace Ui {

class MainWindow;

}

class MainWindow : public QMainWindow

{

Q_OBJECT

public:

explicit MainWindow(QWidget *parent = nullptr);

~MainWindow();

private slots:

void on_OpenSerialButton_clicked();

void ReadData();

void on_btnSend_clicked();

private:

Ui::MainWindow *ui;

QSerialPort *serial;//全局的串口对象

};

#endif // MAINWINDOW_H

##实现效果的mainwindow.cpp代码如下:

#include "mainwindow.h"

#include "ui_mainwindow.h"

//添加串口通信需要用到的两个串口头文件

#include "QtSerialPort/QSerialPort"

#include "QtSerialPort/QSerialPortInfo"

MainWindow::MainWindow(QWidget *parent) :

QMainWindow(parent),

ui(new Ui::MainWindow)

{

ui->setupUi(this);

//查找可用的串口

foreach(const QSerialPortInfo &info,QSerialPortInfo::availablePorts())

{

QSerialPort serial;

serial.setPort(info);

if(serial.open(QIODevice::ReadWrite))

{

ui->portBox->addItem(serial.portName());

serial.close();

}

}

//设置波特率下拉菜单的第0项默认值

ui->baudBox->setCurrentIndex(0);

}

MainWindow::~MainWindow()

{

delete ui;

}

void MainWindow::on_OpenSerialButton_clicked()

{

if(ui->OpenSerialButton->text()==tr("打开串口"))

{

 serial=new QSerialPort;

 //设置串口名

 serial->setPortName(ui->portBox->currentText());

 //打开串口

 serial->open(QIODevice::ReadWrite);

 //设置波特率

 serial->setBaudRate(QSerialPort::Baud115200);

 //设置数据为

 switch(ui->dataBox->currentIndex())

 {

 case 0:

 serial->setDataBits(QSerialPort::Data8);

 break;

 default:

 break;

 }

 //设置校验位

 switch (ui->checkBox->currentIndex())

 {

 case 0:

 serial->setParity(QSerialPort::NoParity);

 break;

 default:

 break;

 }

 //设置停止为

 switch(ui->stopBox->currentIndex())

 {

 case 0:

 serial->setStopBits(QSerialPort::OneStop);

 break;

 case 1:

 serial->setStopBits(QSerialPort::TwoStop);

 break;

 default:

 break;

 }

 //设置流控制

 serial->setFlowControl(QSerialPort::NoFlowControl);//设置为无流控制

 //关闭设置菜单使能

 ui->portBox->setEnabled(false);

 ui->dataBox->setEnabled(false);

 ui->checkBox->setEnabled(false);

 ui->stopBox->setEnabled(false);

 ui->baudBox->setEnabled(false);

 ui->OpenSerialButton->setText("关闭串口");

 QObject::connect(serial,&QSerialPort::readyRead,this,&MainWindow::ReadData);

}

else

{

//关闭串口

serial->clear();

serial->close();

serial->deleteLater();

//恢复使能

ui->portBox->setEnabled(true);

ui->baudBox->setEnabled(true);

ui->dataBox->setEnabled(true);

ui->checkBox->setEnabled(true);

ui->stopBox->setEnabled(true);

ui->OpenSerialButton->setText("打开串口");

}

}

void MainWindow::on_btnSend_clicked()

{

serial->write(ui->txtWrite->toPlainText().toLatin1());

}

//读取接收到的消息

void MainWindow::ReadData()

{

QByteArray buf;

buf=serial->readAll();

if(!buf.isEmpty())

{

QString str = buf;

ui->txtRead->appendPlainText(str);

}

buf.clear();

}
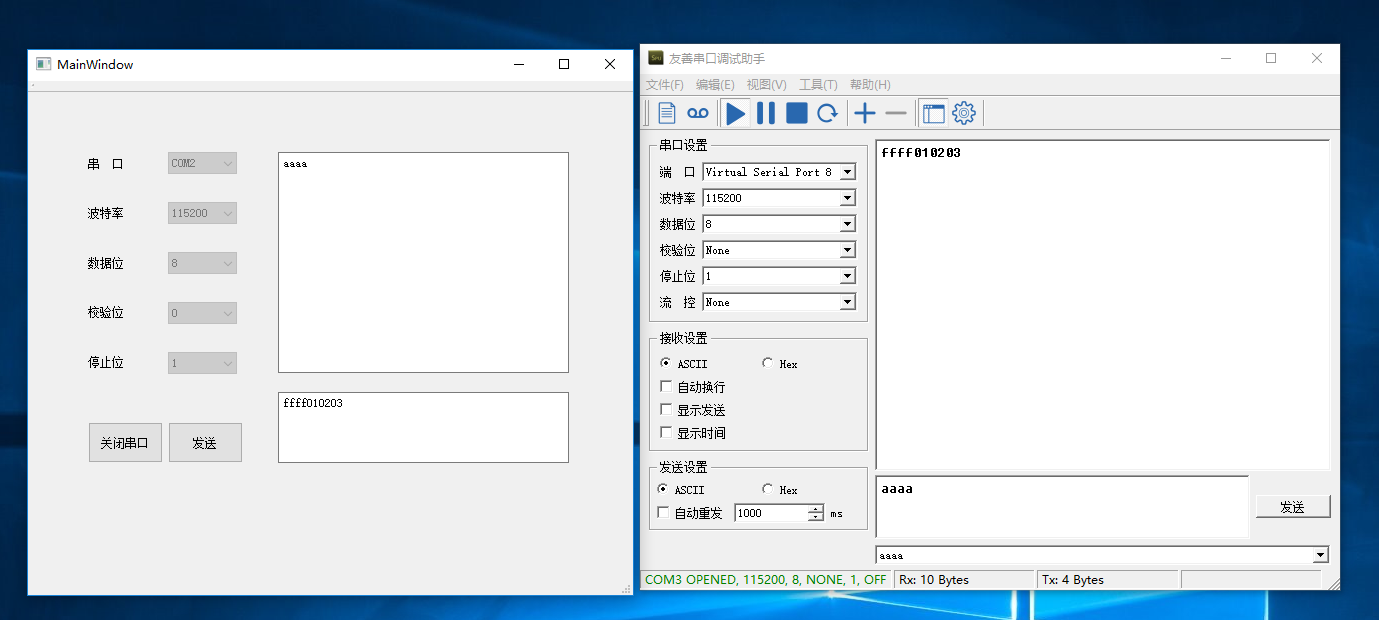
最终运行效果如下图所示:
QT串口通信编程的更多相关文章
- Qt串口通信
1. Qt串口通信类QSerialPort 在Qt5的的更新中,新增了串口通信的相关接口类QSerialPort,这使得在开发者在使用Qt进行UI开发时,可以更加简单有效地实现串口通信的相关功能. 开 ...
- linux下的qt串口通信
1.linux下的qt串口通信跟windows唯一的差别就是端口号的名字,windows下面是COM,而linux是ttyUSB0的路径 2.一般情况下linux插上USB转串口线就可以在/dev/目 ...
- Linux 虚拟串口及 Qt 串口通信实例
Linux 虚拟串口及 Qt 串口通信实例 2011-06-22 17:49 佚名 互联网 字号:T | T Linux 虚拟串口及 Qt 串口通信实例是本文所要介绍的内容,在实现过程中,打开了两个伪 ...
- Qt 串口通信之使用16进制发送数据的转换方式
Qt 串口通信之使用16进制发送数据的转换方式 一 概述 有时候在做上位机串口通讯时,经常需要将字符串转成16进制的形式作为发送,借此分析记录一下. 二 需求分析 //假设需要转换的字符:如下 QSt ...
- Qt 串口通信
在Qt5之前,串口通信基本依赖于第三方库,下面是我曾接触过的串口通信类库: 名称 语言 平台 QextSerialPort QT C++ Win/Linux http://sourceforge. ...
- QT 串口通信 数据16进制发送
在QT中进行串口通信时,很多情况要用到发送16进制的数据.从网上找来了一段代码测试能用: static QByteArray QString2Hex(QString str) { QByteArray ...
- Qt串口通信专题教程
查看以前的教程:Qt编写串口通信程序全程图文讲解 查看Wincom和Lincom介绍:Qt跨平台串口通信软件Wincom与Lincom 下载软件,文档和源码:资源下载 ——————————————20 ...
- Qt 串口通信 高速发送出错的解决方法总结
使用网上的qextserialport-1.2类,自行开发多线程串口通信.开发的过程中,出现两个问题: 问题1:我用信号槽跨线程调用串口类MyCom 发送和接收数据,中间运行的时候,会内存错误,Q ...
- Qt串口通信接收数据不完整的解决方法
在使用串口接收数据时,当数据量大的时候会出现数据接收不完整的情况.因为串口数据获取函数readAll()由readyRead()信号触发,但readyRead()信号在串口读到起始标志时立即发送,并不 ...
随机推荐
- 第15.31节 PyQt(Python+Qt)入门学习:containers容器类部件GroupBox分组框简介
老猿Python博文目录 专栏:使用PyQt开发图形界面Python应用 老猿Python博客地址 一.概述 容器部件就是可以在部件内放置其他部件的部件,在Qt Designer中可以使用的容器部件有 ...
- PyQt(Python+Qt)学习随笔:视图中的拖放操作注意事项
老猿Python博文目录 老猿Python博客地址 在通过PyQt构建的图形界面中进行拖放,要成功进行拖放需要注意: 视图相关属性需要支持拖放,具体相关属性请参考<PyQt(Python+Qt) ...
- PyQt(Python+Qt)学习随笔:布局控件layout的layoutSizeConstraint属性不起作用的问题解决办法
在<PyQt(Python+Qt)学习随笔:布局控件layout的layoutSizeConstraint属性>中介绍layout的layoutSizeConstraint属性后,反复测试 ...
- PHP代码审计分段讲解(11)
后面的题目相对于之前的题目难度稍微提升了一些,所以对每道题进行单独的分析 27题 <?php if(!$_GET['id']) { header('Location: index.php?id= ...
- Leetcode学习笔记(3)
题目1 ID88 给你两个有序整数数组 nums1 和 nums2,请你将 nums2 合并到 nums1 中,使 num1 成为一个有序数组. 说明: 初始化 nums1 和 nums2 的元素数量 ...
- 移动端H5测试调试利器 chrome://inspect/#devices
使用 chrome://inspect/#devices,可以使安卓手机里的WebView也能和chrome一样审查元素,调试和测试移动端H5页面. 我使用的是三星S6 (该功能支持安卓系统4.4及以 ...
- 团队项目6——Alpha阶段项目复审
复审团队 广东靓仔六强选手 复审员 钟俊豪(3118005122) 复审内容 小组名称和链接 优点 缺点&Bug报告 最终排名 代码敲不队https://www.cnblogs.com/pip ...
- js原生方法map实现
<!DOCTYPE html> <html lang="en"> <head> <meta charset="UTF-8&quo ...
- tornado 作业 简单首页 登录页 个人中心
s4 index.py 1 import tornado.ioloop 2 import tornado.web 3 import time 4 5 6 class IndexHandler(torn ...
- easyui form提交时验证必填,打开时不显示必填提示
给textbox添加required:true属性后,打开页面时整个表单都是红的,需要将其设置为提交时再验证. 解决方法:通过textbox的novalidate属性来控制是否开启验证 <inp ...