WindowsTerminal折腾记
背景
Windows Terminal最近出了1.0版本,界面非常美观,但要配置好还是要下一番功夫,而且网上的教程都是互相抄,所以特将我的配置过程记录如下。
字体
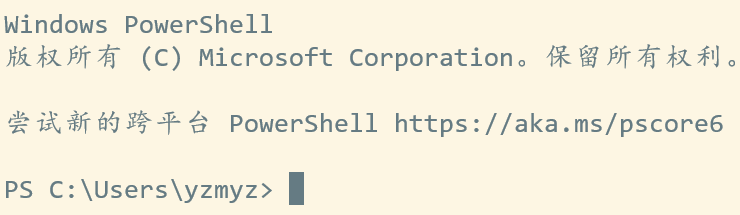
首先是字体,默认字体英文不错,但中文挺不好看的,而Windows Terminal不支持单字节字符和双字节字符配置不同的字体,所以我找到了一个合成字体的网站,将英文的Consolas字体和和中文的楷体合并成了一个字体,然后双击安装。在配置文件的defaults标签下修改fontFace为字体的名字,fontSize为字体的大小,这是使用了合成字体的界面:
背景图片
接着是背景图片,在配置文件的defaults标签下添加如下属性:
"backgroundImage": "D:\\images\\image.jpg",

"backgroundImageOpacity": 0.2,

"backgroundImageStretchMode": "uniformToFill",
第一个属性是路径,第二个是透明度,第三个是拉伸方式,拉伸方式有四种取值,可以参考微软官方文档,建议使用uniformToFill,它能在保持图片分辨率的同时将图片拉伸充满窗口。
主题
Windows Terminal自带可以更换的主题可以在官方github上面看到,因为我的背景图是暖色调的,所以我选择了Solarized Light这一主题,不过使用该主题会造成一些地方的颜色看不太清楚,比如此主题下运行vim的查找字符串高亮显示背景和文字的颜色就过于接近,看不清楚;我所使用的文件管理器vifm的当前行高亮也看不太清楚,PowerShell的一些字符也被背景掩盖,所以需要自己修改一下。这是我自己定制的Solarized Light主题:
        {

            "name": "My Solarized Light",

            "black": "#073642",

            "red": "#dc322f",

            "green": "#859900",

            "yellow": "#b58900",

            "blue": "#268bd2",

            "purple": "#d33682",

            "cyan": "#2aa198",

            "white": "#eee8d5",

            "brightBlack": "#002b36",

            "brightRed": "#cb4b16",

            "brightGreen": "#586e75",

            "brightYellow": "#657b83",

            "brightBlue": "#9ce3f8",

            "brightPurple": "#6c71c4",

            "brightCyan": "#859595",

            "brightWhite": "#fae7b3",

            "background": "#fdf6e3",

            "foreground": "#657b83"

        }
修改了brightBlue和brightCyan属性,同时将cursorColor属性改成了#657b83使得光标文字保持同个颜色,这个属性既可以出现在主题中也可以出现在前面的全局配置中,我放在前面了。如果还有显示不清楚的地方,可以用QQ的截图功能对想要修改的颜色区域进行取色,切换成十六进制后在主题中查找它对应的属性名然后修改。
以上可以解决各种程序的显示不清楚问题,但Powershell的问题本质上是Powershell语法高亮的问题,和Windows Terminal的主题无关,所以需要在PowerShell的配置文件里面修改。进入PowerShell,运行gvim $profile(gvim可以改成notepad等编辑器),然后输入下面的命令,保存退出:
Set-PSReadLineOption -Colors @{

    Number = 'DarkBlue'

    Member = 'DarkBlue'

} -EditMode 'Vi'
其中将Number和Member这两个token的颜色改成蓝色,因为原来的颜色就是黄色,和Solarized Light的背景颜色混起来看不清楚,如果还有显示不清楚的token,可以参考MSDN进行修改,editmode参数的修改属于我的个人喜好,Emacs党可以把Vi换成Emacs,都不是的就去掉这个参数即可。
完整配置
// This file was initially generated by Windows Terminal 1.0.1401.0

// It should still be usable in newer versions, but newer versions might have additional

// settings, help text, or changes that you will not see unless you clear this file

// and let us generate a new one for you.

// To view the default settings, hold "alt" while clicking on the "Settings" button.

// For documentation on these settings, see: https://aka.ms/terminal-documentation

{

    "$schema": "https://aka.ms/terminal-profiles-schema",

    "defaultProfile": "{0a920985-e2e7-4fe2-8610-f29c814c920a}",

    // You can add more global application settings here.

    // To learn more about global settings, visit https://aka.ms/terminal-global-settings

    // If enabled, selections are automatically copied to your clipboard.

    "copyOnSelect": true,

    // If enabled, formatted data is also copied to your clipboard

    "copyFormatting": true,

    "initialRows": 25,

    "initialCols": 80,

    // A profile specifies a command to execute paired with information about how it should look and feel.

    // Each one of them will appear in the 'New Tab' dropdown,

    //   and can be invoked from the commandline with `wt.exe -p xxx`

    // To learn more about profiles, visit https://aka.ms/terminal-profile-settings

    "profiles":

    {

        "defaults":

        {

            // Put settings here that you want to apply to all profiles.

            "fontFace": "KaiConsolas",

            "fontSize": 16,

            "cursorShape": "filledBox",

            "cursorColor": "#657b83",

            "backgroundImage": "D:\\images\\image.jpg",

            "backgroundImageOpacity": 0.2,

            "colorScheme": "My Solarized Light"

        },

        "list":

        [

            {

                // Make changes here to the powershell.exe profile.

                "guid": "{61c54bbd-c2c6-5271-96e7-009a87ff44bf}",

                "name": "Windows PowerShell",

                "commandline": "powershell.exe",

                "hidden": false

            },

            {

                "guid": "{0a920985-e2e7-4fe2-8610-f29c814c920a}",

                "hidden": false,

                "name": "Vifm",

                "commandline": "D:\\Apps\\vifm-w64-se-0.10.1-binary\\vifm.exe",

                "startingDirectory" : "D:\\"

            },

            {

                // Make changes here to the cmd.exe profile.

                "guid": "{0caa0dad-35be-5f56-a8ff-afceeeaa6101}",

                "name": "命令提示符",

                "commandline": "cmd.exe",

                "hidden": false

            },

            {

                "guid": "{2c4de342-38b7-51cf-b940-2309a097f518}",

                "hidden": false,

                "name": "Ubuntu",

                "source": "Windows.Terminal.Wsl"

            },

            {

                "guid": "{b453ae62-4e3d-5e58-b989-0a998ec441b8}",

                "hidden": false,

                "name": "Azure Cloud Shell",

                "source": "Windows.Terminal.Azure"

            }

        ]

    },

    // Add custom color schemes to this array.

    // To learn more about color schemes, visit https://aka.ms/terminal-color-schemes

    "schemes": [

        {

            "name": "My Solarized Light",

            "black": "#073642",

            "red": "#dc322f",

            "green": "#859900",

            "yellow": "#b58900",

            "blue": "#268bd2",

            "purple": "#d33682",

            "cyan": "#2aa198",

            "white": "#eee8d5",

            "brightBlack": "#002b36",

            "brightRed": "#cb4b16",

            "brightGreen": "#586e75",

            "brightYellow": "#657b83",

            "brightBlue": "#9ce3f8",

            "brightPurple": "#6c71c4",

            "brightCyan": "#859595",

            "brightWhite": "#fae7b3",

            "background": "#fdf6e3",

            "foreground": "#657b83"

        }

    ],

    // Add custom keybindings to this array.

    // To unbind a key combination from your defaults.json, set the command to "unbound".

    // To learn more about keybindings, visit https://aka.ms/terminal-keybindings

    "keybindings":

    [

        // Copy and paste are bound to Ctrl+Shift+C and Ctrl+Shift+V in your defaults.json.

        // These two lines additionally bind them to Ctrl+C and Ctrl+V.

        // To learn more about selection, visit https://aka.ms/terminal-selection

        // { "command": {"action": "copy", "singleLine": false }, "keys": "ctrl+c" },

        // { "command": "paste", "keys": "ctrl+v" },

        // Press Ctrl+Shift+F to open the search box

        { "command": "find", "keys": "ctrl+shift+f" },

        // Press Alt+Shift+D to open a new pane.

        // - "split": "auto" makes this pane open in the direction that provides the most surface area.

        // - "splitMode": "duplicate" makes the new pane use the focused pane's profile.

        // To learn more about panes, visit https://aka.ms/terminal-panes

        { "command": { "action": "splitPane", "split": "auto", "splitMode": "duplicate" }, "keys": "alt+shift+d" }

    ]

}
WindowsTerminal折腾记的更多相关文章
- 斐讯N1折腾记
斐讯N1折腾记:运行 Linux 及优化 2018-06-23 37条评论 4,445次阅读 11人点赞 最后更新时间:2019年03月10日 咳咳咳,上篇教程教大家给斐讯 N1 降级并且刷了 ...
- Atom编辑器折腾记
http://blog.csdn.net/bomess/article/category/3202419/2 Atom编辑器折腾记_(1)介绍下载安装 Atom编辑器折腾记_(2)基础了解使用 Ato ...
- BeagleBone折腾记(一):连接你的狗板
BeagleBone折腾记一连接你的狗板 准备 了解BeagleBone BeagleBone社区 所需软硬件 USB连接 TTL连接 结语 准备 了解BeagleBone BeagleBone可能一 ...
- Vue折腾记 - (3)写一个不大靠谱的typeahead组件
Vue折腾记 - (3)写一个不大靠谱的typeahead组件 2017年07月20日 15:17:05 阅读数:691 前言 typeahead在网站中的应用很多..今天跟着我来写一个不大靠谱的ty ...
- Anaconda折腾记(1)
Anaconda折腾记 谨此记录小白的我在Anaconda里面的摸爬滚打 更换更新源 可以不使用命令,直接进入C盘,进入user文件夹,进入当前的用户文件夹下,记得显示隐藏文件. 找到.condarc ...
- FreeBSD jail 折腾记(二)
FreeBSD jail 折腾记(二) 创建jail目录 创建4个 分别是模板 骨架 数据 项目 创建模板目录 mkdir -p /jail/j1 # 然后放入基本目录,上篇说过不再写 创建骨架目录 ...
- 【转载】有图 KVM折腾记..
KVM折腾记...https://lengjibo.github.io/KVM%E6%8A%98%E8%85%BE%E8%AE%B0/ Veröffentlicht am 2018-09-20 | ...
- Android编译环境折腾记
题记:感觉是时候写点什么了=_=! 第一次安装了ubuntu14.04.5,官网下载的iso,官网下的jar,编译android4.x需要安装jdk6,更高的版本会有问题,baidu到很多搭建环境的步 ...
- 【树莓派】【转载】Raspberry Pi (树莓派)折腾记
在网上看到一篇对树莓派折腾记录比较详细的文章,时间比较早,但是有些东西没变. 对于新手而言,还是有点参考价值.文章参见:http://skypegnu1.blog.51cto.com/8991766/ ...
随机推荐
- isinstance用法
''' 作用:来判断一个对象是否是一个已知的类型. 其第一个参数(object)为对象,第二个参数(type)为类型名(int...)或类型名的一个列表((int,list,float)是一个列表). ...
- JPS/JPS+ 寻路算法
目录 概念 强迫邻居(Forced Neighbour) 跳点(Jump Point) JPS 寻路算法(Jump Point Search) 实现原理 示例过程 JPS+(Jump Point Se ...
- C#数据结构与算法系列(八):栈(Stack)
1.介绍 栈是一个先入后出(FILO-First In Last Out)的有序列表 栈是限制线性表中元素的插入和删除只能在线性表的同一端进行的特殊线性表.允许插入和删除的一端,为变化的一端,称为栈顶 ...
- Java Jar 包加密 -- XJar
Java Jar 包加密 一.缘由 Java的 Jar包中的.class文件可以通过反汇编得到源码.这样一款应用的安全性就很难得到保证,别人只要得到你的应用,不需花费什么力气,就可以得到源码. 这时候 ...
- spring cloud config 配置文件更新
Spring Cloud Config Server 作为配置中心服务端 拉取配置时更新 git 仓库副本,保证是最新结果 支持数据结构丰富,yml, json, properties 等 配合 eu ...
- Snmp扫描-snmpwalk、snmpcheck
SNMp经常被错误配置,是信息的金矿. SNMP服务是使用明文传输的,即使不能通过community进行查询,也有可能使用抓包嗅探的方法得到SNMP数据包中的数据. snmpwalk命令可以查询到很多 ...
- Python 简明教程 --- 20,Python 类中的属性与方法
微信公众号:码农充电站pro 个人主页:https://codeshellme.github.io 与客户保持良好的关系可以使生产率加倍. -- Larry Bernstain 目录 类中的变量称为属 ...
- 入门大数据---Spark部署模式与作业提交
一.作业提交 1.1 spark-submit Spark 所有模式均使用 spark-submit 命令提交作业,其格式如下: ./bin/spark-submit \ --class <ma ...
- 入门大数据---Spark累加器与广播变量
一.简介 在 Spark 中,提供了两种类型的共享变量:累加器 (accumulator) 与广播变量 (broadcast variable): 累加器:用来对信息进行聚合,主要用于累计计数等场景: ...
- python文件处理-检查文件名/路径是否正确
内容涉及:检查路径是否存在,文件名长度是否一直,将重复的文件夹重命名 # -*- coding: utf-8 -*- import os import sys import numpy as np i ...