php结合layui前端实现 多图上传
前端html代码
<div class="layui-upload">

    <button type="button" class="layui-btn layui-btn-normal" id="testList">请选择图片</button>

    <span class="num_pic"></span>

    <div class="layui-upload-list">

        <table class="layui-table">

            <thead>

                <tr>

                    <th>文件名</th>

                    <th id="pic">图片预览</th>

                    <th>大小</th>

                    <th>状态</th>

                    <th id="cao">操作</th>

                </tr>

            </thead>

            <tbody id="demoList"></tbody>

        </table>

    </div>

    <button type="button" class="layui-btn" id="testListAction">开始上传</button>

        <span class="num_pic"></span>

</div>
js 代码
<script type="text/javascript">
layui.use('upload', function() {
var $ = layui.jquery,
upload = layui.upload;
//多文件列表示例
var demoListView = $('#demoList'),
uploadListIns = upload.render({
elem: '#testList',
url: "{url('pic/index/upload')}",
accept: 'images',
acceptMime: 'image/*',
size: 8192,
multiple: true,
number: 400,
auto: false,
exts: 'jpg|png|jpeg',
bindAction: '#testListAction',
choose: function(obj) {
var files = this.files = obj.pushFile(); //将每次选择的文件追加到文件队列
//读取本地文件
obj.preview(function(index, file, result) {
var tr = $(['<tr id="upload-' + index + '">', '<td>' + file.name + '</td>', '<td><img src="' + result + '" alt="' + file.name + '" style="width: 100px;height: 40px;"></td>', '<td>' + (file.size / 1014).toFixed(1) + 'kb</td>', '<td>等待上传</td>', '<td>', '<button class="layui-btn layui-btn-xs demo-reload layui-hide">重传</button>', '<button class="layui-btn layui-btn-xs layui-btn-danger demo-delete">删除</button>', '</td>', '</tr>'].join(''));
//单个重传
tr.find('.demo-reload').on('click', function() {
obj.upload(index, file);
$("#upload-" + index).find("td").eq(2).html((file.size / 1014).toFixed(1) + 'kb');
}); //删除
tr.find('.demo-delete').on('click', function() {
delete files[index]; //删除对应的文件
tr.remove();
uploadListIns.config.elem.next()[0].value = ''; //清空 input file 值,以免删除后出现同名文件不可选
}); demoListView.append(tr);
$(".num_pic").text("总共【" + demoListView.find("tr").length + "】张图片");
});
}, done: function(res, index, upload) {
if(res.code == 0) { //上传成功
$("#cao").text("地址");
var tr = demoListView.find('tr#upload-' + index),
tds = tr.children();
tds.eq(3).html('<span style="color: #5FB878;">上传成功</span>');
tds.eq(4).html('<input type="text" name="imgs[]" value="' + res.file + '" class="layui-input" />'); //清空操作
return delete this.files[index]; //删除文件队列已经上传成功的文件
}
this.error(index, upload);
},
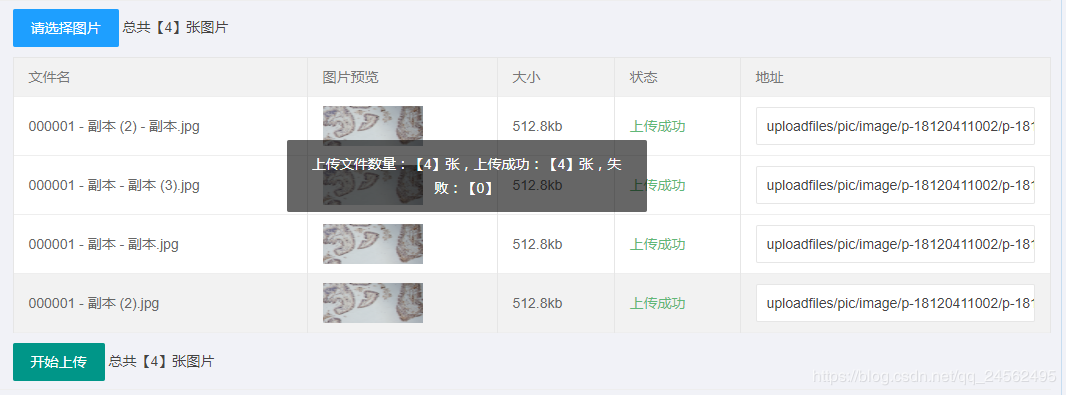
allDone: function(obj) { //当文件全部被提交后,才触发
layer.msg("上传文件数量:【" + obj.total + "】张,上传成功:【" + obj.successful + "】张,失败:【" + obj.aborted + "】", {
time: 3000
});
console.log(obj.total); //得到总文件数
console.log(obj.successful); //请求成功的文件数
console.log(obj.aborted); //请求失败的文件数
},
error: function(index, upload) {
var tr = demoListView.find('tr#upload-' + index),
tds = tr.children();
tds.eq(2).html('<span style="color: #FF5722;">上传失败</span>');
tds.eq(4).find('.demo-reload').removeClass('layui-hide'); //显示重传
}
}); });
</script>
后端代码
public function uploadAction(){

        $file=$_FILES['file'];

        $root_url =  'uploadfiles/pic/image/';

        if (!is_uploaded_file($file['tmp_name'])){

            $data = array('code'=>1,'msg'=>"错误");

            exit(json_encode($data,0));

        }

      /*  $root_url.=date('Ymd').'/';*/

        $ext = pathinfo($file['name']);

        $num=makenum($this->memberinfo['id']);

        $root_url.=$num.'/';

        if (!is_dir($root_url)) {

            mkdir($root_url,0777, true);

        }

        $pa=file_list::get_file_list($root_url);

        $na=count($pa) + 1;

        if ($na<10){

            $name=$num.'-000'.$na;

        }elseif($na<100){

            $name=$num.'-00'.$na;

        }elseif($na<1000){

            $name=$num.'-0'.$na;

        }else{

            $name=$num.'-'.$na;

        }

        $n=$root_url.$name.".".$ext['extension'];

        $result=move_uploaded_file($file['tmp_name'],$n);

        if ($result){

            exit(json_encode(array("code"=>0,"msg"=>"ok","file"=>$n,"size"=>$file['size']),0));

        }else{

            exit(json_encode(array("code"=>1,"msg"=>"false","file"=>$n,"size"=>$file['size']),0));

        }

    }
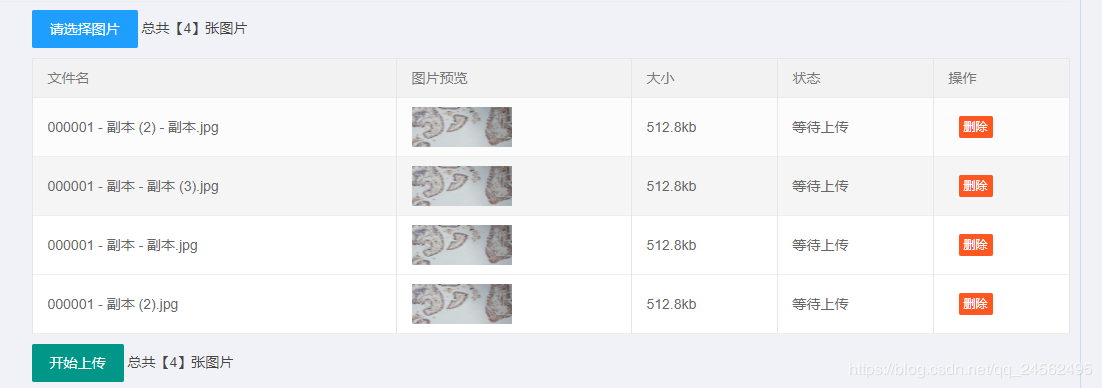
上传效果:
转载:https://blog.csdn.net/qq_24562495/article/details/84785914(原文)
php结合layui前端实现 多图上传的更多相关文章
- layui中的多图上传
效果展示: 1.html部分: 注:<input> 作为隐藏域,用于保存多图上传的资源数组,方便后期进行 form 表单的提交 <input type="hidden&qu ...
- [PHP] layui实现多图上传,图片自由排序,自由删除
实现效果如下图所示: 实现代码: css代码 <style> .layui-upload-img { width: 90px; height: 90px; margin: ; } .pic ...
- layui多图上传实现删除功能
在使用layui的多图上传时发现没有删除功能 在网上搜索解决办法时有的感觉太复杂有的不符合自己所需要的所以就自己动手 下面附上代码 HTML: <div class="layui-up ...
- layui多图上传
<!DOCTYPE html> <html lang="en"> <head> <meta charset="UTF-8&quo ...
- 多图上传控制器及模型代码(2)thinkphp5+layui实现多图上传保存到数据库,可以实现图片自由排序,自由删除。
公共css代码 <style> .layui-upload-img { width: 90px; height: 90px; margin: 0; } .pic-more { width: ...
- thinkphp+layui多图上传(1)thinkphp5+layui实现多图上传保存到数据库,可以实现图片自由排序,自由删除。
公共css代码 <style> .layui-upload-img { width: 90px; height: 90px; margin: 0; } .pic-more { width: ...
- ueditor编辑器多图上传为什么顺序打乱了
我上一个版本用的是ueditor1.3.6,自从1.4.2版以后,“前端上传模块统一改用webuploader”,ueditor在多图上传一直考虑漏掉了图片顺序的问题. 我的网站在用户上传图片文章的时 ...
- Laravel5多图上传和Laravel5单图上传的功能实现
Laravel5文件上传默认只能上传一张图片,但是有的时候我们需要一次性上传多图就不行了,我在网上看了很多关于laravel5图片上传的文章,很多都只是介绍laravel5单图上传,多图片上传介绍少之 ...
- Bootstrap+PHP fileinput 实现多图上传 这是ajax上传,只能单张单张图片地上传
插件及源代码可以在这里下载 http://www.jq22.com/jquery-info5231下面是根据下载的demo进行补充:使用bootstrap界面美观,可预览,可拖拽上传,可配合ajax异 ...
随机推荐
- 远程过程调用发展历程 WebAPI GRPC Hprose
作者:马秉尧链接:https://www.zhihu.com/question/23299132/answer/109978084来源:知乎著作权归作者所有.商业转载请联系作者获得授权,非商业转载请注 ...
- 关于matlab中画图放大局部细节的问题
1)需要用得到一个matnify.m文件,下载地址magnify 2)接下来就是如何使用magnify的问题,参见使用 只是在“使用”中的第二步之前首先要用cd进入magnify所在位置.
- [LeetCode&Python] Problem 704. Binary Search
Given a sorted (in ascending order) integer array nums of n elements and a target value, write a fun ...
- dee
窗口居中def center(self): screen = QDesktopWidget().screenGeometry() size = self.geometry() self.move((s ...
- python基础(五)
一.os模块 import os# os.rename(old,new)#重命名# os.remove(f)#删除文件 # os.mkdir('china/beijing') #创建文件夹# os.m ...
- CentOS官网下载系统镜像
https://jingyan.baidu.com/article/1876c85279cedd890a13766c.html
- 使用日期操作类(Calendar)获得几秒、几分钟、几小时之前的时间
public String dealDate(String case_time){ // 日期操作类 Calendar calendar = Calendar.getInstance(); // 当前 ...
- java学习之路重新出发
一.Java发展史: 1995年由詹姆斯高斯林带领团队开发 java问世 2004 jdk1.5版本更名jdk5.0 2010 sun公司被oracle公司收购 二.java三大体系: java ...
- js相关用法
一.location1.返回当前网址urllocation.href2.设置跳转网址urllocation.href = "http://www.baidu.com"3.重载刷新l ...
- the status bar issue of react-native Modal on Android ( RN v0.57.0)
Problem: When use Modal in react-native, the status bar is not included if you make a full-screen ma ...