
Librepilot-Windows编译环境的搭建
1、安装Msys2
下载Msys2,下载地址 https://msys2.github.io,注意根据笔记本的型号选择32bit或64bit。
2、添加LibrePilot MinGW库
在 /etc/pacman.conf文件的尾部添加如下代码,可以手动添加,添加后保存即可。
[librepilot-mingw]

SigLevel = Optional TrustAll

Server = http://download.librepilot.org/repo/mingw
echo "[librepilot-mingw]" >> /etc/pacman.conf

echo "SigLevel = Optional TrustAll" >> /etc/pacman.conf

echo "Server = http://download.librepilot.org/repo/mingw" >> /etc/pacman.conf
3、安装所需的模块
注意此步骤不在Msys2中进行,而是根据你的电脑机型选择32bit的MinGW-w64 Win32 Shell或者64bit的MinGW-w64 Win64 Shell进行操作。
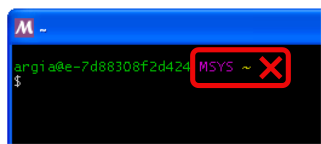
For 32 bit:
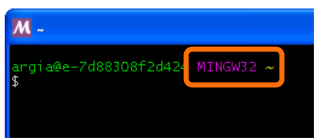
pacman -Sy

pacman -S --needed git unzip tar

pacman -S --needed mingw-w64-i686-toolchain

pacman -S --needed mingw-w64-i686-ccache

pacman -S --needed mingw-w64-i686-ntldd

pacman -S --needed mingw-w64-i686-qt5

pacman -S --needed mingw-w64-i686-SDL

pacman -S --needed mingw-w64-i686-mesa

pacman -S --needed mingw-w64-i686-openssl

pacman -S --needed mingw-w64-i686-gdal-minimal

pacman -S --needed mingw-w64-i686-OpenSceneGraph

pacman -S --needed mingw-w64-i686-osgearth

pacman -S --needed mingw-w64-i686-graphite2

pacman -S --needed mingw-w64-i686-nghttp2

pacman -S --needed mingw-w64-i686-gst-plugins-base

pacman -S --needed mingw-w64-i686-gst-plugins-good

pacman -S --needed mingw-w64-i686-gst-plugins-bad

pacman -S --needed mingw-w64-i686-gst-plugins-ugly

pacman -S --needed mingw-w64-i686-gst-libav
推荐安装的debug包:
pacman -S --needed mingw-w64-i686-OpenSceneGraph-debug

pacman -S --needed mingw-w64-i686-osgearth-debug
For 64 bit:
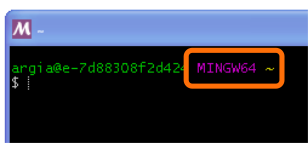
pacman -Sy

pacman -S --needed git unzip tar

pacman -S --needed mingw-w64-x86_64-toolchain

pacman -S --needed mingw-w64-x86_64-ccache

pacman -S --needed mingw-w64-x86_64-ntldd

pacman -S --needed mingw-w64-x86_64-qt5

pacman -S --needed mingw-w64-x86_64-SDL

pacman -S --needed mingw-w64-x86_64-mesa

pacman -S --needed mingw-w64-x86_64-openssl

pacman -S --needed mingw-w64-x86_64-gdal-minimal

pacman -S --needed mingw-w64-x86_64-OpenSceneGraph

pacman -S --needed mingw-w64-x86_64-osgearth

pacman -S --needed mingw-w64-x86_64-gst-plugins-base

pacman -S --needed mingw-w64-x86_64-gst-plugins-good

pacman -S --needed mingw-w64-x86_64-gst-plugins-bad

pacman -S --needed mingw-w64-x86_64-gst-plugins-ugly

pacman -S --needed mingw-w64-x86_64-gst-libav
推荐安装的debug包:
pacman -S --needed mingw-w64-x86_64-OpenSceneGraph-debug

pacman -S --needed mingw-w64-x86_64-osgearth-debug
4、获取Librepilot源代码
注意此步骤依然不在Msys2中进行,而是根据你的电脑机型选择32bit的MinGW-w64 Win32 Shell或者64bit的MinGW-w64 Win64 Shell进行操作。
命令如下:
cd ~

git clone https://bitbucket.org/librepilot/librepilot.git
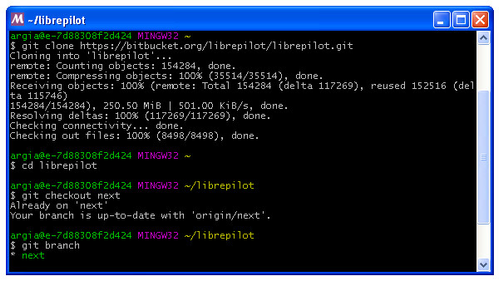
获取完成后,在安装路径文件夹下应该有一个home文件夹,里面是用户,进入后应该有一个librepilot文件夹,该文件夹下即为获取的源代码,可以通过sourceInsight查看源码。
5、安装toolchain
通过cd librepilot切换到该文件夹下,在该文件夹下安装toolchain。
cd librepilot

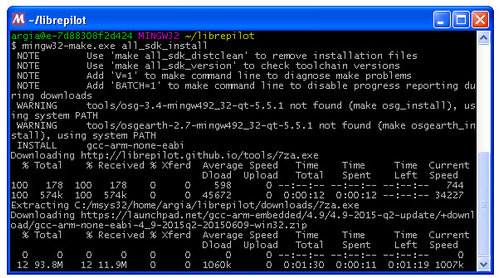
mingw32-make all_sdk_install
一个安装如下的7个toolchain,注:该过程有可能出现error,是因为网络传输数据出现校验不通过的情况,需反复执行mingw32-make all_sdk_install命令,直到完全没有错误为止,此过程中保存网络通畅。
|
Tool
|
Approx. size
|
Used for
|
|---|---|---|
| Arm compiler | ~94Mb |
firmware build |
| Nsis | ~2,1Mb | Windows installer |
| Mesa | ~13Mb | OpenGL software driver |
| ccache | ~350Kb | Build faster |
| gtest | ~1,1Mb | |
| uncrustify | ~250Kb | Format code |
| doxygen | ~4Mb | Documentation |
6、对LibrePilot软件进行编译
注意此步骤依然不在Msys2中进行,而是根据你的电脑机型选择32bit的MinGW-w64 Win32 Shell或者64bit的MinGW-w64 Win64 Shell进行操作。
命令如下:
mingw32-make package
注意:此过程比较缓慢,编译时间较长,需要耐心等待。
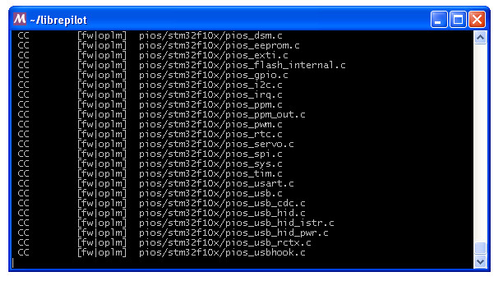
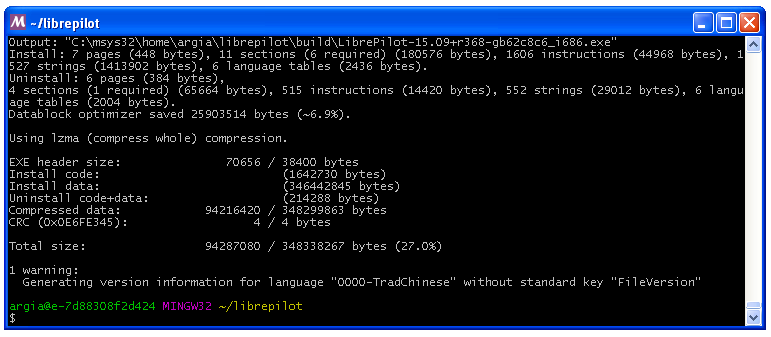
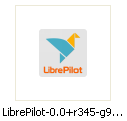
编译完成后,在~/librepilot/build/路径下应该出现一个地面站软件安装包,如下:
7、恭喜完成编译 !
到这一步就应该恭喜你了,完成了全部的编译过程。编译package安装包的时间比较长,后期在修改源码的基础上只需对修改的模块进行编译,这样会比较节省时间。
Librepilot-Windows编译环境的搭建的更多相关文章
- Windows下QT4.8.4编译环境的搭建(转载http://blog.csdn.net/bestgonghuibin/article/details/38933141)
开始使用QT了,所以第一步就是把环境搭起来,这里小记一下,以免以后忘记. 1. 下载安装文件 要使用QT功能,那么必须要下载QT的源码,还必须要一个是用QT的编译环境,可以是VS2010,也可以是专用 ...
- Java编译环境的搭建(eclipse)
每用一种语言开发,要搭建其编译和开发环境,我们废话不说,立刻来看看Java开发环境的搭建. 1.安装JDK和JRE Windows环境下: a.去Oracle官网下载对应版本的JDK安装包,http: ...
- Windows XP环境下 搭建Android NDK环境
搭建Android NDK环境 Windows XP环境下 1 一些下载 ① NDK r7:http://developer.android.com/sdk/ndk/index.html ② cygw ...
- WebAssembly学习(二):Windows10下WebAssembly C/C++编译环境的搭建与Hello World尝试
首先,不论是在Windows.Linux还是Mac上,Webassembly的编译都是主要依赖于Emscripten SDK这个工具的.但是,在这里必须要吐槽一下,不论是WebAssembly官网.W ...
- 第一篇:《UNIX 网络编程 第二版》编译环境的搭建
第一步:搭建基本的编译环境 安装gcc, g++, bulid-essential等编译软件 第二步:下载本书示例源码包 第三步:解压下载到的包并放在用户主目录中 第四步:进入包内并执行以下命令 su ...
- 第一篇:《UNIX 环境高级编程》编译环境的搭建
第一步:搭建基本的编译环境 安装gcc, g++, bulid-essential等编译软件 第二步:下载本书示例源码包 可在这里下载 www.apuenook.com 第三步:解压下载到的包并放在用 ...
- 《UNIX 环境高级编程》编译环境的搭建( 运行本专栏代码必读 )
第一步:搭建基本的编译环境 安装gcc, g++, bulid-essential等编译软件 第二步:下载本书示例源码包 可在这里下载 www.apuenook.com 第三步:解压下载到的包并放在用 ...
- 《UNIX 网络编程 第二版》编译环境的搭建( 运行本专栏代码必读 )
第一步:搭建基本的编译环境 安装gcc, g++, bulid-essential等编译软件 第二步:下载本书示例源码包 可在这里下载http://ishare.iask.sina.com.cn/f/ ...
- 【Linux编译环境的搭建】Linux都没有,怎么学Linux编程?
本文准备从0开始,一步步搭建一套属于自己的多节点Linux系统环境,这将是后续学Linux.用Linux.Linux环境编程.应用和项目部署.工具实验等一系列学习和实践的基石,希望对小伙伴们有帮助. ...
- ESP32 windows开发环境的搭建(官方方法)
首先保证电脑中的已经下载了git客户端,没有的自行去https://git-scm.com/下载 STEP1: 获得编译工具链 Windows没有内置的“make”环境,所以安装工具链你将需要一个兼容 ...
随机推荐
- Docker-----deepin系统下docker安装registry
环境说明 一个坑逼的环境,也不能说坑逼,国产化的需求嘛. root@node22:/registry# uname -a Linux node22 4.4.15-deepin-aere #137 SM ...
- MJRefresh实现请求数据列表不满一页,或者请求数据为空时,不显示footer文字
最近自己负责的项目测试要求: 列表的数据不满一页的话就自动隐藏下面的“上拉加载更多”或是“到底了,没有更多数据”. 百度了一下,看了一篇博客的介绍实现: http://blog.csdn.net/gx ...
- 转 Java的各种打包方式(JAR/WAR/EAR/CAR)
JAR (Java Archive file) 包含内容:class.properties文件,是文件封装的最小单元:包含Java类的普通库.资源(resources).辅助文件(auxiliary ...
- Win32 编程 基础
Win32 程序开发的流程 message based, event driven Win32程序是message based, event driven.也就是说Win32程序的运行是依靠外部 ...
- 搜索框的测试checklist
一:简单搜索输入框测试用例1:不输入任何字符,点击搜索按钮,一般搜索出网站所有的信息 2:一般搜索输入框中的有文章显示,当鼠标点击时,文章消失 3:输入全角/半角中文字符(一个字符.超长字符.已经信息 ...
- python基础语法之字符串
1 字符串中*的使用 *可以使字符串重复n次 print('hello world ' * 2) # hello world hello world 2 索引获取字符串的字符元素 print('hel ...
- java反射机制学习笔记
内容引用自:https://www.cnblogs.com/wkrbky/p/6201098.html https://www.cnblogs.com/xumBlog/p/8882489.html,本 ...
- Neo4j下载与使用
Neo4j 官网 : https://neo4j.com/ Neo4j 国内: http://neo4j.com.cn/topic/5b003eae9662eee704f31cee http://we ...
- __strong修饰符
本文用来观察,对于__strong修饰符,编译器为我们自动添加了什么代码,这些代码对于引用计数有什么影响. 例子一 X __strong *x1 = [[X alloc] init]; 使用控制台打印 ...
- QT use of undeclared identifier 'cout'
在QT 5.12中直接使用cout将提示错误如下: 添加库 #include<iostream>,并将cout&end改为std::cout&std::endl 代码如下: ...