061.Python前端Django组件用户认证组件
一 auth认证组件
在使用pymysql,数据库迁移的时候.,默认生成有十张表如下
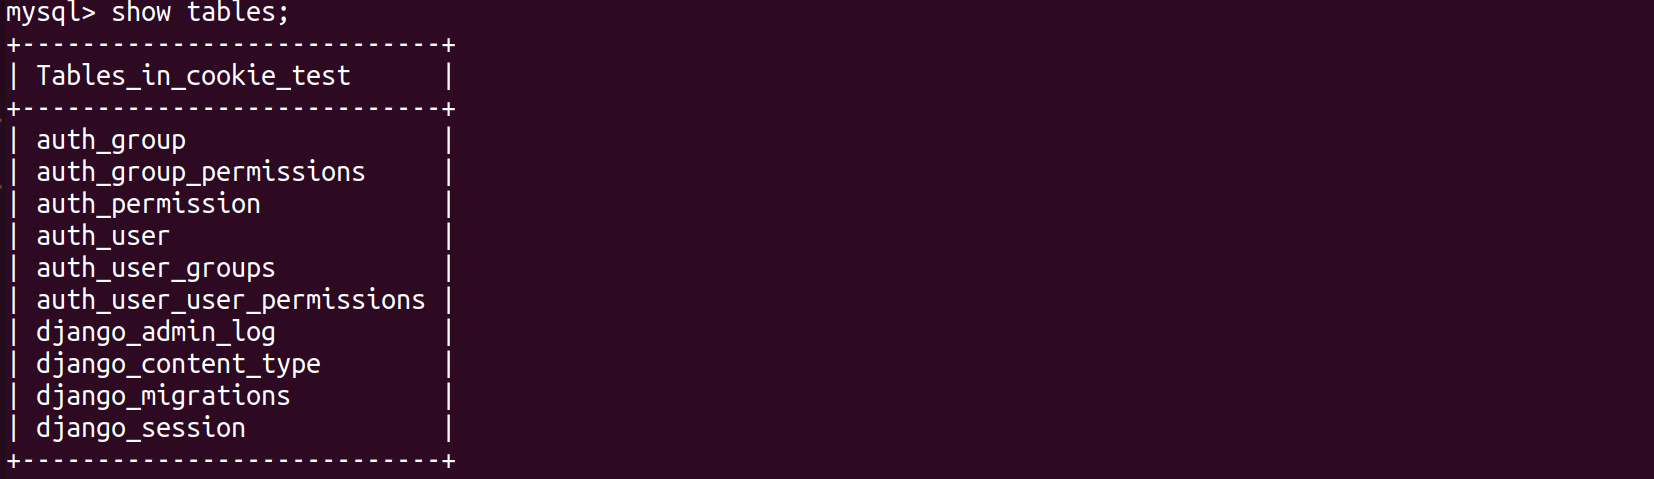
查看author_user表结构
mysql> desc auth_user;
+--------------+--------------+------+-----+---------+----------------+

| Field        | Type         | Null | Key | Default | Extra          |

+--------------+--------------+------+-----+---------+----------------+

| id           | int(11)      | NO   | PRI | NULL    | auto_increment |

| password     | varchar(128) | NO   |     | NULL    |                |

| last_login   | datetime(6)  | YES  |     | NULL    |                |

| is_superuser | tinyint(1)   | NO   |     | NULL    |                |

| username     | varchar(150) | NO   | UNI | NULL    |                |

| first_name   | varchar(30)  | NO   |     | NULL    |                |

| last_name    | varchar(150) | NO   |     | NULL    |                |

| email        | varchar(254) | NO   |     | NULL    |                |

| is_staff     | tinyint(1)   | NO   |     | NULL    |                |

| is_active    | tinyint(1)   | NO   |     | NULL    |                |

| date_joined  | datetime(6)  | NO   |     | NULL    |                |

+--------------+--------------+------+-----+---------+----------------+
在使用用户认证组件,必须使用django自带的author_user表
1.1 创建一个新的auth app
root@darren-virtual-machine:~/PycharmProjects/cookie_seesion# python3 manage.py startapp auth_demo
注册app
INSTALLED_APPS = [

    'django.contrib.admin',

    'django.contrib.auth',

    'django.contrib.contenttypes',

    'django.contrib.sessions',

    'django.contrib.messages',

    'django.contrib.staticfiles',

    'cookie.apps.CookieConfig',

    'session.apps.SessionConfig',

    'auth_demo.apps.AuthConfig',

]
配置路由分发
from django.contrib import admin

from django.urls import path,include

urlpatterns = [

    path('admin/', admin.site.urls),

    path("cookie/",include("cookie.urls")),

    path("session/",include("session.urls")),

    path("auth_demo/",include("auth_demo.urls")),

]
配置路由
root@darren-virtual-machine:~/PycharmProjects/cookie_seesion# vim auth_demo/urls.py
from django.urls import  path,re_path

from auth_demo import  views

urlpatterns = [

    path('index/', views.index),

    path('login/', views.login),

]
1.2 authenticate()用户认证
提供了用户认证,即验证用户名以及密码是否正确,一般需要username password两个关键字参数
如果认证信息有效,会返回一个 User 对象。authenticate()会在User 对象上设置一个属性标识那种认证后端认证了该用户,且该信息在后面的登录过程中是需要的。当我们试图登陆一个从数据库中直接取出来不经过authenticate()的User对象会报错的!!
1.3 login(HttpRequest, user)附加seesion信息
该函数接受一个HttpRequest对象,以及一个认证了的User对象
此函数使用django的session框架给某个已认证的用户附加上session id等信息。
root@darren-virtual-machine:~/PycharmProjects/cookie_seesion# vim auth_demo/views.py
from django.shortcuts import render,redirect,HttpResponse
from django.contrib import auth
# Create your views here.
def index(request):
return render(request,"auth_index.html") def login(request):
if request.method == "GET":
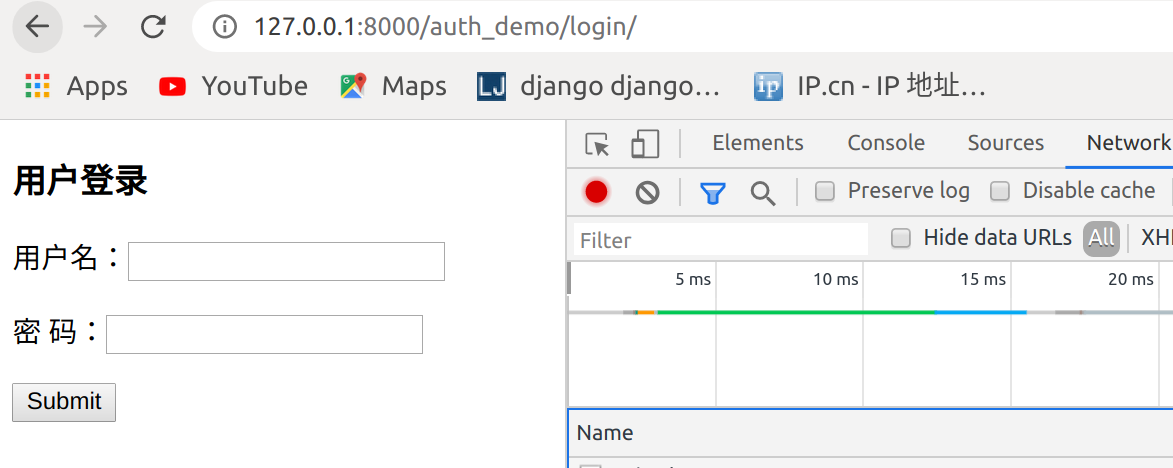
return render(request, "login.html")
else:
username = request.POST.get("username")
password = request.POST.get("password")
user = auth.authenticate(username=username,password=password)
if user:
auth.login(request,user)
request.session["is_login"] = True
return redirect("/auth_demo/index/")
else:
return redirect("/auth_demo/login/")
return render(request,"login.html")
root@darren-virtual-machine:~/PycharmProjects/cookie_seesion# vim templates/auth_index.html
<!DOCTYPE html>
<html lang="en">
<head>
<meta charset="UTF-8">
<title>Title</title>
</head>
<body>
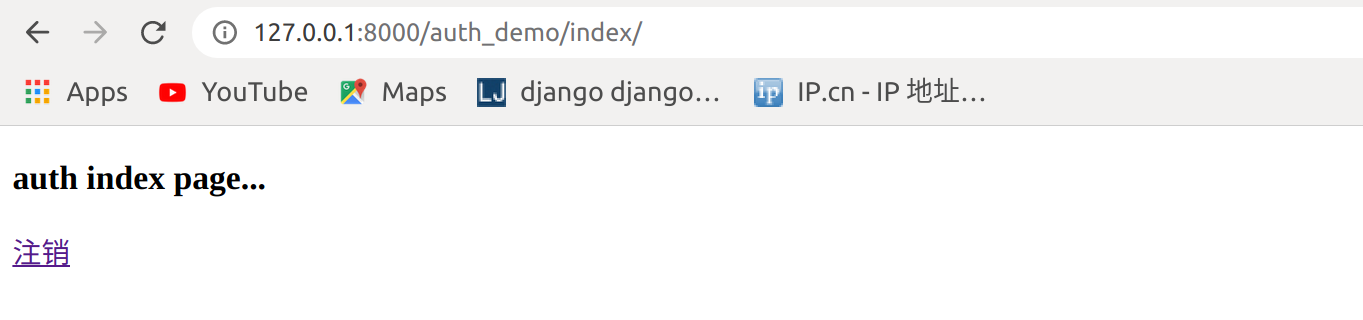
<h3>auth index page...</h3>
</body>
</html>
访问http://127.0.0.1:8000/auth_demo/index/
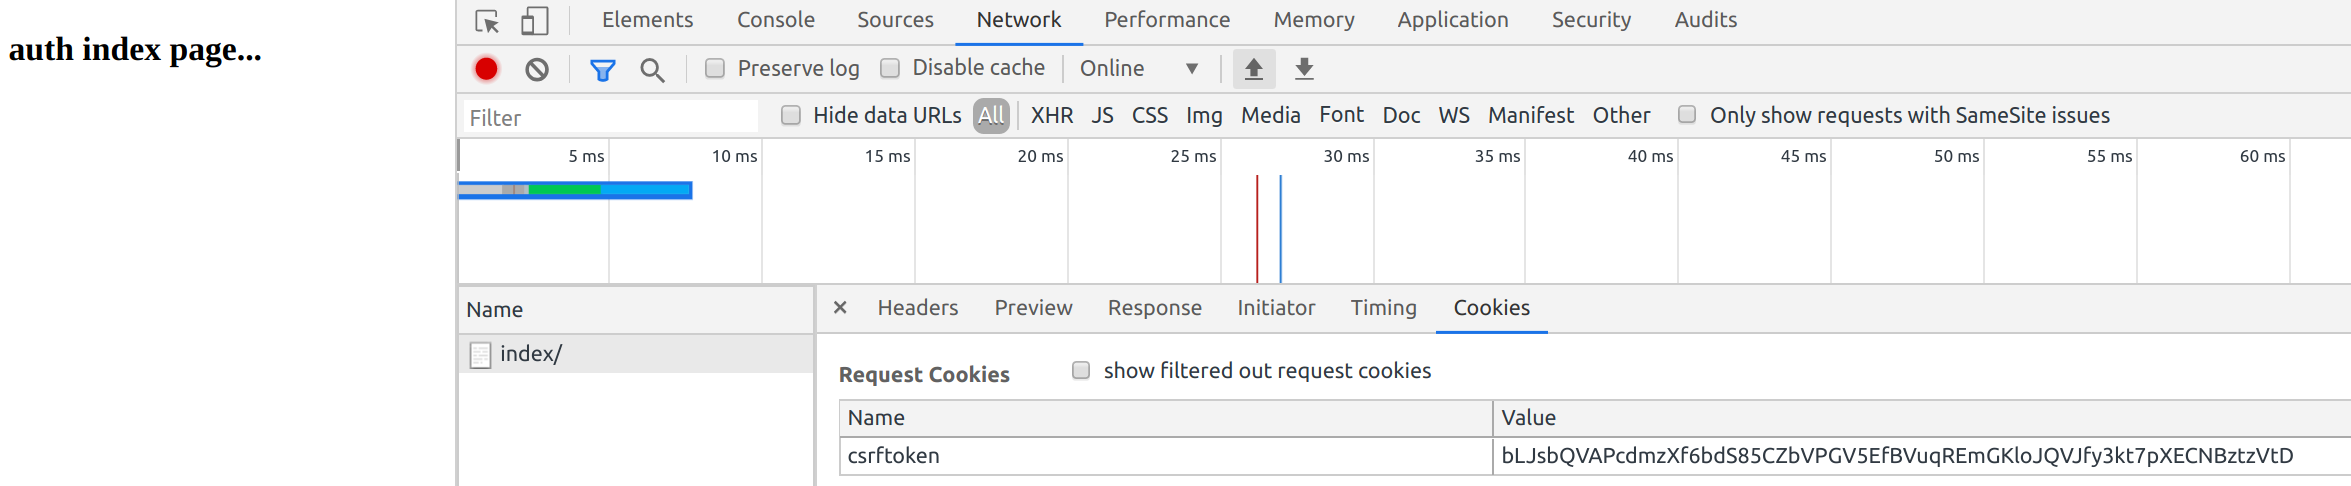
都是干净没有seesion的
添加登陆限制
装饰器views配置
from django.shortcuts import render,redirect,HttpResponse

from django.contrib  import auth

# Create your views here.

def login_required(func):

    def inner(request,*args,**kwargs):

        if not request.user.is_authenticated:

            return redirect("/auth_demo/login/")

        rep = func(request,*args,**kwargs)

        return rep

    return inner

@login_required

def index(request):

    return render(request,"auth_index.html")

def login(request):

    if request.method == "GET":

        return render(request, "login.html")

    else:

        username = request.POST.get("username")

        password = request.POST.get("password")

        user = auth.authenticate(username=username,password=password)

        if user:

            auth.login(request,user)return redirect("/auth_demo/index/")

        else:

            return redirect("/auth_demo/login/")

    return render(request,"login.html")
访问http://127.0.0.1:8000/auth_demo/index/,跳转到登录页面
1.4 创建用户
from django.contrib.auth.models import User

#创建普通用户,密码明文

User.objects.create(username="joy",password="123456")

#创建普通用户,密码密文

User.objects.create_user(username="john",password="123456")

#创建超级管理员用户,密码密文

User.objects.create_superuser(username="darren",password="123456",email="darren@163.com")
查看数据库

使用joy账户不能登录,使用john和darren账户可以登录
登录后
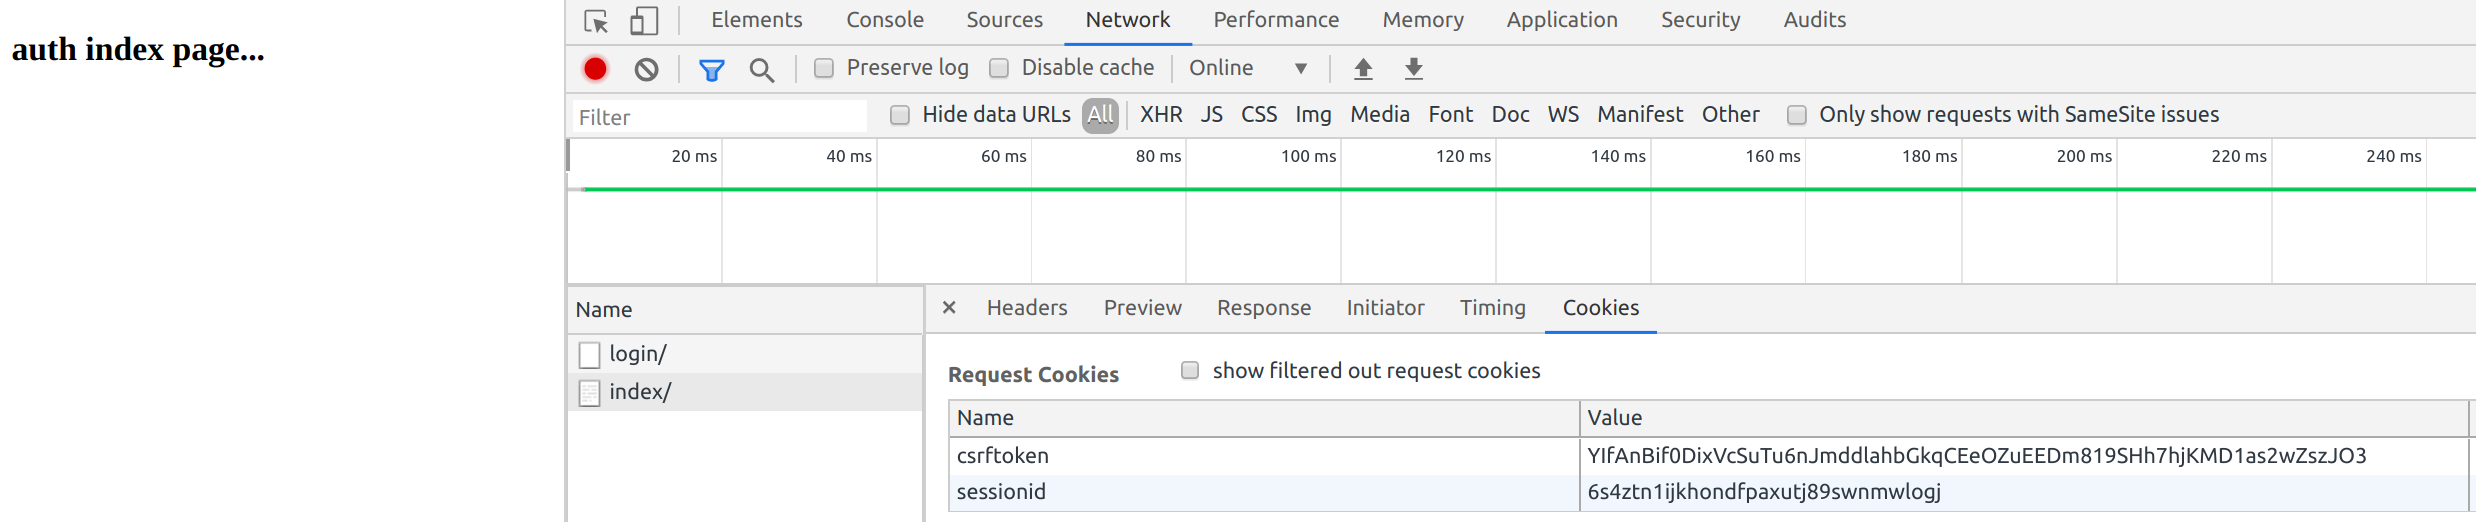
已经有了seesionid
auth.login(request,user)源码
def login(request, user, backend=None):

    """

    Persist a user id and a backend in the request. This way a user doesn't

    have to reauthenticate on every request. Note that data set during

    the anonymous session is retained when the user logs in.

    """

    session_auth_hash = ''

    if user is None:

        user = request.user

    if hasattr(user, 'get_session_auth_hash'):

        session_auth_hash = user.get_session_auth_hash()

    if SESSION_KEY in request.session:

        if _get_user_session_key(request) != user.pk or (

                session_auth_hash and

                not constant_time_compare(request.session.get(HASH_SESSION_KEY, ''), session_auth_hash)):

            # To avoid reusing another user's session, create a new, empty

            # session if the existing session corresponds to a different

            # authenticated user.

            request.session.flush()

    else:

        request.session.cycle_key()

    try:

        backend = backend or user.backend

    except AttributeError:

        backends = _get_backends(return_tuples=True)

        if len(backends) == 1:

            _, backend = backends[0]

        else:

            raise ValueError(

                'You have multiple authentication backends configured and '

                'therefore must provide the `backend` argument or set the '

                '`backend` attribute on the user.'

            )

    else:

        if not isinstance(backend, str):

            raise TypeError('backend must be a dotted import path string (got %r).' % backend)

    request.session[SESSION_KEY] = user._meta.pk.value_to_string(user)

    request.session[BACKEND_SESSION_KEY] = backend

    request.session[HASH_SESSION_KEY] = session_auth_hash

    if hasattr(request, 'user'):

        request.user = user

    rotate_token(request)

    user_logged_in.send(sender=user.__class__, request=request, user=user)
1.5 logout(request) 注销用户
该函数接受一个HttpRequest对象,无返回值。当调用该函数时,当前请求的session信息会全部清除。该用户即使没有登录,使用该函数也不会报错。
添加用户注销
<!DOCTYPE html>

<html lang="en">

<head>

    <meta charset="UTF-8">

    <title>Title</title>

</head>

<body>

<h3>auth index page...</h3>

<a href="/auth_demo/logout">注销</a>

</body>

</html>
路由
from django.urls import  path,re_path

from auth_demo import  views

urlpatterns = [

    path('index/', views.index),

    path('login/', views.login),

    path('logout/',views.logout),

]
视图文件
from django.shortcuts import render,redirect,HttpResponse

from django.contrib  import auth

# Create your views here.

def login_required(func):

    def inner(request,*args,**kwargs):

        if not request.user.is_authenticated:

            return redirect("/auth_demo/login/")

        rep = func(request,*args,**kwargs)

        return rep

    return inner

@login_required

def index(request):

    return render(request,"auth_index.html")

def login(request):

    if request.method == "GET":

        return render(request, "login.html")

    else:

        username = request.POST.get("username")

        password = request.POST.get("password")

        user = auth.authenticate(username=username,password=password)

        if user:

            auth.login(request,user)

            return redirect("/auth_demo/index/")

        else:

            return redirect("/auth_demo/login/")

def logout(request):

    auth.logout(request)

    return redirect("/auth_demo/login/")
访问
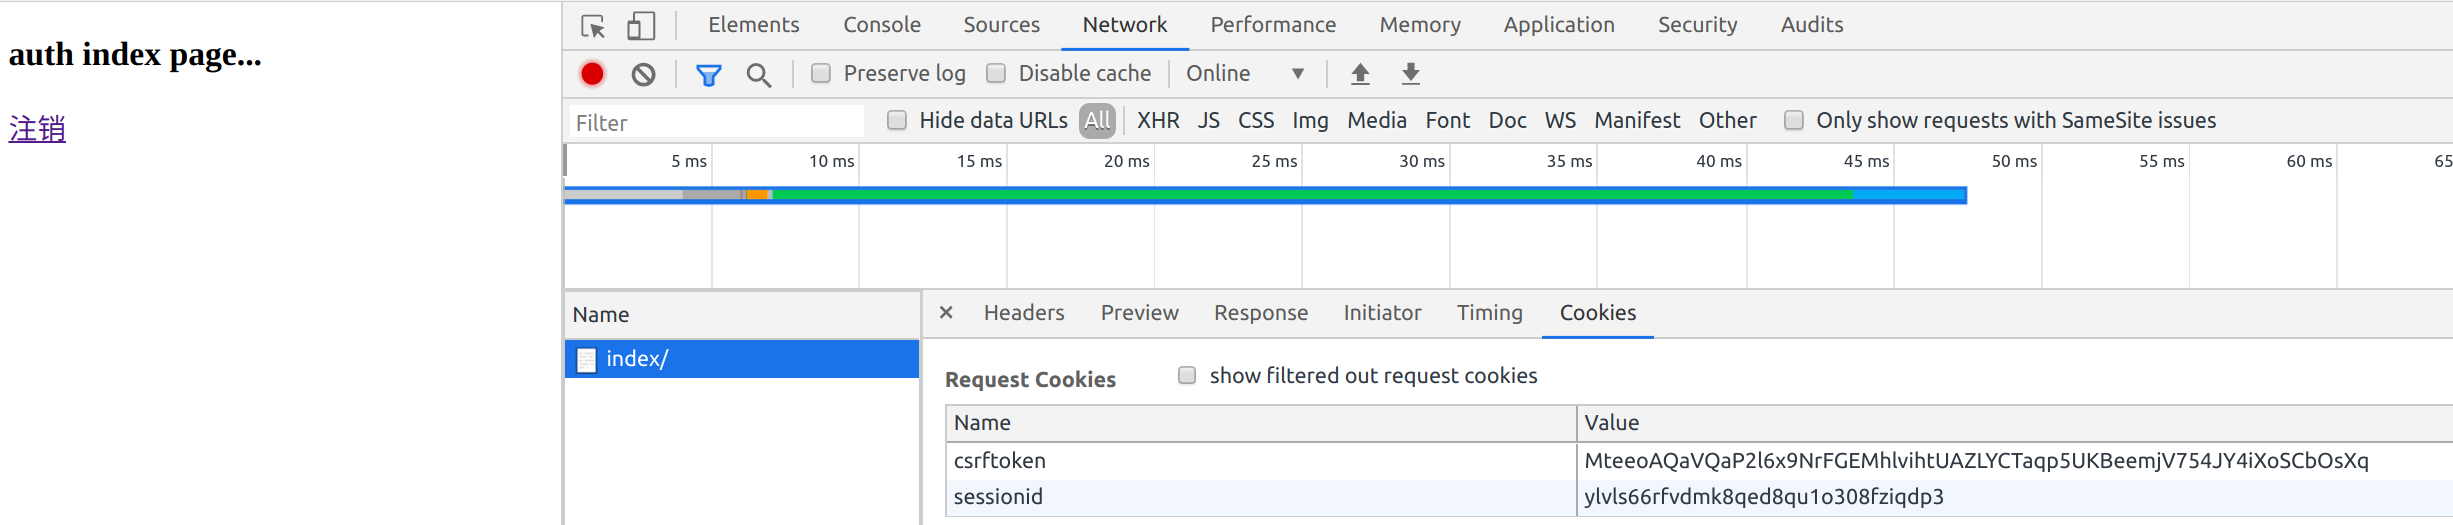
点击注销

添加一个order页面
from django.urls import  path,re_path

from auth_demo import  views

urlpatterns = [

    path('index/', views.index),

    path('login/', views.login),

    path('logout',views.logout),

    path('logout',views.logout),

]
views视图文件
from django.shortcuts import render,redirect,HttpResponse

from django.contrib  import auth

# Create your views here.

def login_required(func):

    def inner(request,*args,**kwargs):

        if not request.user.is_authenticated:

            return redirect("/auth_demo/login/")

        rep = func(request,*args,**kwargs)

        return rep

    return inner

@login_required

def index(request):

    return render(request,"auth_index.html")

def login(request):

    if request.method == "GET":

        return render(request, "login.html")

    else:

        username = request.POST.get("username")

        password = request.POST.get("password")

        user = auth.authenticate(username=username,password=password)

        if user:

            auth.login(request,user)

            return redirect("/auth_demo/index/")

        else:

            return redirect("/auth_demo/login/")

def logout(request):

    auth.logout(request)

    return redirect("/auth_demo/login/")

@login_required

def order(request):

    return HttpResponse("order success")
这样访问http://127.0.0.1:8000/auth_demo/order会跳转到http://127.0.0.1:8000/auth_demo/login/
但是登录后

到了index页面,没有到order页面
User对象
User 对象属性:username, password(必填项)password用哈希算法保存到数据库
1.6 user对象的 is_authenticated
如果是真正的 User 对象,返回值恒为 True 。 用于检查用户是否已经通过了认证。
通过认证并不意味着用户拥有任何权限,甚至也不检查该用户是否处于激活状态,这只是表明用户成功的通过了认证。 这个方法很重要, 在后台用request.user.is_authenticated判断用户是否已经登录,如果true则可以向前台展示request.user.username
要求:
1 用户登陆后才能访问某些页面,
2 如果用户没有登录就访问该页面的话直接跳到登录页面
3 用户在跳转的登陆界面中完成登陆后,自动访问跳转到之前访问的地址
view视图设置
from django.shortcuts import render,redirect,HttpResponse

from django.contrib  import auth

# Create your views here.

def login_required(func):

    def inner(request,*args,**kwargs):

        if not request.user.is_authenticated:

            print(request.path)

            return redirect('/auth_demo/login/?next=%s' % request.path)

        rep = func(request,*args,**kwargs)

        return rep

    return inner

@login_required

def index(request):

    return render(request,"auth_index.html")

def login(request):

    if request.method == "GET":

        return render(request, "login.html")

    else:

        username = request.POST.get("username")

        password = request.POST.get("password")

        user = auth.authenticate(username=username,password=password)

        if user:

            auth.login(request,user)

            path = request.GET.get("next")

            return redirect(path)

        else:

            return redirect("/auth_demo/login/")

def logout(request):

    auth.logout(request)

    return redirect("/auth_demo/login/")

@login_required

def order(request):

    return HttpResponse("order success")
访问http://127.0.0.1:8000/auth_demo/order跳转到http://127.0.0.1:8000/auth_demo/login/?next=/auth_demo/order
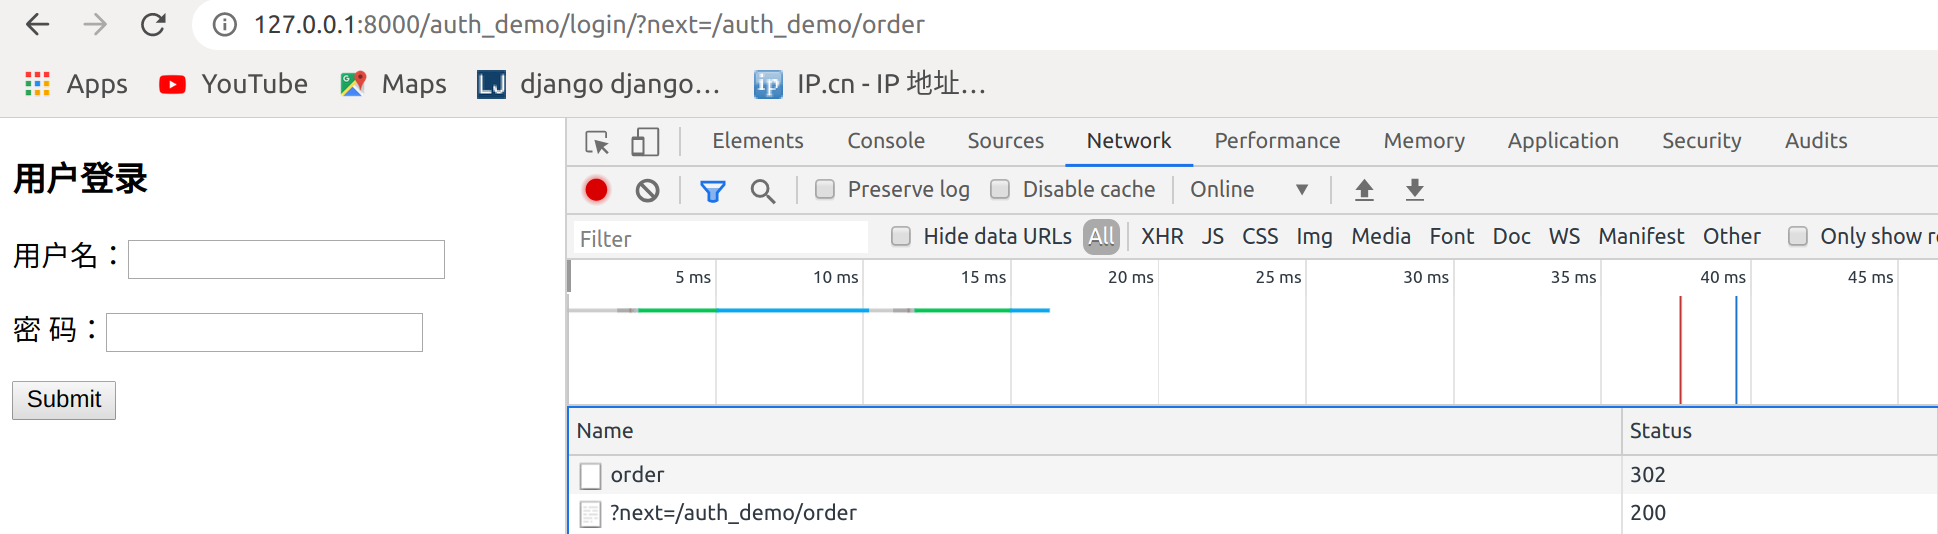
再次登录就到了order页面

点击注销,刷新一下再次登录报错
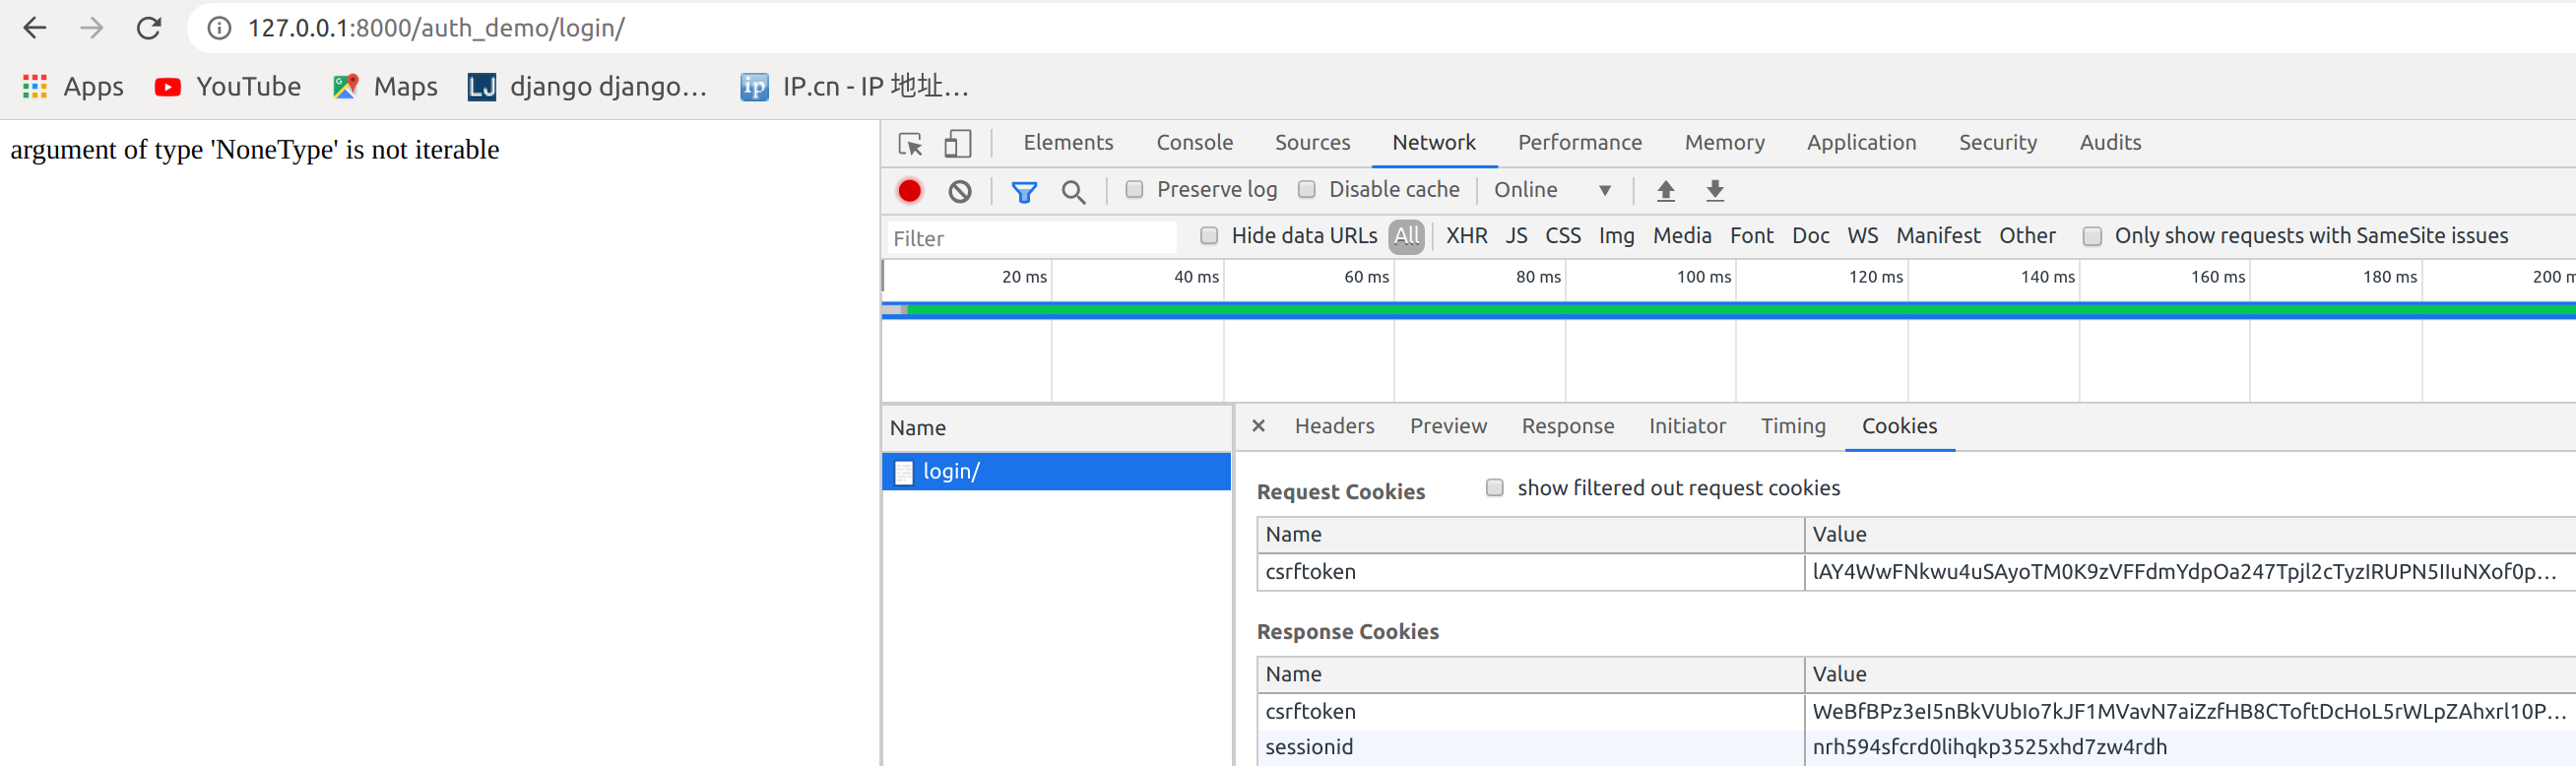
是因为这段代码在跳转会获取一个next参数,但是在直接登录,没有next参数
            path = request.GET.get("next")

            return redirect(path)
处理
from django.shortcuts import render,redirect,HttpResponse

from django.contrib  import auth

# Create your views here.

def login_required(func):

    def inner(request,*args,**kwargs):

        if not request.user.is_authenticated:

            print(request.path)

            return redirect('/auth_demo/login/?next=%s' % request.path)

            return redirect("/auth_demo/login/")

        rep = func(request,*args,**kwargs)

        return rep

    return inner

@login_required

def index(request):

    return render(request,"auth_index.html")

def login(request):

    if request.method == "GET":

        return render(request, "login.html")

    else:

        username = request.POST.get("username")

        password = request.POST.get("password")

        user = auth.authenticate(username=username,password=password)

        if user:

            auth.login(request,user)

            #方法三

            path = request.GET.get("next") or "/auth_demo/index/"

            #方法二

            #path = request.GET.get("next","/auth_demo/index/")

            #方法一

            #if not path:

            #    path = "/auth_demo/index/"

            return redirect(path)

        else:

            return redirect("/auth_demo/login/")

def logout(request):

    auth.logout(request)

    return redirect("/auth_demo/login/")

def logout(request):

    auth.logout(request)

    return redirect("/auth_demo/login/")

@login_required

def order(request):

    return HttpResponse("order success")
登录成功

1.7 内置装饰器
上面的功能可以使用内置的一个装饰器完成
http://127.0.0.1:8000/auth_demo/order/变成http://127.0.0.1:8000/accounts/login/?next=/auth_demo/order/
原因,是因为在源码里面
1从这里进去

进入settings

找到global_seettings
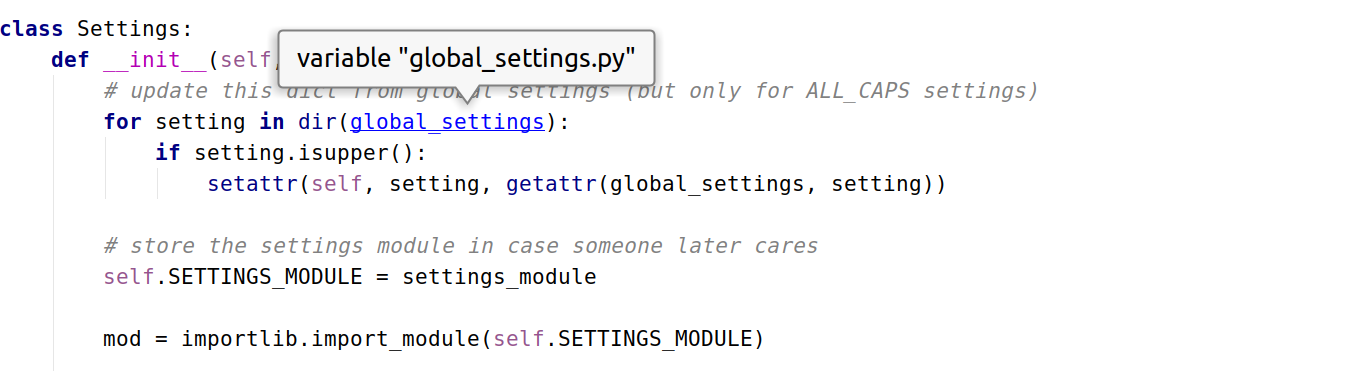
这里设置

在用户的setting配置,这里的优先级高于global_settings
root@darren-virtual-machine:~/PycharmProjects/cookie_seesion# vim cookie_seesion/settings.py
LOGIN_URL = '/auth_demo/login/'
再次访问http://127.0.0.1:8000/auth_demo/order/跳转到http://127.0.0.1:8000/auth_demo/login/?next=/auth_demo/order/已经正常
1.8 添加用户注册页面
from django.urls import  path,re_path

from auth_demo import  views

urlpatterns = [

    path('index/', views.index),

    path('login/', views.login),

    path('logout/',views.logout),

    path('order/',views.order),

    path('register/',views.register),

]
register.html添加注册表单
root@darren-virtual-machine:~/PycharmProjects/cookie_seesion# vim templates/register.html
<!DOCTYPE html>
<html lang="en">
<head>
<meta charset="UTF-8">
<title>Title</title>
</head>
<body>
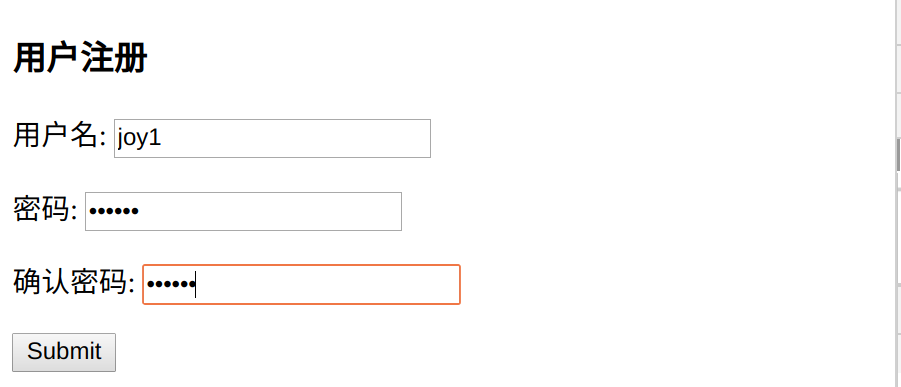
<h3>用户注册</h3>
<form action="" method="post">
{% csrf_token %}
<p>用户名: <input type="text" name="username"></p>
<p>密码: <input type="password" name="password1"></p>
<p>确认密码: <input type="password" name="password2"></p>
<input type="submit">
</form>
</body>
</html>
配置views
from django.shortcuts import render,redirect,HttpResponse

from django.contrib  import auth

from django.contrib.auth.decorators import login_required

from  django.contrib.auth.models import User

# Create your views here.

#def login_required(func):

#    def inner(request,*args,**kwargs):

#        if not request.user.is_authenticated:

#            print(request.path)

#            return redirect('/auth_demo/login/?next=%s' % request.path)

#            return redirect("/auth_demo/login/")

#        rep = func(request,*args,**kwargs)

#        return rep

#    return inner

@login_required

def index(request):

    return render(request,"auth_index.html")

def login(request):

    if request.method == "GET":

        return render(request, "login.html")

    else:

        username = request.POST.get("username")

        password = request.POST.get("password")

        user = auth.authenticate(username=username,password=password)

        if user:

            auth.login(request,user)

            #方法三

            path = request.GET.get("next") or "/auth_demo/index/"

            #方法二

            #path = request.GET.get("next","/auth_demo/index/")

            #方法一

            #if not path:

            #    path = "/auth_demo/index/"

            return redirect(path)

        else:

            return redirect("/auth_demo/login/")

def logout(request):

    auth.logout(request)

    return redirect("/auth_demo/login/")

def logout(request):

    auth.logout(request)

    return redirect("/auth_demo/login/")

@login_required

def order(request):

    return HttpResponse("order success")

def register(request):

    if request.method == "GET":

        return render(request,"register.html")

    else:

        username = request.POST.get("username")

        password1 = request.POST.get("password1")

        password2 = request.POST.get("password2")

        if password1 == password2:

            User.objects.create_user(username=username,password=password1)

            return redirect("/auth_demo/login/")

        else:

            return redirect("/auth_demo/register/")
访问http://127.0.0.1:8000/auth_demo/register/
提交检查数据库

已经有joy1用户,登录

登录成功
1.9 修改密码
check_password(passwd)
用户需要修改密码的时候 首先要让他输入原来的密码 ,如果给定的字符串通过了密码检查,返回 True
修改密码
使用 set_password() 来修改密码
user = User.objects.get(username='')

user.set_password(password='')

user.save
urls
from django.urls import  path,re_path

from auth_demo import  views

urlpatterns = [

    path('index/', views.index),

    path('login/', views.login),

    path('logout/',views.logout),

    path('order/',views.order),

    path('register/',views.register),

    path('set_pwd/',views.set_pwd),

]
修改页码html
root@darren-virtual-machine:~/PycharmProjects/cookie_seesion# vim templates/set_password.html
<!DOCTYPE html>

<html lang="en">

<head>

    <meta charset="UTF-8">

    <title>Title</title>

</head>

<body>

<h3>修改密码</h3>

<form action="" method="post">

    <p>旧密码: <input type="password" name="password1"></p>

    <p>新密码: <input type="password" name="password2"></p>

    <p>确认新密码: <input type="password" name="password3"></p>

    <input type="submit">

</form>

</body>

</html>
views
from django.shortcuts import render,redirect,HttpResponse

from django.contrib  import auth

from django.contrib.auth.decorators import login_required

from  django.contrib.auth.models import User

# Create your views here.

#def login_required(func):

#    def inner(request,*args,**kwargs):

#        if not request.user.is_authenticated:

#            print(request.path)

#            return redirect('/auth_demo/login/?next=%s' % request.path)

#            return redirect("/auth_demo/login/")

#        rep = func(request,*args,**kwargs)

#        return rep

#    return inner

@login_required

def index(request):

    return render(request,"auth_index.html")

def login(request):

    if request.method == "GET":

        return render(request, "login.html")

    else:

        username = request.POST.get("username")

        password = request.POST.get("password")

        user = auth.authenticate(username=username,password=password)

        if user:

            auth.login(request,user)

            #方法三

            path = request.GET.get("next") or "/auth_demo/index/"

            #方法二

            #path = request.GET.get("next","/auth_demo/index/")

            #方法一

            #if not path:

            #    path = "/auth_demo/index/"

            return redirect(path)

        else:

            return redirect("/auth_demo/login/")

def logout(request):

    auth.logout(request)

    return redirect("/auth_demo/login/")

def logout(request):

    auth.logout(request)

    return redirect("/auth_demo/login/")

@login_required

def order(request):

    return HttpResponse("order success")

def register(request):

    if request.method == "GET":

        return render(request,"register.html")

    else:

        username = request.POST.get("username")

        password1 = request.POST.get("password1")

        password2 = request.POST.get("password2")

        if password1 == password2:

            User.objects.create_user(username=username,password=password1)

            return redirect("/auth_demo/login/")

        else:

            return redirect("/auth_demo/register/")

@login_required

def set_pwd(request):

    user = request.user

    state = None

    if request.method == "GET":

        return render(request, "set_password.html")

    else:

        old_password = request.POST.get('password1', '')

        new_password = request.POST.get('password2', '')

        repeat_password = request.POST.get('password3', '')

        if user.check_password(old_password):
    #着这里,一定要使用,user.check_password(),或者request.user.check_password()不能使用User.check_password()

            if not new_password:

                state = 'empty'

            elif new_password != repeat_password:

                state = 'repeat_error'

            else:

                user.set_password(new_password)

                user.save()

                return redirect("/auth_demo/")

        else:

            state = 'password_error'

    content = {

        'user': user,

        'state': state,

    }

    return render(request, 'set_password.html', content)
访问http://127.0.0.1:8000/auth_demo/set_pwd,修改密码即可
061.Python前端Django组件用户认证组件的更多相关文章
- python 全栈开发,Day79(Django的用户认证组件,分页器)
一.Django的用户认证组件 用户认证 auth模块 在进行用户登陆验证的时候,如果是自己写代码,就必须要先查询数据库,看用户输入的用户名是否存在于数据库中: 如果用户存在于数据库中,然后再验证用户 ...
- 06 django的用户认证组件
1.用户认证组件 用户认证组件: 功能:用session记录登录验证状态 前提:用户表:django自带的auth_user 创建超级用户: python3 manage.py createsuper ...
- django - 总结 - 用户认证组件
用户认证组件 from django.contrib import auth 从auth_user表中获取对象,没有返回None,其中密码为密文,使用了加密算法 user = auth.authent ...
- django的用户认证组件
DataSource:https://www.cnblogs.com/yuanchenqi/articles/9064397.html 代码总结: 用户认证组件: 功能:用session记录登录验证状 ...
- Django的用户认证组件,自定义分页
一.用户认证组件 1.auth模块 from django.conrtrib import auth django.contrib.auth中提供了许多方法,这里主要介绍其中的三个: 1)authen ...
- Django之用户认证组件
auth模块 之前我们在进行用户登录验证的时候,都是自己写代码,接收用户提交的数据,然后去数据库取数据进行匹配验证,其实Django已经给我们提供了内置的用户认证功能.不信的话你可以打开models. ...
- 14 Django的用户认证组件
用户认证 auth模块 from django.contrib import auth django.contrib.auth中提供了许多方法,这里主要介绍其中的三个: 1.1 .authentica ...
- Django组件:用户认证组件
一丶用户认证 1.auth模块 from django.contrib import auth django.contrib.auth中提供了许多方法,这里主要介绍其中的三个: (1).authent ...
- Django:(7)auth用户认证组件 & 中间件
用户认证组件 用户认证组件: 功能:用session记录登陆验证状态 前提:用户表:django自带的auth_user 创建超级用户的命令: python manage.py createsuper ...
随机推荐
- 树结构系列(三):B树、B+树
树结构系列(三):B树.B+树 文章首发于「陈树义」公众号及个人博客 shuyi.tech,欢迎访问更多有趣有价值的文章. 文章首发于「陈树义」公众号及个人博客 shuyi.tech 平衡二叉树的查找 ...
- [C++]一篇文章搞懂C++中五花八门的各种初始化
总结 初始化的概念:创建变量时赋予它一个值(不同于赋值的概念) 类的构造函数控制其对象的初始化过程,无论何时只要类的对象被创建就会执行构造函数 如果对象未被用户指定初始值,那么这些变量会被执行默认初始 ...
- TEX Quotes UVA-272
TEX is a typesetting language developed by Donald Knuth. It takes source text together with a few ...
- Nest 中处理 XML 类型的请求与响应
公众号及小程序的微信接口是通过 xml 格式进行数据交换的. 比如接收普通消息的接口: 当普通微信用户向公众账号发消息时,微信服务器将 POST 消息的 XML 数据包到开发者填写的 URL 上. - ...
- 021- Java语言基础-基本数据类型的一些问题和总结
我们输入以下代码: public class DataType07 { public static void main(String[]args){ byte b1 = 4; byte b2 = 5; ...
- 05- 移动端APP的分类 与对比webApp hybridApp nativeApp
随着智能手机的普及,移动端应用几乎成为每个互联网产品的标配.在快速迭代的互联网战场中高效开发.低成本上线产品,是每个应用开发团队追求的目标.此时,选择合适的应用类型和开发模式便至关重要.移动应用可以粗 ...
- Python socket编程(阻塞) --基于SocketServer
SocketServer模块是Python对socket常规通信的一个经过封装的模块,使用简单,基于面向对象的设计模式,但功能有限,可用于快速开发. Tips: 默认端口:6767 默认本地ip:12 ...
- Python小程序 -- 人民币小写转大写辅助工具
大家应该都知道,银行打印账单有时候会跟上人民币的阿拉伯数字以及人民币汉字大写写法,转换的过程中有一定的逻辑难度,较为麻烦,所以笔者心血来潮,花了点时间简单实现了一下这一转换过程,以供初学者参考. 输入 ...
- Python中zipfile压缩文件模块的使用
目录 zipfile 压缩一个文件 解压文件 高级应用 利用 zipfile 模块破解压缩文件口令:Python脚本破解压缩文件口令 zipfile Python 中 zipfile 模块提供了对 z ...
- 6.PHP与JavaScript交互
PHP与JS交互 JS年闰年判断(body里直接引用JS) <form name="form1" method="post" action="& ...