在 GoRoute 中使用 NavigationBar
前言
在App 中通常会把主要的几个页面放在下方icon,让使用者能够方便操作,这个元件在flutter 中称为BottomNavigationBar。
而GoRouter则是Flutter 官方所提供的套件,可以用来整合整个专案的路由。
当这两个功能整合在一起的时候,一个不小心呈现出来的效果就会差很多。
准备:先创建一个新的项目 叫做my_app!
flutter create my_app

cd my_app
加入BottomNavigationBar
在MyHomePage元件中找到build的方法,在Scaffold 加上bottomNavigationBar的属性,加上两个有icon 的元件。
之后执行指令flutter run就可以看到:画面的下方有一个icon 的区块,显示刚刚所加入的search 和add。
@override

Widget build(BuildContext context) {

  return Scaffold(

    bottomNavigationBar: BottomNavigationBar(

      items: const [

        BottomNavigationBarItem(

          icon: Icon(Icons.search),

          label: 'search',

        ),

        BottomNavigationBarItem(

          icon: Icon(Icons.add),

          label: 'add',

        ),

      ],

    ),

    appBar: AppBar(

      title: Text(widget.title),

    ),

    body: Center(

      child: Column(

        mainAxisAlignment: MainAxisAlignment.center,

        children: <Widget>[

          const Text(

            'You have pushed the button this many times:',

          ),

          Text(

            '$_counter',

            style: Theme.of(context).textTheme.headline4,

          ),

        ],

      ),

    ),

  );

}

加入GoRouter
接着要来加入GoRouter这个插件。
定义Router
定义两个route,会使用同一个元件,但是透过传入不同title 的内容来做识别。
找到MyApp 这个元件,在build 里面加上这段。
var router = GoRouter(

  initialLocation: '/page1',

  routes: [

    GoRoute(

      path: '/page1',

      name: 'page1',

      builder: (BuildContext context, GoRouterState state) =>

          const MyHomePage(

        title: 'search',

      ),

    ),

    GoRoute(

      path: '/page2',

      name: 'page2',

      builder: (BuildContext context, GoRouterState state) =>

          const MyHomePage(

        title: 'add',

      ),

    ),

  ],

);
接着要调整MyApp 的 return 的行为:原本是用MaterialApp,现在要来改用MaterialApp.router才能加上路由的设定。
return MaterialApp.router(

  title: 'Flutter Demo',

  theme: ThemeData(

    primarySwatch: Colors.blue,

  ),

  // 把原本的 home 属性刪除并加上这段

  routeInformationProvider: router.routeInformationProvider,

  routeInformationParser: router.routeInformationParser,

  routerDelegate: router.routerDelegate,

);
最后 回去调整BottomNavigationBar 的行为,监听onTap的事件,来达到切换页面的效果。
bottomNavigationBar: BottomNavigationBar(

items: const [

  BottomNavigationBarItem(

    icon: Icon(Icons.search),

    label: 'search',

  ),

  BottomNavigationBarItem(

    icon: Icon(Icons.add),

    label: 'add',

  ),

],

// 监听点击事件

onTap: (index) => context.go('/page${index + 1}'),
改好以后重新启动,即可看到效果,整个页面包含NavigationBar 随着导航的切换也都会跟着重新载入(请先忽略点选了第二页但是icon 还是停留在第一页的问题)。

使用ShellRoute
根据GoRouter 的介绍,当有需要BottomNavigationBar 的时候,应该要采用ShellRoute的架构,就能够只有内容重新载入。
接着就要动一个比较大的工程,要将Scaffold 整个拉出来放到ShellRoute 中。
建立一个新的组件,就叫它ScaffoldWithBottomNavBar,这里为方便 我就不摘取核心代码了,偷个懒直接一个main.dart 到底。
class ScaffoldWithBottomNavBar extends StatefulWidget {

  const ScaffoldWithBottomNavBar({Key? key, required this.child})

      : super(key: key);

  final Widget child;

  @override

  State<ScaffoldWithBottomNavBar> createState() =>

      _ScaffoldWithBottomNavBarState();

}

class _ScaffoldWithBottomNavBarState extends State<ScaffoldWithBottomNavBar> {

  @override

  Widget build(BuildContext context) {

    return Scaffold(

      bottomNavigationBar: BottomNavigationBar(

        items: const [

          BottomNavigationBarItem(

            icon: Icon(Icons.search),

            label: 'search',

          ),

          BottomNavigationBarItem(

            icon: Icon(Icons.add),

            label: 'add',

          ),

        ],

        onTap: (index) => context.go('/page${index + 1}'),

      ),

      // 內容由外面來決定

      body: widget.child,

    );

  }

}
然后 把这个元件加到路由的定义中。
var router = GoRouter(

  initialLocation: '/page1',

  routes: [

    // 在原本的路由前面加上 ShellRoute 并且回传刚刚所建立的元件

    ShellRoute(

      builder: ((context, state, child) =>

          ScaffoldWithBottomNavBar(child: child)),

      routes: [

        GoRoute(

          path: '/page1',

          name: 'page1',

          builder: (BuildContext context, GoRouterState state) =>

              const MyHomePage(

            title: 'search',

          ),

        ),

        GoRoute(

          path: '/page2',

          name: 'page2',

          builder: (BuildContext context, GoRouterState state) =>

              const MyHomePage(

            title: 'add',

          ),

        ),

      ],

    ),

  ],

);
最后 回到MyHomePage元件将原本加关于 BottomNavigationBar 代码移除掉(因为前面已经将其抽出去放到ShellRoute 中)。
@override

Widget build(BuildContext context) {

  return Scaffold(

  	// 移除 bottomNavigationBar 属性

    appBar: AppBar(

      title: Text(widget.title),

    ),

    body: Center(

      child: Column(

        mainAxisAlignment: MainAxisAlignment.center,

        children: <Widget>[

          const Text(

            'You have pushed the button this many times:',

          ),

          Text(

            '$_counter',

            style: Theme.of(context).textTheme.headline4,

          ),

        ],

      ),

    ),

  );

}
都改完后可以看到,BottomNavigationBar 的区块是固定的了,点击切换只有内容页是不同。

结论
在web 上会很习惯这种功能的存在,转到flutter 时,一时间没找到也没特别注意到问题,后来是测试的时候才被点出来。
一个元件使用上的小地方,用错方法就会让使用者看起来没有那么舒服!
最后附上完整的程式码。
import 'package:flutter/material.dart';

import 'package:go_router/go_router.dart';

void main() {

  runApp(const MyApp());

}

class MyApp extends StatelessWidget {

  const MyApp({super.key});

  // This widget is the root of your application.

  @override

  Widget build(BuildContext context) {

    var router = GoRouter(

      initialLocation: '/page1',

      routes: [

        ShellRoute(

          builder: ((context, state, child) =>

              ScaffoldWithBottomNavBar(child: child)),

          routes: [

            GoRoute(

              path: '/page1',

              name: 'page1',

              builder: (BuildContext context, GoRouterState state) =>

                  const MyHomePage(

                title: 'search',

              ),

            ),

            GoRoute(

              path: '/page2',

              name: 'page2',

              builder: (BuildContext context, GoRouterState state) =>

                  const MyHomePage(

                title: 'add',

              ),

            ),

          ],

        ),

      ],

    );

    return MaterialApp.router(

      title: 'Flutter Demo',

      theme: ThemeData(

        // This is the theme of your application.

        //

        // Try running your application with "flutter run". You'll see the

        // application has a blue toolbar. Then, without quitting the app, try

        // changing the primarySwatch below to Colors.green and then invoke

        // "hot reload" (press "r" in the console where you ran "flutter run",

        // or simply save your changes to "hot reload" in a Flutter IDE).

        // Notice that the counter didn't reset back to zero; the application

        // is not restarted.

        primarySwatch: Colors.blue,

      ),

      routeInformationProvider: router.routeInformationProvider,

      routeInformationParser: router.routeInformationParser,

      routerDelegate: router.routerDelegate,

    );

  }

}

class MyHomePage extends StatefulWidget {

  const MyHomePage({super.key, required this.title});

  // This widget is the home page of your application. It is stateful, meaning

  // that it has a State object (defined below) that contains fields that affect

  // how it looks.

  // This class is the configuration for the state. It holds the values (in this

  // case the title) provided by the parent (in this case the App widget) and

  // used by the build method of the State. Fields in a Widget subclass are

  // always marked "final".

  final String title;

  @override

  State<MyHomePage> createState() => _MyHomePageState();

}

class _MyHomePageState extends State<MyHomePage> {

  int _counter = 0;

  void _incrementCounter() {

    setState(() {

      // This call to setState tells the Flutter framework that something has

      // changed in this State, which causes it to rerun the build method below

      // so that the display can reflect the updated values. If we changed

      // _counter without calling setState(), then the build method would not be

      // called again, and so nothing would appear to happen.

      _counter++;

    });

  }

  @override

  Widget build(BuildContext context) {

    // This method is rerun every time setState is called, for instance as done

    // by the _incrementCounter method above.

    //

    // The Flutter framework has been optimized to make rerunning build methods

    // fast, so that you can just rebuild anything that needs updating rather

    // than having to individually change instances of widgets.

    return Scaffold(

      appBar: AppBar(

        // Here we take the value from the MyHomePage object that was created by

        // the App.build method, and use it to set our appbar title.

        title: Text(widget.title),

      ),

      body: Center(

        // Center is a layout widget. It takes a single child and positions it

        // in the middle of the parent.

        child: Column(

          // Column is also a layout widget. It takes a list of children and

          // arranges them vertically. By default, it sizes itself to fit its

          // children horizontally, and tries to be as tall as its parent.

          //

          // Invoke "debug painting" (press "p" in the console, choose the

          // "Toggle Debug Paint" action from the Flutter Inspector in Android

          // Studio, or the "Toggle Debug Paint" command in Visual Studio Code)

          // to see the wireframe for each widget.

          //

          // Column has various properties to control how it sizes itself and

          // how it positions its children. Here we use mainAxisAlignment to

          // center the children vertically; the main axis here is the vertical

          // axis because Columns are vertical (the cross axis would be

          // horizontal).

          mainAxisAlignment: MainAxisAlignment.center,

          children: <Widget>[

            const Text(

              'You have pushed the button this many times:',

            ),

            Text(

              '$_counter',

              style: Theme.of(context).textTheme.headline4,

            ),

          ],

        ),

      ),

      floatingActionButton: FloatingActionButton(

        onPressed: _incrementCounter,

        tooltip: 'Increment',

        child: const Icon(Icons.add),

      ), // This trailing comma makes auto-formatting nicer for build methods.

    );

  }

}

class ScaffoldWithBottomNavBar extends StatefulWidget {

  const ScaffoldWithBottomNavBar({Key? key, required this.child})

      : super(key: key);

  final Widget child;

  @override

  State<ScaffoldWithBottomNavBar> createState() =>

      _ScaffoldWithBottomNavBarState();

}

class _ScaffoldWithBottomNavBarState extends State<ScaffoldWithBottomNavBar> {

  @override

  Widget build(BuildContext context) {

    return Scaffold(

      bottomNavigationBar: BottomNavigationBar(

        items: const [

          BottomNavigationBarItem(

            icon: Icon(Icons.search),

            label: 'search',

          ),

          BottomNavigationBarItem(

            icon: Icon(Icons.add),

            label: 'add',

          ),

        ],

        onTap: (index) => context.go('/page${index + 1}'),

      ),

      body: widget.child,

    );

  }

}
如果上边完整例子的你不喜欢,我再来一个更加通俗易懂的完整例子
最后附上完整的代码。
```dart
import 'package:flutter/material.dart';
import 'package:go_router/go_router.dart';
// 定义标签栏和标签页
var _barItems = <BottomNavigationBarItem>[
const BottomNavigationBarItem(
icon: Icon(Icons.home),
label: '首页',
),
const BottomNavigationBarItem(
icon: Icon(Icons.account_circle),
label: '我的',
),
];
// 定义路由路径
var _routes = <String>[
'/home',
'/about',
];
class ScaffoldWithNavBar extends StatefulWidget {
const ScaffoldWithNavBar({super.key, required this.child});
final Widget child;
@override
State<ScaffoldWithNavBar> createState() => _ScaffoldWithNavBarState();
}
class _ScaffoldWithNavBarState extends State<ScaffoldWithNavBar> {
int currentIndex = 0;
@override
Widget build(BuildContext context) {
return Scaffold(
bottomNavigationBar: BottomNavigationBar(
currentIndex: currentIndex,
items: _barItems,
onTap: (index) {
setState(() {
currentIndex = index;
});
context.go(_routes[index]);
},
),
body: widget.child, // 这里应该是从路由中传入的页面
);
}
}
// GoRouter配置
final GoRouter _router = GoRouter(
initialLocation: '/home',
routes: [
ShellRoute(
builder: (context, state, child) {
return ScaffoldWithNavBar(child: child);
},
routes: [
GoRoute(
path: '/home',
builder: (context, state) {
return const HomeScreen();
},
),
GoRoute(
path: '/about',
builder: (context, state) {
return const AboutScreen();
},
),
],
),
],
);
void main() {
runApp(MaterialApp.router(
routerConfig: _router,
));
}
class HomeScreen extends StatelessWidget {
const HomeScreen({super.key});
@override
Widget build(BuildContext context) {
return Scaffold(
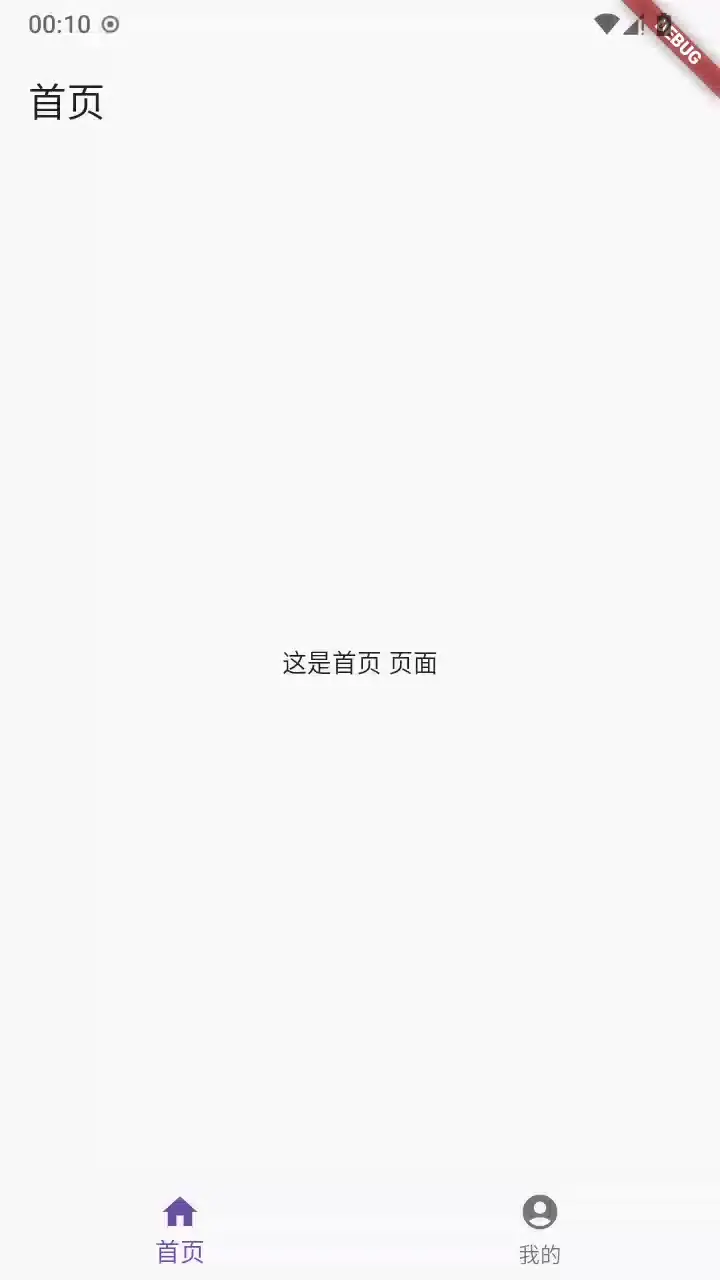
appBar: AppBar(title: const Text('首页')),
body: const Center(child: Text('这是首页 页面')),
);
}
}
class AboutScreen extends StatelessWidget {
const AboutScreen({super.key});
@override
Widget build(BuildContext context) {
return Scaffold(
appBar: AppBar(title: const Text('关于')),
body: const Center(child: Text('这是关于页 页面')),
);
}
}
注意: 如果切换底部导航切换页面的时候出现一瞬黑屏闪烁,那是官方bug,将flutter 升级到 v3.27 及其以上就好了。
参考
[flutter] 在GoRoute 中使用NavigationBar
在 GoRoute 中使用 NavigationBar的更多相关文章
- Android 如何Android中自定义Navigationbar
在如何控制Android系统中NavigationBar 的显示与隐藏文章里简要地介绍了Navigationbar的背景知识, NavigationBar的代码是放在... rameworksasep ...
- IOS 在IOS6中设置navigationBar背景图片 会有一条 黑色阴影 --- 解决方案
//给navigationBar设置背景图片 if ([self.navigationController.navigationBar respondsToSelector:@selector(set ...
- iOS系统中导航栏的转场解决方案与最佳实践
背景 目前,开源社区和业界内已经存在一些 iOS 导航栏转场的解决方案,但对于历史包袱沉重的美团 App 而言,这些解决方案并不完美.有的方案不能满足复杂的页面跳转场景,有的方案迁移成本较大,为此我们 ...
- Android开发之自定义组件和接口回调
说到自定义控件不得不提的就是接口回调,在Android开发中接口回调用的还是蛮多的.在这篇博客开始的时候呢,我想聊一下iOS的自定义控件.在iOS中自定义控件的思路是继承自UIView, 在UIVie ...
- Swift主题色顶级解决方案
一.常规主题色使用点 应用在发布前都会对主题色进行设置,以统一应用的风格(可能有多套主题).在主题色设置上有几个方面,如下: 1. TabBar部分,设置图片高亮.文本高度颜色2. Navigatio ...
- Swift主题色顶级解决方案一
一.常规主题色使用点 应用在发布前都会对其主题色进行设置,以统一应用的风格(可能有多套主题).在主题色设置上有几个方面,如下: 1.TabBar部分,设置图片高亮.文本高度颜色 2.Navigatio ...
- iOS开发 改变UINavigationController的UINavigationBar的高度和背景图片
1.改变高度 自定义UINavigationBar的新类别: //UINavigationBar+BackgoundImage.h #import <Foundation/Foundation. ...
- Visual Studio 跨平台開發實戰(3) - Xamarin iOS 多頁面應用程式開發 (转帖)
前言 在前一篇教學中, 我們學會如何使用Visual Studio 搭配Xcode 進行iOS基本控制項的操作. 但都是屬於單一畫面的應用程式. 這次我們要來練習如何透過Navigation Cont ...
- ios UINavigationController 导航栏
添加全屏侧滑返回 .获取到系统的pop返回手势 .获取pop在哪个view上 .获取target,action .自定义UIPanGestureRecognizer //1.获取手势 guard le ...
- Python开源框架
info:更多Django信息url:https://www.oschina.net/p/djangodetail: Django 是 Python 编程语言驱动的一个开源模型-视图-控制器(MVC) ...
随机推荐
- HTB打靶记录-Vintage
信息收集 nmap -sV -sC -O 10.10.11.45 Nmap scan report for 10.10.11.45 Host is up (2.1s latency). Not sho ...
- Echarts服务端渲染以及客户端懒加载实现方案
为了提升首屏的加载速度,考虑先用服务端渲染快速输出首屏图表,然后等待 echarts.js 加载完后,通过注水操作(Hydration),重新在客户端渲染同样的图表 tips:在客户端渲染的时候,应开 ...
- 使用Python可视化洛伦兹变换
引言 大家好!今天我们将探讨一个非常有趣且重要的物理概念-洛伦兹变换.它是相对论的核心内容之一,描述了在高速运动下,时间.长度以及其他物理量是如何发生变化的.通过使用 Python 进行可视化,我们不 ...
- JMeter提取多个变量值总结
- springAPI对事物支持之XML式配置
<bean id="dataSource" class="org.springframework.jdbc.datasource.DriverManagerData ...
- cglib 代理类 自己equals自己 返回false
简单的cglib代理示例 普通的 Java 类 package cglib; public class UserService { public void saveUser(String userna ...
- 搭建zookeeper集群常见的报错原因(总结)
N.1 报错:Connection broken for id 2, my id = 3, error = java.io.IOException: Channel eof ... 原因:server ...
- vue3 基础-具名插槽 & 作用域插槽
上篇对 slot 的基本概念和使用有一个初步的认识, 即通过 slot 的这种设计, 父组件可以在调用子组件的时候, 给组件之间传递一波 dom, 子组件通过 slot 标签来进行接收. slot 默 ...
- K-means 基本流程 Demo
也是单纯搬个砖, 记个笔记, K-Means 最近是有在用的, 当然之前也有用的, 也是掉包来弄的, 已经很少会去自己写了, 这里的目的, 也是为了自己, 后面再遇到可以复制粘贴. 对, 情况就是这样 ...
- WPF后台自动添加控件Demo
xaml <Window x:Class="EBPlugIn2.EBPlugIn2_YJW_13" xmlns="http://schemas.microsoft. ...